Page is loading ...


Read
all
instructions
before
using
this appliance.
Keep
them for future
reference.
Important
Safety Instructions
• This appliance is not intended for use by persons (including children) with reduced physical,
sensory or mental capabilities, or lack of experience and knowledge, unless they have been given
supervision or instruction concerning use of the appliance by a person responsible for their safety.
• Young children should be supervised to ensure that they do not play with the appliance;
• WARNING: In order to avoid overheating, do not cover this heater;
• The heater must not be located immediately below a socket-outlet;
• To avoid burns, do not touch the hot surface of the heater when it is in us. Use handle when mo-
ving this heater, keep combustible materials, such as drapery and other furnishings at least 900mm
from the front of the heater and away from the side and the rear.
• Do not run the cord under carpet and do not cover it with throw rugs, runners or the like. Place the
cord away from a traffic area and where it will not be tripped over.
• Connect the heater to properly grounded outlets only.
• Use the heater only as described in this manual. Any other use not recommended by the manufac-
tured may cause fire, electric shock or injury to persons.
• Do not use this heater in the immediate surroundings of a bath, a shower, or a swimming
pool;
• If the supply cord is damaged it must be replaced by the manufacturer, authorised service agent, or
similarly qualified persons in order to avoid a hazard;
• CAUTION: In order to avoid a hazard due to inadvertent resetting of the thermal cut-out, this appli-
ance must not be supplied through an external switching device such as a timer, or connected to a
circuit that is regularly switched on and off by the utility;
• Please do not place your clothes or towel on the radiator for fear of over heating.
• Always use the heater in an upright position; make sure the heater is on a dry and even surface.
• Do not insert or allow foreign objects to enter any ventilation or exhaust opening, as this may cause
an electric shock, fire or damage to the appliance.
• Do not use your appliance with an extension cord unless it has been checked and tested by a
qualified electrician or electrical supplier.
• This product is for household use only. Do not use the appliance for any other purpose than its
intended use.
• Do not position the appliances in close proximately to curtains or other combustible materials,
explosive objects, or objects which can be easily deformed or deteriorated. Keep combustible
material such as furniture, cushions, bedding, paper, clothes, curtains etc. at least 1.0m away from
the heater.
• Do not operate in areas where gasoline, paint or other flammable liquids are used or stored.
• The appliance is not suitable for outside use
WARNING - THIS
APPLAINCE
MUST BE
EARTHED.
This heater must be used on an AC supply only and the voltage marked on the heater must cor-
respond to the supply voltage. Before switching on, please read the safety warnings and operating
instructions.
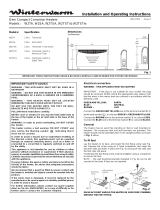
Model
Heating capacity (W)
Dimensions
a
(mm) b (mm) weight (kg)
Crystal 500 500 345 150 3,1
Crystal 1000 1000 415 220 3,6
Crystal 1500 1500 566 370 4,4
Crystal 2000 2000 695 500 5,2
Crystal 2500 2500 915 720 6,0
• nominal stress: 230V
AC,
50 Hz
• protection class: I
• degree of protection: IP 24
• room thermostat: 4°C till 40°C
2
1. Instructions to use
Manual
Thermostat
Operation
Connect the heating convector to the mains
supply to set it into operation.
Switching
the appliance on
Switch on the appliance by setting the tumbler
switch to position
"1".
Switching
the heating on
Switch on the heating by turning the temperature
selector switch and choose the required tempe-
rature. The temperature range extends from 4°C
to 40°C graduated into 10 steps. The thermostat
switches off the heating as soon as the preset
ambient temperature is reached, which will then
be kept constant by cyclic heating. The high
con-
sistency of the thermostat (below 2 K) provides
a constantly comfortable temperature and thus
ensures power-saving heating.
Anti-freezing protection
When setting the temperature selector switch to
position
"1"
the thermostat automatically cuts in if
the ambient temperature falls below 4°C.
Switching
the appliance off
Switch off the appliance by setting the tumbler
switch to position "0".
Integrated
Digital
Programmable
Thermostat
Operation
When in Off mode, press and hold
down the On/Off button for 10 se-
conds to access the first configura-
tion menu.
Menu
1:
ECO
Set-Point Ad-
justment
By default, Economy setting = Com-
fort setting - 3.5°C.
This reduction can be set between 0
to-10°C, in steps of0.5°C.
To adjust the reduction, press on
the + or - buttons then press OK to
confirm and go to the next setting.
To allow the user to modify the set-
point, press on the + button in Eco-
nomy mode
until"—"
is displayed
on the screen.
m m m m
m'm
mmm
• >10 32.
Menu
2: Correction of the measured
temperature
If there is a difference between the temperature
noted (thermometer) and the
tem-
perature measured and displayed
by the unit, menu 2 acts on the
measurement of the probe so as to
compensate for this difference (from
-5°C to +5°C in steps of
0.1
°C).
To modify, press on the + or - buttons then press
OK to confirm and go to the next setting.
Menu
3: Backlight
time
out setting
The time out can be adjusted between 0
and 225 seconds, in steps of 15
seconds (set on 90 seconds by
default).
To modify, press on the + or - but-
tons then press OK to confirm and
go to the next setting.
Menu
4: AUTO mode temperature
dis-
play
option
0 = Continuous display of room temperature.
1 = Continuous display of set-point
temperature.
To modify, press on the + or - but-
tons then press OK to confirm and
go to the next setting.
0
Menu
5: Product number
This menu allows you to view the
product number.
To exit the configuration mode,
press OK.
3

Time Setting
Use
In Off mode, press the Q button.
The days flash.
Press + or - to set the day, then press OK
to confirm and go on to set the hour and then
the minutes.
Press thezyxwvutsrqponmlkjihgfedcbaZYXWVUTSRQPONMLKJIHGFEDCBA Q button once to access the program-
ming,
and press the On/Off button once to exit
the setting mode.
The Mode button allows you to select the diffe-
rent operating modes: Comfort, Economy, Frost
Protection, and Programming AUTO mode.
Pressing the i button gives you the temperature
of the room or the set-point temperature, accor-
ding to your configuration settings in menu 5.
If the ON icon is displayed, this means that the
device is in heating demand mode.
Continuous
Comfort
Programming
Pressing and holding the + or -
buttons lets you change the current
set-point (+5 to +30°C) in
steps of 0.5°C.
130b
When starting up, the "Comfort
mode from 8am to 10pm" program
is applied to all the days of the
week.
To change the programming, press
the
PROG
button in Off or AUTO mode.
The 1st time slot flashes on and off.
I3K
;t time
slot.
Comfort
mode for 1 houri 1
nrcnn
L/UUU
* J * OK
.n.,; ogoe-
mode fori hour-^^-S <
-Day
, Program
profile
Confirm
and go to
the next day
Frost protection
mode for 1 hour
Quick
programming:
To apply the same program to the following day,
press and hold the OK button for approximately
3 seconds until the program of the following day
is displayed.
Continuous
Economy
mode
The Economy set-point is indexed
according to
the Comfort set-point. The reduction
can be modified in the configuration
settings for menu 1.
Modifying
the
Economy
set-point
The set-point can be modified if it
was authorized in the configuration
settings in menu 1 ("—").
Pressing and holding the + or -
buttons lets you change the current
set-point (+5 to +30°C) in steps of 0.5°C.
Continuous
Frost
Protection
To exit the programming mode, press on the On/
Off button. Pressing and holding the + or -
buttons lets you change the current
set-point (+5 to +15°C) in
steps of 0.5°C.
4
AUTOMATIC mode
Technical
characteristics
In this mode the device follows the
programming set.
To modify the programming, press
the PROG button once.
Timer mode
To set a set-point temperature for a certain
period of time, press on the ^ button once.
To set the temperature you want (+5°C to
+30°C), use the + and - buttons, then press OK
to confirm and go on to set the duration.
To set the duration you want (30 min
to 72 hours, in steps of 30 min), use
the + and - buttons (e.g. 1 hr 30
min),
then press OK.
To cancel the timer mode, press on
the OK button.
Absence
mode
You can set your device to Frost protection
mode for a period between
1
and 365 days,
by pressing on the (fj] button.
To set the number of days of absence, press on
the + or - buttons, then confirm by pressing OK.
To cancel this mode, press on the
OK button again.
Locking
the keypad
If you press and hold the central buttons
simultaneously during 5 seconds, it enables
you to lock the keypad. A key symbol appears
briefly on the display.
To unlock the keypad, press simul-
taneously on
the central buttons.
Once the keypad is locked, the key
symbol appears briefly if you press
on a button.
• Power supplied by the power card
• Dimensions in mm (without mounting lugs):
H = 71.7, W =
53,
D= 14.4
• Screw-mounted
• Install in an environment with normal pollution
levels
• Storage temperature: -10°C to +70°C
• Operating temperature: 0°C to +40°CTime
Setting
2.
Important
notes
During operation the temperature at the front pa-
nel and at the hot-air outlet of the convector may
rise above 85 °C. Do not place any objects on or
beside the heater, do not put anything between
the heater and the
wall.
Free air exit must not be hindered by covering
the hot-air outlets with any objects such as
curtains, pieces of laundry etc., otherwise risk of
overheating.
Combustible objects such as wood, paper,
texti-
les etc. as well as highly flammable substances
such as wax, petrol, aerosols must not be placed
near the heater within the hot-air current. Switch
the heater off when carrying out work where
highly flammable vapours could emerge, such as
laying or sealing parquet or other kinds of floor
covering or when using aerosols, floor wax, petrol
etc.
Caution!
The appliance must not be installed in rooms with
explosion hazard such as garages etc. Remove
the protection foil from all panels prior to first
use.
Should the heater give off a bad smell when
it is heated up for the first time this is caused
by manufacturing-related residues, which are
harmless to health. This nuisance will disappear
within short time.
The rising hot air can cause staining on the
wall,
a phenomenon seen in all other types of heaters
too.
The appliance may only be opened by an
authorized professional with the power supply
disconnected.
5

3. Maintenance
To clean the appliance, switch it off and rub it with
a moist cloth using a mild detergent if necessary.
Finally polish with a dry cloth. Do not use any
abrasive or caustic detergents for cleaning.
4. Installation instructions
These installation instructions are an integral part
of the appliance and must be kept in a safe place
by the user. Pass it on to any subsequent user if
the owner of the appliance changes.
Wall convectors are direct electric heaters that
are exclusively intended for being fixed to mas-
sive walls.
Thanks to graduated heating capacities they
can be adapted to any room size. The convector
comes complete with connecting cable that must
be connected to a wall socket.
The appliance has been designed to be connec-
ted to 230 V alternating current (AC).
Fixing
for
Wall
Mount
installation
Fix the appliance in such way that any potentially
combustible objects cannot catch fire. Therefore,
the minimum safety distances mentioned below
must be kept.
Fix the heater to an upright wall that is resistant
to a minimum temperature of 90°C.
Keep a distance of 25 cm to the floor. There
shall be a minimum space of 10 cm between the
heater and any wooden parts or other objects.
Any window sills, roof slopes, brackets etc. must
be located at least 50 cm over the hot-air outlets
of the heater.
If the appliance is used in bathrooms, install it in
such way that the tumbler switch or the tempe-
rature selector cannot be touched by a person
being in the tub or under the shower.
When fixing the appliance to the wall observe the
dimensions given in Fig. 1 and follow all other
instructions for installation. Drill two holes of 7mm
and fix the appropriate plugs. Screw in the two 4
x 25 mm screws so that a distance of
1
- 2 mm is
kept between screw head and
wall.
Hang up the appliance on the suspension bra-
ckets which are fixed to the back of the heater
and push it to the left until it stops.
Then tighten the left-hand screw through the
air exit grille and the provided hole in the back
panel of the heater. Now the appliance is secured
against unintended removal.
Fixing
Feet
for Freestanding Installation
Fix the appliance in such way that any potentially
combustible objects cannot catch fire.
1.
Place the convector on a flat desk or work
surface.
2.
Match the holes on the bottom of the unit
(fig.
1) to the 4 holes on both feet (fig. 2).
3. Fasten the feet to the unit by fixing with the
screws provided.
6
Bild
1
C
D zyxwvutsrqponmlkjihgfedcbaZYXWVUTSRQPONMLKJIHGFEDCBA
connecting
cable
floor
thermostat
toggle
•<EEMB~
o
--SB3B-
O
\\\\\\\\\\\\\\\\\\
Electrical
installation
The appliance has been designed to be connected to 230 V alternating current (AC).
All electrical installation work, in particular protective measures, must be carried out in compliance with
the national regulations and statutory provisions of the respective utilities provider.
The
electrical installation may only be carried out in compliance
with
the installation
instruc-
tions
by an authorized
professional!
The appliance has been designed for fixed connection. Therefore, it is necessary to install a connector
socket for fixed connection where the connecting cable of the appliance is to be fixed.
H05 WF 3 x 1.0 mm (power class 500 W - 2000 W)
H05 WF 3 x 1.5 mm (power class 2500 W)
Permanent cables must not be connected directly to the appliance!
If the electrical installation is done by means of an isolating unit, it should be taken care that the isolati-
on is designed with at least 3 mm separation on all poles.
Type of connection of the appliance: Type Y acc. to VDE 0700 Part 1.
In
case
the connecting cable is damaged, it may only be replaced by a repair
shop
appointed
by the manufacturer!
The minimum distance between appliance and connector socket must be 10 cm. The connecting cable
must not have contact with the appliance.
5. Diagram of
connections
timptratura
„ , heating element .
lontioli-r thermostat
%
Picture
2
220 .240 V-
toseie
switch
Technical
one subject to
change
7
/