Page is loading ...

CH.3
CH.2
CH.1
Revo 3.3
•
9
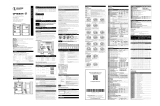
The Traxxas TQ-3 Radio System
Your Revo is equipped with the TQ-3 radio system. The TQ-3 is a 3-channel system that provides up to a quarter mile range and control for up to three
servo outputs. Revo is equipped with two high-torque steering servos connected via a “Y” plug adapter (one input, two equal outputs). The TQ-3 works
in conjunction with the OptiDrive
™
Electronic Shift Module to monitor and control the input and output signals for the throttle and shifting servos
(channels). The OptiDrive monitors the voltage of the on-board RX Power Pack. The "Function" LED will flash red if the battery voltage is too low.
Antenna
Throttle Neutral Adjust
Steering Wheel
Throttle Trim
Steering Trim
Reverse Shift
Forward Shift
Power Switch Power IndicatorBattery
Compartment
Servo Reversing
Switch
Throttle
Trigger
Revo Wiring Diagram
Antenna
On/Off
Switch
Receiver
RX Power Pack
5-cell NiMH
Battery
Steering Servos
Throttle Servo
Shifting Servo
(micro servo)
The OptiDrive ESM is
designed to adapt and
work with aftermarket
three channel radio
systems (see page 15).
OptiDrive ESM
(Electronic Shift
Module)
Battery
Channel 1
Charging Jack
(to charger)
Channel 2
Channel 3
TQ-3 Transmitter
To Transmission
(OptiDrive sensor)

10
•
Revo 3.3
Radio System Terminology
Please take a moment to familiarize yourself with these radio-system
terms. They will be used throughout this manual.
5-Cell Pack – Another term for RX Pack or rechargeable receiver pack.
The RX pack is made up of five rechargeable NiMH battery cells and is
used in place of the 4AA batteries in the model.
Channel - The 27 MHz frequency band is divided into 6 channels so that
up to six models can be operated simultaneously. Each channel is
referred to by its flag color and channel number, as shown below.
Clearing your frequency - A routine, verbal check to make sure
nobody else in your area is operating on the same channel. Always
clear your frequency by calling out your channel number before
operating your model. Wait or move to another area if your channel
is already being used.
Crystal (X-tal) - The plug-in device that determines which channel the
radio system will operate on. For each channel, there are two crystals,
one for the receiver and one for the transmitter. Of those two crystals,
the one marked “RX” with the lower number (.455 MHz lower) must be
inserted into the receiver.
Frequency band - The radio frequency used by the transmitter to send
signals to your Revo. All Traxxas RTR models operate on a 27 MHz
frequency band.
mAh – Abbreviation for milliamp hour. Measure of the capacity of the
battery pack. The higher the number, the longer the battery will last
between recharges.
Neutral position - The standing position that the servos seek when the
transmitter controls are at the neutral setting.
NiCad - Abbreviation for nickel-cadmium. The original rechargeable
hobby pack, NiCad batteries have very high current handling, high
capacity, and can last up to 1000 charging cycles. Good charging
procedures are required to reduce the possibility of developing a
“memory” effect and shortened run times.
NiMH - Abbreviation for nickel-metal hydride. Rechargeable NiMH
batteries offer high current handling, and much greater resistance
to the “memory” effect. NiMH batteries generally allow higher
capacity than NiCad batteries. They can last up to 500 charge
cycles. A peak charger designed for NiMH batteries is required
for optimal performance.
OptiDrive ESM – Electronic Shift Module. The onboard electronic
controller that monitors vehicle speed and throttle position in order to
control the action of the shifting servo. Also includes low battery
indicator for the onboard receiver pack (RX Power Pack).
Receiver - The radio unit inside your Revo that receives signals from the
transmitter and relays them to the servos.
RX Pack - RX is a common abbreviation for the radio receiver and items
associated with it. RX Pack denotes the optional rechargeable battery
pack used to power the radio system in the model. It is available as
Traxxas part number 3037.
Servos - Small motor units in your Revo that operate the throttle and
steering mechanisms.
Three-channel radio system - The TQ-3 radio system, consisting of the
receiver, the transmitter, and the servos. The system uses three
channels: one to operate the throttle, one to shift the transmission,
and one to operate the steering.
Transmitter - The hand-held radio unit that sends throttle and steering
instructions to your Revo.
Trim - The fine-tuning adjustment of the neutral position of the servos,
made by turning the throttle and steering trim knobs on the face of
the transmitter.
Y Adapter – Servo cable adapter that takes one input signal and directs
it to two equal output signals. Used to connect dual steering servos to
the channel one receiver output.
The Traxxas TQ-3 Radio System
Channel
Frequency
Band
Flag
Color
Traxxas
Part No.
1 26.995 Brown 2031
2 27.045 Red 2032
3 27.095 Orange 2033
4 27.145 Yellow 2034
5 27.195 Green 2035
6 27.255 Blue 2036
Learn terms related to the
TRX 3.3 Racing Engine
beginning on page 20.

Installing Transmitter Batteries
Your TQ-3 transmitter uses 8 AA batteries. The battery compartment is
located in the base of the transmitter.
1. Remove the battery compartment door by pressing the tab and
lifting the door up.
2. Install the batteries in the correct orientation as indicated in the
battery compartment.
3. Reinstall the battery door and snap it closed.
4. Turn on the transmitter and check the power indicator for a
solid red light.
If the power indicator light flashes, then the transmitter batteries are
weak, discharged or possibly installed incorrectly. Replace with new or
freshly charged batteries. The power indicator light does not indicate
the charge level of the RX Power Pack installed in the model.
Revo 3.3
•
11
The Traxxas TQ-3 Radio System
CH.3
CH.2
CH.1
Use the Right Batteries
Your transmitter uses AA
batteries. Use new alkaline
batteries, or rechargeable
batteries such as NiCad or
NiMH (Nickel Metal Hydride)
batteries in your
transmitter. Make sure
rechargeable batteries are
fully charged according to
the manufacturer’s
instructions.
If you use rechargeable
batteries in your
transmitter, be aware
that when they begin
to lose their charge, they
lose power much more
quickly than regular alkaline
batteries.
Caution: Discontinue
running your Revo at the
first sign of weak batteries
(flashing red light) to avoid
losing control.
If the power indicator
doesn’t light red, check the
polarity of the batteries.
Check rechargeable
batteries for a full charge.

Charging the Receiver Batteries
To power the radio system
in the truck, your Revo is
equipped with the RX
Power Pack, a rechargeable
5-cell nickel metal hydride
(NiMH) battery pack. The RX
Power Pack must be fully
charged before running the
truck. The supplied TRX
Power Charger is a peak-
detecting unit that will
charge the supplied RX
Power Pack in about one
hour. The peak-detection
circuitry automatically shuts off the charger when the maximum charge
has been achieved. Revo has a built in charging jack so you do not have
to remove the battery pack from the model. The long charger cord
allows easy handling of the truck while the battery is charging.
1. The TRX Power Charger can operate on either AC or DC power*.
An AC power supply is supplied with the charger. Plug the end of the
AC power supply into the back of the charger.
2. Plug the AC power supply into any 110-volt (U.S. models) wall outlet.
The charger light should glow steady green (no battery connected).
3. Plug the charger output cord into the charging jack located under the
right front of the truck. The charging jack is
protected by a rubber plug.
4. The green light on the charger should begin
to flash quickly, indicating that fast charging
is in progress.
5. When the light turns solid green (not
flashing), the battery pack is fully charged
and ready for use.
6. Put the rubber plug back over the charging
jack on the truck.
After fast charging has completed, the TRX Power Charger continues to
charge in trickle (slow) charge mode. It will continue until the battery is
disconnected. The TRX Power Charger will automatically shut off after 90
minutes of fast charging time. When the
charger is not in use, wind the charging
cord around the cord holder. To secure
the cord, insert the end of it into the
retaining slot on either end of the cord
holder. The TRX Power Charger is designed
to be conveniently mounted to a wall or
other vertical surface using the supplied
#8 x 1" wood screws.
The TRX Power Charger can be powered by
our optional DC car adapter (sold separately).
It features a tangle-free, extra-long wire and
integrated fuse. The long charging cord allows
the model to remain outside the car while
charging.
Caution! Never charge batteries in an
enclosed car interior or while driving. Never
leave charging batteries unattended. Monitor
them closely.
Battery Care
Some precautions should be taken to maintain the performance of the
rechargeable NiMH receiver pack in your model. Improper use of the
battery pack could result in personal injury or damage to your truck.
Only use approved chargers for NiMH battery packs (such as the Traxxas
TRX Power Charger). Do not exceed the maximum charge rate of 1 amp.
Do not short-circuit the battery pack. This may cause burns and severe
damage to the battery pack
Do not burn or puncture the batteries. Toxic materials could be released.
If eye or skin contact occurs, flush with water.
Store the battery pack in a dry location, away from heat sources
and direct sunlight.
Nickel Metal Hydride batteries must be recycled or disposed of properly.
Do not completely discharge the RX Power Pack or you could damage
it. Do not use dischargers on the pack. Store the battery with at
least 25% charge. Stop running and recharge at the first indication
of reduced voltage.
After connecting a fully-drained battery to the charger it may take up to
15 seconds for the charger to sense the battery and begin to charge. To
start charging immediately, plug the battery pack into the charger and
then plug the charger into the wall socket.
12
•
Revo 3.3
The Traxxas TQ-3 Radio System
* With optional DC car adapter
Part #3032
To prevent losing control of
your model, it is important to
stop at the first sign of weak
receiver battery. Visible
warning signals include
sluggish steering response
and shortened radio range.
In addition, the OptiDrive is
equipped with a low-voltage
indicator and a failsafe circuit.
When the voltage of the
receiver battery drops below
4.3 volts, the “Function” LED
on the OptiDrive will flash red.
If the voltage drops below 4.3
volts for more than 2 seconds,
the OptiDrive ignores throttle
and shift signals and applies
25% brakes (failsafe mode).
Steering will still be
operational and the
“Function” LED on the
OptiDrive will flash red. The
OptiDrive will stay in failsafe
mode until the power is
turned off or the receiver
battery voltage rises above
4.3 volts for more than 2
seconds. Anytime the
“Function” LED flashes red, it
is time to stop and recharge
your battery pack . Do not try
to continue running your
model with weak receiver
batteries on board.

Setting up the Antenna
1. Locate the black antenna wire that exits the receiver cover. The
receiver cover is mounted on the top of the chassis, near the front.
The antenna wire exits the cover just ahead of the fuel tank.
2. Pull the wire straight with your fingers and then insert the end of
the wire into one end of the antenna tube. Push the wire all the
way through the antenna tube.
3. Insert the base of the tube into the molded post on the side of the
radio box.
4. Place the antenna tip over the top of the tube to secure the
antenna wire.
5. On the transmitter, always fully extend the telescoping antenna
when running your Revo. Make a habit of holding the transmitter
so that the antenna points straight up.
Revo 3.3
•
13
TRX Charger Specifications:
Input voltage:
10.6/16v (min/max)
Fast charge current:
750/1000mA (min/max)
Slow (trickle) charge current:
22/55mA (min/max)
Delta Peak:
10mv
Maximum charge time:
90 minutes
The Traxxas TQ-3 Radio System
Spray a little window
cleaner on the antenna
wire to make it easier
to push through the
antenna tube.
Don’t shorten the length
of the antenna wire. Its
length is tuned to the
frequency band; cutting it
could severely shorten the
radio system’s range.
Don’t push the
transmitter antenna down
from the top. Pull it down
from the bottom, one
segment at a time, to
prevent binding and
kinking the antenna mast.
Antenna Tip
Antenna Tube
Front of
Truck

14
•
Revo 3.3
Steering
T
U
R
N
L
E
F
T
T
U
R
N
R
I
G
H
T
Brake
Neutral
Accelerate
CH.
3
CH.
2
CH.
1
Shift Reverse
Shift Forward
TQ-3 Radio System Controls
The Traxxas TQ-3 Radio System
TQ-3 Radio System Adjustments
In addition to the electronic throttle and steering trim controls, your
radio system features throttle neutral adjustment and servo reversing
switches.
Throttle Neutral Adjustment
The throttle neutral adjustment is located on the transmitter face and
controls the forward/reverse travel of the throttle trigger. Change the
adjustment by pressing the button and sliding it to the desired position.
There are two settings available:
50/50: Allows equal travel for both acceleration and braking.
70/30: Allows more throttle travel (70%) and less
brake travel (30%).
50/50 is the required setting for Revo with the TRX 3.3 Racing Engine.
Electronic Throttle Trim
The electronic throttle trim located on the face of the transmitter adjusts
the neutral (center) point of the throttle servo when the servo is at rest.
This control has been preset for you at the factory. If necessary, adjust
the control so that the carburetor is at idle, and the brakes are not
applied (the model will roll freely). Do not use the throttle trim to raise
or lower the engine idle speed. Make the idle speed adjustment on the
carburetor.
Electronic Steering Trim
The electronic steering trim located on the face of the transmitter
adjusts the neutral (center) point of the steering servos when the servos
are at rest. Adjust this control to make the model drive straight with no
steering input at the wheel.

Revo 3.3
•
15
Servo Reversing Switches
The servo reversing switches are located on the front of the transmitter,
next to the on/off switch. Moving a switch reverses the direction of the
corresponding servo. Each switch corresponds to a channel, as shown
below. For example, if you turn the steering wheel to the right and your
front wheels turn left, you would move the channel 1 switch to correct
the servo direction. It may be necessary to adjust the corresponding trim
control after
moving a switch
.
The default
position for the
servo reversing
switches is
shown.
Programming the OptiDrive
™
ESM
The OptiDrive ESM electronically monitors
vehicle speed and controls forward and reverse
shifting. Controlling the shift action electronically
rather than by mechanical systems reduces the
number of components in the transmission. The
transmission weighs less, there is lower
rotational mass for quicker acceleration, and
constant drive engagement for smooth power delivery.
The OptiDrive module prevents the transmission from changing
directions while the truck is in motion. The truck must be completely
stopped to change directions, regardless of the position of the shift
selector switch on the transmitter. The OptiDrive module is preset at the
factory. If the transmitter throttle trim adjustment is changed, then the
OptiDrive module will need to be re-programmed.
1. The engine must be shut off. The radio system must be on (receiver
and transmitter).
2. Set the TQ-3 Transmitter to its factory default shift settings:
Set the THROTTLE NEUTRAL switch to the 50/50 setting.
Set the THROTTLE TRIM to the center “0” setting, then adjust the
THROTTLE TRIM until the carburetor closes.
Set the CHANNEL 2 SERVO REVERSING SWITCH to the right position.
Set the CHANNEL 3 SERVO REVERSING SWITCH to the right position.
DO NOT change the position of any of the servo reversing switches
after programming the OptiDrive. If settings were changed after
programming the OptiDrive, it will have to be reprogrammed.
3. With the throttle at neutral, press and hold the
SET button until the Function LED flashes green
twice and then release the button immediately.
You are now in programming mode.
4. Pull the transmitter throttle
trigger to the full throttle
position. Hold it there until the
Function LED flashes green
three times.
Note: The throttle
servo will not move during programming even though it is connected
to the controller.
5. Release the transmitter throttle
trigger allowing it to return to
neutral. The Function LED will
turn solid green, indicating that
the shifting servo is OK to shift
and the programming has been completed. The controller is now
programmed and ready to go!
If the transmitter throttle settings are changed, it will be necessary
to complete the programming sequence again.
If the SET button is released before the Function LED flashes
green twice in step 3, the OptiDrive will return to the normal
operation mode.
If you experience any problems during programming, turn the
receiver off, then on again, and repeat the programming steps.
For instructions on how to use the OptiDrive with aftermarket radio
systems, or to access advanced programming options, visit our website,
www.Traxxas.com.
CH.3
CH.2
CH.1
Channel Servo
1 Steering
2 Throttle and braking
3 Shifting
The Traxxas TQ-3 Radio System
TQ-3 Channel to Servo Chart
Large adjustments to the
throttle trim and/or throttle
linkage may require re-setting
the OptiDrive to maintain
proper shifting action.
For transmission durability,
the OptiDrive ESM limits the
model’s reverse speed to about
70% of full throttle. If settings
are changed, and you notice a
decrease in forward top speed,
you could have the OptiDrive
system reversed. Return the
TQ-3 servo-reversing switches
for channels two and three
back to their default settings
and re-program the OptiDrive
Module. For programming with
aftermarket radio systems,
please see our website.
• Green “Function”
Shift allowed
•
Red flashing “Function”
Low battery, see pg. 12
•
Red “Sensor”
a) Sensor, throttle or shift
circuit is broken. Possible
disconnected or broken sensor,
throttle or shift wires. Possible
damaged sensor.
b) Receiver has lost signal from the
transmitter, the OptiDrive has
entered fail-safe (throttle and shift
servos become unresponsive).
•
Blue flashing “Sensor“
Normal operation as
vehicle moves. Indicates
signal pulse from sensor. Depending
on the rotor position, solid blue or off
when vehicle is at rest.
OptiDrive Operation

16
•
Revo 3.3
TQ-3 Radio System Rules
Each time you prepare to run your Revo,
you must clear your frequency to be sure
no one else in the area is using the same
channel as you.
There are six possible channels, numbered
1 through 6. Each is represented by a color.
Look at the crystal plugged into the back of
your transmitter to determine which
channel your truck is assigned to.
Always turn your TQ-3 transmitter on first
and off last. This procedure will help to prevent your Revo from
receiving stray signals from another transmitter, or other source,
and running out of control.
Always have the transmitter and receiver turned on before you start
the engine. Never turn the radio system off while the engine is
running. The on/off switch in the model only turns the receiver on
and off. It does not turn off the engine.
Always use new or freshly charged batteries for the transmitter, and
make sure the on-board 5-cell NiMH battery pack is fully charged.
The function light on the OptiDrive will flash red if the 5-cell battery
pack requires charging. Weak batteries will limit the range of the
radio signal between the receiver and the transmitter. Loss of the
radio signal can cause you to lose control of your Revo.
Channel 1
Brown
Channel 2
Red
Channel 3
Orange
Channel 4
Yellow
Channel 5
Green
Channel 6
Blue
CH.3
CH.2
CH.1
Always turn your transmitter on first.
Always turn your receiver on second.
Then start your engine.
1
2 3
Remember, always turn the
TQ-3 transmitter on first and
off last to avoid damage to
your Revo. Never turn the
radio off while the engine is
running.
The Traxxas TQ-3 Radio System

Using the TQ-3 Radio System
The TQ-3 Radio System was pre-adjusted at the factory. The adjustment
should be checked before running the model, in case of movement
during shipping. Here’s how:
1. Fully extend the chrome antenna mast on the transmitter and turn
the switch on. The red indicator light on the transmitter should be
solid red (not flashing).
2. Turn on the receiver switch in the model. The switch is located in the
top of the radio compartment. The function light on the OptiDrive
ESM should be green. A red flashing LED indicates low voltage in the
RX Power Pack. The sensor LED is intermittent depending on the
rotor position.
3. Position Revo so that its front wheels are off the ground.
4. Turn the steering wheel on the transmitter back and forth and check
for rapid operation of the steering servo. Also, check that the steering
mechanism is not loose or binding. If the steering operates slowly,
then check the receiver pack to make sure it is fully charged.
5. When looking down at model, the front wheels should be pointing
straight ahead. If the wheels are turned slightly to the left or right,
slowly adjust the steering trim control on the transmitter until they
are pointing straight ahead.
6. Operate the throttle trigger on the transmitter and check for rapid
operation of the throttle servo. When the throttle trigger is pulled
back, the carburetor should open (slide moves out). When the
throttle trigger is pushed all the way forward, the brake should lock.
7. Operate the shift button on the transmitter and check for rapid
operation of the shifting servo. Push the shift button down for
forward. The servo will operate the spring-loaded shift mechanism
and you will hear the transmission click into forward. Push the shift
button up for reverse and you will again hear the transmission click
and shift into gear.
8. Once adjustments are made, turn off the receiver on your Revo,
followed by the hand-held transmitter.
Range-Testing the TQ-3 Radio System
Before each running session with your Revo, you should range-test your
radio system to ensure that it operates properly.
1. Turn on the radio system and check its operation as described in the
previous section (Using the TQ-3 Radio System).
2. Have a friend hold the model with the engine off.
3. Make sure your transmitter antenna is fully extended, and then walk
away from the model with the transmitter until you reach the farthest
distance you plan to operate the model.
4. Operate the controls on the transmitter once again to be sure that
the model responds correctly.
5. Do not attempt to operate the model if there is any problem with the
radio system or any external interference with your radio signal at
your location.
Revo 3.3
•
17
The Traxxas TQ-3 Radio System
When the engine is running,
don’t use the throttle trim on
the transmitter to adjust the
engine idle speed. Instead,
use the idle speed adjustment
on the carburetor.
Don’t attempt to operate
your Revo if there are any
problems with your radio
system or radio interference
at your location.
/