Page is loading ...

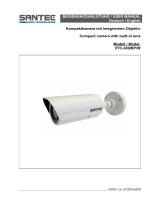
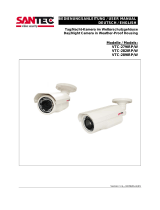
Bedienungsanleitung / User manual VTC-252P/BS
_________________________________________________________________________________
- 3 -
Dear customer,
Thank you for purchasing a high quality SANTEC device.
We recommend that you read this manual thoroughly before operating your new
system for the first time. Please follow all instructions and observe the warnings
contained in this manual.
Please contact your local dealer or use the SANTEC Service Hotline if you have any
questions or if you wish to claim for a service or warranty.
You will find further information on our website:
www.santec-video.com
All rights reserved. This publication may not be reproduced, stored in a retrieval system or transmitted,
in any form or by any means (electronic, mechanical, photocopying, recording or otherwise), without
the written prior permission of SANYO VIDEO Vertrieb AG.
No reproduction of any part or excerpts thereof are permitted.
Errors excepted. Specifications are subject to change without notice for quality improvement.
SANTEC is a registered trademark of SANYO VIDEO Vertrieb AG. All other companies or products
mentioned in this publication are trademarks, registered trademarks or brands of the respective
company. They are not connected in any way with SANYO VIDEO Vertrieb AG.
© copyright by SANYO VIDEO Vertrieb AG
SANTEC Service Hotline:
+49 / 900 / 1 72 68 32
+49 / 900 / 1 SANTEC
(if available from your country)
support@santec-video.com

Bedienungsanleitung / User manual VTC-252P/BS
_________________________________________________________________________________
- 4 -
DEUTSCH
Inhaltsverzeichnis
Allgemeine Vorsichtsmaßnahmen 5
Allgemeine Sicherheitshinweise 6
Installation 8
Die Kamera im Überblick 10
Einstellung der Kamera über das OSD (Bildschirm-Menü) 11
Besondere Ausstattungsmerkmale 17
Technische Daten 17
Anordnung der Montagelöcher 18
ENGLISH
Table of contents
Safety precautions 20
Safety instructions 21
Installation 23
Camera overview 25
Camera adjustment via OSD menu 26
Special features 32
Technical specifications 32
Drilling holes scheme 33

Bedienungsanleitung / User manual VTC-252P/BS
_________________________________________________________________________________
- 11 -
Einstellung der Kamera über das OSD (Bildschirm-Menü)
OSD Menü-Übersicht:
Shutter
• Auto • FLK • Fixed (Werteinstellung) • Manual (Werteinstellung)
BLC
• Off • On (BLC Area, BLC Ratio)
AGC
• Off • On (AGC Gain)
White Bal.
• ATW • AWB • Fixed (AWB 1-4) • Manual (Red, Blue)
Function
Return
Camera ID
• Off • On (ID Texteingabe, ID Position)
Mirror
• Off • On
Day/Night
• Auto (Delay, Startlevel, Endlevel) • Color • B/W (Burst on/off)
Motion Det
• Off • On (Area, Motion Threshold, Motion Trace)
Privacy
• Off • On (Area Select, Area State on/off) • left/right/top/bottom/color
Gamma
• 0,05-1,0 • User
Sprache
• English
Reset (Enter)
Adjust
Contrast
Schärfe
Pegel Blau
Pegel Rot
Return
Exit

Bedienungsanleitung / User manual VTC-252P/BS
_________________________________________________________________________________
- 20 -
Safety precautions
Caution
Description of symbols
Danger: This symbol is intended to alert the user to the presence of un-insulated
"dangerous voltage" within the product’s enclosure that may be of sufficient
magnitude to constitute a risk of electric shock to a person.
Warning: This symbol is intended to alert the user to the presence of important
operating and maintenance (servicing) instructions in the literature accompanying
the appliance.
CE compliance
Attention: Any changes or modifications to this appliance which have not been explicitly
approved of by the respective regulatory authority, may lead to a prohibition of usage of this
appliance.
This appliance complies with the CE guidelines.

Bedienungsanleitung / User manual VTC-252P/BS
_________________________________________________________________________________
- 21 -
Safety instructions
Before operating the appliance, please read this manual carefully and retain it for further
reference.
Before cleaning the appliance, it has to be switched off and unplugged from the power outlet.
Wipe the appliance with a soft damp cloth.
Do not use harsh cleansers or aerosols for cleaning. The type label may not be replaced.
Do not use attachments unless recommended by the manufacturer as they may affect the
functionality of the appliance and result in the risk of fire, electric shock or injury.
Never install the appliance in areas exposed to water or other liquids.
The appliance has to be installed in a safe and stable location which is able to carry the weight of
the appliance. Quick stops, excessive force, and uneven surfaces may cause the appliance to fall
causing serious injury to persons and damage to objects.
Openings in the appliance, if any, are provided for ventilation to ensure reliable operation of the
appliance and to protect if from overheating. These openings must not be covered or blocked.
Please make sure that the appliance does not overheat.
The appliance should only be operated from the type of power source indicated on the marking
label. If you are not sure of the type of power supplied at the installation location, please contact
your local dealer.
An appliance which is powered through a polarized plug (a plug with one blade wider than the
other) will fit into the power outlet only one way. This is a safety feature. If you are unable to insert
the plug into the outlet, try reversing the plug. Do not defeat the safety purpose of the polarized
plug.
If the appliance is powered through a grounding-type plug, the plug will only fit into a grounding-
type power outlet. This is a safety feature. If your outlet does not have the grounding plug
receptacle, contact your local electrician.
Route power cords and cables in a manner to protect them from damage by being walked on or
pinched by items places upon or against them.
For protection of the appliance during a lightning storm or when it is left unattended and unused
for a longer period, unplug the appliance from the wall outlet. Disconnect any antennas or cable
systems that may be connected to the appliance. This will prevent damage to the appliance due to
lightning or power-line surges.
Do not overload wall outlets and extension cords as this can result in a risk of fire or electric
shock.
Never insert items into the openings of the appliance. They may touch parts under electric current
which may cause an electric shock.
Never pour any liquids over the appliance.

Bedienungsanleitung / User manual VTC-252P/BS
_________________________________________________________________________________
- 22 -
In case of any operating interruption or a complete operating failure please switch off the
appliance and disconnect it from the wall outlet. Never attempt to service or repair the appliance
yourself, as opening or removing covers may expose you to dangerous voltage or other hazards.
Refer all servicing to qualified service personnel.
When replacement parts are required, be sure that the service technician uses replacements parts
specified by the manufacturer or that have the same characteristics as the original part.
Unauthorized substitutions may result in fire, electric shock or other hazards.
Upon completion of any service or repairs to the appliance, ask the service technician to perform
safety checks to verify that the appliance is in proper operating condition.
The appliance should only be installed by qualified service personnel and has to comply with local
specifications and regulations.
Never point the camera at an object with a high degree of luminance. Bright vertical or horizontal
lines can result in a distortion (outshine) of the entire image on the monitor. This artifact is not an
error but a particularity of semiconductor CCDs when they are directly exposed to a powerful light
source.
At the installation site, the camera has to be adjusted to the given light conditions (see OSD).
Please respect the local legal regulations on waste if you need to dispose of discarded appliances.
This symbol means that electrical appliances need to be disposed of properly and not
simply with unsorted household refuse. Please respect local regulations on waste
disposal.
About this user manual
This manual aims at assisting the user on how to operate camera VTC-252P/BS.
This manual is subject to rigid quality control. However, no guarantee can be given that mistakes are
not present. We reserve the right to make changes to the manual without prior notice.
Before operating the appliance, please read this manual carefully and retain it for further reference.
Verify that all appliance items are included in the delivery. Should items be missing, do not operate the
appliance and contact your local dealer.
Never attempt to repair the appliance yourself. This should only be done by qualified service
personnel.
Improper handling of the appliance will invalidate the warranty.

Bedienungsanleitung / User manual VTC-252P/BS
_________________________________________________________________________________
- 23 -
Items included in the delivery
1 x camera VTC-252P/BS
1 x cable adapter BNC socket/plug
1 x user manual
Installation
(also see the pictures on the following pages)
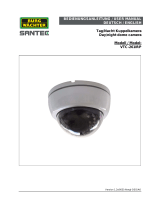
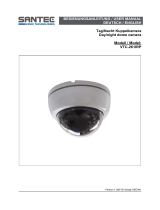
This camera is a colour dome camera. It has been developed for indoor CCTV applications.
You will find the technical data at the end of the manual.
1. Bracket and camera installation
Make sure to fix the camera onto a solid basis which is capable to carry the weight of the
camera. Ensure that the camera is safely installed by using only suitable screws.
2. Power supply and monitor impedance
Only use a stabilised power supply unit with sufficient wattage (see chapter “Specifications”
for recommended power supply). Only approved cables should be used.
If a monitor is connected directly, the monitor impedance has to be set to 75 Ohm. Verify the
position of the switch in case the video picture is of poor quality.
The yellow BNC-plug is for video output.
The red outlet is for power supply input.
A cable adapter BNC socket/plug is included in the delivery which can be put onto the
additional video output, e.g. to connect a monitor during the camera installation phase in
case the regular cable has already been laid (picture 2).
3. Camera housing
Open the camera housing by carefully turning it counter-clockwise (see picture 1).
Close the camera housing by carefully turning it clockwise (see picture 1).
Improper handling of the appliance will invalidate the warranty.

Bedienungsanleitung / User manual VTC-252P/BS
_________________________________________________________________________________
- 24 -
4. Adjustments
OSD
All camera adjustments are done via an OSD menu. On the camera there is a mini-joystick.
Press onto the joystick and a menu pops up in the video picture. You can now move the
joystick left/right/up/down in order to get to the desired menu item. For confirming your
choice, press onto the joystick (picture 2).
See chapter „Camera adjustments via OSD menu“ for more information.
Lens (picture 2)
To achieve the correct angle of view, turn the zoom ring until you get from a wide angle to a
near angle or vice versa. Use the second ring to adjust the sharpness.
3-axis adjustment (picture 4)
The camera module can be set via 3 axis which makes it possible to have customised
setting, e.g. in case of wall mounting.
1. turn the whole bracket
2. up and down
For making adjustments, loosen the screws carefully.
After the adjustments have been made, tighten the screws again carefully.
Additional video output (picture 2)
You may use this additional video output via the adapter (which is included in the delivery),
e.g. to connect a monitor during the installation phase if the regular video connection cable is
already in use.

Bedienungsanleitung / User manual VTC-252P/BS
_________________________________________________________________________________
- 25 -
Camera overview
Picture 1 Picture 2
Picture 3 Picture 4
All dimensions in mm.
Picture 5
video output BNC
12V DC input (mid +)
open
here
mini-joystick
lens
adjustment
holes for fixing screws
additional video
output (via adapter),
e.g. for monitor
connection during
installation phase
100
130

Bedienungsanleitung / User manual VTC-252P/BS
_________________________________________________________________________________
- 26 -
Camera adjustment via OSD menu
Menu overview:
Shutter
• Auto • FLK • Fixed (value setting) • Manual (value setting)
BLC
• Off • On (BLC Area, BLC Ratio)
AGC
• Off • On (AGC Gain)
White Bal.
• ATW • AWB • Fixed (AWB 1-4) • Manual (Red, Blue)
Function
Return
Camera ID
• Off • On (ID text, ID position)
Mirror
• Off • On
Day/Night
• Auto (Delay, start level, end level) • Color • B/W (Burst on/off)
Motion Det
• Off • On (Area, Motion Threshold, Motion Trace)
Privacy
• Off • On (Area Select, Area State on/off) • left/right/top/bottom/color
Gamma
• 0.05-1.0 • User
Language
• English
Reset (Enter)
Adjust
Contrast
Sharpness
Blue
Red
Return
Exit

Bedienungsanleitung / User manual VTC-252P/BS
_________________________________________________________________________________
- 27 -
Bedienung des OSD Menüs
All camera adjustments are done via an OSD menu. On the camera there is a mini-joystick.
Press onto the joystick and a menu pops up in the video picture. You can now move the
joystick left/right/up/down in order to get to the desired menu item. For confirming your
choice, press onto the joystick.
In case the menu says “SET key”, this means pressing the joystick.
This camera is pre-equipped with a DC lens.
The setting has to stay at “DC”.
SHUTTER:
Adjustment of picture shutter.
Auto: Press onto the joystick to open the menu for brightness setting.
FLK: FLK (Flickerless) can be set if picture vibration occurs caused by e.g. a
non 50 Hz light source.
Manual : Press onto the joystick and a menu for setting values pops up. Press
again onto the joystick (return) to confirm your selection.
Fixed : Press onto the joystick and a menu for setting values pops up. Adjust
the shutter values here. Press again onto the joystick (return) to
confirm your selection.
BLC (backlight compensation):
OFF
ON
BLC AREA: You can select the active BLC area using the joystick.
By longer pressing onto the joystick a sub-menu pops up which
enables to directly select or delete all areas. „Return“ saves the
values.
Select „Exit“ to quit.
BLC Ratio: Select the desires BLC value.
Return: Exit the BLC settings.

Bedienungsanleitung / User manual VTC-252P/BS
_________________________________________________________________________________
- 28 -
AGC:
OFF
ON
AGC Gain: Select the desired AGC value.
WHITE BAL:
ATW: Used for colour temperatures of 2400 – 12000K, e.g. for outdoor
applications.
AWB: Automatic white balance
Manual :
Red: Setting of red value
Blue: Setting of blue value
Point the camera to a white background and adjust it to achieve a good
white picture.
Fixed: AWB 1 – 4: Setting options for 4 pre-defined values.
FUNCTION:
(open the extended camera menu)
CAMERA ID:
Camera title to be displayed in the picture.
Move the joystick left/right to select one of the following options:
OFF ON
When selecting ON you go directly to the title menu. Using the joystick, you can enter a title
of max. 15 characters.
Select the desired character and confirm by
pressing onto the joystick. Use the arrow left/right
to navigate within the entered title and to go to the
next character.
CLR deletes the whole entry.
POS gets you to the position menu.
END ends the settings and you will get into the
previous menu.

Bedienungsanleitung / User manual VTC-252P/BS
_________________________________________________________________________________
- 29 -
MIRROR:
Picture mirroring.
Move the joystick left/right to select one of the following options:
OFF ON
OFF: The picture is displayed in a regular way.
ON: The picture is mirrored.
DAY/NIGHT:
Auto : The camera automatically adjusts to day or night operation (automatic
day/night switching).
By pressing onto the joystick, you will get into a sub-menu for:
Delay
Start level
End level
Color: Pictures are displayed in color.
B/W: Pictures are displayed in black/white.
Burst on: Switches on the “Colorburst”.
Burst off: Switches off the “Colorburst”.

Bedienungsanleitung / User manual VTC-252P/BS
_________________________________________________________________________________
- 30 -
MOTION:
OFF: Motion detection switched off.
ON : Motion detection switched on.
Motion Threshold
Motion Trace:
On
Off
MOTION AREA:
Use the joystick to select the active motion area.
By longer pressing onto the joystick a sub-menu pops up to directly select or delete all areas.
„Return“ saves the values.
„Exit“ quits the setting.

Bedienungsanleitung / User manual VTC-252P/BS
_________________________________________________________________________________
- 31 -
PRIVACY:
OFF:
On :
Area Select 1–4: 4 areas can be selected.
Area State: On
Off
GAMMA:
Move the joystick left/right to set the gamma value.
LANGUAGE:
The language is set to English.
ADJUST:
Use the joystick to set values for:
Contrast
Sharpness
CB_Gain
CR_Gain
„Return“ saves the values.

Bedienungsanleitung / User manual VTC-252P/BS
_________________________________________________________________________________
- 32 -
Special features
540 TVL resolution
Integrated manual zoom lens 4.0 – 9.0 mm
Automatic day/night switching
Easy camera adjustments via OSD menu and mini-joystick
Voltage: 12V DC
Additional video output for installation purposes
Technical specifications
Camera VTC-252P/BS
Camera type Colour dome camera
Video norm PAL
Sensor 1/3“ Sony Super HAD CCD
Active pixel 755(H) x 582(V)
Horizontal resolution 540 TVL
Min. illumination 0.1 lux
S/N ratio > 50 dB
Video output 1.0 Vpp at 75 Ohm, BNC
Lens 4,0 – 9,0 mm
OSD menu Shutter, white balance, BLC, AGC, DNR,
sens-up, camera title,
mode (day/night– colour), motion detection,
privacy zones, mirroring, sharpness
Electronic characteristics
Voltage 12V DC
Power consumption 3 watt
Mechanical characteristics
Dimensions (DxH) 130 x 100 mm
Weight approx. 210 g
Housing material plastic
Environment
Operating temperature -10° to +50° C
Recommended accessories
Power supply unit SANTEC VCA-12V-0,6AS
Subject to technical changes without notice. Errors excepted.

Bedienungsanleitung / User manual VTC-252P/BS
_________________________________________________________________________________
- 33 -
Drilling holes scheme
All dimensions in mm.
The scheme is not true to scale.

__________________________________________________________________________
www.santec-video.com
Ihr Fachhändler / Your local distributor:
1/36