Page is loading ...

Owner's manual
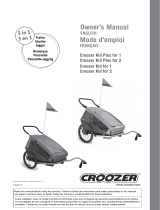
CROOZER 535
CROOZER 737
Date of Issue 12/2003

18
Contents
1. The Basic Unit ............................................................................................................................................. 20
1.1. Assembling the Basic Unit .................................................................................................................... 20
1.1.1. Assembling the Passenger Compartment.................................................................................... 20
1.1.2. Wheel Assembly on Models 535 and 737.................................................................................. 21
1.1.3. Fitting the Handlebar ................................................................................................................. 21
1.1.4. Fitting the Safety Flag................................................................................................................. 22
1.1.5. Fitting Battery Lights (not supplied as standard) .......................................................................... 22
1.2. Functions of the Basic Unit................................................................................................................... 22
1.2.1. Seat and Safety Belt.................................................................................................................... 22
1.2.2. Parking Brake ............................................................................................................................ 23
1.3. Weather Cover ..................................................................................................................................... 24
1.4. Folding the Basic Unit .......................................................................................................................... 24
2. Drawbar ...................................................................................................................................................... 25
2.1 Safety Recommendation........................................................................................................................ 25
2.2. Fixing the Drawbar on the Transporter.................................................................................................. 25
2.3. Fixing the Drawbar on the Bicycle........................................................................................................ 26
2.3.1. Fitting the Coupling Unit to the Bicycle ......................................................................................26
2.3.1.1. Bicycle with Full Axle............................................................................................................. 26
2.3.1.2. Bicycle with Quick Release Axle ............................................................................................ 26
2.3.2. Fitting the Drawbar to the Coupling Unit .................................................................................. 27
2.4. Safety Instructions for the Bicycle Trailer ...................................................................................... 27
3. The Buggy Wheel ........................................................................................................................................ 28
3.1. Fitting the Buggy Wheel ....................................................................................................................... 28
3.2. Safety Instructions for the Buggy Wheel................................................................................................ 28
4. Jogger Set ................................................................................................................................................... 29
4.1. Assembling the Jogger Set..................................................................................................................... 29
4.1.1. Fitting the Wheel Arms .............................................................................................................. 29
4.1.2. Fitting the Front Wheel ...............................................................................................................29
4.2. Safety Instructions for the Jogger Set...................................................................................................... 30
5. General Safety Instructions ......................................................................................................................... 30
6. Maintenance, Care and Storage of the CROOZER ....................................................................................... 30
6.1. Drawbar............................................................................................................................................... 30
6.2. Wheels................................................................................................................................................. 31
6.3. Storage ................................................................................................................................................. 31
7. Guarantee ................................................................................................................................................... 31
8. Specifications .............................................................................................................................................. 32

19
Congratulations on buying a CROOZER!
Your new child transporter stands out because of its excellent quality, user-friendliness, high safety standards and
great versatility. The Child Transport System enables you go for bike rides, walks or jogging with your children with-
out having to park a fleet of special vehicles in the garage, cellar or shed.
It consists of a basic unit (passenger compartment with chassis, handlebar and two 20” wheels) plus the following
accessories:
• Drawbar
• Buggy wheel:
a rotatable 8” buggy wheel
• Jogger set:
16” front wheel with two wheel arms
You have decided to buy a product from the CROOZER Series from
Zwei plus zwei Marketing GmbH.
CROOZERS ARE AVAILABLE IN VARIOUS VERSIONS DEPENDING ON EU COUNTRY.
This guide applies to models 535 (for two children) and 737 (for one child).
The safety instructions are in the storage area cover!

20
1. The Basic Unit
Passenger compartment with multi-pur-
pose weather cover folded down
Wheels, handlebar, safety flag Drawbar, buggy wheel, stroller wheel
with wheel arms
1.1. Assembling the Basic Unit
1.1.1. Assembling the Passenger Compartment
To unfold the passenger compartment,
remove the upper frame from the lower.
Then put your hand into the Croozer
and pull the seat handle back.
Engage first the left and then the right
catch.
A locking pin is integrated into the catch
on the right side, and prevents acciden-
tal folding.
Engaged lock
Please note: The auxiliary lock on
the right side must be released each
time before folding, otherwise you
will damage the transporter frame.
See also: Instructions for folding
(Point 1.4.)

21
1.1.2. Wheel Assembly on Models 535 and 737
The transporters are fitted with 20” spoked wheels and tyres dimension
47-406 (20” x 1.75”)
Assembly:
Press on the rubber cap and insert the
clevis axle into the hollow axle until it
engages. Repeat this on the other side
and check the wheels are securely
positioned.
1.1.3. Fitting the Handlebar
Both ends of the handlebar are pushed into the tubes at the upper rear section of the
transporter framework.
Tip: If the handlebar sticks, try using soap or silicon spray!
Check that the insert tube holes are properly aligned with the uptake tubes
and lock them on each side with the spring clip bolt, which you push
through from outside inwards and then secure with the spring clip loop.
Tip: Fitting the spring clip bolt is
made easier if you release the
folding catches and slightly fold the
trailer.
Safety note!
In the event of the vehicle tipping
over: Your handlebar grip acts as a
safety bar. So keep it permanently
installed, even when using the
transporter behind a bicycle!
The handlebar can be adjusted for two
positions. The lower position is
however only intended for small people
or children.

22
1.1.4. Fitting the Safety Flag
On both sides of the Croozer is a flag flap stitched vertically. When using the
flag (recommended), this is always put on the side facing the traffic.
1.1.5. Fitting Battery Lights (not supplied as standard)
There are two flaps sewn above the contour marking at the back of the transporter for attaching 1 or 2 diode rear
lights, and they can be inserted here.
Please note: Using at least one
permanent light (diode rear light)
when visibility is poor, at twilight or
when it is dark is required by the
Road Traffic Act. The use of flashing
rear lights is not allowed.
Note: Please ensure when buying
lights that they bear an approval
mark (e.g. K mark).
1.2. Functions of the Basic Unit
1.2.1. Seat and Safety Belt
Strap your children in as shown in the drawings. Take care that the length of the individual straps is adjusted to suit
the size of your child.
Please note: Never transport your children without the safety belts being
properly and fully adjusted. Otherwise your child could be seriously or
even fatally injured in the event of an accident!

23
Tip: The tension of the transporter
fabric can be adjusted using the
adjustable anchor straps.
1.2.2. Parking Brake
The Croozers are equipped on both sides with a parking brake, each of which is operated separately.
To lock the brake, pull the brake lever upwards using the red button, until you feel it engage. To release it press the
brake lever down towards the ground as far as it will go.
Please note: Operating the brake
using your foot can damage the
brake and the wheels. The brakes
should not be used to control a
rolling transporter to a halt.
1.3. Weather Cover
The Croozer models are fitted with a multi-purpose weather cover for climate control. The weather cover when fully
fitted across the access opening offers protection to the occupant from rain, wind and cold.
Please note: If the anchor straps
are pulled too tight, the folding
mechanism will be affected.
If the clear view window is rolled back,
the insect mesh behind prevents insects
from flying in and small stones being
thrown up. The rubber tags at the side
are used to fix the rolled up clear view
window in place, and these are sewn on
the upper edge of the weather cover.
Both covers can be rolled up together
and held firmly in place by the rubber
tags sewn on the upper edge of the
cover.
For better ventilation and in particular if
the outside temperature is high, the rear
flap can also be rolled up and fixed in
place.

24
Tip: In wet weather the back wheel of the traction bicycle can throw up water and dirt onto the front of the
transporter. This is considerably reduced by fitting a splash guard on the rear wheel mudguard.
Please note: When used behind a bicycle, at the very least the mesh cover should be in place, so that the children
cannot be injured by insects or stones thrown up.
1.4. Folding the Basic Unit
First release both parking brakes! (Push the handle downwards)
Dismantle the wheels, by pressing on the rubber cap of each at the same time as
pulling off the wheel.
Stand behind the transporter and release the side clips, which hold the unit in place. Please note that an additional locking
device is present on the right-hand side, which must be released before opening the catch. To do this push the red sliding device
forwards with your right thumb and then open the clips inwards towards the centre. Now press the seat frame forwards so that
the transporter can be folded inwards.
Note: If the body does not fold easily and smoothly check for objects in the transporter which might be blocking the
folding mechanism. Never use force to fold the unit.

25
2. Drawbar
2.1 Safety Recommendation
All aluminium drawbars used by Zwei plus zwei have undergone safety tests either by the manufacturers or
Zwei plus zwei. These tests include functional tests and load and fatigue tests. Zwei plus zwei only uses drawbars
which have withstood these tests without any problem whatsoever.
Because it is difficult to determine the exact life time of a bicycle trailer and to know the actual loads to which the
drawbars will be subjected to during this time, there does remain a risk in theory, and this cannot be excluded with
absolute certainty, that even a drawbar which has undergone testing could fail, if it is put under extreme load for
several years.
To rule out this theoretical risk, we have limited the period of use for all drawbars to a maximum of 3 years.
Please draw attention to this safety recommendation should you sell the trailer.
2.2. Fixing the Drawbar on the Transporter
When you first fit the drawbar we recommend that you tip the Croozer backwards on an even and clean surface so
that you have a better view and can more easily familiarise yourself with the attachment system.
Please note: Always use both spring clip bolts! A drawbar which has not
been secured properly can come loose during travel. This is extremely
dangerous and can lead to severe injury and even death of the occupants.
Insert the drawbar rear end into the
receiving unit.
To lock, the rear spring clip is pushed
through the boreholes in the receiving
unit and drawbar and then secured with
the spring clip loop.
To do this pull the loop across the end of
the bolt so that the clip opening surro-
unds the end of the bolt. Now press the
drawbar firmly into the receiving unit
and fasten the second spring clip loop in
the centre borehole. The drawbar is now
attached in two places.
To remove the drawbar, release the
spring clip loops and remove the
safety bolts. Then you can pull the
drawbar out towards the front.

26
2.3.1.1. Bicycle with Full Axle
Remove the left hand axle nut. Any spacers or plain washers can generally
be retained. Put the coupling unit on the axle and reattach the nut. At the
same time align the coupling unit horizontally so that the square drawbar
connector fits on top. (see also picture 1 in 2.3.2.)
Please note: The axle nut must be tightened on the axle thread by at least 5
full turns, so that adequate clamping force is ensured. A thread which is
too short can lead to accidental loosening of the rear wheel and thereby to
damage and accidents. If in doubt ask your specialist dealer!
Tip: For bicycles where the length of the standard quick release is
insufficient, a special quick release with longer axle is available.
2.3.1.2. Bicycle with Quick Release Axle
Detach the quick release and guide it through the coupling unit along with
the quick release axle. Push the quick release through the hollow axle again,
attach the nut and clamp the quick release with the correct prestress.
(see also: Point 4.1) At the same time align the coupling unit horizontally so
that the square drawbar connector fits on top. (see also picture 1 in 2.3.2.)
Tip: For bicycles where the coupling
unit for horizontal assembly as
supplied does not fit, a coupling unit
for vertical assembly is available.
Please note: The thread of the adjusting nut of the quick release must be
tightened on the quick release axle by at least 5 full turns, so that adequate
clamping force is ensured. A quick release axle which is too short can lead
to accidental loosening of the rear wheel and thereby to damage or acci-
dents. If in doubt ask your specialist dealer!
2.3. Fixing the Drawbar on the Bicycle
2.3.1. Fitting the Coupling Unit to the Bicycle
Always fit the drawbar and coupling on the left hand side in direction of travel!
Please note: When the Croozer is used as a trailer behind a bicycle, your own and your child’s safety depend on
the coupling being properly fitted. Proceed therefore with special care. Never cycle with a coupling which is
inadequately attached or not secured. If in doubt ask your specialist dealer!

27
2.3.2. Fitting the Drawbar to the Coupling Unit
Please note: A coupling, which is incorrectly fitted, could become loose and could either slip sideways into the
spokes or forwards in the direction of the bottom bracket during braking. In both cases there is considerable
danger that the cyclist will fall or become injured. Please therefore always ensure before every journey that the
coupling is correctly and securely positioned.
2.4. Safety Instructions for the Bicycle Trailer
• Before use read the User Guide carefully
• Before setting off always correctly fasten the coupling and safety tie
• Ensure correct assembly of all components, in particular wheels and
drawbar
• Only carry children who can sit without support
• Always strap children into the trailer
• Always protect children with suitable helmets
• Cycle more slowly and carefully with the trailer than you would if you
were riding just a bicycle.
• Only take bends at walking pace, otherwise the trailer could tip
• Maximum speed 25 km/h
• Maximum load 40kg (2 seater), 25 kg (single-seater)
• Tyre pressure 2.5 bar
Please note: Please always try to
avoid going over obstacles with one
wheel only, since this can lead to
the transporter turning over
completely irrespective of speed.
Push the square drawbar connection
over the coupling unit attached to the
bicycle.
Insert the spring clip bolt through the
boreholes of both coupling parts and
close the clip so that the clip opening
surrounds the bolt end.
Secure the drawbar by putting the safety
tie around the rear section of the bicycle
frame and fastening it to the drawbar
ring with the snap hook.

28
3. The Buggy Wheel
3.1. Fitting the Buggy Wheel
For operation as a buggy, your Croozer is fitted as standard with a bracket
into which the buggy wheel (included in the delivery) can be inserted.
3.2. Safety Instructions for the Buggy Wheel
• When you park your Croozer buggy, always lock both parking brakes.
• The brakes should not be used to control a rolling transporter to a halt.
• When pushing the buggy, you should always make use of the safety strap
to prevent the transporter from accidental rolling. To do this put the loop
attached to the handle bar around your wrist.
• Please always try to avoid pushing your buggy over obstacles (e.g. kerbs)
particularly if it is heavily laden, otherwise it could get damaged.
• When the transporter is used behind a bicycle the buggy wheel must
always be detached, otherwise it may catch on obstacles. This could lead
to damage and accidents.
To do this raise the transporter on its
front bumper until you can easily see the
bracket for the buggy wheel. Now push
the buggy wheel from underneath as far
as it will go.
The buggy wheel is secured so that it
cannot come loose or fall off by means
of the spring clip bolt attached to the
bracket.
Ensure that you pull the spring clip loop
over the end of the bolt so that the end
of the bolt is completely surrounded by
the clip opening.
To remove the wheel follow this procedure in reverse.

29
4. Jogger Set
4.1. Assembling the Jogger Set
4.1.1. Fitting the Wheel Arms
Put both wheel arms on the correct side of the carrier as shown in the
picture.
Follow the same procedure for inserting and locking the wheel arms as for
the drawbar.
4.1.2. Fitting the Front Wheel
Open the quick release lever as far as
possible. It may be necessary to loosen
the adjusting nut of the quick release by
a few turns so that the latter can be
pushed into the dropouts.
Insert the wheel axle into the dropouts
of the wheel arms and centrally align the
wheel.
Tighten the adjusting nut of the opened
quick release clockwise until the
supporting surfaces of the quick release
are up against the dropout.
Close the quick release. The quick release is properly adjusted
when you can clearly feel resistance as
you tighten. You should feel this
resistance about 60° before the final
point in the lever movement.
Please note: If the quick release is
tightened too much, the plastic
dropouts can be damaged and so
impair proper functioning.
Tip: Any deviation of the jogger from
a straight line when in use can be
corrected by further alignment of the
front wheel.

30
4.2. Safety Instructions for the Jogger Set
• When you park your Croozer jogger, always lock both parking brakes.
• The brakes should not be used to control a rolling transporter to a halt.
•When pushing the jogger, you should always use the safety strap to prevent the transporter from accidental rolling. To do
this put the loop attached to the handle bar around your wrist.
• Do not sit or stand on the wheel arms, since these can be damaged by overloading of this kind.
5. General Safety Instructions:
Irrespective of any special use, attention should always be paid to the following instructions:
• Never exceed the maximum load of 40 kg (Model 535) and 25 kg (Model 737).
• Carry a maximum of one child (model 737) or two children (model 535).
• Do not carry children who are over seven years old.
• Children should be old enough to wear a helmet and be able to sit upright without outside help, or they should be
strapped in a specially fitted baby seat (accessory).
• The child’s head, including helmet, must not project above the upper frame.
• Children must always wear seat belts.
• Never leave a child unattended in the trailer, buggy or jogger.
• Always check on a regular basis that your children are comfortable at the given temperatures.
• Please always try to avoid going over obstacles with one wheel only, since this can lead to the transporter turning
over completely irrespective of speed.
6. Maintenance, Care and Storage of the CROOZER
6.1. Drawbar
Check the drawbar regularly for signs of damage (e.g. cracks). In the interests of safety, the drawbar should be
replaced every three years (see also Section 2: “Safety Recommendation”)

31
6.2. Wheels
Have the wheels (tyres, rims, tension of spokes) checked by your specialist dealer at least once a year.
6.3. Storage
Store your Croozer in a dry and well-ventilated place. Before storing your Croozer, it should be dry to prevent the
growth of mould and the formation of marks from mildew. Put your Croozer as little as possible in direct sunlight to
prevent colours fading. Do not store the trailer coupled to the bicycle over a long period of time.
Please note: As well as rubber, tyres contain many chemical substances which improve their physical
characteristics. In unfavourable circumstances, these substances may lead to staining of the transparent side
panels of the child transporter. For this reason, always store wheels in such a way that they do not come into
contact with these side panels.
7. Guarantee
The statutory warranty covers defects. Damage resulting from improper use, use of force, lack of maintenance, or
normal wear and tear, is excluded from such a statutory defect warranty.
The period of statutory warranty depends on the law of the country in question.
Our products have components or parts which are also subject to natural wear and tear arising from normal use,
depending very much on the type and degree of use and also how well the product has been serviced and
maintained. In particular where there has been a lot of use (day in day out and in all kinds of weather), individual
parts or components can reach their wear limit before the statutory guarantee period has expired. Because a product
has become prematurely worn because of use, it does not automatically mean the product is defective.
We have therefore listed in the following table, for your information, the important parts affected by wear and tear
and have named typical contributing factors related to use, which may considerably influence wear limit. This table
complements the existing operation guide – please do also note the instructions on “Maintenance, Care and Storage
of the CROOZER” in your operation guide.
1. Maintenance and Care of Bicycle Trailers und Child Joggers:
Irrespective of the:
• type of use
• intensity of use
• care und maintenance
functional-related wear occurs in bicycle trailers or child joggers in the components and parts listed in the following
table. Reaching the wear limit does very much depend on how well the users have looked after and maintained the
product as well as the particular type and intensity of use such as:
• mileage in km
• loading by:
passengers
baggage
• type of ride:
degree of acceleration and braking
• fast cornering
• effects of the weather:
UV rays
humidity
dirt
temperature
salty air
contact with salt water
streets gritted with salt
• storage
• level of maintenance:
interval between services
means of maintenance
storage
servicing and inspection work

32
Please look at the following table (‘Wear factors’). You can see from this table which factors particularly affect the
wear and tear on individual parts.
This table complements the existing operation guide – please do also note the instructions on “Maintenance, Care
and Storage of the CROOZER”.
Factors, which particularly increase wear on bicycle trailers and child joggers:
Parts
Wear factors
Load because of: Passengers x xx x xx
Baggage xx x xx
Influence of the
weather: UV rays xx *1 x xx xx xx *3
Humidity xx *2 xx xx x x x
Dirt xx xx xx xx x x
Temperature xxxxx x
Salty air x x xx x xx x
Contact with salt water xx xx xx xx xxx x
Streets gritted with salt xx xx x xxx x
Storage x *4 x *4 x *4 x *4 x *5
Tyres *6
Rims,
hubs &
spokes
Windows
Textile
floors
& side walls
Seat
Fabric
body
Influences on wear and tear:
x: Moderate effect on wear and tear
xx: Strong effect on wear and tear
xxx: Considerable effect on wear and
tear
*1 - Avoid strong sun light
*2 - Avoid mould forming by storage in a
dry place
*3 - Avoid long exposure to sun light
*4 - Avoid mould forming by storage in a
dry place
*5 - No wear and tear if stored in a
hanging position
*6 - Regularly check the air pressure
Internal space
Seats
Seat width
Legroom
Headroom
Dimensions and weight
L x W x H
L x W x H folded
Handle height
Weight / load
Wheel size
* Average (trapezoidal seat shape)
Croozer 535
2
60 cm*
55 cm
60 cm
110 cm / 89 cm / 80 cm
113 cm / 89 cm / 27 cm
max. 98 cm
15 kg / 40 kg
47-406 / 20 x 1,75“
Croozer 737
1
30 cm*
55 cm
60 cm
110 cm / 75 cm / 80 cm
113 cm / 75 cm / 27 cm
max. 98 cm
14 kg / 25 kg
47-406 / 20 x 1,75“
8. Specifications
www.croozer.info

Montage- en
gebruiksaanwijzing
CROOZER 535
CROOZER 737
Stand 12/2003
/