Page is loading ...

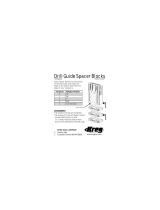
Cornhole Boards
DO IT YOURSELF
$145

2
Cornhole Boards
PVC Cornhole Boards, built to last. A few features are the collapsible legs, integrated cup
holder and hanging system to mount on the wall.
Simple Backyard Rules
• Boards are placed 27ft from front edge to front edge.
• Games are played to 21 points.
• Woody: Refers to any cornhole bag that has been pitched and remains on the cornhole
board playing surface at the conclusion of the frame. Each woody is 1pt.
• Cornhole – Refers to any cornhole bag that has been pitched and passes through the
cornhole board hole at anytime within the frame. Each cornhole is 3pts.
• A bag that comes to rest touching the ground AND the board does not count as a point.
• Cancellation Scoring: The approved method of scoring for the sport of cornhole is
“cancellation” scoring. In cancellation scoring, the points of one player cancel out the
points of their opponent. Using this method, only one player/team can score in each frame.
• Both players play one board at a time, and stay in their designated lane for the whole game
(right or left).
• Players start the game at board 1 and alternate pitching bags until each player has pitched
all (4) of his/her bags.
• Players then walk to the end of their lane to the other board, take score, and resume
pitching back to the other cornhole board.
• Players must deliver the bag with an under-hand release.
• Feet must stay behind the line of the front of the board at the time of releasing the bag.
• The player/team who scored in the preceding frame pitches first in the next frame. If neither
player/team scores, the player/team who pitched first in the preceding frame shall retain
first pitch in the next frame.
• If bags become piled inside the cornhole board hole and may interfere or obstruct with the
next pitch or if there is question whether a cornhole bag would have naturally fallen through
the hole, a player may request to “rake” the cornhole bags

3
Drawing - Layout
Tools
• Hearing Protection
• Safety Glasses
• Drill Bits
• Power Miter Saw
• Drill/Driver
• Jig Saw
• Table Saw or Circular Saw
• Tape Measure
Drawing - Layout
Bolt Assembly
Bag Storage
cross Member -
5-1/2 x 5-1/2” x
3/4 ” (oversized)
Inner Frame -
3-1/2 x 45-1/2”
x 3/4”
Outer Frame -
3-1/2 x 48” x
3/4 ”
Leg Suppo rt - 3-1/2 x
5-1/2” x 3/4” (oversized)
Leg - 3-1/2” X 11-9/16”
x 3/4”
Top Cleat - 2” x 7” X 3/4”
(oversized)
Top - 24” x 48” x 1/2“
with 6” dia. Hole
Tools:
• Hearing
Protection
• Safety Glasses
• Drill Bits
• Power Miter Saw
• Drill / Driver
• Jig saw
• Table Saw or
Circular Saw
• Tape Measure
Outer Frame —
3-1/2” x 48” x 3/4”
Inner Frame —
3-1/2” x 45-1/2” x
3/4”
Bag Storage
cross Member —
5-1/2” x 5-1/2” x
3/4” (oversized)
Leg Support —
3-1/2” x 5-1/2” x 3/4”
(oversized)
Leg — 3-1/2” x
11-9/16” x 3/4”
Top Cleat — 2” x 7”
x 3/4” (oversized)
Top — 24” x 48”
x 1/2” with 6” dia. Hole
24
24 1/2
45
1
/
2
47
12
48
Bolt Assembly

4
Drawing - Materials
• 1/2”x2’x4’ HandiPanel
• 2ea ‐1’x4’x8’ (3/4” Thickness)
Royal Trim Board
• 1ea 1’x8’x8’ (3/4” Thickness)
Royal Trim Board
• 8ea – 5/16” x 2‐1/2” Galvanized
Carriage Bolts
• 8ea – 5/16” Galvanized Nuts
• 16ea – 1” Galvanized Washers
• PVC Glue
• 24ea 1” weather resistant
Pocket hole screws
• 12ea 2” weather resistant
trimhead screws
Drawing‐Materials
Materials
2ea‐2’x4’x1/2”
HandiPanel
2ea‐1x4x1/2”
RoyalTrimBoard
1ea1x8x1/2”Royal
TrimBoard
8ea–5/16”x2‐
1/2”Galvanized
CarriageBolts
8ea–5/16”
GalvanizedNuts
16ea–1”
GalvanizedWashers
PVCGlue
24ea1”weather
resistancePocket
holescrews
12ea2”weather
resistancetrim‐
headscrews
Outer Frame Inner Frame Leg
Drillin
g
Details
4ea - Bolt Assembl
y
4ea - Bolt Assembly
Drilling Details
24
48
12
9
6
Outer Frame Inner Frame Leg
1
3
/
4
1
3
/
4
1
3
/
4
1
3
/
4
1
3
/
4
3
1
/
2
96
3
1
/
2
7
1
/
4
R1
3
/
4
2
1
/
2

5
Step 1: Cut Board Parts
1.1 – Cut Board and Frame
Using the drawing as a guide, cut the board top and the
framing members to size. A few helpful hints:
If using factory cut panels for the top, confirm the
dimensions are correct and the board is square.
Stack the frame parts (4 of each length) and cut them on
a chop saw with a single cut, this will ensure accuracy.
1.2 – Drill Leg Mount & Pocket Holes
Drill all pocket holes NOTE: pay attention to the board
orientation. The boards should mirror each other.
Per the drawing – mark and drill the holes for the legs. If
you try to drill after assembly it will require a shorter than
standard drill bit
1.3 – Assemble Frame
Using PVC Cement and wood screws to assemble
the frame. Take note of the board orientation during
construction – pocket hole pointing down and on the
inside of the structure.
After assembled we cut a spacer block to gauge the
distance between the board top edge and the frame.
The spacer will be utilized.
Cutting Board and Frame
Assemble Frame and Pre-t
Drill Leg Mount
& Pocket Holes

6
Step 2: Assemble Body
2.1 – Glue Frame to Board Top
Using the frame as a guide, mark the location of the
frame on the back of the top and apply PVC cement to
the marked area.
2.2 – Attach Frame
Secure frame using 1” Kreg Pocket Hole All weather
screws (course thread) .Utilize the gauge block for
spacing and clamping the frame to the top.
2.3 – Install Interior Supports
Use the same technique (PVC cement and Screws) to
fasten interior supports.
NOTE: cut a spacer block to hold the position of the
framing during installation.
Glue Frame to Top
Install the Interior Supports
Attach Frame with Screws

7
`
HHoollee LLaayyoouutt
3.1 – Hole Layout
On the face of the top layout the center line
of the circle. 9” from the top and 12” from the edge.
3.2 – Draw 6” Circle
Use a compass to mark the circle using the
centerline as reference. We set the compass at 3” to
create a 6” diameter circle.
3.3 – Cutting
Cut the hole with a jigsaw. Drill a ½” diameter
hole to start the jigsaw cut.
Step 3 Assemble Body
DDrraaww 66”” CCiirrccllee
CCuuttttiinngg
Step 3: Assemble Body
3.1 – Hole Layout
On the face of the top, layout the center line of the circle.
9” from the top and 12” from the edge.
3.2 – Draw 6” Circle
Use a compass to mark the circle using the centerline as
reference. Set the compass at 3” to create a 6” diameter
circle.
3.3 – Cutting
Cut the hole with a jigsaw. Drill a ½” diameter hole to
start the jigsaw cut.
Hole Layout
Cutting
Draw 6” Circle
12
9

8
IInnsseerrtt BBoolltt aanndd wwaasshheerr
4.1 – Insert Bolt and washer
The leg assembly will require a washer
between legs and frame to allow folding for storage.
4.2 – Attach Legs
Slide the leg over the bolt and against the
washer; place another washer and the nut on the
bolt. Tighten snugly with a wrench.
4.3 – Repeat process
Use the same routine for the remaining legs
NOTE: the interior leg should mounted on the
inside of the inner framing support.
Step 4 Attaching the Legs
AAttttaacchh LLeeggss
RReeppeeaatt pprroocceessss
Step 4: Attaching the Legs
4.1 – Insert Bolt and Washer
The leg assembly will require a washer between legs
and frame to allow folding for storage.
4.2 – Attach Legs
Slide the leg over the bolt and against the washer; place
another washer and the nut on the bolt. Tighten snugly
with a wrench.
4.3 – Repeat Process
Use the same routine for the remaining legs
NOTE: the interior leg should mounted on the inside of
the inner framing support.
Insert Bolt and Washer
Repeat Process
Attach Legs

9
Step 5: Leg Supports
5.1 – Measure Support Length
The distance between the legs will vary due to support
location, washer assembly and tightness of bolts.
Measure distance on all leg assemblies.
5.2 – Cut and Bore
Cut 3-1/2” X ¾” PVC boards for each leg assembly.
OPTION – use 3” hole saw to cut a circle in the center of
the support. This will act as cup holder during play.
5.3 – Attach to the Leg Assembly
Attach support with PVC glue. Fasteners (nails or
screws) are an option.
NOTE: use scrap material (3/4”) as spacers under
the support block to provide proper offset during the
clamping process.
Measure
Attach to the Leg Assembly
Cut and Bore

10
MMeeaassuurree
6.1 – Measure Support Cleat length
The distance between the frame supports
could differ, so measure each board for proper fit.
The portion of the cleat system to mounted to the
wall should be ripped ½” narrower that the support
cleats. This will aid in the hanging of the boards.
6.2 – Cut and Bore
Cut the top cleat and mount it to the supports
with PVC glue and screws
NOTE: this part is directional, so make sure
the angled side is facing the back of the board.
6.3 – Attach to the leg Assembly
Using the same measurement as the top
cleat, cut the cross member for the bag storage
compartment. Mount it to the bottom portion of the
interior support frame.
NOTE: Leaving a ½” gap at the bottom of the
bag storage cross member with allow water and
debris to escape.
Step 6 Wall Hanger / Bag
Storage
CCuutt aanndd FFaasstteenn
AAttttaacchh ccrroossss mmeemmbbeerr
Step 6: Wall Hanger / Bag Storage
6.1 – Measure Support Cleat Length
The distance between the frame supports could differ,
so measure each board for proper fit. The portion of the
cleat system to be mounted to the wall should be ripped
½” narrower that the support cleats. This will aid in the
hanging of the boards.
6.2 – Cut and Bore
Cut the top cleat and mount it to the supports with PVC
glue and screws
NOTE: this part is directional, so make sure the angled
side is facing the back of the board.
6.3 – Attach to the Leg Assembly
Using the same measurement as the top cleat, cut the
cross member for the bag storage compartment. Mount
it to the bottom portion of the interior support frame.
NOTE: Leaving a ½” gap at the bottom of the bag
storage cross member with allow water and debris to
escape.
Measure Cut and Fasten
Attach Cross Member

11
MMeeaassuurree
7.1 – Mount the Cleat
Mount the Hanger Cleats to the wall using an
appropriate securing system. We used self-drilling
wall anchors for this sheetrock application.
NOTE: the cleat should be fastened 2-1/2”
below desired height of the board and allow 24-1/2”
between cleats for clearance.
7.2 – Hang the board
Place the bags in the storage compartment
and lift the boards into place for storage and/or
display.
7.3 – Finished Product
Step 7 Hanging the
boards
FFiinniisshheedd PPrroodduucctt
HHaanngg tthhee bbooaarrddss
Step 7: Hanging the Boards
7.1 – Mount the Cleat
Mount the Hanger Cleats to the wall using an appropriate
securing system. Self-drilling wall anchors were used for
this sheetrock application.
NOTE: the cleat should be fastened 2-1/2” below desired
height of the board and allow 24-1/2” between cleats for
clearance.
7.2 – Hang the Board
Place the bags in the storage compartment and lift the
boards into place for storage and/or display.
7.3 – Finished Product
Measure Finished Product
Hang the Boards

RoyalBuildingProducts.com 1.855.ROYAL85
/