Page is loading ...

Instruction Manual
for the
AquameterTM Series
Multiparameter Water Quality
Meters, Probes, Utilities & Accessories
(Software Version 3.00 and above including Optical DO & Depth Measurement)
Document No. 10401-00188
Revision: M
Date: February 16, 2011
Aquaread Ltd
Kent Innovation Centre
Thanet Reach Business Park
Millennium Way
Broadstairs
Kent
CT10 2QQ
ENGLAND
Phone: +44 1843 609 692
www.aquaread.co.uk
P.O. Box 4, 6987 ZG Giesbeek
Nijverheidsstraat 30,
6987 EM Giesbeek,
The Netherlands
T +31 313 880 200
E info@eijkelkamp.com
I www.eijkelkamp.com
M185701E

Aquameter™ Series Instruction Manual 10401-00188 Rev M
PROPRIETARY NOTICE
The information disclosed within this document or separately supplied in furtherance of this
document includes proprietary rights of Aquaread Ltd. Neither this document nor the
information disclosed herein or of a supplementary nature shall be reproduced or transferred
to other documents or used for any other purposes, except as specifically authorised in
writing by Aquaread Ltd. Copyright 2011 Aquaread Ltd. All rights reserved.
SOFTWARE LICENCE AGREEMENT
By using the Aquameter, its associated probes and PC based software (AquaLink),
you agree to be bound by the terms and conditions of the following software licence
agreement. Please read this agreement carefully.
Aquaread Ltd grants you a limited license to use the software embedded in the devices (the “Software”) in
binary executable form in the normal operation of the products. Title, ownership rights and intellectual
property rights in and to the Software remain in Aquaread Ltd.
You acknowledge that the Software is the property of Aquaread Ltd and is protected under British copyright
laws and international copyright treaties. You further acknowledge that the structure, organisation and code
of the Software are valuable trade secrets of Aquaread Ltd.
You agree not to decompile, dissemble, modify, reverse assemble, reverse engineer or reduce to human
readable form the Software or any part thereof or create any derivative works based on the Software.
RECYCLING
Any product bearing this symbol must be handed over to an applicable collection point for the
recycling of electrical and electronic equipment. By ensuring this product is disposed of properly,
you will prevent possible adverse consequences for the environment which could be caused by
inappropriate waste handling.
Note: For return for recycling, please contact Aquaread Ltd for instructions on how to return end-of-life
equipment, accessories, and all auxiliary items for proper disposal.
WARNING
Favourable indications made by this equipment do not guarantee water is safe for human
or animal consumption. This equipment can not detect the presence of harmful bacteria or
toxins. If in doubt, ALWAYS TREAT SUSPECT WATER PRIOR TO CONSUMPTION. In
no event will Aquaread Ltd be liable for any incidental, special, indirect or
consequential damages, whether resulting from the use, misuse, miscalibration or
inability to use this equipment, or from defects in the equipment.
TRADEMARKS
Aquaread™, AquaPlus™, Aquameter™, Aquaprobe™, AquaLink™ and RapidCal™
are all trademarks of Aquaread Ltd.
Microsoft®, Windows® and Excel® are trademarks of Microsoft Corporation
GOOGLE™ is a trademark of Google, Inc. StablCal® is a trademark of the HACH company
Aquaread Ltd has no affiliation with Microsoft Corporation, Google, Inc. or HACH
© 2011 Aquaread Ltd. www.aquaread.co.uk Page 2 of 64

Aquameter™ Series Instruction Manual 10401-00188 Rev M
Table of Contents
1. INTRODUCTION............................................................................................................................................................6
2. WHAT’S IN THE BOX?.................................................................................................................................................6
2.1. THE AQUAMETER AND THE ENVIRONMENT..................................................................................................................6
2.2. THE AQUAPROBE AND THE ENVIRONMENT..........................................................................................................................7
2.3. ABOUT THE PROBE SLEEVE..............................................................................................................................................7
2.4. PROTECTIVE SLEEVE END CAP.........................................................................................................................................7
2.5. ABOUT THE LANYARD.....................................................................................................................................................7
3. BATTERY INSTALLATION AND CARE...................................................................................................................8
3.1. CHOICE OF BATTERY TYPE..............................................................................................................................................8
3.2. BATTERY LIFE................................................................................................................................................................8
3.3. BATTERY CHARGING ......................................................................................................................................................8
3.4. BATTERY CONDITION ICON ..............................................................................................................................................8
3.5. BATTERY SAVER FUNCTIONS............................................................................................................................................8
4. OVERVIEW OF THE OPERATING SYSTEM...........................................................................................................9
4.1. INITIAL SWITCH ON, LANGUAGE AND CLOCK SETUP ...........................................................................................................9
5. CONNECTING AN AQUAPROBE.............................................................................................................................10
6. TAKING MEASUREMENTS ....................................................................................................................................10
6.1. WHAT DOES IT ALL MEAN?.........................................................................................................................................11
6.2. TREND INDICATION.......................................................................................................................................................12
6.3. TEMPERATURE COMPENSATION.......................................................................................................................................12
6.4. GPS RECEPTION..........................................................................................................................................................13
7. DEPTH MEASUREMENT (AP-1000 ONLY)............................................................................................................14
7.1. TAKING DEPTH MEASUREMENTS.....................................................................................................................................14
7.2. DIFFERENTIAL DEPTH MEASUREMENT .............................................................................................................................14
8. MEMORY MODE ........................................................................................................................................................15
8.1. MANUALLY SAVING READINGS.......................................................................................................................................15
8.2. RECALLING AND VIEWING SAVED READINGS ....................................................................................................................15
8.3. RECALLING GLP DATA................................................................................................................................................15
8.4. CLEARING THE MEMORY................................................................................................................................................16
8.5. AUTOMATIC DATA LOGGING..........................................................................................................................................16
8.6. IMPORTANT INFORMATION ABOUT MEMORY MODE ...........................................................................................................17
9. SETTING UNITS OF MEASUREMENT...................................................................................................................18
10. RAPIDCAL CALIBRATION METHOD..................................................................................................................20
10.1. ABOUT CALIBRATION..................................................................................................................................................20
10.2. USING RAPIDCAL.......................................................................................................................................................20
10.3. CALIBRATION ERROR CODES........................................................................................................................................22
10.4. RESETTING TO FACTORY CALIBRATION DEFAULTS...........................................................................................................22
10.5. CALIBRATION DATA STORAGE......................................................................................................................................23
11. AFTER USE..................................................................................................................................................................24
12. GENERAL PROBE MAINTENANCE......................................................................................................................25
12.1. IDENTIFYING THE INDIVIDUAL ELECTRODES ....................................................................................................................25
13. PH/ORP ELECTRODE CALIBRATION AND MAINTENANCE........................................................................26
13.1. RECOGNISING THE PH/ORP ELECTRODE........................................................................................................................26
13.2. ELECTRODE REMOVAL AND REPLACEMENT.....................................................................................................................26
13.3. KEEPING THE ELECTRODES MOIST.................................................................................................................................26
13.4. CALIBRATING PH........................................................................................................................................................27
© 2011 Aquaread Ltd. www.aquaread.co.uk Page 3 of 64

Aquameter™ Series Instruction Manual 10401-00188 Rev M
13.5. ERRORS DURING CALIBRATION.....................................................................................................................................28
13.6. PH ELECTRODE EFFICIENCY.........................................................................................................................................28
13.7. CALIBRATING ORP.....................................................................................................................................................29
13.8. CONVERTING ORP READINGS TO THE HYDROGEN SCALE................................................................................................31
14. DO/EC ELECTRODE CALIBRATION AND MAINTENANCE..........................................................................32
14.1. RECOGNISING THE DO/EC ELECTRODE.........................................................................................................................32
14.2. DO MEASUREMENT TECHNIQUES..................................................................................................................................32
14.3. PRECAUTIONS DURING USE..........................................................................................................................................32
14.4. CALIBRATING THE DO/EC ELECTRODE.........................................................................................................................32
14.5. CALIBRATING THE DO ZERO POINT..............................................................................................................................33
14.6. CALIBRATING THE DO 100% SATURATION POINT IN MOIST AIR .....................................................................................34
14.7. REPLACING THE GALVANIC DO ELECTRODE MEMBRANE CAP..........................................................................................34
14.8. REPLACING THE OPTICAL DO CAP (AP-900 & AP-1000 ONLY)...................................................................................35
14.9. CALIBRATING EC ......................................................................................................................................................36
14.10. VERIFYING EC CALIBRATION.....................................................................................................................................37
14.11. ERRORS DURING CALIBRATION...................................................................................................................................38
14.12. CLEANING THE EC CONTACTS....................................................................................................................................38
15. TURBIDITY ELECTRODES CALIBRATION AND MAINTENANCE..............................................................39
15.1. ABOUT TURBIDITY......................................................................................................................................................39
15.2. PRECAUTIONS DURING USE..........................................................................................................................................39
15.3. CALIBRATING THE TURBIDITY ELECTRODES....................................................................................................................40
15.4. TURBIDITY ZERO POINT CALIBRATION ...........................................................................................................................40
15.5. VERIFYING TURBIDITY ZERO POINT CALIBRATION ...........................................................................................................41
15.6. CALIBRATING THE TURBIDITY 1000 NTU POINT...........................................................................................................42
15.7. VERIFYING TURBIDITY 1000 NTU POINT CALIBRATION .................................................................................................42
15.8. ERRORS DURING CALIBRATION.....................................................................................................................................42
15.9. RECOGNISING THE TURBIDITY ELECTRODES ....................................................................................................................42
15.10. LENS MAINTENANCE................................................................................................................................................43
15.11. REFERENCES.............................................................................................................................................................43
16. AQUALINK PC SOFTWARE....................................................................................................................................44
16.1. SOFTWARE INSTALLATION ............................................................................................................................................44
16.2. DRIVER INSTALLATION .................................................................................................................................................44
16.3. RUNNING AQUALINK..................................................................................................................................................44
16.4. UPLOADING DATA FROM YOUR AQUAMETER..........................................................................................................45
16.5. PH/ORP ELECTRODE DATA LOGGED USING AN AP-100, AP-400, AP-500 OR AP-600 ...............................................45
16.6. PH/ORP ELECTRODE DATA LOGGED USING AN AP-700 - AP-1000..............................................................................46
16.7. DISPLAYING GPS CO-ORDINATES.................................................................................................................................46
16.8. ON SCREEN HELP.......................................................................................................................................................46
16.9. SAVING LOGGED DATA...............................................................................................................................................46
16.10. RETRIEVING LOGGED DATA ......................................................................................................................................46
16.11. EXPORTING DATA.....................................................................................................................................................46
16.12. EXPORTING TEXT REPORTS.......................................................................................................................................47
16.13. TYPICAL TEXT REPORT COVER PAGE..........................................................................................................................48
16.14. EXPORTING EXCEL® FILES .......................................................................................................................................49
16.15. EXPORTING GOOGLE™ FILES .....................................................................................................................................49
16.16. IMPORTING FILES INTO GOOGLE™ MAPS .....................................................................................................................49
16.17. IMPORTING FILES INTO GOOGLE™ EARTH ...................................................................................................................49
16.18. GOOGLE™ EXAMPLES...............................................................................................................................................51
17. SPECIFICATION........................................................................................................................................................52
17.1. METERS................................................................................................................................................................52
17.2. PROBES GENERAL.............................................................................................................................................52
17.3. NOTES CONCERNING MAXIMUM PROBE IMMERSION DEPTH..............................................................................................52
17.4. PROBES SPECIFIC...............................................................................................................................................53
18. PART NUMBERS........................................................................................................................................................54
18.1. AQUAMETERS & AQUAPROBES ....................................................................................................................................54
18.2. ACCESSORIES.............................................................................................................................................................55
18.3. CALIBRATION & MAINTENANCE SOLUTIONS...................................................................................................................55
© 2011 Aquaread Ltd. www.aquaread.co.uk Page 4 of 64

Aquameter™ Series Instruction Manual 10401-00188 Rev M
19. LIMITED WARRANTY.............................................................................................................................................56
19.1. CLEANING PRIOR TO RETURN......................................................................................................................................57
19.2. DECONTAMINATION CERTIFICATE..................................................................................................................................57
20. TROUBLESHOOTING...............................................................................................................................................58
21. DECLARATION OF CONFORMITY......................................................................................................................59
22. APPENDIX 1. THE TECH BEHIND AQUAREAD’S OPTICAL DO MEASUREMENT SYSTEM................60
22.1. PRINCIPLE OF OPERATION.............................................................................................................................................60
22.2. SENSOR CAP LIFE.......................................................................................................................................................61
23. APPENDIX 2. FLOW THROUGH CELL................................................................................................................62
23.1. INTRODUCTION............................................................................................................................................................62
23.2. SPIGOT INSTALLATION.................................................................................................................................................62
23.3. AQUAPROBE PREPARATION PRIOR TO FIRST USE.............................................................................................................62
23.4. AQUAPROBE INSTALLATION ..........................................................................................................................................62
23.5. OPERATION................................................................................................................................................................63
23.6. CAUTION...................................................................................................................................................................63
23.7. CLEANING..................................................................................................................................................................63
23.8. FLOWCELL TROUBLESHOOTING......................................................................................................................................63
24. APPENDIX 3. PROBE HANGER..............................................................................................................................64
© 2011 Aquaread Ltd. www.aquaread.co.uk Page 5 of 64

Aquameter™ Series Instruction Manual 10401-00188 Rev M
1. Introduction
This manual covers the setup, operation, calibration and maintenance of the full Aquameter
series of Meters, Aquaprobes and the associated AquaLink PC software. Depending upon
the model of Meter and Probe you are using, some of the functions described may not be
available. Please refer to the table in the Specification section of this manual for details of
what to expect from your particular combination.
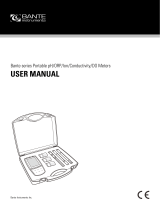
2. What’s in the Box?
The Aquameter is supplied with the following:
The Aquameter unit.
Quick release lanyard.
Set of 5 AA Alkaline batteries.
USB Cable for downloading logged data to a PC.
Cross-head screwdriver for fitting the batteries and Probe maintenance.
Getting started cards for quick reference.
CD containing AquaLink software, USB drivers and this Instruction Manual.
Warranty card.
The accessories included with the Aquaprobe you have chosen will vary between models,
but in all cases you will receive the following:
The Aquaprobe unit.
Protective Sleeve End Cap.
300mL of RapidCal Solution.
Spare 300mL calibration / rinse bottle.
Spare set of sleeve screws.
Two mounting nuts.
Getting started card for quick reference.
Warranty card.
In addition, you may receive other solutions and spare parts (see Aquameters &
Aquaprobes in section 18).
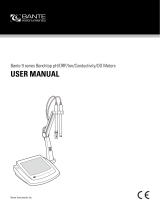
2.1. The Aquameter and the Environment
The Aquameter is designed to be used outdoors and is rated to IP67, that is to say it is
waterproof but it is not designed for submersion. In order to prevent accidental dunking or
loss, a lanyard is supplied.
Please note that the Aquameter is only waterproof when the associated Aquaprobe
plug is fitted. Without the plug fitted, water can enter the Meter through the socket.
Damage caused by water ingress through the socket is not covered by your
warranty.
You may notice a small hole on the rear of the unit near the socket. This is a waterproof
vent for the internal barometric sensor. Do not poke anything in this hole! Doing so will
cause major damage to the vent’s waterproof membrane and invalidate your warranty.
© 2011 Aquaread Ltd. www.aquaread.co.uk Page 6 of 64

Aquameter™ Series Instruction Manual 10401-00188 Rev M
2.2. The Aquaprobe and the Environment
The Aquaprobe is designed to be fully submerged in water and is rated to IP68, that is to
say, it is rated for continual immersion to a depth of 10 meters.
2.3. About the Probe Sleeve
Each Aquaprobe is constructed with a two-part protective aluminium sleeve surrounding
the more delicate sensing electrodes.
The lower half of the Probe Sleeve can be easily removed by unscrewing to allow cleaning
of the individual electrodes, however, both halves of the Probe sleeve form an integral,
working part of the Probe’s measurement system, and MUST be fitted for correct
operation.
2.4. Protective Sleeve End Cap
Whilst the Aquaprobe is fitted with an extremely rugged sleeve, damage may be caused to
individual electrodes if sharp objects enter the open end of the lower sleeve.
In order to avoid this, a protective Sleeve End Cap is provided and should be used
whenever there is a risk that sharp objects may be present in the water being sampled, i.e.
down bore holes or in shallow streams littered with rocks or garbage.
When sampling in open water, leave the protective Sleeve End Cap off as the increased
flow across the electrodes will give faster readings.
The protective Sleeve End Cap should never be fitted during calibration or when
using the Aquaprobe with the optional Flow Through Cell (Flowcell).
If there is any risk of damage to the electrodes, fit the cap. Damage caused to electrodes
when the Sleeve or Sleeve End Cap is not fitted, is not covered by your warranty.
2.5. About the Lanyard
The lanyard supplied with the Aquameter may, at first, appear to be a little long. This is
intentional. In order to keep the Meter out of the way whilst your hands are full, the lanyard
has been made long enough to wear round your neck and over your shoulder so the Meter
sits on your hip.
The extra length also allows the meter to be held in a comfortable position in front of you
during normal use. In order to prevent you being dragged into the water in the event of the
Probe cable becoming snagged, the lanyard includes a quick-release clip.
© 2011 Aquaread Ltd. www.aquaread.co.uk Page 7 of 64

Aquameter™ Series Instruction Manual 10401-00188 Rev M
3. Battery Installation and Care
The Aquameter requires five AA size batteries. To install the batteries, loosen the two
screws on the centreline of the rear of the meter and remove the battery compartment lid.
Following the battery polarity markings inside the battery compartment, insert five AA cells
then replace the compartment lid and tighten the screws.
3.1. Choice of Battery Type
Alkaline or rechargeable batteries may be used, but never mix battery types in the meter. If
you choose to use rechargeable batteries, we recommend Energizer 2500mAh (or greater)
Nickel-Metal Hydride cells, which are widely available.
If the Meter is to be out of use for a long period, remove the batteries to prevent damage
due to possible leakage.
3.2. Battery Life
A set of fresh alkaline cells will give over 20 hours use in the AM-200 GPS Aquameter and
up to 40 hours use in the AM-100 Aquameter. A fully charged set of 2500mAh NiMH cells
will give up to 40 hours use in the AM-200 GPS Aquameter and up to 60 hours use in the
AM-100 Aquameter.
3.3. Battery Charging
During the charging process, batteries generate heat and vent gasses, and must never be
charged inside a sealed unit. Because the Aquameter is a sealed unit, we do not allow
charging in-situ. Batteries must be removed and charged with a suitable battery charger
outside the Meter. We recommend the use of one of the Energizer range of NiMH chargers.
3.4. Battery Condition Icon
On all the main Aquameter screens, a battery condition icon is displayed in the top left
corner. The icon shows full when the batteries are fresh, and gradually empties as the
batteries are used. When the batteries need replacing, the empty battery icon will flash on
and off. If you ignore this, the Meter will automatically switch itself off when the battery
voltage becomes too low for reliable operation.
When using rechargeable batteries, the battery icon will not show completely full, even with
freshly charged cells. This is due to the fact that rechargeable batteries are only rated at
1.2V per cell compared to 1.5V per cell for alkaline batteries. This indication does not affect
battery life. The icon will simply sit at the ¾ full mark for a longer period of time.
3.5. Battery Saver Functions
The Aquameter is designed to switch off automatically if you do not touch any of the keys
for 30 minutes. The only exception to this is if you have activated the Automatic Data
Logging feature. In this case, the Meter will continue to operate until either the memory is
full or the batteries go flat.
The display on the Aquameter incorporates a white backlight to improve visibility in low-light
conditions. As on a mobile phone, the backlight switches on each time a key is pressed,
and stays on at full brightness for 15 seconds. After 15 seconds, the backlight will fade to
half brightness. After a further 15 seconds the backlight will switch off.
During normal operation, if you want to activate the backlight without changing the Meter
function, simply press the OK key.
© 2011 Aquaread Ltd. www.aquaread.co.uk Page 8 of 64

Aquameter™ Series Instruction Manual 10401-00188 Rev M
4. Overview of the Operating System
The operating software in the Aquameter has been designed for simple, intuitive use.
Similarly, a great deal of development work has been put into simplifying and automating
the calibration procedures in the Aquameter in order to allow normal field operatives (as
opposed to trained lab technicians) to achieve quick and accurate results.
If you are used to operating a mobile phone or programming audio/visual equipment using
a remote control, you should feel at home with the familiar up/down left/right arrow shaped
navigation keys and central OK key.
The tree structure behind the MENU key should also be very familiar. Each item on the
menu leads to a sub menu and then either onto further menus or final choices. Each
branch of the menu system is navigated using the arrow keys. At each point, selections can
be made by either pressing the OK key or the right arrow key.
To reverse along a branch of the menu system, use the ESC (escape) key or left arrow
key. After a short time, you should be able to navigate around the entire menu system at
speed using just the four arrow keys. If, at any time, you leave the Meter in one of the sub-
menu screens, it will automatically back out to the main operating screen after 15 seconds.
4.1. Initial Switch On, Language and Clock Setup
To switch the meter on or off, briefly press the red key. Do not hold it down. The meter
contains a clock and is capable of operating in several different languages. When switching
on for the first time, you must select an operating language and set the clock. The first
screen you will see is the Language Selection Screen.
Language
English
Francais
Deutsch
To select the language, move the cursor down the list using the down arrow key. To enter
your selection, press the OK key or the right arrow key.
The next screen to be displayed is the Time & Date Setting Screen.
Time & Date
Time:15:46:37
Date:16/Apr/09
To set the time and date, use the arrow keys to move the cursor around the screen. Use
the up and down arrow keys to adjust values. When the time and date are correct, press
the OK key. Don’t worry if you make a mistake first time round. You can easily get back to
these screens later through the MENU key.
© 2011 Aquaread Ltd. www.aquaread.co.uk Page 9 of 64

Aquameter™ Series Instruction Manual 10401-00188 Rev M
5. Connecting an Aquaprobe
The Aquameter is designed to operate in conjunction with any one of eight different
Aquaprobes (each variant is considered in later sections).
To connect an Aquaprobe, align the key slot of the Aquaprobe plug with the Aquameter
socket, then press the plug into the socket and tighten the retaining collar. Always ensure
the Aquameter is switched off prior to connecting or disconnecting an Aquaprobe.
6. Taking Measurements
If the Aquaprobe you are using includes a pH/ORP electrode, remove the storage cap by
pulling the red lanyard marked ‘Remove Before Use / Replace After Use’ straight down. Do
not use a twisting motion to remove or replace the cap as this can unscrew the
electrode from the Probe body. Rinse any salty deposits from the pH/ORP electrode with
fresh water.
Fit the protective Sleeve End Cap into the end of the Probe sleeve if required, then
immerse the Aquaprobe in the sample water, making sure that the water level covers the
minimum immersion depth groove halfway up the Probe sleeve. Switch the Aquameter on.
TIP: Occasional application of a smear of silicone grease or similar lubricant to the
protective Sleeve End Cap O ring and the inside rim of the Probe sleeve will make fitting
and removal of the Cap easier.
If the Aquaprobe is connected correctly, the meter will read the Probe’s serial number and
model number, then will automatically configure itself to display only those readings the
current Aquaprobe is capable of taking. Initial Probe readings will be displayed on the
meter’s screen along with the current GPS status (GPS model only). The initial data screen
for the GPS Aquameter in conjunction with the fully loaded AP-800 Aquaprobe is shown
below.
TEMP:018.5°C
ORP:0415.2mV
pH:06.48
GPS:Acquiring
If the current Aquaprobe / Aquameter combination is capable of reading more than three
parameters, left/right arrows will appear at the bottom corners of the screen to indicate
further data screens are available (as shown above).
To access these screens, simply press either the left or right arrow keys. Any value that is
out of range or unavailable will be displayed as dashes. The other three screens available
with the AM-200/AP-800 combination are shown below.
DO:098.7%
EC:6541µS/cm
TDS:3271mg/L
GPS:3D Pos
© 2011 Aquaread Ltd. www.aquaread.co.uk Page 10 of 64

Aquameter™ Series Instruction Manual 10401-00188 Rev M
SAL:03.57 PSU
SSG:01.3σt
TURB:12.3 NTU
GPS:3D Pos
BARO:1013mb
DEPTH:15.75m
Hit [OK] to zero
GPS:3D Pos
Lat:N51°21.498
Long:E001°24.323
Alt:00050M 1013mb
Sats in use:09
6.1. What Does It All Mean?
The screens above show the full default range of readings for the AM-200/AP-800
combination. If you are using a different Meter/Probe combination, you may have fewer
screens to choose from and the readings may appear in a different order to facilitate logical
screen layouts. If an asterisk (*) character is flashing just below the battery symbol, this
indicates that Auto Data Logging is switched on. See Automatic Data Logging in section 8.
The table below explains the readings and indicates which to expect with each Meter/Probe
combination.
Prefix Meaning Units Available On
TEMP Probe Temperature °C or °F* All Probe & Meter Models
TURB Turbidity NTUs AP-200, 400, 600, 800, 900
& 1000
pH pH (Acidity/Alkalinity) pH or pHmV* AP-100 & 400 thru 1000
ORP Oxidation Reduction Potential mV AP-100 & 400 thru 1000
GPS GPS Status See section 6.4 AM-200 + All Probe Models
DO Dissolved Oxygen %Sat or mg/L* AP-300 & 500 thru 1000
EC Electrical Conductivity µS/cm or mS/cm†AP-300 & 500 thru 1000
TDS Total Dissolved Solids mg/L or g/l†AP-300 & 500 thru 1000
SAL Salinity PSU or ppt* AP-300 & 500 thru 1000
SSG Sea Water Specific Gravity σt AP-300 & 500 thru 1000
BARO Barometric Pressure mb or inHg* AP-300 & 500 thru 1000
DEPTH Depth above / below zero datum Meters / Feet* AP-1000
Lat Latitude Degrees & Mins AM-200 + All Probe Models
Long Longitude Degrees & Mins AM-200 + All Probe Models
Alt Altitude above Sea Level Meters or Feet* AM-200 + All Probe Models
Note: the BARO prefix is not displayed when an AM200/AP-800 or AP-900 combination is
in use. In this case, barometric pressure is displayed after the altitude (Alt) at the end of line
3 on the position and altitude screen, with no prefix (as shown [1013mb] on the above
screen example).
© 2011 Aquaread Ltd. www.aquaread.co.uk Page 11 of 64

Aquameter™ Series Instruction Manual 10401-00188 Rev M
Items in the Units column marked with an asterisk (*) can be selected as alternative units of
measurement in the Settings Menu (see section 9: Setting Units of Measurement). Items in
the Units column marked with a dagger (†) are auto-ranging, i.e. when the values become
too large to display, the units of measurement automatically re-scale.
On Probe models AP-100, 400, 500 and 600, the pH field will be replaced by ORP
(Oxidation Reduction Potential ) if an OPR electrode is fitted in place of the pH electrode. In
this case, the reading will be shown in mV. This is again controlled via the Settings Menu.
The EC field can be replaced by its reciprocal value, RES (Resistivity), if selected in the
Settings Menu. If selected, readings will be displayed in either Ω▪cm or KΩ▪cm, depending
on the value.
GPS position information can also be displayed in the UK as an Ordnance Survey Grid
Reference. See section 9: Setting Units of Measurement for more details.
6.2. Trend Indication
To the right of each reading, (except position, BARO and depth), a trend indication is given.
This consists of either an upwards facing arrow (which indicates the numeric value of the
reading is rising), a downwards facing arrow (which indicates the numeric value of the
reading is falling) or a two-headed arrow which indicates a steady reading.
When taking a set of readings, gently stir the Probe, or raise and lower it in the sample (if
there is no natural water flow) until the temperature value is steady. By this time the other
values should be reasonably steady and ready for reading or saving.
Be aware, in order to achieve accurate Dissolved Oxygen readings, the Probe needs to be
either placed in flowing water, or needs to be stirred or raised and lowered continuously to
ensure a constant flow of fresh water over the DO Electrode. If there is no water flow
across the Probe, the oxygen in the immediate area of the DO Electrode will be consumed
and the reading will start to fall.
6.3. Temperature Compensation
The electrochemical properties of all solutions change as the solutions’ temperature
changes. In addition, the response of electrochemical measuring electrodes change with
temperature. It is a fundamental, practical requirement in the field of water quality
monitoring that test measurements taken at different temperatures can be compared.
In order to facilitate this, the Aquaprobe automatically applies corrections for temperature
wherever required.
During calibration of the pH electrode, the variation in the calibration buffer solution due to
temperature is automatically corrected for. The variation in response of the pH electrode
due to temperature is also automatically compensated for. During measurement of pH, the
variation in response of the pH electrode due to temperature is automatically compensated
for.
During calibration of the EC electrode, the variation in the calibration buffer solution due to
temperature is automatically corrected for. During measurement of EC, the readings can be
displayed without any temperature correction, corrected to 20°C, or corrected to 25°C. See
section 9: Setting Units of Measurement for more details.
© 2011 Aquaread Ltd. www.aquaread.co.uk Page 12 of 64

Aquameter™ Series Instruction Manual 10401-00188 Rev M
During calibration of the DO electrode, variations due to temperature and air pressure are
automatically compensated for. During the measurement of DO, temperature, air pressure
and salinity are automatically compensated for.
During calibration of the ORP electrode, the variation in the calibration buffer solution due
to temperature is automatically corrected for. During measurement of ORP however,
temperature corrections are not applied as the correction factors are system and chemical
dependent and are not easily determined.
ORP potential measurements are mostly made to follow reactions rather than for their own
sake. The completion of an ORP reaction is normally accompanied by a sharp change in
the ORP millivolts reading. This change is usually much larger than the errors induced by
temperature side effects.
Turbidity calibration and measurements are made by the Aquaprobe using optical
techniques, which are not susceptible to the effects of temperature. Temperature
compensation is therefore not applied.
6.4. GPS Reception
The GPS version of the Aquameter (AM-200) contains a built-in GPS receiver and antenna.
The antenna is situated at the top of the case, just behind the AQUAREAD Logo.
For optimum signal reception, the antenna must be able to ‘see’ a reasonably large amount
of the sky. The GPS receiver will not work indoors or when shielded from the sky by
any solid structure.
After switch-on, the GPS receiver will automatically start to search for satellites. During this
phase, the message GPS:Acquiring will be shown on the bottom line of all the screens.
As soon as three satellites are acquired, two dimensional position (no altitude) will be
calculated and the message GPS:2D POS will be shown on the bottom line of the screens.
Once a fourth satellite is acquired, altitude will be calculated and GPS:3D POS will be
shown on the bottom line of the screens. With a good view of the sky, position should be
calculated within ninety seconds of switch-on. To see your geographic position and the
number of satellites in use, use the left or right arrow keys to scroll to the Position page.
If you switch the meter on indoors, then carry it outside after several minutes, there may be
a considerable delay in acquiring satellites. In this case, switch the meter off, then back on
again to reset the acquisition process.
© 2011 Aquaread Ltd. www.aquaread.co.uk Page 13 of 64

Aquameter™ Series Instruction Manual 10401-00188 Rev M
7. Depth Measurement (AP-1000 only)
Depth is measured in the Aquaprobe AP-1000 by a pressure sensor mounted inside the
body of the probe. The exact position of the sensor is 150mm (6”) up from the bottom edge
of the sleeve.
Depth is calculated by subtracting the barometric pressure being measured in the
Aquameter from the water pressure being measured in the Aquaprobe. The pressure
differential, once corrected for temperature and salinity (water density), is directly
proportional to depth.
The depth measurement system uses the EC sensor to detect when the probe has been
placed in water. All the time the probe is measuring an EC of zero, the depth will read zero.
As soon as an EC value is detected, the meter will start to calculate depth. For this reason,
it is important to ensure the Probe is connected to the Meter and switched on prior to
submerging the probe in water.
7.1. Taking Depth Measurements
Connect the Probe to the Meter and switch on prior to submerging the probe in water.
Select the Baro/Depth screen as illustrated below. The depth should be reading zero.
BARO:1013mb
DEPTH:00.00m
Hit [OK] to zero
GPS:3D Pos
If the depth is not reading zero (this is possible if the probe is wet and a low EC reading is
registering), press the OK key. You will be asked to confirm by pressing OK again.
Slowly lower the probe into the water. As soon as the depth value starts to register, you can
lower the probe more quickly.
7.2. Differential Depth Measurement
If you want to measure changes in depth, it may be more convenient to zero the depth
measurement once the probe has been submerged.
To do this, press the OK key whilst displaying depth, then confirm. The unit will now read
positive or negative changes in depth from the current depth (zero datum).
If the values are positive, the water level has increased from the zero datum. If the values
are negative, the water level has decreased.
Using the Automatic Data Logging feature detailed in the following section, it is possible to
monitor water levels over a period of time for later recall.
© 2011 Aquaread Ltd. www.aquaread.co.uk Page 14 of 64

Aquameter™ Series Instruction Manual 10401-00188 Rev M
8. Memory Mode
8.1. Manually Saving Readings
When you are happy that the readings are stable, press the M+ key to snapshot the
readings along with the time, date, GLP (calibration) data and position (GPS models only).
As each reading is saved, a numeric memory location ‘Tag’ will be briefly displayed which
you can note down. This Tag can be used to identify readings at a later date, both on the
Aquameter and when using AquaLink software.
8.2. Recalling and Viewing Saved Readings
To recall your readings, press the MR key. On entering Memory Recall mode, the most
recent Tag and set of readings are displayed first along with the date and time the readings
were taken shown on the bottom line of the screen.
M TEMP:012.5°C M
ORP:0415.2mV
pH:08.21
02/Apr/09 15:04:01
During Memory Recall, an ‘M’ is flashed in the top left and right corners of the screen
alternatively with an up/down arrow and a left/right arrow. This is to indicate that the Meter
is in Memory Recall mode and that other screens can be accessed using the arrow keys.
To see earlier readings, press the up arrow key. Just before each set of readings is
displayed, the Tag will be briefly displayed. To view all the parameters within one set of
readings, use the left/right arrow keys as described earlier. To exit Memory Recall mode,
press the ESC key. If no key is pressed for 30 seconds, Memory Recall mode will be
automatically cancelled.
8.3. Recalling GLP Data
Each time a set of readings is added to memory, the date of the last successful calibration
of each electrode is also appended. This is called GLP (Good Laboratory Practice) Data. In
addition to the date of the last successful EC calibration, the Calibration Standard value at
which the EC was calibrated is also displayed (see section 14: Calibrating EC for further
details).
To view the last successful calibration date for each electrode for any particular stored
reading, enter Memory Recall mode, scroll to the reading you are interested in using the
up/down keys, then press the MENU key. The screen below will be displayed.
GLP DATA
>pH/ORP
DO/EC
Turb
Using the up/down keys, select the electrode you are interested in, then press either the
OK key or the right arrow key. If, for instance, you selected pH/ORP, the screen below
would be displayed.
© 2011 Aquaread Ltd. www.aquaread.co.uk Page 15 of 64

Aquameter™ Series Instruction Manual 10401-00188 Rev M
GLP DATA
pH7.00 [31/Jan/09]
pH4.01 [07/Feb/09]
ORP [09/Feb/09]
This tells you that the last successful calibration, prior to the recorded reading being
taken, was January 31st for the pH 7.00 point, February 7th for the pH 4.01 point and
February 9th for ORP. If the date field is dashed (==/===/==), this means the electrode was
either not fitted or had never been calibrated.
To exit this screen press the ESC key or the left arrow key.
8.4. Clearing the Memory
The memory within the Aquameter is capable of storing up to 1900 full sets of readings.
To clear the entire memory, switch the Meter off, hold down the M+ key, then switch the
Meter back on. A screen will be displayed asking you to confirm your request. Press OK to
clear the memory or ESC to cancel and return to normal operation.
8.5. Automatic Data Logging
If you want to save readings automatically on a regular basis, in order, say, to check water
quality at a certain location over a period of time, you can set the Meter to record readings
automatically.
To do this, press the MENU key. The Main Menu screen will be displayed.
Main Menu
Auto Data Logging
Settings
Calibration
Select Auto Data Logging by pressing the right arrow key or the OK key. The Auto Data
Logging screen will be displayed.
Auto Data Logging
Interval:10 Mins
Status:OFF
Using the arrow keys to navigate, set the desired logging interval, then set the Status to
ON.
To leave this screen, reverse back to the Main Menu screen then the normal operation
screen by pressing the left arrow key. The Meter will now record a full set of data
automatically at the set rate until either the memory is full or the batteries go flat.
To remind you that Auto Data Logging is switched on, an asterisk (*) character will flash on
and off just below the battery symbol on all the main reading screens.
© 2011 Aquaread Ltd. www.aquaread.co.uk Page 16 of 64

Aquameter™ Series Instruction Manual 10401-00188 Rev M
You can cancel Auto Data Logging at any time by going back into the screen above and
setting the Status to OFF. Auto Data Logging will also be cancelled if you switch the Meter
off.
8.6. Important Information About Memory Mode
When data is saved in the Meter, it is compressed in raw Probe format. In other words, the
same way that it came up from the Probe. When you recall the data in Memory Recall
mode, the data is decompressed, then processed for display.
The advantage of this is that the readings will always appear in the current Meter
configuration. For example, if you spent a day taking readings with the Meter set to read
Dissolved Oxygen in %Saturation, then when you got back you really want to see
Dissolved Oxygen displayed in mg/L, you can do this by simply changing the Meter settings
(see section 9: Setting Units of Measurement).
The stored data can be displayed any way you want on recall. You are not limited to
viewing the data in the same way it was logged. This is a major advantage and allows you
to actually store and recall far more parameters than can be displayed at any one time.
The same rules apply when data is output to a PC running AquaLink Software via the USB
cable. The data that is output is always as per the Meter’s current configuration. You can
output the data as many times as you like in various Meter configurations.
© 2011 Aquaread Ltd. www.aquaread.co.uk Page 17 of 64

Aquameter™ Series Instruction Manual 10401-00188 Rev M
9. Setting Units of Measurement
To alter the way the Aquameter displays readings, press the MENU key to get to the Main
Menu, then choose Settings. The Settings Menu will be displayed.
Settings Menu
Units
Time & Date
Language
From this screen choose Units. The Units Menu will be displayed. Remember, you can use
just the arrow keys to navigate through the branches of the menus. You don’t need to press
OK or ESC at each level.
Units Menu
DO/EC/TDS
TEMP/pH/ORP/SAL
BARO/Alt & Depth
At the Units Menu, you have a choice of which units you want to adjust. Choose the first
line if you want to adjust Dissolved Oxygen, Electrical Conductivity or TDS. Choose line 2 if
you want to adjust Temperature, pH, ORP or Salinity. Finally, line 3 will give access to
Barometric Pressure, Altitude and Depth settings.
Moving the cursor right onto the first line will display the following screen.
Units
DO:%SAT
EC:Ref 25°C
TDS Fact:0.50
On this screen you can adjust the DO: setting between %Sat and mg/L. This will set the
Meter to display Dissolved Oxygen as either % Saturation or in milligrams/Litre (which is
the same as parts per thousand). Both readings are automatically corrected for
atmospheric pressure, sample temperature and sample salinity.
The second option on this screen allows you to choose how the Meter displays Electrical
Conductivity. There are four options. EC can be displayed as ‘Absolute EC’ without any
temperature correction [ABS EC], as ‘Specific EC’ referenced to 20°C [Ref 20°C], as
‘Specific EC’ referenced to 25°C [Ref 25°C] or as a reciprocal of Absolute EC, which is
Absolute Resistivity [ABS RES].
© 2011 Aquaread Ltd. www.aquaread.co.uk Page 18 of 64

Aquameter™ Series Instruction Manual 10401-00188 Rev M
Finally, this screen allows you to set the factor that the Meter uses to calculate Total
Dissolved Solids from Specific EC. This is the TDS Fact: (TDS = EC x TDS Fact) and can
be set anywhere between 0.00 and 1.00. Default value is 0.65.
Selecting the second line of the Units Menu will display the following screen.
Units
TEMP:°C
pH:pH
SAL:PSU
The first option on this screen allows you to change the temperature display between °C
and °F.
The second option allows you to change the pH display between plain pH and pHmV. Plain
pH displays normal, temperature compensated pH values in the range 0 - 14.
pHmV displays the actual voltage being generated by the pH electrode in +/- millivolts (mV)
over a range of +/- 625mV. This is not temperature compensated.
Finally, if you have chosen to replace the pH electrode with an ORP electrode (Aquaprobe
models AP-100, AP-400, AP-500 & AP-600 only), this field must be set to ORP. The
meter will then display ORP in +/- mVs over a range of +/- 2000mV.
The ORP option is not available when connected to Aquaprobe models AP-700 and AP-
800 as they both have combined pH/ORP electrodes and ORP display is automatic.
The last option on this screen allows you to choose between displaying salinity in Practical
Salinity Units (PSU), or parts per thousand (ppt), which is the same as grams per litre.
Selecting the third line of the Units Menu will display the following screen.
Units
BARO:mb
ALT:Metres
The first line allows you to choose between displaying Barometric pressure in millibars (mb)
or in inches of mercury (inHg).
The second line allows you to choose between displaying altitude and depth in metres (M)
or feet (F). Whatever units ALT is set to, DEPTH (AP-1000 only) will follow. Altitude is
displayed with respect to mean sea level.
Depth is displayed with respect to the depth zero datum, which can be the water surface or
any point at which the depth has been zeroed. See section 7: Differential Depth
Measurement for further details.
© 2011 Aquaread Ltd. www.aquaread.co.uk Page 19 of 64

Aquameter™ Series Instruction Manual 10401-00188 Rev M
10. RapidCal Calibration Method
10.1. About Calibration
Calibration is a very important part of successful water quality measurement and should be
carried out regularly as detailed in each separate section of this manual. A great deal of
development work has been put into simplifying and automating the calibration procedures
in the Aquameter in order to allow normal field operatives (as opposed to trained lab
technicians) to achieve quick and accurate results.
In order to standardise calibration techniques, Aquaread provide purpose made, amber
plastic, 300mL calibration bottles, some with non-reflective pads fitted to their bases. All
Aquaprobes are designed to be calibrated in these calibration bottles with both halves of
the Probe Sleeve fitted but without the Sleeve End Cap fitted.
Both halves of the Probe sleeve form an integral, working part of the Probe’s
measurement system, and MUST be fitted during calibration and measurement for
correct operation.
Whilst it is acceptable to use other vessels for calibrating EC, DO pH and ORP, Turbidity
calibration should always be carried out in the purpose made bottles, otherwise
accuracy can be seriously degraded.
10.2. Using RapidCal
RapidCal is an easy way to calibrate any of the Aquaprobes in the field using just one
calibration solution. RapidCal calibrates EC at 2570µS/cm, the pH7.00 point and the Zero
NTU Turbidity point simultaneously. Ideally, this procedure should be carried out at the
beginning of each day the Probe is to be used. To use RapidCal:
1. Remove the lid from a fresh 300mL bottle of RapidCal solution,
remove the storage cap from the pH electrode if fitted, wash the
Probe in distilled water, then drop the Probe in all the way. Bang
the Probe against the pad in the bottom of the bottle several
times in order to remove any air bubbles that may be clinging to
the Turbidity electrodes.
2. When the Probe is inserted, ensure the level of the solution is
right up to the threaded part of the bottle. If the level is low, as
shown in the photograph on the right, the EC electrodes will not
be covered and EC will not calibrate properly. If the level is low,
top up with fresh RapidCal solution.
3. Switch the Aquameter on and wait until the temperature, EC, pH
and Turbidity measurements are all completely stable. The
longer you can leave the probe to achieve thermal equilibrium
before proceeding, the better.
4. Ensure the temperature of the solution is between 5ºC and 40ºC (41ºF - 104ºF).
5. Press the MENU key then select Calibration. The following screen will be displayed.
© 2011 Aquaread Ltd. www.aquaread.co.uk Page 20 of 64
/