Page is loading ...

ba75931e03 12/2011
Oxi 7310
Oxi 7310P
Operating manual
D.O. meter
Oxi 7310P
Oxi 7310
Printermodul

Oxi 7310
ba75931e03 12/2011
Copyright © Weilheim 2011, WTW GmbH
Reproduction in whole - or even in part - is prohibited without the express writ-
ten permission of WTW GmbH, Weilheim.
Printed in Germany.

Oxi 7310 - Contents
Oxi 7310 Contents
ba75931e03 12/2011 3
1 Overview. . . . . . . . . . . . . . . . . . . . . . . . . . . . . . . . . . . . . . . . . . 6
1.1 Oxi 7310 meter . . . . . . . . . . . . . . . . . . . . . . . . . . . . . . . . . . . . . . 6
1.2 Oxi 7310P meter . . . . . . . . . . . . . . . . . . . . . . . . . . . . . . . . . . . . . 7
1.3 Sensors. . . . . . . . . . . . . . . . . . . . . . . . . . . . . . . . . . . . . . . . . . . . 7
2 Safety . . . . . . . . . . . . . . . . . . . . . . . . . . . . . . . . . . . . . . . . . . . . 8
2.1 Safety information . . . . . . . . . . . . . . . . . . . . . . . . . . . . . . . . . . . . 8
2.1.1 Safety information in the operating manual . . . . . . . . . . . . 8
2.1.2 Safety signs on the meter . . . . . . . . . . . . . . . . . . . . . . . . . 8
2.1.3 Further documents providing safety information . . . . . . . . 8
2.2 Safe operation. . . . . . . . . . . . . . . . . . . . . . . . . . . . . . . . . . . . . . . 9
2.2.1 Authorized use. . . . . . . . . . . . . . . . . . . . . . . . . . . . . . . . . . 9
2.2.2 Requirements for safe operation . . . . . . . . . . . . . . . . . . . . 9
2.2.3 Unauthorized use. . . . . . . . . . . . . . . . . . . . . . . . . . . . . . . . 9
3 Commissioning . . . . . . . . . . . . . . . . . . . . . . . . . . . . . . . . . . . 10
3.1 Scope of delivery . . . . . . . . . . . . . . . . . . . . . . . . . . . . . . . . . . . 10
3.2 Power supply . . . . . . . . . . . . . . . . . . . . . . . . . . . . . . . . . . . . . . 10
3.3 Initial commissioning . . . . . . . . . . . . . . . . . . . . . . . . . . . . . . . . . 10
3.3.1 Inserting the batteries . . . . . . . . . . . . . . . . . . . . . . . . . . . 11
3.3.2 Connecting the power pack . . . . . . . . . . . . . . . . . . . . . . . 12
3.3.3 Mounting the stand . . . . . . . . . . . . . . . . . . . . . . . . . . . . . 12
4 Operation . . . . . . . . . . . . . . . . . . . . . . . . . . . . . . . . . . . . . . . . 13
4.1 General operating principles . . . . . . . . . . . . . . . . . . . . . . . . . . . 13
4.1.1 Keypad. . . . . . . . . . . . . . . . . . . . . . . . . . . . . . . . . . . . . . . 13
4.1.2 Display . . . . . . . . . . . . . . . . . . . . . . . . . . . . . . . . . . . . . . . 14
4.1.3 Status information (meter) . . . . . . . . . . . . . . . . . . . . . . . . 14
4.1.4 Socket field . . . . . . . . . . . . . . . . . . . . . . . . . . . . . . . . . . . 15
4.2 Switching on the meter . . . . . . . . . . . . . . . . . . . . . . . . . . . . . . . 15
4.3 Switching off . . . . . . . . . . . . . . . . . . . . . . . . . . . . . . . . . . . . . . . 16
4.4 Navigation . . . . . . . . . . . . . . . . . . . . . . . . . . . . . . . . . . . . . . . . . 16
4.4.1 Operating modes . . . . . . . . . . . . . . . . . . . . . . . . . . . . . . . 16
4.4.2 Measured value display . . . . . . . . . . . . . . . . . . . . . . . . . . 17
4.4.3 Menus and dialogs. . . . . . . . . . . . . . . . . . . . . . . . . . . . . . 17
4.4.4 Elements in menus and dialogs. . . . . . . . . . . . . . . . . . . . 17
4.4.5 Example 1 on navigation: Setting the language . . . . . . . 19
4.4.6 Example 2 on navigation: Setting the date and time . . . . 20

Contents Oxi 7310
4 ba75931e03 12/2011
5 Dissolved oxygen. . . . . . . . . . . . . . . . . . . . . . . . . . . . . . . . . . 22
5.1 Measuring . . . . . . . . . . . . . . . . . . . . . . . . . . . . . . . . . . . . . . . . 22
5.1.1 Measuring D.O. . . . . . . . . . . . . . . . . . . . . . . . . . . . . . . . 22
5.1.2 Measuring the temperature . . . . . . . . . . . . . . . . . . . . . . 24
5.2 Calibration . . . . . . . . . . . . . . . . . . . . . . . . . . . . . . . . . . . . . . . . 25
5.2.1 Why calibrate? . . . . . . . . . . . . . . . . . . . . . . . . . . . . . . . . 25
5.2.2 When to calibrate? . . . . . . . . . . . . . . . . . . . . . . . . . . . . . 25
5.2.3 Calibration procedures . . . . . . . . . . . . . . . . . . . . . . . . . . 25
5.2.4 Calibration in water vapor-saturated air
(air calibration vessel) . . . . . . . . . . . . . . . . . . . . . . 25
5.2.5 Calibrating with a Comparison meas. (OxiComp) . . . . . 26
5.2.6 Calibration data . . . . . . . . . . . . . . . . . . . . . . . . . . . . . . . 28
6 Settings . . . . . . . . . . . . . . . . . . . . . . . . . . . . . . . . . . . . . . . . . . 30
6.1 Measurement settings . . . . . . . . . . . . . . . . . . . . . . . . . . . . . . . 30
6.1.1 Changing the settings for D.O. sensors . . . . . . . . . . . . . 30
6.1.2 Calibration interval . . . . . . . . . . . . . . . . . . . . . . . . . . . . . 31
6.2 Sensor-independent settings . . . . . . . . . . . . . . . . . . . . . . . . . . 32
6.2.1 System . . . . . . . . . . . . . . . . . . . . . . . . . . . . . . . . . . . . . . 32
6.2.2 Data storage. . . . . . . . . . . . . . . . . . . . . . . . . . . . . . . . . . 33
6.3 Reset . . . . . . . . . . . . . . . . . . . . . . . . . . . . . . . . . . . . . . . . . . . . 33
6.3.1 Resetting the measurement settings . . . . . . . . . . . . . . . 33
6.3.2 Resetting the system settings. . . . . . . . . . . . . . . . . . . . . 34
7 Data storage . . . . . . . . . . . . . . . . . . . . . . . . . . . . . . . . . . . . . . 35
7.1 Manual storage . . . . . . . . . . . . . . . . . . . . . . . . . . . . . . . . . . . . 35
7.2 Automatic storage at intervals . . . . . . . . . . . . . . . . . . . . . . 36
7.3 Measurement data storage . . . . . . . . . . . . . . . . . . . . . . . . . . . 38
7.3.1 Displaying and editing the measurement data storage . 38
7.3.2 Erasing the measurement data storage . . . . . . . . . . . . . 40
7.3.3 Measurement dataset. . . . . . . . . . . . . . . . . . . . . . . . . . . 40
7.3.4 Storage locations . . . . . . . . . . . . . . . . . . . . . . . . . . . . . . 40
8 Transmitting data (USB interface). . . . . . . . . . . . . . . . . . . . . 41
8.1 Options for data transmission . . . . . . . . . . . . . . . . . . . . . . . . . 41
8.2 Connecting a PC . . . . . . . . . . . . . . . . . . . . . . . . . . . . . . . . . . . 42
8.3 MultiLab Importer. . . . . . . . . . . . . . . . . . . . . . . . . . . . . . . . . . . 42
9 Printer (only Oxi 7310P). . . . . . . . . . . . . . . . . . . . . . . . . . . . . 43
9.1 Commissioning / switching the printer on or off . . . . . . . . . . . . 43
9.2 Operation / printing . . . . . . . . . . . . . . . . . . . . . . . . . . . . . . . . . 44
9.3 Printer settings . . . . . . . . . . . . . . . . . . . . . . . . . . . . . . . . . . . . . 44
9.4 Maintenance . . . . . . . . . . . . . . . . . . . . . . . . . . . . . . . . . . . . . . 44
9.4.1 Changing the roll of paper . . . . . . . . . . . . . . . . . . . . . . . 44
9.5 What to do if... / printer . . . . . . . . . . . . . . . . . . . . . . . . . . . . . . 45
10 Maintenance, cleaning, disposal. . . . . . . . . . . . . . . . . . . . . . 46
10.1 Maintenance . . . . . . . . . . . . . . . . . . . . . . . . . . . . . . . . . . . . . . 46
10.1.1 General maintenance activities . . . . . . . . . . . . . . . . . . . 46

Oxi 7310 Contents
ba75931e03 12/2011 5
10.1.2 Replacing the batteries. . . . . . . . . . . . . . . . . . . . . . . . . . 46
10.2 Cleaning. . . . . . . . . . . . . . . . . . . . . . . . . . . . . . . . . . . . . . . . . . 47
10.3 Packing . . . . . . . . . . . . . . . . . . . . . . . . . . . . . . . . . . . . . . . . . . 47
10.4 Disposal . . . . . . . . . . . . . . . . . . . . . . . . . . . . . . . . . . . . . . . . . . 47
11 What to do if.... . . . . . . . . . . . . . . . . . . . . . . . . . . . . . . . . . . . . 48
11.1 Dissolved oxygen. . . . . . . . . . . . . . . . . . . . . . . . . . . . . . . . . . . 48
11.2 General information . . . . . . . . . . . . . . . . . . . . . . . . . . . . . . . . . 48
12 Technical data. . . . . . . . . . . . . . . . . . . . . . . . . . . . . . . . . . . . . 50
12.1 Measuring ranges, resolution, accuracy . . . . . . . . . . . . . . . . . 50
12.2 General data . . . . . . . . . . . . . . . . . . . . . . . . . . . . . . . . . . . . . . 51
13 Firmware update. . . . . . . . . . . . . . . . . . . . . . . . . . . . . . . . . . . 53
14 Glossary . . . . . . . . . . . . . . . . . . . . . . . . . . . . . . . . . . . . . . . . . 54
15 Index . . . . . . . . . . . . . . . . . . . . . . . . . . . . . . . . . . . . . . . . . . . . 57

Overview Oxi 7310
6 ba75931e03 12/2011
1 Overview
1.1 Oxi 7310 meter
The Oxi 7310 compact precision dissolved oxygen (D.O.) meter enables you to
perform D.O. measurements quickly and reliably.
The Oxi 7310 provides the maximum degree of operating comfort, reliability
and measuring certainty for all applications.
The USB interface can be used for data transmission to a PC and for software
updates of the meter.
1 Keypad
2Display
3 Socket field
1
2
3

Oxi 7310 Overview
ba75931e03 12/2011 7
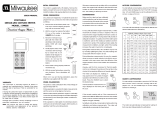
1.2 Oxi 7310P meter
The integrated printer of the Oxi 7310P enables to document measurements
according to GLP requirements.
1.3 Sensors
A measuring system ready to measure consists of the Oxi 7310 meter and a
suitable sensor.
Suitable sensors are D.O. (dissolved oxygen) sensors.
The information concerning the printer of the Oxi 7310P is given in
a separate chapter (see section 9 P
RINTER (ONLY OXI 7310P), page
43).
1 Keypad
2Display
3 Socket field
4Printer
5 Control panel of the printer
Information on available sensors is given on the Internet and in the
WTW catalog, "Laboratory and field instrumentation".
Printerm
o
dul
1
2
3
4
5

Safety Oxi 7310
8 ba75931e03 12/2011
2Safety
2.1 Safety information
2.1.1 Safety information in the operating manual
This operating manual provides important information on the safe operation of
the meter. Read this operating manual thoroughly and make yourself familiar
with the meter before putting it into operation or working with it. The operating
manual must be kept in the vicinity of the meter so you can always find the infor-
mation you need.
Important safety instructions are highlighted in this operating manual. They are
indicated by the warning symbol (triangle) in the left column. The signal word
(e.g. "CAUTION") indicates the level of danger:
NOTE
indicates a possibly dangerous situation where goods might be damaged
if the actions mentioned are not taken.
2.1.2 Safety signs on the meter
Note all labels, information signs and safety symbols on the meter and in the
battery compartment. A warning symbol (triangle) without text refers to safety
information in this operating manual.
2.1.3 Further documents providing safety information
The following documents provide additional information, which you should
observe for your safety when working with the measuring system:
• Operating manuals of sensors and other accessories
• Safety datasheets of calibration or maintenance accessories (such as buffer
solutions, electrolyte solutions, etc.)
WARNING
indicates a possibly dangerous situation that can lead to seri-
ous (irreversible) injury or death if the safety instruction is not
followed.
CAUTION
indicates a possibly dangerous situation that can lead to
slight (reversible) injury if the safety instruction is not fol-
lowed.

Oxi 7310 Safety
ba75931e03 12/2011 9
2.2 Safe operation
2.2.1 Authorized use
This meter is authorized exclusively for D.O. measurements in the laboratory.
Only the operation and running of the meter according to the instructions and
technical specifications given in this operating manual is authorized (see
section 12 T
ECHNICAL DATA, page 50).
Any other use is considered unauthorized.
2.2.2 Requirements for safe operation
Note the following points for safe operation:
• The meter may only be operated according to the authorized use specified
above.
• The meter may only be supplied with power by the energy sources
mentioned in this operating manual.
• The meter may only be operated under the environmental conditions
mentioned in this operating manual.
• The meter may only be opened if this is explicitly described in this operating
manual (example: Inserting the batteries).
2.2.3 Unauthorized use
The meter must not be put into operation if:
• it is visibly damaged (e.g. after being transported)
• it was stored under adverse conditions for a lengthy period of time (storing
conditions, see section 12 T
ECHNICAL DATA, page 50).

Commissioning Oxi 7310
10 ba75931e03 12/2011
3 Commissioning
3.1 Scope of delivery
D.O. meter Oxi 7310
4 batteries 1.5 V Mignon type AA
Power pack
USB cable
Stand
Stand holder
Comprehensive operating manual
Short instructions
CD-ROM with
– USB drivers
– comprehensive operating manual
– software MultiLab Importer
3.2 Power supply
The Oxi 7310 is supplied with power in the following ways:
Mains operation with the supplied power pack.
Battery operation (4 x alkaline manganese batteries, type AA)
USB operation via a connected USB-B cable.
3.3 Initial commissioning
Perform the following activities:
Insert the supplied batteries
For mains operation: Connect the power pack
If necessary, mount the stand
Switch on the meter (see section 4.2 S
WITCHING ON THE METER, page 15)
Set the date and time (see section 4.4.6 E
XAMPLE 2 ON NAVIGATION: SETTING
THE DATE AND TIME, page 20)

Oxi 7310 Commissioning
ba75931e03 12/2011 11
3.3.1 Inserting the batteries
You can operate the meter either with normal batteries or with
rechargeable batteries (Ni-MH). In order to charge the batteries, an
external charging device is required.
1 Battery compartment
1. Open the battery compartment (1) on the underside of the
meter.
CAUTION
Make sure that the poles of the batteries are positioned cor-
rectly.
The ± signs on the batteries must correspond to the
± signs in
the battery compartment.
2. Place four batteries (type Mignon AA) in the battery compartment.
3. Close the battery compartment (1).
4. Set the date and time (see section 4.4.6 E
XAMPLE 2 ON NAVIGATION:
S
ETTING THE DATE AND TIME, page 20)
1

Commissioning Oxi 7310
12 ba75931e03 12/2011
3.3.2 Connecting the power pack
3.3.3 Mounting the stand
The stand base can be mounted at the right side of the meter.
CAUTION
The line voltage at the operating site must lie within the input
voltage range of the original power pack (see section 12 T
ECH-
NICAL DATA, page 50).
CAUTION
Use original power packs only (see section 12 TECHNICAL DATA,
page 50).
1. Connect the plug of the power pack to the socket for the power pack on
the Oxi 7310.
2. Connect the original power pack to an easily accessible power outlet.
1
2

Oxi 7310 Operation
ba75931e03 12/2011 13
4 Operation
4.1 General operating principles
4.1.1 Keypad
In this operating manual, keys are indicated by brackets <..> .
The key symbol (e.g. <ENTER>) generally indicates a short keystroke (under
2 sec) in this operating manual. A long keystroke (approx. 2 sec) is indicated
by the underscore behind the key symbol (e.g. <ENTER_>).
<F1>:
<F1_>:
<F2>:
<F2__>:
Softkeys providing situation dependent functions, e.g.:
<F1>/[Menu]: Opens the menu for measurement settings
<F1_>/[Menu]: Opens the menu for system settings
<On/Off>: Switches the meter on or off
<M>: Selects the measured parameter / Quits the settings
<CAL>:
<CAL_>:
Calls up the calibration procedure
Displays the calibration data
<STO>:
<STO_>:
Saves a measured value manually
Opens the menu for the automatic save function
<RCL>:
<RCL_>:
Displays the manually stored measured values
Displays the automatically stored measured values
<><>:
<_><_>:
Menu control, navigation
Increments, decrements values
Increments, decrements values continuously
<ENTER>:
<ENTER_>:
Opens the menu for measurement settings / confirms
entries
Opens the menu for system settings
<AR> Freezes the measured value (HOLD function)
Switches the AutoRead measurement on or off
F1
F2
STOSTO
RCL
ARAR

Operation Oxi 7310
14 ba75931e03 12/2011
4.1.2 Display
4.1.3 Status information (meter)
1 Status information (sensor)
2 Measured value (with unit)
3 Measured parameter
4 Sensor symbol (calibration evaluation, calibration interval)
5 Measured temperature (with unit)
6 Status information (meter)
7 Softkeys and date + time
AR Stability control (AutoRead) is active
HOLD Measured value is frozen (<AR> key)
Batteries almost empty
3
2
4
5
6
7
1
HOLD AR
25.0
7.92
°C
O
2
mg/l
[Factor][CellOx]
01.07.2011
08:00
Menu
USB output

Oxi 7310 Operation
ba75931e03 12/2011 15
4.1.4 Socket field
4.2 Switching on the meter
1 D.O. sensor
2 Mini USB-B interface
3 Connection for stirrer (StirrOx
®
G)
4 Power pack
5 Service interface
CAUTION
Only connect D.O. sensors to the meter that cannot return any
voltages or currents that are not allowed (> SELV and
> current circuit with current limiting).
Almost all customary D.O. sensors fulfill these conditions.
1. Switch the meter on with <On/Off>.
The meter performs a self-test.
The display shows the manufacturer's logo while the self-test is being
performed.
The measured value display appears.
1
3
4
5
2
O
2
7.92
mg/l
25.1
°C
[CellOx]
01.07.2011
08:00
Menu USB output

Operation Oxi 7310
16 ba75931e03 12/2011
4.3 Switching off
Automatic switch-off
function
The instrument has an automatic switch-off function in order to save the
batteries (see section 6.2.1 S
YSTEM, page 32). The automatic switch-off func-
tion switches off the meter if no key is pressed for an adjustable period.
The automatic switch-off function is not active
if the communication cable is connected
if the Automatic data storage function is active, or with automatic data trans-
mission
if the power pack is connected
Display illumination The meter automatically switches off the display illumination if no key is
pressed for 30 seconds. The illumination is switched on with the next keystroke
again.
You can also generally switch the display illumination on or off (see section
6.2.1 S
YSTEM, page 32).
4.4 Navigation
The principles of navigation in menus and dialogs are explained in the following
sections.
4.4.1 Operating modes
The meter has the following operating modes:
Only those displays and functions are available in the active operating mode
that are currently being required.
1. Switch the meter off with <On/Off>.
Operating
mode
Description
Measuring The measurement data of the connected sensor are shown
in the measured value display
Calibration The course of a calibration with calibration information, func-
tions and settings is displayed
Storing in
memory
The meter stores measuring data automatically or manually
Transmit-
ting data
The meter transmits measuring data and calibration records
to a USB-B interface automatically or manually.
Setting The system menu or a sensor menu with submenus, set-
tings and functions is displayed

Oxi 7310 Operation
ba75931e03 12/2011 17
4.4.2 Measured value display
In the measured value display, open the setting menus with the <F1> softkey.
The current functions of the softkeys are shown on the display.
Use <F1>/[Menu] (short
pressure) to open the menu for calibration and
measurement settings for the displayed measured parameter.
Use <F1_>/[Menu] (long
pressure (approx. 2 s) to open the Storage & config
menu with the sensor-independent settings.
Use the keys of the keypad to carry out further functions such as storage or cali-
bration (see section 4.1.1 K
EYPAD, page 13). These functions are not available
in other operating situations.
4.4.3 Menus and dialogs
The menus for settings and dialogs in procedures contain further subelements.
To select a subelement, use the <><> keys. The current selection is dis-
played with a frame.
To make further settings, switch to the next higher menu level with
<F1>[Back].
Use <M> to return to the measured value display.
4.4.4 Elements in menus and dialogs
Submenus
The name of the submenu is displayed at the upper edge of the frame. Sub-
menus are opened by confirming with <ENTER>. Example:
Settings
Settings are indicated by a colon. The current setting is displayed on the
right-hand side. The setting mode is opened with <ENTER>. Subsequently,
the setting can be changed with <><> and <ENTER>. Example:
General
Interface
Clock
Service information
Reset
System
01.07.2011
08:00
Back

Operation Oxi 7310
18 ba75931e03 12/2011
Functions
Functions are designated by the name of the function. They are immediately
carried out by confirming with <ENTER>.
Example: Display the Calibration record function.
Messages
Information is marked by the
i
symbol. It cannot be selected. Example:
Language: English
Beep: Off
Illumination
: On
Contrast: 48 %
Switchoff time: 30 min
General
01.07.2011
08:00
Back
Calibration record
Calibration data storage
Calibration interval
: 150 d
O
2
01.07.2011
08:00
Back
Calibration
Temperature unit: °C
Sal correction
: On
Salinity
: 21.7
Stability control: On
Reset
i
Air pressure = 941 mbar
O
2
01.07.2011
08:00
Back

Oxi 7310 Operation
ba75931e03 12/2011 19
4.4.5 Example 1 on navigation: Setting the language
1. Press the <On/Off> key.
The measured value display appears.
The instrument is in the measuring mode.
2. Using <F1_>/[Menu], open the Storage & config menu.
The instrument is in the setting mode.
3. Select the System submenu with <><>.
The current selection is displayed with a frame.
4. Open the System submenu with <ENTER>.
5. Select the General submenu with <><>.
The current selection is displayed with a frame.
O
2
7.92
mg/l
25.1
°C
[CellOx]
01.07.2011
08:00
Menu USB output
System
Data storage
Storage & config
01.07.2011
08:00
Back
General
Interface
Clock
Service information
Reset
System
01.07.2011
08:00
Back

Operation Oxi 7310
20 ba75931e03 12/2011
4.4.6 Example 2 on navigation: Setting the date and time
The measuring instrument has a clock with a date function. The date and time
are shown in the measured value display.
When storing measured values and calibrating, the current date and time are
automatically stored as well.
The correct setting of the date and time and date format is important for the fol-
lowing functions and displays:
Current date and time
Calibration date
Identification of stored measured values.
Therefore, check the time at regular intervals.
6. Open the General
submenu with <ENTER>.
7. Open the setting mode for the Language with <ENTER>.
8. Select the required language with <><>.
9. Confirm the setting with <ENTER>.
The meter switches to the measuring mode.
The selected language is active.
Language: Deutsch
Beep: Off
Illumination: On
Contrast
: 48 %
Switchoff time: 30 min
General
01.07.2011
08:00
Back
Language: Deutsch
Beep: Off
Illumination
: On
Contrast: 48 %
Switchoff time: 30 min
General
01.07.2011
08:00
Back
/