Exerpeutic 1020H Owner's manual
- Type
- Owner's manual
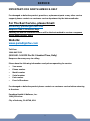
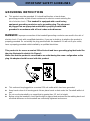
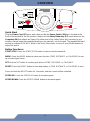
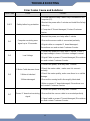
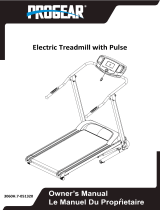
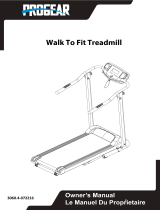
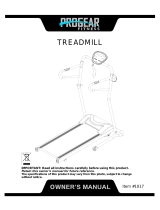
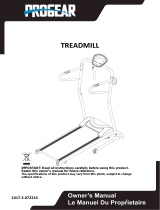
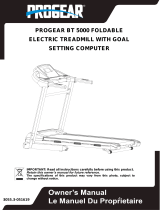
Exerpeutic 1020H is an electric treadmill with a pulse sensor, designed for walking only. It has a maximum weight capacity of 400 lbs / 182 kgs. The dimensions of the walking deck are not specified in the manual, but the minimum safety area clearance is 2000mm x 1000mm. The treadmill has a 120-volt motor and a speed range of 0.5 to 8 miles per hour. It also has an incline adjuster, which allows you to increase the incline of the walking deck for a more challenging workout. The treadmill comes with a computer that displays your speed, distance, time, calories burned, and heart rate.
Exerpeutic 1020H is an electric treadmill with a pulse sensor, designed for walking only. It has a maximum weight capacity of 400 lbs / 182 kgs. The dimensions of the walking deck are not specified in the manual, but the minimum safety area clearance is 2000mm x 1000mm. The treadmill has a 120-volt motor and a speed range of 0.5 to 8 miles per hour. It also has an incline adjuster, which allows you to increase the incline of the walking deck for a more challenging workout. The treadmill comes with a computer that displays your speed, distance, time, calories burned, and heart rate.


-
 1
1
-
 2
2
-
 3
3
-
 4
4
-
 5
5
-
 6
6
-
 7
7
-
 8
8
-
 9
9
-
 10
10
-
 11
11
-
 12
12
-
 13
13
-
 14
14
-
 15
15
-
 16
16
-
 17
17
-
 18
18
-
 19
19
-
 20
20
-
 21
21
-
 22
22
-
 23
23
-
 24
24
-
 25
25
-
 26
26
-
 27
27
-
 28
28
-
 29
29


Exerpeutic 1020H Owner's manual
- Type
- Owner's manual
Exerpeutic 1020H is an electric treadmill with a pulse sensor, designed for walking only. It has a maximum weight capacity of 400 lbs / 182 kgs. The dimensions of the walking deck are not specified in the manual, but the minimum safety area clearance is 2000mm x 1000mm. The treadmill has a 120-volt motor and a speed range of 0.5 to 8 miles per hour. It also has an incline adjuster, which allows you to increase the incline of the walking deck for a more challenging workout. The treadmill comes with a computer that displays your speed, distance, time, calories burned, and heart rate.
Ask a question and I''ll find the answer in the document
Finding information in a document is now easier with AI
Related papers
-
Exerpeutic 1020H Owner's manual
-
-
-
-
-
-
-
-
-
Other documents
-
 Progear 3060H Owner's manual
-
 Progear 3060 Owner's manual
-
 Progear Fitness 1017 Owner's manual
-
 Progear 3050 Owner's manual
-
Fitness Reality 2050H Owner's manual
-
Fitness Reality TRE2500 Owner's manual
-
-
 Progear 1017 Owner's manual
-
-
 Progear 3055 Owner's manual


