Quick Guide P-4030/P-4035 MFP/P-C3060/P-C3065 MFP
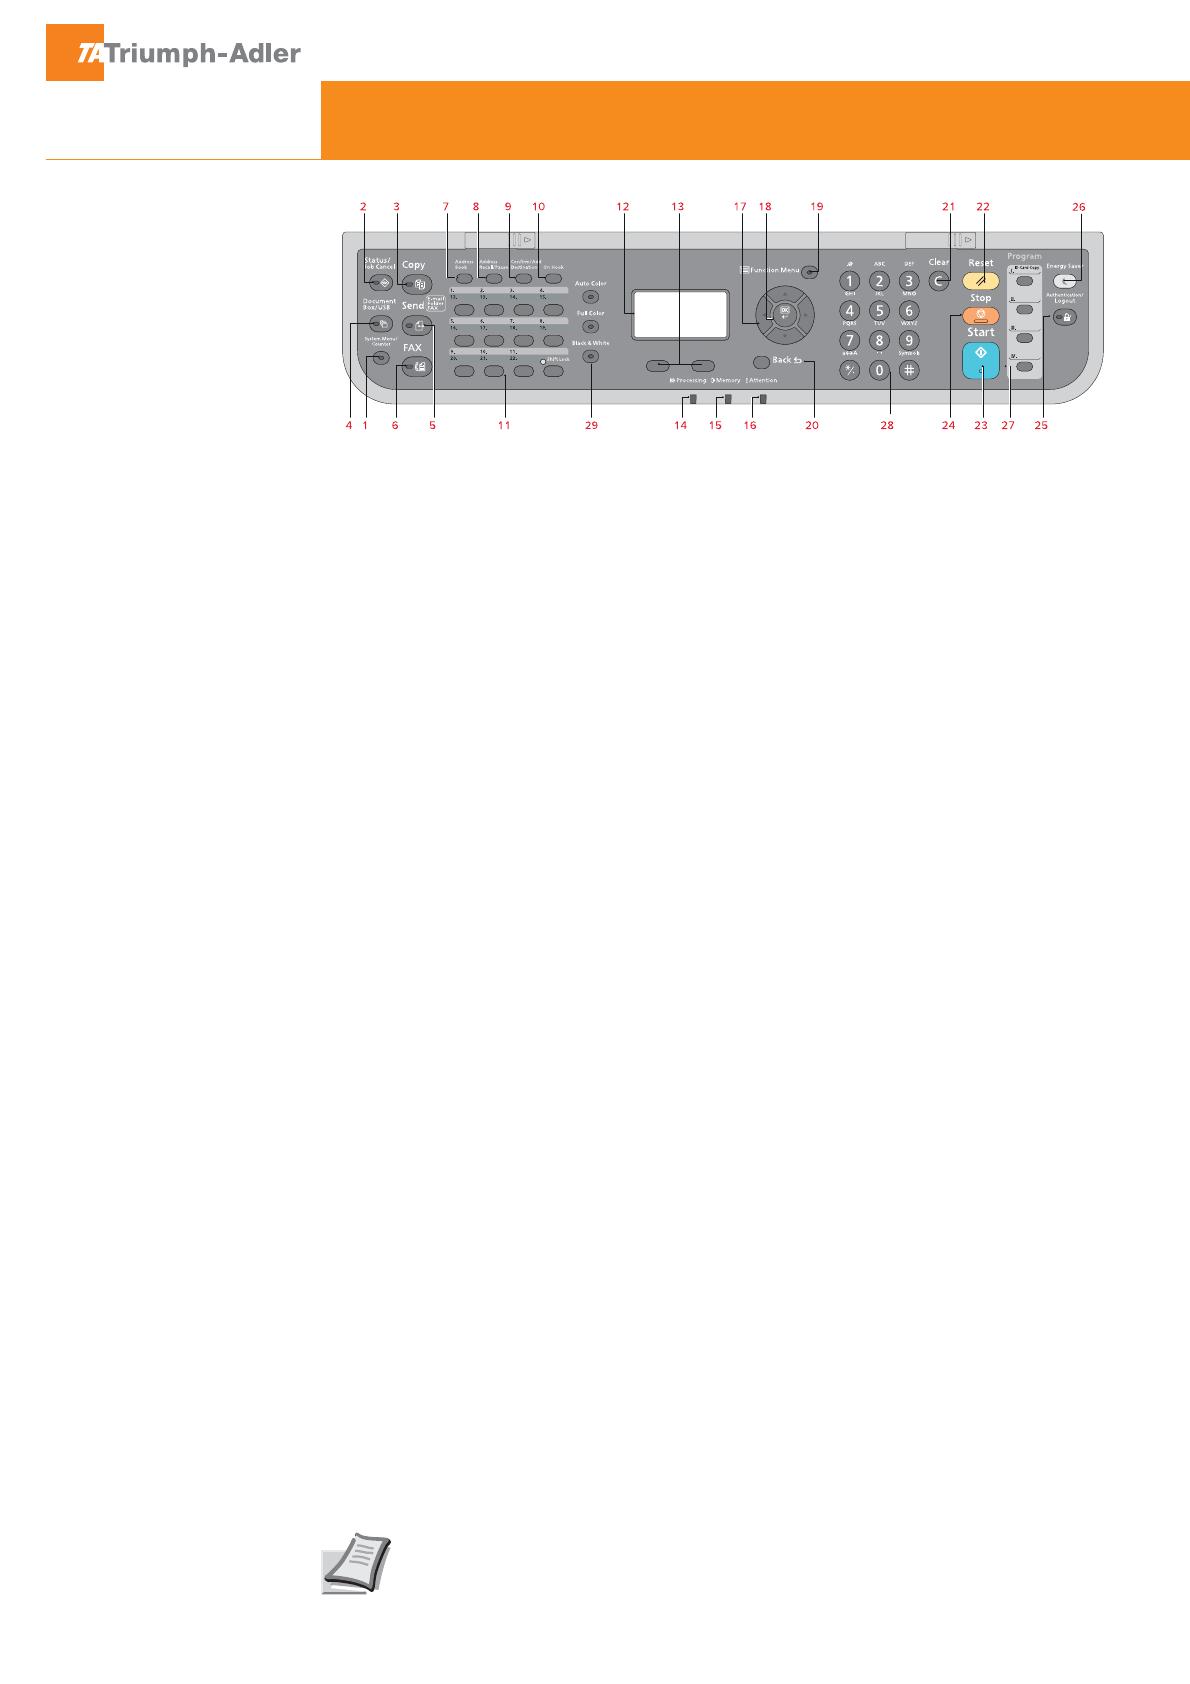
Operation panel
1 Displays the System Menu/Counter
screen.
2 Displays the Status/Job Cancel screen.
3 Displays the Copy screen.
4 Displays the Document Box/USB
screen.
5 Displays the Send screen. You can
change it to display the Address Book
screen.
6 Displays the Fax screen.
7 Displays the Address Book screen.
8 Calls the previous destination. Also
used to enter a pause when entering a
fax number.
9 Con¿rms the destination or adds a
destination.
10 Switches between on-hook and
off-hook when manually sending a fax.
11 Recalls the destination registered for
One Touch Keys.
12 Displays the setting menu, machine
status, and error messages.
13 Message Display. Check what is shown
here while operating the machine.
14 Blinks when printing or
sending/receiving.
15 Blinks while the machine is accessing
the machine memory, fax memory or
USB memory (general purpose item).
Switch off the machine only when LED
is dark!
16 Lights or blinks when an error occurs
and a job is stopped.
17 Used to select a menu item, move
the cursor when entering characters,
change a value etc.
18 Selects the chosen item or ¿nalises the
entered value.
19 Displays the function menu for copy,
print, transmission and document box.
20 Returns the Message Display to the
previous screen.
21 Clears entered numbers and
characters.
22 Resets settings and displays the basic
screen.
23 Starts copying and scanning operations
and processing for setting operations.
24 Cancels the printing job in progress.
25 Authenticates user switching, and exits
the operation for the current user (i. e.
log out).
26 Puts the machine into Sleep Mode.
Recovers from Sleep if in Sleep Mode.
27 Used to register or recall programs.
28 Numeric keys. Enter numbers and
symbols.
29 For the selection of the copy mode
between Auto Color, Full Color and
Black & White
(only for P-C3060/P-C3065 MFP).
Depending on the model in use not all
functions are available.
For more details refer to the Operation
Guide on the co-packed DVD.


