
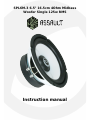
SPL6M.3 6.5" 16.5cm 4Ohm Midbass
Woofer Single 125w RMS
Instruction manual

Thank you for choosing Bassface. From the simplest connector to our top of the range
amplifier - every element of these products has been designed to give you the best possible
performance for your money. Please take the time to read these instructions carefully as
they contain useful and important information. Modern high power audio systems can
generate voltages at the speaker similar to mains operated equipment – for some reason
everyone seems to ignore or forget this. Your wiring needs to be good to be safe. Please
remember this and take your time. Please exercise caution when setting volume levels –
powerful audio equipment can easily produce enough sound to permanently damage
hearing. Remember that audio competitors use ear protection when operating and
competing. Do remember that incorrect installation or abuse is not covered under warranty
– please make sure that your installation and any partnered product is suitable and
compatible. If you are unsure please seek qualified advice before proceeding. Always use
appropriate hand and eye protection when working with tools, and always work within your
capabilties as an installer. We offer a 12 month manufacturer warranty via your distributor
or retailer. Please retain your purchase receipt as proof of purchase. Please note that
Bassface operates a policy of continuous product development and we reserve the right to
change specification without prior notice. You can follow our process on our website by
reviewing the version history information.
Please note that we sometimes include information inside these manuals which we feel is of
potential value to the client on related subjects such as conversion charts, capacitance
values or wiring diagrams. Please feel free to copy any of this information since it is in the
public domain.
Generally, separate mid bass and mid range driver units are considered to be specialist
products, in that they are supplied as raw driver units without crossover network. The
intention is that the unit will be installed in conjunction with an existing crossover unit or
active crossover and a pair of tweeters which you supply. These speakers are designed to
offer the finest in sonic imaging and staging, as well as delivering excellent levels of output.
A careful installation will pay dividends in terms of performance.
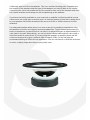
Before installation, please take the time to review your chosen fitment location and to
check on mounting clearance both behind and in front of the speaker. If you do not have
the clearance behind to allow operation of the vehicle windows or other functions you may

need to make or obtain spacer rings to move the unit forwards. You need to ensure that the
cone and surround will not touch anything during playback. Remember that the cone will
move a good few mm forwards during operation. Should you need to make your own spacer
rings, we suggest MDF or similar, since the additional solidity and lower resonance goes a
long way towards eliminating vibrations when compared to a plastic ring.
When you mount the speaker with screws it is really important to make sure that you do
not damage the speaker surround with tools or any retaining washers. If you need to drill
new holes for mounting the speaker into the steel of the panel then make a small pilot hole
first to ensure accuracy, after first marking the points with a felt tip pen.
Crucially, you also need to ensure that there is no gap between the speaker framework and
the door panel – as leaks like this will ruin the bass response. Additionally it is vital that the
chassis of the speaker is tightly mounted and perfectly flat.
We strongly advise that you consider sound proofing the car at least around the speakers
themselves to ensure that the sound produced does not get lost in the vibrations created in
the panel. This will allow your speaker to be more rigid, giving you the best sound quality
and most output possible.
When installing sound proofing it normally helps to warm the material before use. Try to
double up the layers close to the speaker itself. You are trying to increase the weight of the
panel, lower the resonance and give the speaker something solid to kick against.
When you install the amplification please ensure that you maintain the same phasing setup
throughout your installation. So it’s either “stripe to positive” or “stripe to negative” right
the way through.
When it comes to setting up your system for sound, please remember that the single most
common cause of speaker failure is distortion. And the single most common cause of
distortion is an amplifier set at too high a level.
We do recommend the use of an external amplifier to drive our midbass and midrange
speakers. If you are going to power your new speakers off your head unit then please
remember that head unit manufacturers insist on producing products that actually distort
at about three quarters the way up their volume scale. If you add a little bass to the
settings this critical point can be as low as half the way up the volume level! The result of
this is that the owner of the system blames the speaker for the distortion. The comment is
usually “the speakers are not powerful enough to take the sound.” In reality, you need to
ensure that you play the system within the scope of the capability of the amp you are
using. If this is a simple head unit then consider adding a subwoofer if you need more bass
– or add an amplifier to the speaker outputs if you need to drive your new speakers harder.
Remember that it’s easy to burn out speakers with distortion and this isn’t part of the
warranty.
With your Bassface speakers you are going to experience a much finer tonal balance and a
superb stereo experience. What you are not going to do is to make your amplifier or head
unit more powerful than it already its, or to re-write the rules of physics and create sub
bass out of a speaker that is not designed to do that.
When you look to tune the crossover frequency we would advise that you start with around

a 5Khz high pass roll off to the tweeters. This is an excellent starting point. Depending on
the location of the tweeters and the type of the tweeters you may be able to run a lower
crossover point, which will enable more of the sound to come out of the tweeters and often
this creates a better sound image, as well as tightening up the midbass.
If you have the facility available on your head unit or amplifier it will be beneficial in most
cases to also set a high pass crossover point, to limit the amount of bass that is being fed in
to your speakers. We would recommend the use of a 60, 80 or 100Hz crossover in most
situations.
For advanced installers where there is no room to work it is possible to experiment using
mid woofers to function as compact enclosure subwoofers. To get the best performance in
these circumstances you would look to run them in a sealed enclosure of approximately 0.5
cubic feet for the pair. Alternatively, you can run them infinite baffle without a box using a
solid thick board to mount them. If you are using the speakers as woofers please set the
crossover frequencies to give a subsonic filter at approx 35Hz. For the low pass we
recommend starting at 200Hz for this application. You can use Dacron to stuff the enclosure
to mimic a slightly larger box than you physically have.
-
 1
1
-
 2
2
-
 3
3
-
 4
4


Ask a question and I''ll find the answer in the document
Finding information in a document is now easier with AI
Related papers


Other documents
-
Deaf Bonce ML-10S D2 Owner's manual
-
RetroSound R-C652N Installation guide
-
M-Audio EX66 Owner's manual
-
Bowers & Wilkins CT800 User manual
-
WILSON AUDIO Cub Series 2 Owner's manual
-
Genesis 201 User manual
-
Genesis G2.2 Setup And Owners Manual
-
-
-