-2-
SAFETY INFORMATION WARNINGS
NOTE: When burning any unit or appliance that combusts fuel for heat, such as coal, oil, wood or natural and
(L.P.) liquid petroleum gas, we highly recommend the use of smoke and carbon monoxide detectors in your
home.
Early signs of carbon monoxide poisoning resemble u, with headaches, dizziness and/or nausea. If you have
these signs, the heater may not be working properly. Get fresh air at once! Have heater serviced Some people-
pregnant women, persons with heart or lung disease, anemia, those under the inuence of alcohol and those at
high altitudes-are more affected by carbon monoxide than others.
CAUTION: Strong drafts, such as a ceiling fan placed directly in front of the heater (pulling from either direction)
may create sooting. Sooting will discolor walls.
1. The installation must conform with local codes or in the absence of local codes, with National Fuel Gas Code,
ANSI Z223.1/NFPA54. NOTE: See the “Producing Adequate Air For Combustion And Ventilation” section of this
manual. Never install this heater:
• In a recreational vehicle, bathroom, bedroom or any other sleeping quarters.
• Where curtains, furniture, clothing or other ammable objects are less than 24” from the front of the heater
• In high trafc areas or in windy areas
2. Two models are available. One specic model for propane (LP) and one for natural gas. Use the correct type
of gas for your home. Do not convert from one gas type to another.
3. If this heater is used with propane gas, do not place propane supply tank(s) inside any structure.
4. What To Do IF You Smell Gas:
• Shut off the gas supply.
• Do not try to light any appliance.
• Do not touch any electrical switch; do not use any phone in your building.
• Immediately call your gas supplier from a neighbor’s phone. Follow the gas supplier’s instructions.
• If you cannot reach your gas supplier, call the re department.
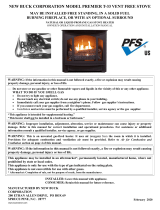
5. When operated for the rst time, logs may emit a “paper burning” smell. This smell will gradually diminish and
will be totally eliminated after the rst few hours of operation. Run gas logs with ue damper open during this
time. Do not use blower at this time.
6. This heater shall not be installed in unusually tight construction unless provisions are provided for adequate
combustion and ventilation air (see “Producing Adequate Air For Combustion And Ventilation” section of this
manual).
7. The surface of gas logs becomes very hot when operating. Keep children and adults away from the hot
surface. Gas logs will remain hot for sometime after shutdown. Allow the surface to cool before touching.
8. Do not place clothing or other ammable material on or near the appliance.
9. If equipped, fresh air damper must be closed.
10. Keep the appliance area clean and free from combustible materials, gasoline, and other ammable vapors
and liquids.
11. If burner shuts off, do not relight until you provide fresh outside air. If the burner continues to shut off, have the
unit serviced.
Important: Vent-free heaters add moisture to air. Although this is benecial, installing heater in rooms without
adequate ventilation may cause mildew to form from too much moisture.
Warning: Any change to this heater or its controls can be dangerous.
IMPORTANT: READ THIS OWNER’S MANUAL CAREFULLY AND COMPLETELY BEFORE TRYING TO ASSEMBLE, OPERATE,
OR SERVICE APPLIANCE. IMPROPER USE OF THESE LOGS CAN CAUSE SERIOUS INJURY OR DEATH FROM BURNS,
FIRE, EXPLOSION AND CARBON MONOXIDE POISONING.
Important Information