Page is loading ...

User Guide & Warranty
1200W Router
After Sales Support
Now you have purchased a Power Craft
product you can rest assured in the
knowledge that as well as your 3 year
parts and labour warranty you have
the added peace of mind of dedicated
helplines and web support.
AFTER SALES SUPPORT
UK / NORTHERN IRELAND HELPLINE: 0870 7323023
REPUBLIC OF IRELAND HELPLINE: 1800 481005
WEB SUPPORT: WWW.OMEGAWOLF.COM/POWERCRAFT
MODEL NUMBER: PBF-1200
In order to deal with your enquiry as quickly and efficiently as possible, we ask you to send your
enquiry by email ([email protected]). Do not forget to include your name, address and a
daytime telephone number.
Alternatively, you can contact our freephone service hot-line on the number given below.
Office hours are as follows:
Mon - Fri: 8 am - 6 pm, Sat: 10 am - 2 pm, Sun: 10 am - 4 pm
UK / NORTHERN IRELAND HELPLINE:
0870 7323023
REPUBLIC OF IRELAND HELPLINE:
1800 481005
WEB SUPPORT:
www.omegawolf.com/powercraft
Omega, Interex House, Prospect Close, Lowmoor Business Park
NG17 7LF Kirkby In Ashfield, England
Replacements or repairs under guarantee regulations are free of charge.
GB/IRE-0706-07
Name:
Address:
Contact Telephone No.:
E-mail:
Location of purchase:
Fault Description:
If you are requested by the manufacturer to return the item for
repair please complete the enclosed section and send it together
with your product and your receipt (proof of purchase) to the
service address shown below.
1200W ROUTER
PBF-1200

Helpline No. UK / Northern Ireland 0870 7323023 • Rep. Ireland 1800 481005
Web Support: www.omegawolf.com/powercraft
Model Number:
PBF-1200 19
Warranty
Helpline No. UK / Northern Ireland 0870 7323023 • Rep. Ireland 1800 481005
Web Support: www.omegawolf.com/powercraft
Model Number:
PBF-1200 02
Contents
03 Introduction
04 Machine specifications
06 Safety instructions
- General safety instructions
- Additional safety instructions
10 Assembly
- Mounting and removing cutters
- Adjusting the parallel fence ruler
- Mounting the guide bush
- Mounting the adapter for dust extraction
- The ON/OFF switch
- Usage tips
13 Operation
- Height setting of the router column
- Setting the plunge depth
- Adjustment using the revolver- depth stop
16 Maintenance
18 Exploded view
19 Warranty
WARRANTY CERTIFICATE
Year of manufacture: 00/2007 Router PBF-1200
Congratulations! You have made an excellent choice with the purchase of this Quality
product. Our commitment to quality also includes our service. Should you, contrary to
expectations, experience defects due to material or manufacturing faults during private use
within 36 months of the date of purchase we shall be liable for warranty in accordance with
statutory warranty regulations, provided that: - The device was not put to any use other than the intended.-
Was not overloaded. - Was not used with the wrong accessories. - Repairs where not carried out by any
other than the authorised workshop. The warranty certificate is only valid in connection with the receipt.
Please keep both in a safe place. The warranty does not affect your statutory rights.
The product is guaranteed for a period of three years beginning on the day of purchase. Keep your purchase
receipt safe as proof of the date of purchase. The guarantee period can only be extended for the duration of
any repair required.
During the warranty period, defective devices can be sent FREIGHT PREPAID to the service address stated at
the end of this booklet. We will, at our discretion either repair or exchange the device in accordance with
warranty legislation.
Please include the following when sending in your product for repair:
1. The receipt (proof of purchase)
2. This warranty certificate with your name, address, contact details and a fault description
completed overleaf.
If the original receipt is not enclosed the repair will be charged for in all cases. After the warranty has
expired you can still send defective devices for repairs FREIGHT PREPAID to the address at the end of this
booklet. Quotes as well as repairs after warranty period are to be paid for in all cases. Ensure the product is
sent well packed as no responsibility can be accepted for items lost or damaged in transit. This warranty
does not affect your statutory rights.
EC DECLARATION OF CONFORMITY
We Ferm B.V.
Lingenstraat 6, 8028 PM Zwolle, The Netherlands
declare that the design and construction of the following machine, in the form supplied by us, comply with
the requirements of the appropriate EC directives.
Product Description: 1200W Router
Model: PBF-1200
Appropriate EC directives: 98/37EEC, 73/23EEC, 89/336/EEC, 2002/95/EC, 2002/96/EC
Applicable harmonised norms: EN60745-1, EN60745-2-17, EN55014-1, EN55014-2, EN61000-3-2, EN61000-3-3
J.A. Bakker - van Ingen J. Lodewijk
CEO Ferm B.V. Quality Manager Ferm Global 10/2007

Helpline No. UK / Northern Ireland 0870 7323023 • Rep. Ireland 1800 481005
Web Support: www.omegawolf.com/powercraft
Model Number:
PBF-1200 03
Introduction
Congratulations on choosing to buy a
PowerCraft product.
By doing so you now have the assurance and peace of mind that comes with
purchasing a product made by one of Europe’s leading manufacturers.
All products brought to you by PowerCraft are manufactured to the highest
standards of performances and safety, and, as part of our philosophy for
customer service and satisfaction, are backed by our comprehensive
3 Year Warranty.
We hope you will enjoy using your purchase for many years to come.
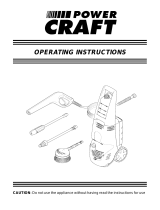
For your own safety and for the safety of others, please read these in-
structions carefully before using this appliance. It will help you under-
stand your product more easily and avoid unnecessary risks. Keep this
instruction manual in a safe place for future use.
Introduction
The router has been designed for professional routing of wood and wood pro-
ducts. Check the machine, for loose parts and accessories from transport damage.
Helpline No. UK / Northern Ireland 0870 7323023 • Rep. Ireland 1800 481005
Web Support: www.omegawolf.com/powercraft
Model Number:
PBF-1200 18
Exploded view
Parts list
No. Description Position
302112 Locking knob with spring 6 + 7
302111 Dust extraction 8
302123 Carbon brush (set) 64
302114 Parallel guide 94
302005 Guiding rod (set) 95 + 97 (2x)
302121 Ruler 99
302133 Collet wrench 100
302122 Template ring 101

Helpline No. UK / Northern Ireland 0870 7323023 • Rep. Ireland 1800 481005
Web Support: www.omegawolf.com/powercraft
Model Number:
PBF-1200 17
Helpline No. UK / Northern Ireland 0870 7323023 • Rep. Ireland 1800 481005
Web Support: www.omegawolf.com/powercraft
Model Number:
PBF-1200 04
Machine specifications Maintenance
Technical specifications
Product information
Fig. A1 Fig. A2
8
14
11
6
5
16
3
1
15
15
14
8
4
2
19
17
9
18
10
12
11
21
7
2
13
Voltage 230 V~
Frequency 50 Hz
Power input 1200 W
No load speed 9000-30000/min
Max. cutter diameter 30 mm
Cutting depth 30 mm
Collet 6 & 8 mm
Weight 4.7 kg
Lpa (sound pressure) 90.9 dB(A)
Lwa (sound power) 101.9 dB(A)
Vibration value 1.77 m/s
2
Faults
Should a fault occur, e.g. after wear of a part, please contact the adress on the war-
ranty card. In the back of this manual you find an exploded view showing the parts
that can be ordered.
Environment
In order to prevent the machine from damage during transport, it is delivered in a
sturdy packaging. Most of the packaging materials can be recycled. Take these
materials to the appropriate recycling locations.
Faulty and/or discarded electrical or electronic apparatus have to be
collected at the appropriate recycling locations.

Helpline No. UK / Northern Ireland 0870 7323023 • Rep. Ireland 1800 481005
Web Support: www.omegawolf.com/powercraft
Model Number:
PBF-1200 05
Machine specifications
Fig. C
1. On/off switch (Fig. A, page 4)
2. Handle (Fig. A, page 4)
3. Base plate (Fig. A, page 4)
4. Fixing screws for parallel fence (Fig. A, page 4)
5. Switch lock (Fig. A, page 4)
6. Collet nut (Fig. A, page 4)
7. Spindle lock (Fig. A, page 4)
8. Plunge depth adjustment button (Fig. A, page 4)
9. Wing bolt for depth stop (Fig. A, page 4)
10. Depth stop (Fig. A, page 4)
11. Clamping lever (Fig. A, page 4)
12. Plunge depth scale (Fig. A, page 4)
13. Adjusting wheel for electronic speed control (Fig. A, page 4)
14. Height adjustment button (Fig. A, page 4)
15. Plunge depth fine-tuning button (Fig. A, page 4)
16. Dust extraction facility (Fig. A, page 4)
17. Parallel fence ruler (Fig. A, page 4)
18. Zero mark (Fig. A, page 4)
19. Parallel fence (Fig. A, page 4)
20. Guide rod (Fig. C, page 5)
21. Depth stop revolver (Fig. G, page 14)
Contents
1. Machine data
2. Safety instructions
3. Mounting accessories
4. Operation
5. Maintenance
4
417
19
20
Helpline No. UK / Northern Ireland 0870 7323023 • Rep. Ireland 1800 481005
Web Support: www.omegawolf.com/powercraft
Model Number:
PBF-1200 16
Maintenance
Make sure that the machine is not live when carrying out maintenance
work on the motor.
The machines have been designed to operate over a long period of time with a mi-
nimum of maintenance. Continuous satisfactory operation depends upon proper
machine care and regular cleaning.
Cleaning
Regularly clean the machine housing with a soft cloth, preferably after each use.
Keep the ventilation slots free from dust and dirt. If the dirt does not come off use
a soft cloth moistened with soapy water. Never use solvents such as petrol, alcohol,
ammonia water, etc. These solvents may damage the plastic parts.
Troubleshooting
On the next page please find some potential causes and solutions to possible
failure.
• The operating
switch is switched
on, but the motor is
not working
• Router runs slowly
• Excessive vibration
• Sparks inside the
housing
• The electric circuit is
broken
• Wires in the mains
plug or in the socket
are loose
• The switch is faulty
• Blunt or damaged
cutter
• Variable speed set
low
• Motor is overloaded
• Bent cutter shank
• Carbon brushes are
worn
• Have the electric
circuit repaired
• Have socket and
plug checked or
repaired
• Have the switch
repaired
• Re-sharpen or
replace cutter
• Increase variable
speed
• Reduce pushing
force on router
• Replace cutter
• Replace the carbon
brushes

Helpline No. UK / Northern Ireland 0870 7323023 • Rep. Ireland 1800 481005
Web Support: www.omegawolf.com/powercraft
Model Number:
PBF-1200 15
Operation
depth is set correctly, the groove in question can be routed accurately to within 0.1
mm.
Preparation:
• Place the desired cutter in the tool.
• Loosen the clamping lever (11). The router can then be pushed down against
the spring force.
• Push the tool down until the cutter touches the workpiece, then relock it
using the clamping lever (11).
• Loosen button 9 (counter-clockwise).
• Set button 15 to zero.
• Use button 8 to set the depth all the way down.
• Tighten button 9 (clockwise). The plunge depth is now set to precisely 0 mm.
Rough setting:
• Read the value from the scale (12).
• Loosen button 9 (counter-clockwise).
• Turn button 8 and re-read the value from the scale. The difference between
the two values is the plunge depth setting. For example: If the value on the
scale (12) is 8.5 in the zero-setting and the value is 7.0 after button (8) has been
turned, then the plunge depth has been set to 1.5 cm.
• Retighten button 9 (clockwise).
Fine adjustment:
• Loosen button 9 (counter-clockwise).
• The top button (15) is still set to zero. Give this button a full counter-clockwise
turn, until it is back in the zero position. The plunge depth is now 1.0 mm less.
• If required, the plunge depth can be set accurately to within 0.1 mm.
• Retighten button 9.
Adjustment using the r
evolver- depth stop
The revolver-depth stop enables you to quickly choose between six different cut-
ting depths. These are also determined by the adjustment of the depth stop (10).
• Adjust the required cutting depth by rotating the revolver-depth stop (21).
Helpline No. UK / Northern Ireland 0870 7323023 • Rep. Ireland 1800 481005
Web Support: www.omegawolf.com/powercraft
Model Number:
PBF-1200 06
Safety instructions
The following symbols are used in these instructions for use:
Read the instructions carefully.
Conformity with the relevant EU safety directives.
Class II machine - double insulation - earth connection not required.
Danger of life and risk of injury as well as risk of damage to the
machine in case of non-adherence to the safety instructions in
these instructions of use.
Danger of electric shock.
Remove the plug from the mains socket.
Variable speed control
Wear ear and eye protection
Faulty and/or discarded electrical or electronic machines have to be
collected at the appropriate recycling locations.
General safety instr
uctions
Caution! Read all instructions. The non-observation of the instructions
mentioned below may cause an electric shock, fire and/or severe injuries. The
term “electric tool” mentioned below refers to mains-operated electric tools
(with power cord) and to rechargeable electric tools (without power cord).
Keep these instructions for use in a safe place.
1) Workplace
(a) Keep your workplace clean and tidy. Untidy and badly illuminated work
areas may lead to accidents.

Helpline No. UK / Northern Ireland 0870 7323023 • Rep. Ireland 1800 481005
Web Support: www.omegawolf.com/powercraft
Model Number:
PBF-1200 07
Safety instructions
(b) Do not operate this machine in potentially explosive environments
containing combustible liquids, gases or dusts. Electric tools send out
sparks which may ignite dust or vapours.
(c) Keep children and other persons away from the electric tool during use.
When distracted, you may lose control over the apparatus.
2) Electric safety
(a) The plug of the machine has to be suitable for the socket. The
connector may not be modified in any way. Do not use an adapter plug
together with earthed devices. Unchanged connectors and fitting
sockets reduce the risk of an electric shock.
(b) Avoid body contact to earthed surfaces, such as pipes, radiator, stoves
and refrigerators. There is a higher risk of an electric shock, if your body
is earthed.
(c) Keep the machine clear of rain or humidity. The penetration of water
into an electrical device increases the risk of an electric shock.
(d) Do not use the cable for unintended purposes, to carry or suspend the
machine or to pull the connector out of the socket. Keep the cable clear
of heat, oil, sharp edges or any moving parts. Damaged or entangled
cables increase the risk of an electric shock.
(e) When using an electric tool in the open, use an extension cable only
which has been approved for outdoor use. The use of an extension
cable suitable for use in the open will reduce the risk of an electric
shock. Always use an RCD (redicual circuit device or circuit breaker).
(f) Hold the machine at the insulated gripping surfaces as the belt grinder
may hit its own power cord. Damaging a live cable may make metal
machine parts live, which may lead to an electric shock.
3) Personal safety
(a) Please pay attention and watch what you are doing, and carry out the
work with the electric tool sensibly. Do not use the machine, when you
are tired or under the influence of drugs, alcohol or medicine. A
moment of carelessness in the use of the machine could lead to serious
injuries.
(b) Wear your safety equipment and always put on safety goggles. Wearing
personal protective gear, such as dust mask, anti-skid safety shoes, hard
hat and ear protection, depending on the type of use of the electric
tool, will reduce the risk of injury.
(c) Avoid unintentional operation. Make sure that the switch is in the
“OFF” position before you remove the plug from the socket. If you have
Helpline No. UK / Northern Ireland 0870 7323023 • Rep. Ireland 1800 481005
Web Support: www.omegawolf.com/powercraft
Model Number:
PBF-1200 14
Operation
Height setting of the router column
Fig. G
Button (14) is used to set the maximum height of the router.
The plunge depth is then fixed. This is usually necessary when using the tool on a
special router table.
Rough setting:
• Loosen the clamping lever (11). The router can then be pushed down against
the spring force.
• Hold button (14) between your thumb and index finger.
• Push the grey button (14) and use your other hand to push the router down at
the same time.
• Release the button. The router is now locked and will no longer return to its
original position.
Fine adjustment:
• Turn button (14) clockwise. This causes the router column to slowly move
down.
• Turn button (14) counter-clockwise. This causes the router column to slowly
move up.
Setting the plunge depth
Fig. G
The plunge depth can be adjusted by using buttons 8, 9, 11 and 15. If the plunge
15
14
8
11
12
9
21

Helpline No. UK / Northern Ireland 0870 7323023 • Rep. Ireland 1800 481005
Web Support: www.omegawolf.com/powercraft
Model Number:
PBF-1200 13
Operation
The ON/OFF switch
• To switch on the tool, press and hold the on/off switch (1, Fig. A1, page 4).
• If you release the on/off switch (1, Fig. A1, page 4), the tool will be switched
off.
• You can lock the on/off switch by pressing the on/off switch (1, Fig. A1, page 4)
and then button (5, Fig. A1, page 4). The switch lock can be released by briefly
pressing the on/off switch (1, Fig. A1, page 4).
• Do not put the machine down when the motor is still running. Do not place
the machine on a dusty surface. Dust particles may enter the mechanism.
Usage tips
• Hold the machine in rest position on the workpiece when switching the ma-
chine on or off. Otherwise the cutter in the collet may damage the workpiece.
The cutter in the collet may damage the workpiece.
• Clamp the workpiece and make sure that the workpiece cannot slide from un-
der the machine during the cutting activities.
• Hold the machine firmly and move it evenly over the workpiece. Do not force
the machine.
• Only use cutters which do not show any signs of wear. Worn cutters have a ne-
gative effect on the efficiency of the machine.
• Always switch off the machine first before removing the plug from the wall
socket.
Helpline No. UK / Northern Ireland 0870 7323023 • Rep. Ireland 1800 481005
Web Support: www.omegawolf.com/powercraft
Model Number:
PBF-1200 08
Safety instructions
your finger on the switch when carrying the machine or if you connect
the running machine to the socket, this may lead to accidents.
(d) Remove the adjusting tools or the spanners before switching on the
machine. A tool or a key which is located in a revolving part of the
machine may lead to injuries.
(e) Concentrate at all times. Ensure a safe stand and keep your balance at
all times. In this case you will be able to control the machine better in
unexpected situations.
(f) Wear suitable clothing. Do not wear any loose clothing or jewellery.
Keep your hair, clothing and gloves clear of any moving parts.
(g) If dust extraction or collection devices can be mounted, make sure that
they are connected properly and are used in the proper way. The use of
these pieces of equipment reduce hazards caused by dust.
4) Careful handling and use of electric tools
(a) Use the correct tool for the job at hand.
(b) Do not use an electric tool, if the switch is defective. An electric tool,
which cannot be switched on or off, is dangerous and has to be
repaired.
(c) Remove the plug from the socket before setting down the machine,
changing accessories or putting the machine aside. This precautionary
measure prevents the unintentional start of the machine.
(d) Keep unused electric tools out of reach of children. Do not permit
persons to use the machine who are not familiar with it or who have
not read these instructions. Electric tools are dangerous, if they are used
by inexperienced persons.
(e) Maintain the machine with care. Please check whether the movable
parts are perfectly operational and do not jam, whether parts have
broken or have been damaged in such a way that the function of the
machine is impaired. Have damaged parts repaired prior to using the
machine. Many accidents are caused by electric tools which are poorly
maintained.
(f) Keep all cutting tools sharp and clean.
(g) Use the electric tool, the accessories, the insert tools, etc according to
these instructions, and in the way described for this special type of
apparatus. In the process, take the working conditions and the work to
be carried out into consideration. Only use this belt sander for the
purpose for which it is intended.
(h) Use clamps or vice to hold work. It is safer then using your hands and
frees both hands to operate the tool.

Helpline No. UK / Northern Ireland 0870 7323023 • Rep. Ireland 1800 481005
Web Support: www.omegawolf.com/powercraft
Model Number:
PBF-1200 09
Safety instructions
5) Servicing
(a) Have your machine repaired by qualified expert staff using original
spare parts only.
(b) Caution! The use of accessories or add-on devices other than those
recommended in these instructions may mean a risk of injury. Use
original spare parts only.
Additional safety instr
uctions
• Please check workpieces for any obstructions on the surface of the material,
such as protruding nails etc., to protect the router head.
• Wait until the router has come to a complete stop before removing any bloc-
ked or routed material around the cutter. Use a long stick for this and not your
finger.
• Please keep your hands away from the routing surface.
• Immediately switch off the tool if it starts producing any unusual noise or
starts vibrating excessively.
Always check that the power supply corresponds to the voltage on the
rating plate.
Your machine is double insulated, therefore no earthwire is required.
• Immediately throw away old cables or plugs when they have been replaced by
new ones. It is dangerous to insert the plug of a loose cable in the wall outlet.
• Only use an approved extension cable suitable for the power input of the machi-
ne. The minimum conductor size is 1.5 mm
2
. When using a cable reel always un-
wind the reel completely.
Prior to mounting an accessory always unplug the tool.
Wait until the machine has come to a complete standstill and the cut-
ter has cooled down before replacing a cutter.
Helpline No. UK / Northern Ireland 0870 7323023 • Rep. Ireland 1800 481005
Web Support: www.omegawolf.com/powercraft
Model Number:
PBF-1200 12
Assembly
Mounting the adapter for dust extraction
Fig. E Fig. F
Use the dust adapter for the extraction of dust.
• Mount the dust adapter (24, Fig. E) with the screws (22) on the cutter sole (3).
• Place the dust tube (25) in the dust output (16 Fig. F).
• Place the tube of your vacuum cleaner on the dust tube (25, Fig. F).
Keep the outlet of the machine behind the machine for a good view
on the workpiece.
16
25
22
24
22
3

Helpline No. UK / Northern Ireland 0870 7323023 • Rep. Ireland 1800 481005
Web Support: www.omegawolf.com/powercraft
Model Number:
PBF-1200 11
Assembly
• Slide the parallel fence onto the mounted rods until it is in full contact with
the workpiece. The zero-position is now set.
• Attach the ruler (17, Fig. C, page 5) to the rod of the parallel guide. The zero on
the ruler must be aligned with the zero mark (18, Fig. A1, page 4).
• Loosen the parallel fence fixing screw (4, Fig. C, page 5) and move the fence
until the desired setting has been reached. Important: when adjusting the pa-
rallel fence, please take into account the diameter of the cutter.
• Retighten the fixing screw (4, Fig. C, page 5).
Mounting the guide bush
Fig. D
The guide bush is a handy aid for cutting a pattern.
• Mount the guide bush (23) on the router base (3) using the screws (22).
3
23
Helpline No. UK / Northern Ireland 0870 7323023 • Rep. Ireland 1800 481005
Web Support: www.omegawolf.com/powercraft
Model Number:
PBF-1200 10
Assembly
Mounting and removing cutters
Fig. B
Only use cutters with a shaft diameter which corresponds with the size of the col-
let. Only use cutters which are suited for the maximum speed of the machine. The
cutter diameter should not exceed the maximum diameter (see ‘Technical specifi-
cations’).
• Press the spindle lock (7) and turn the collet nut (6) until it engages in the lock.
Keep the spindle lock pressed during this procedure.
• Open the collet nut using the wrench.
• Place the cutter shaft in the collet.
• Tighten the collet nut so that the cutter is locked properly.
• Open the collet nut when you want to replace a cutter.
Adjusting the parallel fence r
uler
The parallel fence is a useful tool for precision routing at a fixed distance from the
edge of the workpiece.
• Place the desired cutter in the tool.
• Loosen the clamping lever (11, Fig A1, page 4).
• Push the tool down until the cutter sticks out from the base plate, then re-
tighten the clamping lever (11, Fig A1, page 4).
• Place the router onto the workpiece in such a manner that the cutter touches
the side of the workpiece. Please ensure that the furthest protruding part of
the cutter touches the workpiece (by turning the cutter if necessary).
• Slide the provided guide rods (20, Fig. C, page 5) into the appropriate holes.
7
6
/