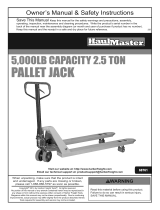
Pallet Jack
Item 68760 / 68761
INSTRUCTIONS AND PRECAUTIONS
Capacity 2-1/2 Ton (5,000 LB.)
Control Lever 3 Position
Fork
Height
Maximum 7-1/2 IN.
Minimum 3 IN.
Fork Length 47-1/2 IN.
Fork Width 6-1/4 IN.
Width over Forks 27 IN.
Steering Wheel Dia. 7 IN.
Copyright
©
2011 by Harbor Freight Tools
®
. All rights reserved. No portion of this document or any
artwork contained herein may be reproduced in any shape or form without the express written consent
of Harbor Freight Tools. Diagrams within this document may not be drawn proportionally. Due to
continuing improvements, actual product may differ slightly from the product described herein. Tools
required for assembly and service may not be included.
When unpacking, make sure that the product is intact and undamaged.
If any parts are missing or broken, please call
1-800-444-3353 as soon as possible.

Page 2 Item 68760 / 68761
1. Do not exceed 5,000 lb. capacity.
Be aware of dynamic loading!
Sudden load movement may
causing product failure.
2. Wear ANSI-approved safety
goggles, heavy-duty work
gloves and non-skid footwear
during assembly and use.
3. Use as intended only. Do not
use to support people or animals
or use for aircraft purposes.
4. Keep clear of fork and
load while raised.
5.
surface able to withstand
weight of truck and load.
6. Do not leave unattended
while under load.
7. Only use with balanced,
properly secured load.
8. Inspect before every use; do not
use if parts loose or damaged.
9. This product is not a toy. Do
not allow children to play
with or near this item.
10. Do not operate while under the
11. Do not wear loose clothing or
jewelry, and wear restrictive
hair covering, as they can be
caught in moving parts.
12. Before each use, carefully inspect
the wheels, Handle Frame, Chassis
and Handle for proper operation.
Do not use the Jack unless all
components are operating properly.
13. Maintain product labels and
nameplates. These carry important
safety information. If unreadable
or missing, contact Harbor
Freight Tools for a replacement.

Page 3Item 68760 / 68761
Read the ENTIRE
IMPORTANT SAFETY
INFORMATION
You will need to attach the Handle
to the base of the Jack before
and Diagrams near the end of
this manual for part numbers.
Tighten hardware to no more
than 43 ft-lb, using a torque
wrench (sold separately).
1.
from the Handle Bracket (D151).
2. Set the Handle (D610A or B) on
the Handle Bracket, making sure
that the Chain (D612) and the
Adjusting Bolt (D614) pass through
the large opening in the center of
the Handle Bracket and the hole
in the center of the Shaft (D153).
3. Slide the Washers (D616)
onto the Screws (D611) then
insert the Screws through the
Handle into the Handle Bracket
(D151) and tighten securely.
4.
insert the Adjusting Bolt (D614)
into the slotted open end, keeping
the Adjusting Nut (D615) on the
underside of the Lever Plate.
The Control Lever on the Handle has
a.
Handle
Control Lever
Drive
Lower
to its lowest position. Pump
the Handle frame up and
down to lift the Jack Forks.
b. Drive - Move the Handle to
the center position. The Jack
Forks do not change position
when in drive. This position is
used when the load is moved
from one location to another.
c. Lower - Hold the Handle up
in its highest position. This
position automatically moves
the Forks to their lowest level.
This position is only in place as
long as you hold the Handle up.
The Handle moves back to the
Drive position when released.
If the Handle does not function
properly, make adjustments as
described in the following chart
by turning the Adjusting Nut
(D615). After each adjustment,
check that all positions of the

Page 4 Item 68760 / 68761
Control Lever function properly
and re-adjust if needed.
Drive
Forks rise
instead of
staying in
neutral.
Clockwise
until pumping
action does not
raise forks.
Drive
Forks lower,
or lower when
pumping handle
is in Drive
position.
Counterclockwise
until forks do
not lower.
Lower
Forks do
not lower.
Clockwise until
raising the Control
Lever lowers
the Forks.
Forks do not
elevate.
Counterclockwise
until the Forks
elevate while
pumping in the
Before every use, check that
there is enough oil in the Jack
by lowering the Forks, removing
the Oil Plug (D149) from the
high quality hydraulic oil to
To Bleed the Jack of excess air:
1. Hold the Control Lever up to its
highest position to lower the Forks.
2.
3. Pump the Handle up and
down several times to push
excess air out of the Jack.
4. If needed add oil to the
5.
Read the ENTIRE
IMPORTANT SAFETY
INFORMATION
1. Hold the Control Lever in its
highest position to lower the Forks,
then release the Control Lever.
2. Slide the Forks under the load,
being careful to center the load over
the Forks, and to have the main
weight of the load resting as near
as possible to the Steering Wheels.
3. Push the Control Lever down to
Handle until the load is raised off
4. Move the Control Lever to the
Drive position and wheel the
load to the desired location.
5. Hold the Control Lever in its
highest position to lower the Forks,
then release the Control Lever.
6. Slide the Forks out from
under the load.
7.
the Control Lever in its highest
position to Lower the Forks.
8. Store in a clean dry place
away from children.

Page 5Item 68760 / 68761
PLEASE READ THE FOLLOWING CAREFULLY
If product has no serial number, record
month and year of purchase instead.
Some parts are listed and shown for illustration purposes
only, and are not available individually as replacement parts.

Page 6 Item 68760 / 68761
Read the ENTIRE IMPORTANT SAFETY INFORMATION
1. Lower Jack completely after every use.
2. Periodically use motor oil or grease to lubricate all moveable parts.
3.

Page 7Item 68760 / 68761
The Forks do not
raise completely.
through Oil Plug hole.
The forks will
not raise.
1.
2. Air in valve chamber.
3. Old/contaminated oil.
1.
through Oil Plug hole.
2.
Upper position and pump the
handle several times.
3. Change oil and replace Seals.
The forks will
not descend.
1. Deformed piston rod.
2. Piston rod rusted.
3. Control handle, bolt, or
chain broken or missing.
1.
2. Lubricate/replace rod. Keep Jack in
lowered position when not in use.
3.
Fluid Leak. Component, likely seal,
worn or damaged.
Inspect and replace worn or damaged parts.
Forks descend
without operating
release valve.
1. Contaminated oil clogging valve.
2. Hydraulic component damaged.
1. Clean valve with kerosene and change oil.
2.

Page 8 Item 68760 / 68761
D601 Spring 1
D602 Blade Spring 1
D603 1
D604 Elastic Pin 1
D605 Elastic Pin 1
D606 Elastic Pin 1
D607 Elastic Pin 1
D608 Control Handle 1
D609 Pull Board 1
D610B Handle (For Type A) 1
D610A Handle (For Type B) 1
D611 Screw 3
D612 Chain 1
D613 Pin 1
D614 Adjusting Bolt 1
D615 Adjusting Nut 1
D616 Washer 3

Page 9Item 68760 / 68761
D201 Screw 1
D202 Oil Holder 1
D203 1
D204 Elastic Pin 1
D205 2
D206 Joint (For Type A) 2
D206D Joint (For Type B) 2
D207 Shaft 2
D208 2
D208D 2
D209 Nut (For Type A) 2
D209D Nut (For Type B) 2
D210 Pin 2
D211 Shaft 1
D212 Shaft 2
D213 Elastic Pin 2
D214 Shaft 2
D215 2
D216 Elastic Pin 2
D217 4
D218 Fork Frame 1
D219 Washer 4
D220 Bearing 4
D221 4
D222 Linking Plate 4
D223 Elastic Pin 8
D224 Bushing 4
D225 Bushing 2
D226 Bolt 2
D227 2
D228 Nut 2
D229 2
D230 2
D231 Washer 2
D232 Washer 4

Page 10 Item 68760 / 68761
D101 1
D102 Washer 1
D103 Spring 1
D104 1
D105 Y-Seal 1
D106 Screw (For Type A) 1
D106B Screw (For Type B) 1
D107 1
D107B 1
D108 Spring 1
D109 1
D110
(For Type A)
1
D110B Screw (For Type B) 1
D111 1
D111B 1
D112 Steel Ball 1
D113 Pump Base 1
D115 Elastic Pin 1
D116 Steering Wheel 2
D118 Thrust Plate 1
D119 Oil Holder 1
D120 1
D121 Bearing Cover 1
D122 Bearing 1
D123 Elastic Pin 2
D124 Dust Cover 2
D127 Bearing 4
D129 Spring 1
D130 Strike Pin 1
D131 2
D132 Lever Plate 1
D133 Adjusting Screw 1
D134 Nut 1
D135 1
D136 Axle Sleeve 1
D137 Adjusting Bolt 1
D139 1
D140 Spring 1
D141 1
D142 Screw 1
D143 1
D144 Y-Seal 1
D145 Elastic Pin 1
D146 Steel Ball 1
D147 1
D148 1
D149 Oil Plug 1
D150 Shaft 1
D151 Handle Bracket 1
D152 1
D153 Shaft 1
D154 Elastic Pin 1
D155 Elastic Pin 1
D156 Bushing 1
D157 Seal Washer 1
D158 Bushing 2
D159B Sleeve (For Type B) 1
D160B Screw (For Type B) 1

Page 11Item 68760 / 68761

Harbor Freight Tools Co. makes every effort to assure that its products meet high quality and durability
standards, and warrants to the original purchaser that this product is free from defects in materials
and workmanship for the period of 90 days from the date of purchase. This warranty does not apply
to damage due directly or indirectly, to misuse, abuse, negligence or accidents, repairs or alterations
outside our facilities, criminal activity, improper installation, normal wear and tear, or to lack of
maintenance. We shall in no event be liable for death, injuries to persons or property, or for incidental,
contingent, special or consequential damages arising from the use of our product. Some states do
not allow the exclusion or limitation of incidental or consequential damages, so the above limitation
of exclusion may not apply to you.
AND FITNESS.
To take advantage of this warranty, the product or part must be returned to us with transportation
charges prepaid. Proof of purchase date and an explanation of the complaint must accompany the
election or we may elect to refund the purchase price if we cannot readily and quickly provide you with
a replacement. We will return repaired products at our expense, but if we determine there is no defect,
or that the defect resulted from causes not within the scope of our warranty, then you must bear the
cost of returning the product.
to state.
-
 1
1
-
 2
2
-
 3
3
-
 4
4
-
 5
5
-
 6
6
-
 7
7
-
 8
8
-
 9
9
-
 10
10
-
 11
11
-
 12
12
Harbor Freight Tools 68761 Owner's manual
- Type
- Owner's manual
- This manual is also suitable for
Ask a question and I''ll find the answer in the document
Finding information in a document is now easier with AI
Related papers
-
Pittsburgh Automotive Item 03338 Owner's manual
-
Pittsburgh Automotive Item 61160 Owner's manual
-
Pittsburgh Automotive 60659 Owner's manual
-
Pittsburgh Automotive 800 lb. Low Lift Transmission Jack Owner's manual
-
Harbor Freight Tools Item 68385 Owner's manual
-
Harbor Freight Tools 66171 Owner's manual
-
Pittsburgh Automotive 60315 Owner's manual
-
Harbor Freight Tools Jumbo Helping Hands with LED Lights User manual
-
Pittsburgh Automotive 800 lb. Low Lift Transmission Jack Owner's manual
-
Harbor Freight Tools Steering Wheel Remover Set User manual
Other documents
-
Vestil PM5-2748-Y Owner's manual
-
 Haul-Master Item 68761-UPC 193175329677 Owner's manual
-
Vestil ALL-T-2 User manual
-
 Strongway 55830 Owner's manual
-
 ROUGHNECK Pallet Truck Owner's manual
-
Pittsburgh Automotive Item 46319 Owner's manual
-
Pittsburgh Automotive 60240 Owner's manual
-
Vestil PM2-2044 Owner's manual
-
 Kleton ML972 User manual
-
Central Machinery 60604 Owner's manual


