JVC HV-29JH24 User manual

Category
LCD TVs
Type
User manual
INSTRUCTIONS
COLOUR TELEVISION
Contents
HV-29JH24
HV-29JH54
HV-29JH74
HV-29VH14
HV-29VH54
GGT0056-001A-H
Introduction of the functions
Setting up your TV
TV buttons and functions
Remote control buttons
and functions
Using the TV's menu
Basic operation
PICTURE SETTING menu
PICTURE FEATURES menu
SOUND SETTING menu
FEATURES menu
INSTALL menu
Additional preparation
Troubleshooting
Specification
. . . . . . 2
. . . . . . . . . . . . . 3
. . . . . . . . 6
. . . 8
. . . . . . . . . . . . 19
. . . . . . . . . . . . . . 19
. . . . . 20
. . . 21
. . . . . . 25
. . . . . . . . . . . 26
. . . . . . . . . . . . . . 29
. . . . . . . . . . 35
. . . . . . . . . . . . . . 37
. . . . . . . . . . . . . . . . . 40
04_Eng.book.fm Page 1 Friday, August 6, 2004 2:00 PM
2
ENGLISH
HV-29JH24/29JH54/29JH74/29VH14/29VH54 / GGT0056-001A-H / English
Thank you for buying this JVC colour television.
To make sure you understand how to use your new TV, please read this manual thoroughly
before you begin.
1 Operate only from the power source indicated on the rear of the TV.
2 Avoid damaging the power cord and mains plug. When unplugging the TV, grasp the
mains plug. Do not pull on the power cord.
3 Never block or cover the ventilation
openings.
Never install the TV where good ventilation is
unattainable.
When installing this TV, leave spaces for
ventilation around the TV of more than the
minimum distances as shown.
4 Do not allow objects or liquid into the cabinet
openings.
5 In the event of a fault, unplug the unit and call a service technician. Do not attempt to repair
it yourself or remove the rear cover.
6 The surface of the TV screen is easily damaged. Be very careful with it when handling the
TV. Should the TV screen become soiled, wipe it with a soft dry cloth. Never use rub it
forcefully. Never use any cleaner or detergent on it.
7 If you are not going to use this TV for a long period of time, be sure to disconnect the AC
plug from the AC socket.
8 The apparatus shall not be exposed to dripping or splashing and that no objects filled with
liquids, such as vases, shall be placed on the apparatus.
Introduction of the functions
WARNING: TO PREVENT FIRE OR SHOCK HAZARD, DO NOT EXPOSE THIS
APPLIANCE TO RAIN OR MOISTURE.
CAUTION: TO ENSURE PERSONAL SAFETY, OBSERVE THE FOLLOWING
RULES REGARDING THE USE OF THIS TV.
Function Description
DigiPure The DigiPure function uses the latest digital technology to give you
a natural looking picture.
Progressive Scan
(525P / 625P signal
possible)
This TV can display the Progressive video signal both of 525P
(NTSC) and 625P (PAL) signal.
Cinema Surround The Cinema Surround function gives you a surround sound with a
“live” effect.
15 cm
10 cm 10 cm 15 cm
04_Eng.book.fm Page 2 Friday, August 6, 2004 2:00 PM
3
HV-29JH24/29JH54/29JH74/29VH14/29VH54 / GGT0056-001A-H / English
Setting up your TV
CAUTION
Turn off all the equipment including the
TV before connecting anything.
1 Connecting the aerial and VCR
Aerial cable is not supplied. Use a
good quality 75-ohm coaxial cable.
Read the manual that came with the
VCR before connecting.
If not connecting a VCR (see Fig. A):
Connect an aerial cable to the aerial socket
on this TV.
If connecting a VCR (see Fig. B):
1 Connect the aerial cable to the aerial
input socket on the VCR, and connect
the VCR and TV with another aerial
cable.
2 Connect the VCR’s VIDEO OUT (video
output) jack and the TV’s VIDEO jack
with a video cable.
To connect a VCR to the TV with an S-
VIDEO cable:
Connect the VCR’s S-VIDEO OUT (S-
VIDEO output) connector and TV’s S
connector with an S-VIDEO cable A,
instead of connecting with a video cable.
3 Connect the VCR’s AUDIO OUT (audio
L/R output) jacks and the TV’s AUDIO
jacks (L/MONO and R) with an audio
cable.
If the VCR’s audio output is in mono,
connect the VCR’s AUDIO OUT (audio
output) jack and the TV’s AUDIO L/
MONO jack with an audio cable.
R
RL
L/MONO
L/MONOR
VIDEO
VIDEO-2
VIDEO
OVER
S
VIDEO-3/
COMPONENT
VIDEO-1
OUTPUT
P
R
/C
R
P
B
/C
B
Y/VIDEO
AUDIO
AUDIO
AUDIO
R
RL
L/MONO
L/MONOR
VIDEO
VIDEO-2
VIDEO
OVER
S
VIDEO-3/
COMPONENT
VIDEO-1
OUTPUT
P
R
/C
R
P
BB
/C
Y/VIDEO
AUDIO
AUDIO
AUDIO
Back of the TV
Fig. A
Back of the TV
Fig. B
04_Eng.book.fm Page 3 Friday, August 6, 2004 2:00 PM
4
HV-29JH24/29JH54/29JH74/29VH14/29VH54 / GGT0056-001A-H / English
Setting up your TV
2 Connecting the power cord
Connect the mains plug to the AC outlet.
3 Putting the batteries into the
remote control
Use two AA/R6 batteries.
Insert the batteries from the - end, making
sure the + and - polarities are correct.
Follow the warnings printed on the
batteries.
If the remote control does not work
properly, replace the batteries.
The batteries we supply are only for
setting up and testing your TV. Please
replace them as soon as necessary.
4 Making the initial settings
When the TV is first turned on, it enters the
initial setting mode, and the JVC logo is
displayed.
1 Press the main power button on the
TV.
The TV is turned on, and the JVC logo
appears.
If the POWER lamp on the TV lights
red and does not change to green,
your TV is in the standby mode. Press
the POWER button on the remote
control to turn the TV on.
If the JVC logo does not appear, your
TV has already been turned before. In
this case, use the “LANGUAGE” and
“AUTO PROGRAM” functions to make
the initial settings. For details, see
“INSTALL menu” on page 29.
2 Press the MENU/OK button.
The LANGUAGE menu appears. You
can choose a language for the on-screen
language.
POWER
HV-29VH14 / HV29VH54
Main power button
POWER lamp
Main power button
POWER
VRL/MONO
S
IN (VIDEO-4)
OVER
POWER
MENU
CHANNEL
VOLUME
TV/VIDEO
OK EXIT
HV-29JH24 / HV-29JH54 /
HV-29JH74
POWER lamp
04_Eng.book.fm Page 4 Friday, August 6, 2004 2:00 PM
5
HV-29JH24/29JH54/29JH74/29VH14/29VH54 / GGT0056-001A-H / English
Setting up your TV
3 Press the 6 buttons to choose
ENGLISH. Then press the MENU/ OK
button.
The AUTO PROGRAM function starts.
The TV channels you receive are
automatically stored in the PR
(programme numbers) LIST.
To stop the AUTO PROGRAM
function, press the MENU/OK button.
4 After the TV channels have been
stored in the programme numbers
(PR) list, the EDIT menu appears.
You can proceed to edit the
programme numbers list using the
EDIT/MANUAL function. For details,
see “EDIT/MANUAL” on page 30.
If a TV channel you want to view is not
stored in the programme numbers list,
you can register it using the MANUAL
function. For details, see “EDIT/
MANUAL” on page 30.
The AUTO PROGRAM function does
not store a TV channel to the
programme number 0 (AV).
If you do not need to use the EDIT/
MANUAL function, press the MENU/
OK button to close the EDIT menu.
Now, setting up is complete. Please
enjoy your new JVC TV!
7
RETURN
+
4
1
MENU
0
8
5
2
9
6
3
MUTING
COLOUR
SYSTEM
SOUND
CINEMA
SURROUND
DISPLAY
ZOOM
TV/TEXT
TV/VIDEO
PICTURE
MODE
CHANNEL VOLUME
RM-C1350 TV
FAVORITE CH
POWER
OK
PIP
SUB-P
RM-C1351 TV
FAVORITE CH
RM-C1353 TV
FAVORITE CH
Except
HV-29JH54
HV-29VH14
HV-29VH54
Except
HV-29JH24
HV-29VH14
HV-29JH24
HV-29JH54 / HV-29VH54
Except
HV-29JH24
HV-29VH14
HV-29JH74
FAVORITE CH
HV-29VH14
04_Eng.book.fm Page 5 Friday, August 6, 2004 2:00 PM
6
HV-29JH24/29JH54/29JH74/29VH14/29VH54 / GGT0056-001A-H / English
TV buttons and functions
Turn the main power on
Press the main power button 1.
The POWER lamp 2 lights red and your TV
is in the standby mode.
To turn the main power off:
Press the main power button again. The
POWER lamp 2 goes off.
Turn the TV on from standby
mode
Press the CHANNEL-/+ buttons 5.
The POWER lamp 2 lights red to green
and your TV will be turned on.
You can also turn on the TV by
pressing the TV/VIDEO button 3
while it is in standby mode.
Choose a TV channel
Press the CHANNEL-/+ buttons 5.
Choose a VIDEO terminal
Press the TV/VIDEO button 3 or
CHANNEL-/+ buttons 5.
Adjust the volume
Press the VOLUME-/+ buttons 4.
The volume level indicator appears.
MENU button 6
Press to open the menu.
For details, see “Operation with the buttons
on the TV” on page 20.
Remote control sensor 7
(Behind the cover)
VIDEO-4 terminal 8
See page 35.
Headphone jack 9
Connect the headphones with a stereo
mini-jack (3.5mm in diameter).
S
IN (VIDEO-4)
VR
MENU
OK
L/MONO
OVER
CHANEL VOLUME
TV/VIDEO
EXIT
986543
POWER
1
7
2
HV-29VH14 / HV29VH54
VRL/MONO
S
IN (VIDEO-4)
OVER
POWER
MENU
CHANNEL
VOLUME
TV/VIDEO
OK EXIT
VRL/MONO
S
IN (VIDEO-4)
OVER
MENU
CHANNEL
VOLUME
TV/VIDEO
OK EXIT
98
65 4
3
(Behind the cover)
(Behind the cover)
POWER
HV-29JH24 / HV-29JH54 /
HV-29JH74
2
1
7
VRL/MONO
S
IN (VIDEO-4)
OVER
POWER
MENU
CHANNEL
VOLUME
TV/VIDEO
OK EXIT
04_Eng.book.fm Page 6 Friday, August 6, 2004 2:00 PM
7
HV-29JH24/29JH54/29JH74/29VH14/29VH54 / GGT0056-001A-H / English
TV buttons and functions
VIDEO-1 terminal 0
See pages 3 and 35.
VIDEO-2 terminal -
See page 35.
VIDEO-3/COMPONENT
terminal =
See pages 28 and 35.
OUTPUT terminal ~
See page 35.
Aerial socket !
Connect the aerial cable.
See page 3.
S
VIDEO
VIDEO-1
VIDEO-2
VIDEO-3/
COMPONENT
OUTPUT
Y/VIDEO
VIDEO
L/MONO
AUDIO
OVER
R
L/MONO
AUDIO
R
L
AUDIO
R
0
-
=
~
!
S
VIDEO
VIDEO-1
VIDEO-2
VIDEO-3
COMPONENT
OUTPUT
Y/VIDEOC
B
C
R
VIDEO
L/MONO
AUDIO
OVER
R
L/MONO
AUDIO
R
L
AUDIO
R
P/C
RR
P/C
BB
04_Eng.book.fm Page 7 Friday, August 6, 2004 2:00 PM
8
HV-29JH24/29JH54/29JH74/29VH14/29VH54 / GGT0056-001A-H / English
Remote control buttons and functions
Turn the TV on from standby
mode
Press the POWER button.
The POWER lamp lights red to green and
your TV will be turned on.
You can turn on the TV from the
standby mode by pressing the TV/
VIDEO button, the CHANNEL-/+
buttons or the number buttons.
To turn the TV off:
Press the POWER button again.
The POWER lamp changes from green to
red and the TV enters standby mode.
Choose a TV channel
Choose a programme number in which a
TV channel has been set.
Press the CHANNEL-/+ buttons or enter
the programme number (PR) with the
number buttons.
If you want to put a two-digit channel
into the TV, press the -/--button to
change to the two-digit entry system.
You can select a channel from the PR
LIST. For details, see “DISPLAY
button” on page 11.
If you do not have a clear picture or no
colour appears, follow the operation
procedure “COLOUR SYSTEM button”
on page 11.
Adjust the volume
Press the VOLUME-/+ buttons.
Watch images from an
external device
Choose a VIDEO terminal to which the
external device has been connected.
Press the TV/VIDEO button.
You can choose a VIDEO terminal with
the CHANNEL-/+ buttons or from the
PR LIST.
To return to a TV channel:
Press the TV/VIDEO button, the
CHANNEL-/+ buttons or the number
buttons.
7
RETURN
+
4
1
MENU
0
8
5
2
9
6
3
MUTING
COLOUR
SYSTEM
SOUND
CINEMA
SURROUND
DISPLAY
ZOOM
TV/TEXT
TV/VIDEO
PICTURE
MODE
CHANNEL VOLUME
RM-C1350 TV
FAVORITE CH
POWER
OK
PIP
SUB-P
RM-C1351 TV
FAVORITE CH
RM-C1353 TV
FAVORITE CH
Except
HV-29JH54
HV-29VH14
HV-29VH54
Except
HV-29JH24
HV-29VH14
HV-29JH24
HV-29JH54 / HV-29VH54
Except
HV-29JH24
HV-29VH14
HV-29JH74
FAVORITE CH
HV-29VH14
04_Eng.book.fm Page 8 Friday, August 6, 2004 2:00 PM
9
HV-29JH24/29JH54/29JH74/29VH14/29VH54 / GGT0056-001A-H / English
Remote control buttons and functions
MUTING button
Press the MUTING button to turn off the
volume. Pressing the MUTING button again
resumes the previous volume level.
ZOOM button
You can change the screen size according
to the picture aspect ratio. Choose the
optimum one from the following ZOOM
modes.
Press the ZOOM button to choose a
mode.
The ZOOM button works only in the
normal screen.
REGULAR:
Use to view a normal picture (4:3 aspect
ratio) as its original size is.
ZOOM:
You can zoom up the Wide picture (16:9
aspect ratio) to fill the TV screen.
The left side and right side of the Wide
picture (16:9 aspect ratio) will be cut
off.
16:9:
This mode converts a normal picture (4:3
aspect ratio) into a Wide picture (16:9
aspect ratio).
Use for picture with a 16:9 aspect ratio
that have been squeezed into a normal
picture (4:3 aspect ratio), you can
restore their original dimensions.
CINEMA SURROUND button
You can enjoy an enhanced sound for a
wider audience by using CINEMA
SURROUND function.
Press the CINEMA SURROUND button to
select one of CINEMA SURROUND
modes.
HIGH/LOW:
When you listen to the stereo sound, please
select HIGH or LOW mode.
You can enjoy the sound for a wider
audience similar to the experience at the
theatre.
In case that you setting up the
CINEMA SURROUND function to
HIGH mode, there may be slight
volume distortion. In case that occurs,
please switch the HIGH mode to LOW
mode, the effect of CINEMA
SURROUND functions will be less
noticeable, however, the volume
distortion will be corrected.
MONO:
Select the MONO mode, when you listen to
the mono sound.
You can enjoy the sound for a wider
audience similar to stereo sound.
OFF:
The CINEMA SURROUND function
switches off.
PICTURE MODE button
You can choose one of three PICTURE
MODEs (three kinds of picture setting) to
adjust the picture settings automatically.
Press the PICTURE MODE button to
choose a mode.
BRIGHT:
Heightens contrast and sharpness.
STANDARD:
Standardizes picture adjustment.
SOFT:
Softens contrast and sharpness.
04_Eng.book.fm Page 9 Friday, August 6, 2004 2:00 PM
10
HV-29JH24/29JH54/29JH74/29VH14/29VH54 / GGT0056-001A-H / English
Remote control buttons and functions
RETURN+ button
The RETURN+ button has two functions;
the RETURN+ function and the RETURN
function. If a channel has been registered
as the “Return Channel”, the RETURN+
function operates. If there is no setting for
the “Return Channel”, the RETURN function
operates.
RETURN+ function
By registering a channel you frequently
view as the “Return Channel”, you can
select that channel at any time simply by
pressing the RETURN+ button.
To register a TV channel as the “Return
Channel”:
Choose the Programme number to which
the channel you want to register has been
set, and press the RETURN+ button and
hold for more than 3 seconds continuously.
“RETURN PLUS PROGRAMMED!” is
displayed and the registration is completed.
To cancel a TV channel registered as the
“Return Channel”:
While viewing any TV channel, press the
RETURN+ button and hold for more than 3
seconds continuously. “RETURN PLUS
CANCELED!” is displayed and the
registration is cancelled.
When you turn off the TV, the
registration for the “Return Channel” is
cancelled.
If you want to view the “Return
Channel” and another TV channel
alternately, first choose a channel
other than the “Return Channel”. And
then press the RETURN+ button to
change the channel to the “Return
Channel” In this way, you can view two
channels alternately by pressing the
RETURN+ button.
RETURN function
The TV temporarily memorises the TV
channel that was chosen right before the
current TV channel as the “Last Channel”.
By pressing the RETUTN+ button, you can
alternately view the current TV channel and
the “Last Channel”.
If you want to view two channels
alternately by using the RETURN
function, first choose one TV channel
and then choose the other TV channel
with the Number buttons. If you choose
the TV channel without using the
Number buttons, there are cases
where a channel other than the one
you first chose is registered as the
“Last Channel”.
svt/u button
When you are viewing a bilingual broadcast
programme, you can choose the sound
from Bilingual I (Sub I) or Bilingual II (Sub
II).
When the stereo broadcasting is
received poorly, you can change from
stereo to mono sound so that you can
hear the broadcast more clearly and
easily.
Press the svt/u button to choose a
sound mode.
s : Stereo sound
v : mono sound
t : Bilingual I (sub I)
u : Bilingual II (sub II)
MONO : Cancels the Multi Sound function,
and the sound becomes
monaural.
The sound mode you can choose
differs depending on the TV
programme.
This function does not work in the
VIDEO modes.
04_Eng.book.fm Page 10 Friday, August 6, 2004 2:00 PM
11
HV-29JH24/29JH54/29JH74/29VH14/29VH54 / GGT0056-001A-H / English
Remote control buttons and functions
DISPLAY button
You can display the PR LIST, programme
number or VIDEO terminal number on the
screen.
Press the DISPLAY button.
Press the DISPLAY button changes the
display as follows:
Choose a TV channel or a
VIDEO terminal
1 Press the DISPLAY button to display
the PR LIST.
2 Press the 6 and 5 buttons to
choose a programme number or
VIDEO terminal.
Then press the MENU/OK button.
For programme numbers with the
CHANNEL GUARD function set, the n
(CHANNEL GUARD) mark is
displayed next to the programme
number in the PR LIST.
The VIDEO terminals are registered
after the programme number PR99.
The AV channel (channel number 0) in
the PR LIST will be chosen only if you
connect the VCR to the TV with an
aerial cable without connecting a video
cable.
COLOUR SYSTEM button
The colour system is chosen automatically.
However, if the picture is not clear or no
colour appears, choose the colour system
manually.
Press the COLOUR SYSTEM button to
choose the appropriate colour system.
AUTO:
This function detects a colour system from
the input signal.
The AUTO mode may not function
properly if you have poor signal quality.
If the picture is abnormal in the AUTO
mode, choose another colour system
manually.
The AUTO mode detects a colour
system from the input signal and
chooses the appropriate colour system
automatically.
For the colour systems in each country
or region, see the table
“BROADCASTING SYSTEMS” on
page 12.
PAL/SECAM/NTSC3.58/NTSC4.43:
PAL, SECAM, or NTSC colour system.
SOUND SYSTEM button
The sound system is chosen automatically.
However, if you cannot hear the sound
normally even when the picture appears
normally, choose the sound system
manually.
Press the SOUND SYSTEM button to
choose the appropriate sound system.
B/G : B/G system
I : I system
D/K : D/K system
M : M system
This function does not work in the
VIDEO mode.
For the sound systems in each country
or region, see the table
“BROADCASTING SYSTEMS” on
page 12.
No indication
04_Eng.book.fm Page 11 Friday, August 6, 2004 2:00 PM
12
HV-29JH24/29JH54/29JH74/29VH14/29VH54 / GGT0056-001A-H / English
Remote control buttons and functions
BROADCASTING SYSTEMS
For sound and colour systems in your
country or region, refer to the table below:
COLOUR SYSTEM
SOUND SYSTEM
Favorite channel
registration
You can register your favorite TV channels
with the colour buttons (Red, Green, Yellow
and Blue). After registration you can recall
the favorite channel by pressing the colour
button.
1 In the normal screen, choose a TV
channel (PR01-99) you want to
register.
For detailed operation, see “Choose a
TV channel” on page 8.
2 Press and hold a colour button for 3
seconds or more.
Then “FAVORITE CHANNEL
PROGRAMMED!” appears on the screen
and the current channel is registered.
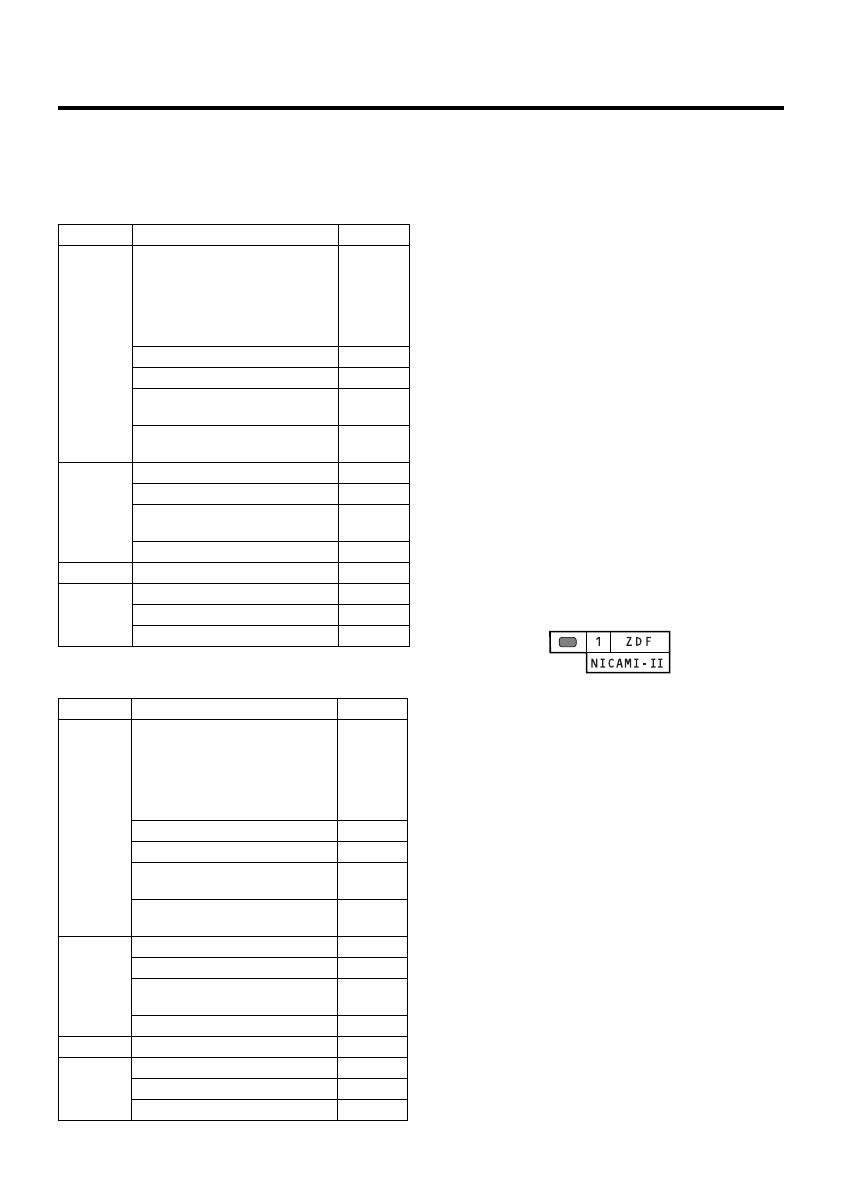
If the chosen channel is already
registered as the favorite channel,
when a colour button is pressed, the
registered colour button icon appears
on the top right of the screen.
You cannot register in the Text mode,
or while multiple screens, such as PIP
(picture in picture) are displayed.
Also you cannot register if the chosen
channel is guarded with the CHANNEL
GUARD function and the screen is
blue, or if an on-screen menu is
displayed.
Even if you perform AUTO PROGRAM
function, the registration made here
will not be changed. (For AUTO
PROGRAM, see page 29.)
Recalling the favorite channel
Press the colour button, then the registered
favorite channel will be displayed.
You cannot recall the favorite channel
in the Text mode, Menu mode where
an on-screen menu is displayed, or
while multiple screens are displayed.
Area Country or Region System
Asia,
Middle
East
Bahrain, Kuwait, Oman,
Qatar, United Arab Emirates,
Yemen, etc.
Indonesia, Malaysia,
Singapore, Thailand, India,
etc.
PAL
China, Vietnam, etc. PAL
Hong Kong, etc. PAL
Islamic Republic of Iran,
Lebanon, Saudi Arabia, etc.
SECAM
Philippines, Taiwan,
Myanmar, etc.
NTSC
Europe
Russia, etc. SECAM
Czech Republic, Poland, etc. PAL
Germany, Holland, Belgium,
etc.
PAL
UK, etc. PAL
Oceania Australia, New Zealand, etc. PAL
Africa
Republic of South Africa, etc. PAL
Nigeria, etc. PAL
Egypt, Morocco, etc. SECAM
Area Country or Region System
Asia,
Middle
East
Bahrain, Kuwait, Oman,
Qatar, United Arab Emirates,
Yemen, etc.
Indonesia, Malaysia,
Singapore, Thailand, India,
etc.
B/G
China, Vietnam, etc. D/K
Hong Kong, etc. I
Islamic Republic of Iran,
Lebanon, Saudi Arabia, etc.
B/G
Philippines, Taiwan,
Myanmar, etc.
M
Europe
Russia, etc. D/K
Czech Republic, Poland, etc. D/K
Germany, Holland, Belgium,
etc.
B/G
UK, etc. I
Oceania Australia, New Zealand, etc. B/G
Africa
Republic of South Africa, etc. I
Nigeria, etc. B/G
Egypt, Morocco, etc. B/G
04_Eng.book.fm Page 12 Friday, August 6, 2004 2:00 PM
13
HV-29JH24/29JH54/29JH74/29VH14/29VH54 / GGT0056-001A-H / English
Remote control buttons and functions
The picture effect dedicated for the
colour button applies. For details, see
“Setting the picture effect” below:
Setting the picture effect
Each colour button has a dedicated picture
effect. When you choose a favorite channel,
the dedicated picture effect is used. When
shipped, the factory set picture effect is
used for this purpose. However, you can set
this picture effect as required. For details,
see “FAVORITE CH SETTING” on page 24.
Showing the favorite channels
Press the DISPLAY button to display the
PR LIST.
You can see the favorite channel that has
the registered colour button icon at the right
of the channel number.
Viewing a teletext
programme
[Except HV-29JH54/HV-29VH14/
HV-29VH54]
1 Choose a TV channel with a teletext
broadcast.
2 Press the TV/TEXT button.
Pressing the TV/TEXT button changes
the mode as follows:
3 Choose a teletext page by pressing
the CHANNEL-/+ buttons, number
buttons or colour buttons.
To return to the TV mode:
Press the TV/TEXT button or TV/VIDEO
button.
If you have trouble receiving teletext
broadcasts, consult your local dealer
or the broadcast station.
In the Text mode, the ZOOM mode is
fixed to the REGULAR mode.
No menu operations are possible
when viewing a teletext programme.
If characters on a teletext programme
do not appear properly, change the
TELETEXT LANGUAGE setting. For
details, see “TELETEXT LANGUAGE”
on page 34.
ZDF
BBC1
TV mode
TV and
Text mode
Text mode
04_Eng.book.fm Page 13 Friday, August 6, 2004 2:00 PM
14
HV-29JH24/29JH54/29JH74/29VH14/29VH54 / GGT0056-001A-H / English
Remote control buttons and functions
(Hold) button
You can hold a teletext page on the screen
for as long as you want, even while several
other teletext pages are being received.
Press the (Hold) button.
The (hold) are displayed at the top left
of the screen.
To cancel the Hold function:
Press the (Hold) button again.
(Reveal) button
Some teletext pages include hidden text
(such as answers to a quiz).
You can display the hidden text.
Each time you press the (Reveal)
button, text is hidden or revealed.
(Size) button
You can double the height of teletext
display.
Press the (Size) button.
(Index) button
You can return to the index page instantly.
Press the (Index) button.
In the List mode, you can return to the
page number displayed in the lower
left area of the screen.
(Cancel) button
You can search for a teletext page while
watching TV.
1 Press the number button to enter a
page number, or press the colour
button.
The TV searches for a teletext page.
2 Press the (Cancel) button.
The TV programme appears. When the
TV finds the teletext page, its page
number appears in the upper left of the
screen.
3 Press the (Cancel) button to
return to a teletext page when the
page number is on the screen.
You cannot return to the TV mode with
the (Cancel) button.
(Sub-page) button
Some teletext pages include sub-pages that
are automatically displayed. You can hold
any sub-page, or view it at any time.
1 Press the (Sub-page) button to
operate the Sub-page function.
Sub-page numbers are displayed at the
left of the screen.
*: Background colour of the sub-page
number.
2 Press the CHANNEL-/+ buttons to
choose a sub-page number.
To cancel the (Sub-page) function:
Press the (Sub-page) button again.
Colour* Meaning of sub-page number
Yellow Currently being displayed.
White Can be displayed.
Blue or
Red
Cannot be displayed and it is not
sent.
04_Eng.book.fm Page 14 Friday, August 6, 2004 2:00 PM
15
HV-29JH24/29JH54/29JH74/29VH14/29VH54 / GGT0056-001A-H / English
Remote control buttons and functions
Using the List mode
You can store the numbers of your favorite
teletext pages in memory and call them up
quickly using the colour buttons.
To store the page numbers:
1 Press the MODE button to engage the
List mode.
The stored page numbers are displayed
at the bottom of the screen.
2 Press a colour button to choose a
position. Then press the number
buttons to enter the page number.
3 Press and hold down the (Store)
button.
The four page numbers blink white to
indicate that they are stored in memory.
To call up a stored page:
1 Press the MODE button to engage the
List mode.
2 Press a colour button to which a page
has been assigned.
To exit the List mode:
Press the MODE button again.
Twin and PIP (picture in
picture) function
[Except HV-29JH24/HV-29VH14]
You can display two different pictures, the
main picture and sub picture, at a time. In
Twin mode, both pictures are equal in size.
In PIP mode, the small sub picture appears
at a corner of the screen. You can swap the
main picture and sub picture instantly. Note
that the main and sub pictures use different
input sources each other. For example, if
the main picture’s source is TV, the sub
picture’s one will be VIDEO.
While watching a normal picture, press
the PIP button.
Pressing the PIP button changes the mode
as follows:
You can also enter this mode while in
the Multi-display mode, Freeze mode
or Strobe mode, except in the Text
mode.
To return to the normal screen:
Press the PIP button until the sub picture
disappears.
You can hear the sound from the main
picture only.
In the normal screen, if the current
channel is guarded with the CHANNEL
GUARD function and the screen is
blue, the PIP button does not work.
Normal screen
Twin mode
PIP mode
Main
Main
Sub
Sub
04_Eng.book.fm Page 15 Friday, August 6, 2004 2:00 PM
16
HV-29JH24/29JH54/29JH74/29VH14/29VH54 / GGT0056-001A-H / English
Remote control buttons and functions
When you exit the Twin or PIP mode,
the sub picture lastly displayed will be
saved, and it will appear next time.
The following table shows what will
happen if the same input sources are
chosen for both main and sub pictures
when you enter the Twin or PIP mode.
If the main picture is the same as the sub
picture, then the sub picture will be
changed to VIDEO-1. But if the main
picture is VIDEO-1, then the sub picture
will be changed to VIDEO-2.
[When the same input sources are chosen]
If you press the PIP button when
receiving the Progressive Video Signal
(525P or 625P signal), "525P" or
“625P” appears on the screen and the
Twin/PIP function does not operate.
TV channel selection
For the main picture:
Choose a channel using the CHANNEL-/+
buttons or the number buttons.
For the sub picture:
Choose a channel using the SUB-P-/+
buttons.
Input source selection (TV,
VIDEO-1, -2, -3 or -4)
For the main picture:
Press the TV/VIDEO button.
Each time you press the button, the input
source changes as follows (the one used for
the sub picture will be skipped):
VIDEO-1 VIDEO-2 VIDEO-3
VIDEO-4 TV
For the sub picture:
Press the (Input) button.
Each time you press the button, the input
source changes as follow (the one used for
the main picture will be skipped):
VIDEO-1 VIDEO-2 VIDEO-3
VIDEO-4 TV
Swapping the pictures
Press the (Swap) button.
Each time you press the button, the main
picture and the sub picture will be swapped.
Changing the sub picture
position (in PIP mode only)
You can position the sub picture to one of
corners of the main picture.
Press the (Position) button.
Each time you press the button, the sub
picture moves clockwise (lower right
lower left upper left upper right).
Setting the colour system of the
sub picture
You can choose the colour system of the
sub picture.
While the sub picture is being displayed,
press the C.SYS button.
Each time you press the button, the colour
system of the sub picture changes as
follows:
AUTO PAL SECAM NTSC3.58
NTSC4.43
For all source, normally choose AUTO.
The chosen colour system will not be
saved.
If the main picture and the sub picture
are of different colour systems, there
will be some differences in the size of
the sub picture and flicker may take
place.
Main picture Sub picture
TV TV VIDEO-1
VIDEO-1 VIDEO-1 VIDEO-2
VIDEO-2 VIDEO-2 VIDEO-1
VIDEO-3 VIDEO-3 VIDEO-1
VIDEO-4 VIDEO-4 VIDEO-1
04_Eng.book.fm Page 16 Friday, August 6, 2004 2:00 PM
17
HV-29JH24/29JH54/29JH74/29VH14/29VH54 / GGT0056-001A-H / English
Remote control buttons and functions
Multi-display function
[Except HV-29JH24/HV-29VH14]
You can watch nine different TV
programmes at a time. As you can display
nine TV programmes successively, this
function is convenient to locate the TV
programme you want. Eight pictures are still
pictures and the last one is the moving
picture with the blue frame. You can choose
any picture as the moving picture and then
watch it in the normal screen.
Entering the Multi-display mode
While watching a TV programme in the
normal screen, press the MULTI button.
The screen changes to the multi-picture
screen and nine pictures are displayed in
the numerical order.
You can also enter this mode while in the
Twin mode, but not in the Text mode.
Pictures will appear in the assigned
order in the PR LIST (PR01-99).
If the number of pictures to be
displayed at a time is less than nine,
fewer pictures than nine will be
displayed.
The guarded channel with the
CHANNEL GUARD function will be
skipped and will not be displayed.
You cannot display a video image in
the Multi-display mode.
The RETURN+ button, svt/u button,
COLOUR SYSTEM button and
SOUND SYSTEM button are disabled
in the Multi-display mode.
If you press the MULTI button when
receiving the Progressive video signal
(525P or 625P signal), "525P" or
“625P” appears on the screen and the
MULTI function does not operate.
Returning to the normal screen
Press the MULTI button or MENU/OK
button, or choose a TV channel with the
number buttons.
The moving picture with the blue frame will
be displayed in the normal screen.
Pressing the TV/VIDEO button will also
returns the TV to the normal screen.
Choosing a picture as the
moving one
You can choose one of the pictures as the
moving picture with the blue frame.
Press 5 and 6 buttons to move the
blue frame.
The chosen picture becomes the moving
picture.
Pressing the 3 button in the right-most
position “3” or “6” will scroll the blue
frame to the next position, “4” or “7”.
While, pressing the 2 button in the left-
most position “4” or “7” will scroll the
blue frame to the previous position, “3”
or “6”.
Displaying the next nine pictures
Press the NEXT button.
The next nine pictures will be displayed at a
time. By pressing the NEXT button
successively, you can display all available
pictures except video images.
Displaying the channel numbers
on the multi-display screen
Press the DISPLAY button.
Respective channel numbers appear on the
nine pictures.
To go off the channel numbers:
Press the DISPLAY button again.
Moving picture with the blue frame
04_Eng.book.fm Page 17 Friday, August 6, 2004 2:00 PM
18
HV-29JH24/29JH54/29JH74/29VH14/29VH54 / GGT0056-001A-H / English
Remote control buttons and functions
Freeze function
[Except HV-29JH24/HV-29VH14]
While watching a picture, you can capture a
still picture you want. The captured still
picture and the moving picture are
displayed at a time. (They are the pictures
of the same source.)
Press the (Freeze) button.
Still picture is captured and displayed on the
right side of the screen. On the left, the
moving picture is displayed.
The (Freeze) button does not work
in the Text mode.
To return to the normal screen:
Press the (Freeze) button again or
press the number buttons to choose a
channel.
You cannot use the FREEZE button
when the sub picture or the main
picture are displayed on the screen.
If the current channel is guarded with
the CHANNEL GUARD function and
the screen is blue, this button does not
work.
If you press the FREEZE button when
receiving the Progressive video signal
(525P or 625P signal), "525P" or
“625P” appears on the screen and the
FREEZE function does not operate.
Strobe function
[Except HV-29JH24/HV-29VH14]
You can display eight consecutive still
pictures and one moving picture at a time.
(They are the pictures of the same source.)
Press the STROBE button.
Eight consecutive still pictures which are
captured at intervals of about 0.2 second
are displayed in the order of “1” to “9”.
(These numbers are not actually displayed.)
The STROBE button does not work in
the Text mode.
To return to the normal screen:
Press the STROBE button again or press
the number buttons to choose a channel.
If signal level of the main picture is
weak, the still images become
abnormal.
You cannot use the STROBE button
when the sub picture or the main
picture are displayed on.
If the current channel is guarded with
the CHANNEL GUARD function and
the screen is blue, the STROBE button
does not work.
If you press the STROBE button when
receiving the Progressive video signal
(525P or 625P signal), "525P" or
“625P” appears on the screen and the
STROBE function does not operate.
Moving
picture
Still
picture
04_Eng.book.fm Page 18 Friday, August 6, 2004 2:00 PM
19
HV-29JH24/29JH54/29JH74/29VH14/29VH54 / GGT0056-001A-H / English
Using the TV’s menu
This TV has a number of functions you can operate using menus.
To fully utilize all your TV’s functions, you need to understand the basic menu operating
techniques fully.
The following remote control is for HV-29JH74. However, the buttons used for setting TV
menus are common to all models.
Basic operation
1 Press the MENU/OK button to display
the MENU (main menu).
The display appearing at the bottom of
a menu indicates buttons on the
remote control you can use when you
operate a chosen function.
2 Press the 6 buttons or 5 to
choose a menu title, and press the
MENU/OK button.
The menu appears.
To return to the previous menu:
Press the DISPLAY button.
To exit a menu instantly:
Press the TV/VIDEO button.
3 Press the 6 buttons to choose a
function.
For details of the functions in the
menus, see the following pages.
7
RETURN
+
4
1
MENU
0
8
5
2
9
6
3
MUTING
COLOUR
SYSTEM
SOUND
CINEMA
SURROUND
DISPLAY
ZOOM
TV/TEXT
TV/VIDEO
PICTURE
MODE
CHANNEL VOLUME
RM-C1350 TV
FAVORITE CH
POWER
OK
PIP
SUB-P
OK
TV
DISP.
MENU/OK button
TV/VIDEO button
DISPLAY button
04_Eng.book.fm Page 19 Friday, August 6, 2004 2:00 PM
20
HV-29JH24/29JH54/29JH74/29VH14/29VH54 / GGT0056-001A-H / English
Using the TV’s menu
4 Press the 5 buttons to choose the
setting of that function.
If you want to operate a function which
appears only with its name, follow the
descriptions of that function on the
following pages.
The display appearing at the bottom of
a menu shows you a button on the
remote control that you can use when
you operate a chosen function.
5 Press the MENU/OK button to
complete the setting.
The menu disappears.
When watching the television with the
NTSC system, the menus as displayed
at about half of their normal vertical
size.
Operation with the buttons on the
TV
You can also operate the menus using the
buttons on the front panel of the TV.
There is no DISPLAY button on the
front panel of the TV, which will be
used for menu operation.
PICTURE SETTING menu
PICTURE MODE
You can choose one of three PICTURE
MODEs to adjust the picture settings
automatically.
BRIGHT:
Heightens contrast and sharpness.
STANDARD:
Standardizes picture adjustment.
SOFT:
Softens contrast and sharpness.
You can also operate the PICTURE
MODE function with the PICTURE
MODE button on the remote control.
For details, see “PICTURE MODE
button” on page 9.
Adjusting the picture
You can change the picture settings of each
picture mode, as you like. The picture
settings changed are stored in the picture
mode.
CONTRAST
You can adjust the picture contrast.
2 : lower
3 : higher
BRIGHT
You can adjust the picture brightness.
2 : darker
3 : brighter
SHARP
You can adjust the picture sharpness.
2 : softer
3 : sharper
MENU
OK
CHANNEL
VOLUME
TV/VIDEO
EXIT
OK
buttons
6
buttons
5
buttons
TV/VIDEO
buttons
HV-29VH14/HV-29VH54
HV-29JH24/HV-29JH54/HV-29JH74
OK
buttons
6
buttons
5
buttons
TV/VIDEO
buttons
MENU
CHANNEL
VOLUME
TV/VIDEO
OK EXIT
04_Eng.book.fm Page 20 Friday, August 6, 2004 2:00 PM
  • Page 1 1
  • Page 2 2
  • Page 3 3
  • Page 4 4
  • Page 5 5
  • Page 6 6
  • Page 7 7
  • Page 8 8
  • Page 9 9
  • Page 10 10
  • Page 11 11
  • Page 12 12
  • Page 13 13
  • Page 14 14
  • Page 15 15
  • Page 16 16
  • Page 17 17
  • Page 18 18
  • Page 19 19
  • Page 20 20
  • Page 21 21
  • Page 22 22
  • Page 23 23
  • Page 24 24
  • Page 25 25
  • Page 26 26
  • Page 27 27
  • Page 28 28
  • Page 29 29
  • Page 30 30
  • Page 31 31
  • Page 32 32
  • Page 33 33
  • Page 34 34
  • Page 35 35
  • Page 36 36
  • Page 37 37
  • Page 38 38
  • Page 39 39
  • Page 40 40

JVC HV-29JH24 User manual

Category
LCD TVs
Type
User manual

Ask a question and I''ll find the answer in the document

Finding information in a document is now easier with AI