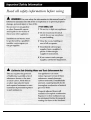
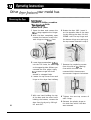
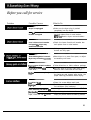
GE DBLR453GT dryer comes with a broad range of features and functionalities to make your laundry experience easier and more efficient. By following the detailed instructions in this manual, you will be able to utilize its capabilities to the fullest. This dryer offers various drying options, including regular, permanent press, delicate, and timed cycles, allowing you to customize the drying process based on the type of fabrics you're handling. Additionally, the dryer features an automatic electric ignition system, eliminating the need for a pilot light and enhancing safety during operation.
GE DBLR453GT dryer comes with a broad range of features and functionalities to make your laundry experience easier and more efficient. By following the detailed instructions in this manual, you will be able to utilize its capabilities to the fullest. This dryer offers various drying options, including regular, permanent press, delicate, and timed cycles, allowing you to customize the drying process based on the type of fabrics you're handling. Additionally, the dryer features an automatic electric ignition system, eliminating the need for a pilot light and enhancing safety during operation.


-
 1
1
-
 2
2
-
 3
3
-
 4
4
-
 5
5
-
 6
6
-
 7
7
-
 8
8
-
 9
9
-
 10
10
-
 11
11
-
 12
12
-
 13
13
-
 14
14
-
 15
15
-
 16
16
-
 17
17
-
 18
18
-
 19
19
-
 20
20
-
 21
21
-
 22
22
-
 23
23
-
 24
24


GE DBLR453GT dryer comes with a broad range of features and functionalities to make your laundry experience easier and more efficient. By following the detailed instructions in this manual, you will be able to utilize its capabilities to the fullest. This dryer offers various drying options, including regular, permanent press, delicate, and timed cycles, allowing you to customize the drying process based on the type of fabrics you're handling. Additionally, the dryer features an automatic electric ignition system, eliminating the need for a pilot light and enhancing safety during operation.
Ask a question and I''ll find the answer in the document
Finding information in a document is now easier with AI
Related papers
Other documents
-
Hotpoint NWXR473 User manual
-
-
-
-
-
-
-
-
-