Compaq 5000 Series Replacing Instructions
- Type
- Replacing Instructions
This manual is also suitable for
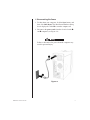
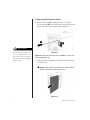
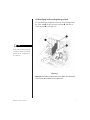
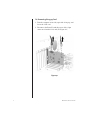
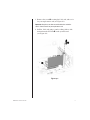
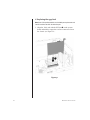
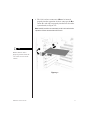
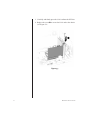
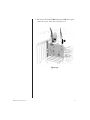
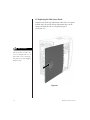
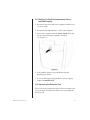
Compaq 5000 Series: Experience high-speed data transfer and seamless connectivity with the 1394 card. This advanced device features a high-speed serial bus, allowing simultaneous connection of up to 63 devices. Perfect for video enthusiasts, the card enables easy attachment of video devices to your computer, enhancing your multimedia experience.
Compaq 5000 Series: Experience high-speed data transfer and seamless connectivity with the 1394 card. This advanced device features a high-speed serial bus, allowing simultaneous connection of up to 63 devices. Perfect for video enthusiasts, the card enables easy attachment of video devices to your computer, enhancing your multimedia experience.


-
 1
1
-
 2
2
-
 3
3
-
 4
4
-
 5
5
-
 6
6
-
 7
7
-
 8
8
-
 9
9
-
 10
10
-
 11
11
-
 12
12
-
 13
13
-
 14
14
-
 15
15
-
 16
16


Compaq 5000 Series Replacing Instructions
- Type
- Replacing Instructions
- This manual is also suitable for
Compaq 5000 Series: Experience high-speed data transfer and seamless connectivity with the 1394 card. This advanced device features a high-speed serial bus, allowing simultaneous connection of up to 63 devices. Perfect for video enthusiasts, the card enables easy attachment of video devices to your computer, enhancing your multimedia experience.
Ask a question and I''ll find the answer in the document
Finding information in a document is now easier with AI
Related papers
-
Compaq 5000 Series Replacement Instructions Manual
-
-
-
HP Presario 5007EA Specification
-
-
Compaq Presario 3000 Series Maintenance And Service Manual
-
-
-
-
Other documents
-
HP Compaq nx9008 Notebook PC Owner's manual
-
HP Laptop NX9008 User manual
-
-
Avid NewsCutter XP 3.0 Installation guide
-
HP 6005 - Pro Microtower PC User manual
-
HP dc7900 - Convertible Minitower PC Reference guide
-
HP COMPAQ 6000 PRO MICROTOWER PC User manual
-
-
HP QY467AW User manual
-
HP COMPAQ 6000 PRO SMALL FORM FACTOR PC User manual