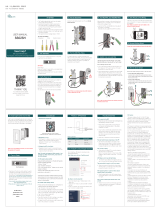
Yardian Pro Smart Sprinkler Controller

Aeon Matrix Yardian Pro Smart Sprinkler Controller User guide

  • Hello! I am an AI chatbot trained to assist you with the Aeon Matrix Yardian Pro Smart Sprinkler Controller User guide. I’ve already reviewed the document and can help you find the information you need or explain it in simple terms. Just ask your questions, and providing more details will help me assist you more effectively!
User Guide
Smart Sprinkler Controller
Apple HomeKit
PRO19 Series
VERSION 1.0
Table of Contents
What’s in the Box
4
Select Button and Run/Stop Button
6
Reboot Button and Wi-Fi Reset Button
7
Main LED Indicator
8
Understand Your Irrigation System
9
The Yardian Installation
11
Step 1 Replace your old controller
12
Step 2 Install your Yardian controller
14
Step 3 Download the Yardian app
18
Step 4 Pair your Yardian to your profile
20
2
Setup of the Yardian App
37
• Home
38
• Control
40
• Yard
42
• Program
44
How to Use Apple Home App to Control Yardian
46
5-A Ethernet connection
22
Step 5 Set up the Internet connection
21
5-B Wi-Fi onboarding
24
For Android users
27
For iOS users
31
3
What’s in the Box
1. Yardian Pro, the controller
4
5
3 2
Yardian must be connected to the power
adapter included.
2. Power adapter
3. Power cord
4. Labeling stickers
Output
24VAC, Max. 1A
-22°F to 140°F (-30°C to 60°C)
Operating
Temperature
Input
Output
100 – 240VAC, 50 – 60Hz
36VDC, 1.66A
5. Wall screws and anchors
Screw
Ø3/16 x 1''
4
Product label
Zones LED
Power supply port
Select button
Run/Stop button
Terminal blocks
Wi-Fi reset button
H
G
A
B
C
D
E
F
I
Ethernet port
J
USB port
K
Main LED
Reboot button
SN :
:
:
:
MAC
Input
YID :
Output
------------
------------
36VDC, 1.66A
24VAC, Max. 1A
Model: PRO1900
FCC ID: 2AS9BYP1
A1B2C34D
www.yardian.com | Made in Taiwan
-- ------
-------
S2 S1 C12M 1 2 3 4 5 6 7 8 9 10 11 C
24VAC
OUT
A
B
D
C
E
F
J
K
G
H
I
1
5
Select Button and Run/Stop Button
Instant Control
Auto Scan
SN :
:
:
:
MAC
Input
YID :
Output
------------
------------
36VDC, 1.66A
24VAC, Max. 1A
Model: PRO1900
FCC ID: 2AS9BYP1
A1B2C34D
www.yardian.com | Made in Taiwan
-- ------
-------
S2 S1 C12M 1 2 3 4 5 6 7 8 9 10 11 C
24VAC
OUT
• Press/hold Select and Run/Stop at the same time
LED in green: solenoid valve attached
LED in red: faulty solenoid valve detected (overcurrent)
• Click Select on the top to specify a zone in Zone Selection Mode (LED in green).
• Press/hold Select for over 1 second to switch between Zone Selection Mode and
Time Selection Mode (LED in red).
• Click Select to specify duration in min(s) in Time Selection Mode.
• Click Run/Stop to run the zone. To stop watering anytime, press/hold Run/Stop
for over 3 seconds.
Run/Stop button
Select button
6
Reboot Button and Wi-Fi Reset Button
Reboot Button
Press to reboot the system
Press and hold for around 10
seconds, release when the LED
turns red.
Reset to factory default
Press and hold for around 5
seconds, release when the LED
is blinking green and blue.
Reset Wi-Fi
SN :
:
:
:
MAC
Input
YID :
Output
------------
------------
36VDC, 1.66A
24VAC, Max. 1A
Model: PRO1900
FCC ID: 2AS9BYP1
A1B2C34D
www.yardian.com | Made in Taiwan
-- ------
-------
S2 S1 C12M 1 2 3 4 5 6 7 8 9 10 11 C
24VAC
OUT
Wi-Fi Reset Button
7
1 second1 second
System
Booting Up
Initializing
Firmware Updating
(Do not turn off power)
Reboot Required
(Press the Reboot Button)
Reboot Required - Action Failed
(Press the Reboot Button)
Wi-Fi Station Mode
Connecting to Your Router
Connected to the Internet
Watering
Wi-Fi AP Mode
Access Point Mode
Watering
Ethernet
Connected to the Internet
Watering
Main LED Indicator
SN :
:
:
:
MAC
Input
YID :
Output
------------
------------
36VDC, 1.66A
24VAC, Max. 1A
Model: PRO1900
FCC ID: 2AS9BYP1
A1B2C34D
www.yardian.com | Made in Taiwan
-- ------
-------
S2 S1 C12M 1 2 3 4 5 6 7 8 9 10 11 C
24VAC
OUT
8
Understand Your Irrigation System
S2 S1 C12M 1 2 3 4 5 6 7 8 9 10 11 C
24VAC
OUT
Controller
Rain Sensor
Common Wire
Valve
Valve
Water
Main
Sprinkler Wires
Wire from controller to corresponding valve
Water
to Zones
Master Valve
Master Valve Wire
M
Z2
Z4
C
C
C
9
Digital version user guide
10
Set up your Yardian in a few easy steps
The Yardian Installation
The Yardian should be mounted less than 6.5 feet (2 meters)
from the floor for easier accessibility.
11
1
Step
Replace your old controller
Take a picture of your current wiring. This will help you identify the correct
sequence of wires.
Electrical
Hazard
WARNING
Exposed sprinkler wires with 24VAC could generate an electric
shock in wet locations. Please ask your retailer or contractor if
sprinkler accessories may be needed.
12
1
2
3
Zones
4
5
5
6
6
7
7
8
8
9
9
10
10
11
11
12
12
Disconnect your old controller and remove sprinkler wires. Adhere a
numeric labeling sticker to tag each associated wire for easy identification.
Remove your old controller from the wall.
Zones - wires connected to zone valves
Common - common wire or ground wire
Rain Sensor - optional
Master Valve - optional
13
Install your Yardian controller
Open the top cover.
Mount your Yardian to the desired location.
2
Step
HERE
Place your thumb on the top right
corner to make it easier to open the
cover.
14
Mark the wall for the screws. Mount the Yardian with the screws.
Connect sprinkler wires according to the corresponding labels.
SN :
:
:
:
MAC
Input
YID :
Output
------------
------------
36VDC, 1.66A
24VAC, Max. 1A
Model: PRO1900
FCC ID: 2AS9BYP1
A1B2C34D
www.yardian.com | Made in Taiwan
-- ------
-------
S2 S1 C12M 1 2 3 4 5 6 7 8 9 10 11 C
24VAC
OUT
2
1
If you attach more than 1 solenoid to a zone, please
check your solenoid specifications and make sure the
overall current consumption does not exceed 0.9A.
Please specify your rain sensor
type (normally open or closed)
in the app if applicable.
SN :
:
:
:
MAC
Input
YID :
Output
------------
------------
36VDC, 1.66A
24VAC, Max. 1A
Model: PRO1900
FCC ID: 2AS9BYP1
A1B2C34D
www.yardian.com | Made in Taiwan
-- ------
-------
S2 S1 C12M 1 2 3 4 5 6 7 8 9 10 11 C
24VAC
OUT
15
Step 1
Plug the power cord into the home outlet.
SN :
:
:
:
MAC
Input
YID :
Output
------------
------------
36VDC, 1.66A
24VAC, Max. 1A
Model: PRO1900
FCC ID: 2AS9BYP1
A1B2C34D
www.yardian.com | Made in Taiwan
-- ------
-------
S2 S1 C12M 1 2 3 4 5 6 7 8 9 10 11 C
24VAC
OUT
Ensure to connect the power cord
to a socket-outlet with earthing
connection.
16
Step 2
Close the top cover.
PRESS
HERE
This product contains CR1225
battery. Risk of explosion if the
battery is replaced by an
incorrect type
CAUTION
17
Step 2
Create an account.
Sign in the Yardian app with your account.
iOS 9.0+ and Android
TM
5.0 Lollipop®+
Download the Yardian app
3
Step
2:00 PM
18
Enter your profile name and locate your Yardian.
2:00 PM
Locate Your Yardian
Profile Name Profile Name
Country
Locate
Save
Add Profile
Yardian location settings will help
to get the weather information
with accuracy.
19
Step 3
Pair your Yardian to your profile
4
Step
Select the Yardian device settings card to start pairing.
Enter the 8-digit Yardian ID (YID) on the device.
2:00 PM
My Yardian
Unpaired
Please Click To Pair
Yardian Device Settings
2:00 PM
Please Enter Your YID:
Yardian Pairing
A 1 B 2 C 3 4 D
SN :
:
:
:
MAC
Input
YID :
Output
------------
------------
36VDC, 1.66A
24VAC, Max. 1A
Model: PRO1900
FCC ID: 2AS9BYP1
A1B2C34D
www.yardian.com | Made in Taiwan
-- ------
-------
YID:
A1B2C34D
20
/