Dometic CS160D User manual

Category
Wine coolers
Type
User manual

This manual is also suitable for

825 12 39-50
®
MO-M 0720
Type C…
INSTALLATION
&
OPERATING
INSTRUCTIONS
CS
110 D/DV
160 D/DV
200 D
- 3 -
INTRODUCTION
Thank you for choosing the Dometic Wine Cellar.
Please read the following instructions carefully be-
fore installing your new wine cellar. We trust you

The wine cellar must be installed and used accord-
ing to these instructions in order for it to operate
correctly and economically.
TRANSIT DAMAGE
Inspect the wine cellar for transit damage. You
must report any damage the company responsible
for the delivery within the legal or stated time for
this type of product. If there is no such established
report time, the damage must be reported within
seven days of delivery.
ACCESSORIES
Please check that the following accessories are at-
tached to the Wine Cellar or in the separate card-
board box inside the wine cellar.
Cardboard box:
Handle
Storage shelves
Drip tray

Shelf supports
Screws

Keys
CD
Instruction manual
Necessary additional tools not included:


DATA PLATE
Check the data plate, inside the wine cellar at
the top left, to ensure you have received the right
model.
The data plate shows details
that you will need to quote if
you have to contact service
personnel.
It is a good idea to make a note of them here:
Model designation . . . . . . . . . . . . . . . . . . . . . . . .
Product number . . . . . . . . . . . . . . . . . . . . . . . . . .
Serial number . . . . . . . . . . . . . . . . . . . . . . . . . . .
Voltage . . . . . . . . . . . . . . . . . . . . . . . . . . . . . . . .
INSTALLATION
Please follow these instructions:
For best performance, air needs to circulate free-
ly over the cooling unit behind the wine cellar.
The free-standing design of the cellar means that
it should stand at least 25 mm from the rear and
side walls.
Allow a clearance of at least 100 mm above the
wine cellar.
Note that it must be possible to open the wine
cellar door at least 90° to allow the sliding
shelves to be pulled out.
30 mm
25 mm
25 mm
Rear
Wall
Wall
- 4 -
ELECTRICAL CONNECTION
The electrical installation must be carried out cor-
rectly, taking into account all relevant regulations
and codes of practice. The wine cellar operates on
a single-phased alternating current.
Please check that the voltage shown on the data
plate corresponds to your power supply.
The wine cellar must be earthed.

earthed socket. Dometic and its subsidiaries will
not be held responsible for any incident due to non-
existent or defective earth wires.
Electrical leads must be routed and secured so
that they cannot come into contact with hot or
sharp parts of the wine cellar.
TEMPERATURE SETTING
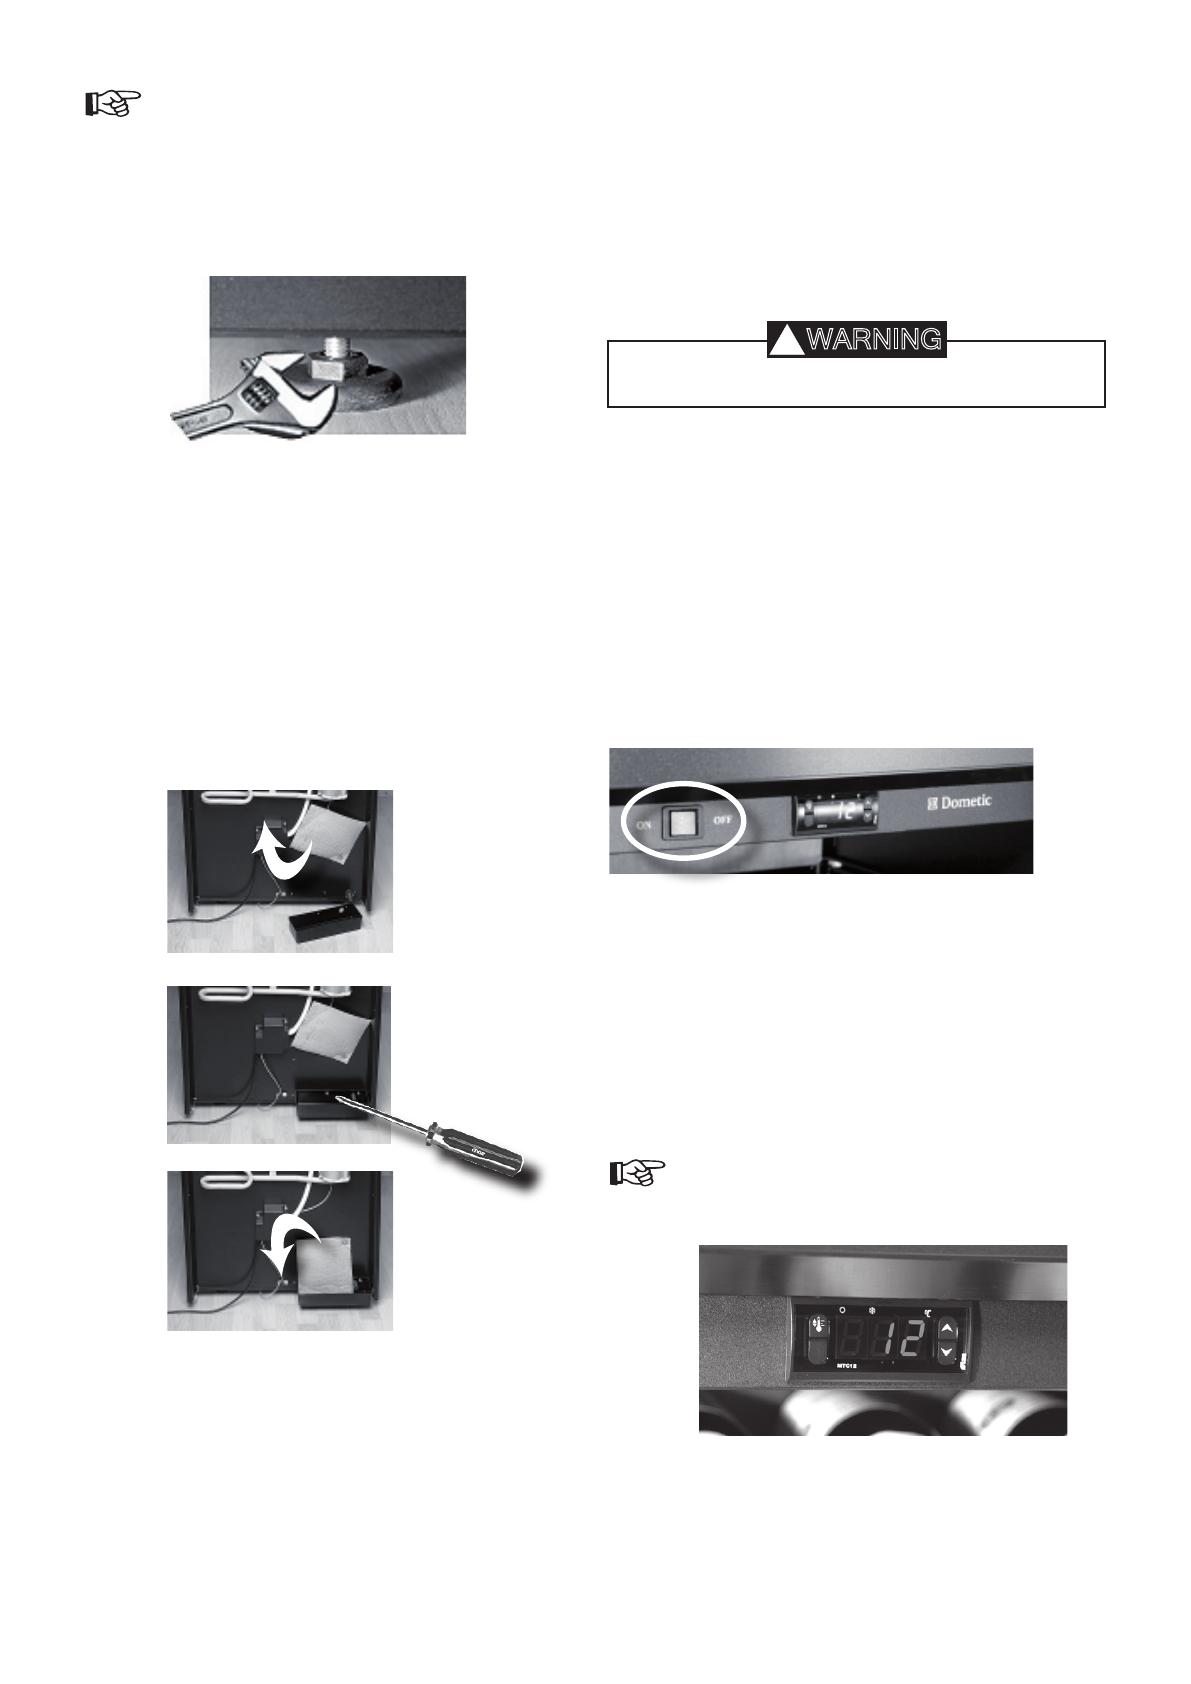
Plug in the wine cellar and turn it on with the ON/
OFF switch.
The wine cellar is equipped with an electronic con-
trol. This allows you to programme the temperature
inside the wine cellar. The wine will be stored be-
tween 10°C and 15°C according to expert advice.
and 15°C according to expert advice. The tem-
perature, pre-set at 12°C in the factory, is shown
on the display. The temperature can be changed on
demand between 8°C and 18°C depending on the
wine stored.

displayed and then, the pre-set value will

-
ture.
Please allow 6 seconds for the control
system to record the new value.
1.
2.
3.
Remove the transport pallet on which your
wine cellar rests.
Adjust the feet to allow a 30 mm clear-
ance under the wine cellar and verify
that it stands in a vertical position in both
directions. If necessary, use a spirit level.
For optimum performance, please place
your wine cellar far away from any source
of heat, e.g. radiator, cooker or intense
sunlight.

the top left corner inside the wine cellar.
Fit the door handle to the door, see “Ap-
pendix A”.
Attach the drip tray on the back. The
screws are already attached at the back.
1.
2.
3.
4.
5.
6.
WARNING
!
1
2
3
- 5 -
MAINTENANCE
We recommend that you keep your wine cellar as
clean as possible. Unplug the cellar before clean-
ing. Do not use any abrasive or strong scented
substances. Use a smooth cloth or sponge and light
detergent.
It is very important to check regularly that the air
circulation underneath and behind the cellar is not
blocked.
Condensation collects in a small cup placed at
the back of the wine cellar. The cup has a sponge
which helps the condensation to evaporate. Check
that the plastic pipe routing the water from the
inside to the cup is not blocked by dust or dirt.
You should replace the inside ventilation charcoal

upper left corner inside the wine cellar.
If the wine cellar fails to work, check the following
points before calling a service technician:
Is the fuse of power supply intact?
Is the plug properly inserted in its socket?
Is the wine cellar switched on?
If the cause of failure is not to be found among the
points listed above, contact an authorised service
technician.
The wine cellar is equipped with an overheating
protection. An authorised service technician can
check whether this has been triggered or not.
INSTALLATION OF GUIDES AND SHELF
SUPPORTS
SLIDING SHELVES
Place the rear hook of the guide in front of the
desired hole in the rear row and push in direction
of arrow 1. Then, do the same with the front hook

SHELF SUPPORT FOR STORAGE SHELF
Place the support hooks in the holes at desired
level, press in as arrow 1 indicates and push down
as arrow 2 indicates.
Reinforcement bar
The reinforcement bar is a shelf support and must
not be removed for safety reasons.
KITS
Each kit contains two shelves and shelf supports.
Sliding shelf kit number: 921 17 81-99
Storage shelf kit number: 921 17 81-98
Model Max. no. of sliding shelves
CS110 D/DV 
CS160 D/DV 12
CS200 D 16
1
2
REINFORCEMENT BAR
1
2
- 6 -
STORING THE WINE
Bottles should be stored in your wine cellar accord-

differences into account when storing your wine
and avoid mixing the bottles.
It is important to store bottles on their side in order
for the cork to remain in contact with the wine.
The maximum number of “Bordeaux tradition”
bottles that can be stored in a wine cellar that is

Place bottles top to bottom in the cellar for op-
timum volume use. The sliding shelves and the
storage shelves can be placed in several positions
depending on the size of your wine cellar.
Use the sliding shelf when storing specially shaped
bottles.
Note that you should store no more than one
layer of bottles on the shelves.
Model
No. of
storage shelves
No. of
bottles
CS110 D/DV 1+1 116
CS160 D/DV 1+2 170
CS200 D 1+3 206
CAUTION
Storing Bordeaux tradition
Storing Burgundy tradition
Example of how to store mixed bottle types
- 7 -
APPENDIX A - INSTRUCTION FOR MOUNTING THE HANDLE
STAINLESS STEEL DOORS
1
2
3
Screw
Remove the door gasket behind the
two holes adapted for the handle. Start
in the upper corner and gently pull
out the gasket from the slot. Continue
down and pass the two holes.
From the inside of the door, put the



tap the screw into the threads in the

Remount the door gasket by pressing
it back in its slot by hand. Make sure
that the gasket is all the way back in
place of origin.



CAUTION
Do not use any sharp tools to force the
gasket back. This can damage the gasket
and the wine cellar will loose performance.
- 8 -
APPENDIX A - INSTRUCTION FOR MOUNTING THE HANDLE
See step 1, “”.
See step 3, “”.



GLASS DOORS WOODEN DOORS


- 9 -
APPENDIX B - ELECTRIC DIAGRAM
  • Page 1 1
  • Page 2 2
  • Page 3 3
  • Page 4 4
  • Page 5 5
  • Page 6 6
  • Page 7 7
  • Page 8 8
  • Page 9 9
  • Page 10 10
  • Page 11 11
  • Page 12 12

Dometic CS160D User manual

Category
Wine coolers
Type
User manual
This manual is also suitable for

Ask a question and I''ll find the answer in the document

Finding information in a document is now easier with AI