Page is loading ...

The manufacturer reserves the right to make changes to the product,
and update this manual at any time.
The manufacturer reserves the right to make changes to the productand update this manual at any time.
3
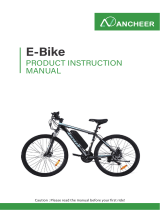
E-bike P6
USER MANUAL

Contents IMPORTANT! BEFORE RIDING, YOU SHOULD
1
IMPORTANT! BEFORE RIDING, YOU SHOULD
1. PACKAGE CONTENTS
2. PRODUCT OVERVIEW
3. INSTALLING THE HANDLEBARS
4. INSTALLING THE FRONT WHEEL
5. INSTALLING THE PEDALS
6. INSTALLING THE HEADLIGHT
7. INSTALLING THE SADDLE
8. DISPLAY INTRODUCTION
9. HOW TO USE THE DISPLAY, HEADLIGHT & HORN
10. HOW TO TAKE OFF THE BATTERY
11. HOW TO CHARGE THE BATTERY
12. NOTES OF CHARGING
13. DAILY CARE AND MAINTENANCE
14. TROUBLE SHOOTING
15. SPECIFICATIONS
16. LIMITED WARRANTY STATEMENT
17. CONTACT US
01
02
03
05
06
07
08
09
10
11
12
13
14
15
16
17
18
·Make sure your electric bike is fully charged before the first ride
· Make sure the pedals are tight
·Make sure the front wheel is installed properly and tight
·Check to be sure the tires are inflated properly
·Learn how to use the display
· Wear a helmet when riding is highly advised
When riding, please
·Always respect pedestrians
·Obey local traffic rules
·Pay attention to other running vehicles around you
After riding
·If there is any abnormality or loose parts, please check and repair as soon as possible
·After riding on a rainy day, please clean up the rainwater and sediment immediately
If you have any trouble with the installation, please contact Hiboy customer service
for support: ebike@hiboy.com
19

1. PACKAGE CONTENTS 2. PRODUCT OVERVIEW
Please check package contents carefully, if anything is missing or damaged, please
contact Hiboy customer service for support: ebike@hiboy.com
32
Brake lever
Headlight
Fork
Seat
Freewheel
Rear Derailleur
Crank Set Pedal
Charger x 1
Battery Key x 2
Hexagon wrench x 1
Pedals (R and L) x 2 User manual x 1
Headlight screw x 1
Electric bike x 1
Installing tool x 1
Spring x 2
Skewer x 1
End nut x 1
The manufacturer reserves the right to make changes to the productand update this manual at any time.
3
E-bike P6
USER MANUAL

54
2. PRODUCT OVERVIEW
Display
Thumb Throttle
Disc Brake
Battery
Disc Brake
Motor
Kickstand
3.INSTALLING THE HANDLEBARS
1.Shown in figure 1, according to the direction of the arrow, rotate the handle stem towards the front of the bike.
2.Put the handlebar in the handlebar mount and be careful with the wires.
3.Insert the screws and tighten alternating sides with installing tool.
4.Verify and check all items are tight.
Charge Port
Battery Lock
Sensor
12
3

4. INSTALLING THE FRONT WHEEL
76
Spring
Brake disc
5. INSTALLING THE PEDALS
1. Insert the front wheel in between the front fork on the bike. Be sure the fork is resting on the outside of the axle.
2.Shown in figure 2, align the wheel axle with the disc brake slot, put the brake disc into the disc brake slot. Keep
the skewer and spring on the RIGHT side of ebike's riding direction, and the other spring and the end nut on the LEFT
side of ebike’s riding direction. Then insert the skewer into the wheel axle, shown in figure 1. BE AWARE TO DISTINGUISH
THE LEFT SIDE AND THE RIGHT SIDE.
3.Screw the skewer with the end nut and tighten.
4.Lock up the lever. Lift the lever up until parallel with the front fork. The front wheel is now installed.
1.Identify the Left and Right labels on the pedals. They can only be installed in their own side. INCORRECT INSTALLATION WILL
CAUSE DAMAGE. PLEASE BE AWARE TO DISTINGUISH LEFT & RIGHT BEFORE INSTALLATION.
2. L is for the Left pedal of the riding direction; R is for the Right pedal of the riding direction, the chain side.
3.Take the wrench which is integrated in the multi-function installing tool and tighten the nuts with wrench.
12
34
Skewer
Spring
End nut
Spring
Spring
Skewer End nut
Disc brake slot
12
Left - Riding direction
Right - Riding direction

6. INSTALLING THE HEADLIGHT
9
7. INSTALLING THE SADDLE
8
2.Tighten the screw with nut by using the installing tool.
3.Use a hexagon wrench to lock in a clockwise direction.
1.Shown in Figure 1, insert the screw of the headlight into the headlight hole.
2. Push the saddle down, pull up or push down to adjust the height.
3. Check to make sure the saddle is fully inserted and adjust it accordingly.
1.Install the saddle according to the picture.
4. Lock the handle.
12
43
21
3
Nut Headlight hole
Headlight Hexagon wrench
Nut
Installing tool

1110
8. DISPLAY INTRODUCTION
4. Lock the handle.
9. HOW TO USE THE DISPLAY, HEADLIGHT & HORN
1. Press to turn on the display. Your bike will be ON. Press again to turn it off. The display will automatically shut down when
there is no operation or riding for 5 minutes.
2. Short press “+” or “-” button to change the assist level from 0 to 5. 0 is without assist. 5 is the max assist level.
3. Short press to switch the display data in the multi-function area when riding.
4. When the ebike is static, long press “-” to enter the 6KM/h cruise mode; release “-” to cancel the cruise mode.
1. Press the light button to turn on/off the headlight
2. Press the horn button for horn control
Speed display
Controller failure
Brake
Motor failure
Voltage protection
Battery indicator
Cruise mark
Multi-function display area
Assist level
VOL:voltage ODO:total mileage
TRIP:single meleage
TIME:working time

1312
10. HOW TO TAKE OFF THE BATTERY
2. Press the horn button for horn control
1. Insert the key and turn 90 degrees clockwise.
2.Take out the battery upwards.
11. HOW TO CHARGE THE BATTERY
1.Charge the battery on the bike, find the charge port at the bottom of the battery tube.
2.Pull out the rubber flap of the charging port and insert the charger output plug into the charging port. Connect the
input plug to the power supply. The small light on the charger in RED indicates it is in charging; GREEN indicates it is fully charged.
3.You can also take off the battery and place it in a clean and flat place in room temperature and charging.

1514
12. NOTES OF CHARGING
2.Pull out the rubber flap of the charging port and insert the charger output plug into the charging port. Connect the
input plug to the power supply. The small light on the charger in RED indicates it is in charging; GREEN indicates it is fully charged.
3.You can also take off the battery and place it in a clean and flat place in room temperature and charging.
1. Fully charging time may vary from 6 to 7 hours.
2. The small light on the charger in RED indicates it is in charging; GREEN indicates it is fully charged.
3. Insufficient charging will not influence the battery lifecycle. AVOIDING deep discharge is helpful to protect the
battery and extend its lifecycle.
4.Pay attention to check whether the surface temperature of the battery case rises too high during charging. It is
FORBIDDEN to cover battery while charging.
5.Due to high temperature in summer, it is NOT advised to charge it immediately after riding. In winter, it is
FORBIDDEN to charge the battery OUTSIDE where the temperature is below 32-degree F. You are recommended
to charge it in room temperature.
6.If the battery will not be used for a long time, take it off from the bike and discharge its capacity to 60%-80% for
stock. Disconnect it from the charger and place it in a dry, ventilated place without direct sunlight. In order to maintain
a long lifecycle, it is recommended to charge the battery every two months.
13. DAILY CARE AND MAINTENANCE
Cleaning
1. If you see stains on the bike, wipe them off with a damp cloth. If the stains won't scrub off, put on some toothpaste and brush
them with a toothbrush, then wipe them off with a damp cloth.
2. Do not clean the bike with alcohol, gasoline or any other corrosive and volatile chemicals.
4. Before cleaning, make sure that the bike is turned off, the charging cable is unplugged, and the rubber flap of the charging
port is closed.
3. Do not wash the bike with a high-pressure water spray.
Battery maintenance
1. Use original battery packs.
2.Do not touch the contacts. Do not dismantle or puncture the casing. Keep the contacts away from metal objects to prevent
short circuit.
3.Use original power adapter to avoid potential damage.
4.After each use, fully charge the battery to prolong its life span.
Storage
1. When the bike is not in use, keep it indoors where is dry and cool with temperature between 32°F / 0°C and 113°F / 45°C.
2.Excessive sunlight, overheating or overcooling may be harmful to battery's life span.

1716
14.TROUBLE SHOOTING
15. SPECIFICATIONS
6.If the battery will not be used for a long time, take it off from the bike and discharge its capacity to 60%-80% for
stock. Disconnect it from the charger and place it in a dry, ventilated place without direct sunlight. In order to maintain
a long lifecycle, it is recommended to charge the battery every two months.
ITEM
59.4*11.4*32.7in / 1510*290*830mm
SPECIFICATIONS
P6
Package Size
Model
Package Weight
82.7lb / 37.5kg
E-bike Weight
65lb / 29.5kg
Max Speed
21.7mph / 35km/h
265lb / 120kg
24.9-31mil / 40-50km
49.7-62.1mil / 80-100km
Max Load
15%
Pure Electric Riding Dist.(Load 143lb)
Pedal Assist Riding Dist.(Load 143lb)
Max Angle of Climb
Pneumatic tire 26*4.0in
Variable Speed 9 speeds
Charger Input Vol. AC 100-240V Output Vol. DC54.6V 2A
Aluminum alloy
Bike IPX4, Battery IPX5
Frame Material
IP level
Tire
Symptoms Possible Reason
2.Brakes are applied
1.Insufficient battery power 1.Fully charge the battery
2.Disengage brakes
3.Clean & repair connectors
1.Repair and reconnect
2.Tighten or replace
3.Secure or replace
4.Repair or replace
1.Adjust the connections
2.Replace
3.Replace
4.Repair or replace
5.Replace charge fuse
1.Adjust tire pressure
4.Adjust the brakes
1.Charge or replace battery
2.Replace throttle
1.Tighten, repair or replace
Ebike doesn’t work
3.Faulty connections
4.Improper turn on sequence
The motor doesn’t work
when ebike is powered on
1.Loose wiring
2.Loose or damaged throttle
3.Loose or damaged motor plug wire
4.Damaged motor
1.Charger is not well connected
Battery cannot be charged
2.Charger damaged
3.Battery damaged
4.Wiring damaged
5.Blown charge fuse
1.Low tire pressure
2.Low or faulty battery
Range reduced
Solutions
3.Driving with too many hills, braking or excessive load
4.Brakes rubbing
1.Insufficient battery power
2.Loose or damaged throttle
3.Misaligned or damaged magnet ring
1.Loose or damaged wheel spokes or rim
2.Loose or damaged motor wiring
Irregular acceleration or
max speed reduced
Abnormal noises from
wheel or motor
1
2
3
4
5
6
2.Check connections, balance and charge battery
3.Align or replace magnet ring
2.Reconnect or replace motor
4.Turn on ebike with proper sequence
3.Assist with pedals or adjust route

1918
16. LIMITED WARRANTY STATEMENT 17. CONTACT US
30 DAY SATISFACTION GUARANTEED RETURN POLICY
1. If you are unsatisfied with your purchase, Hiboy’s return policy allows you to return the product purchased on the
Authorization channel within 30 days counting from the date of receipt of shipment and request a refund from the
Authorization channel for any reason.
2.Note: Express shipping cost is non-refundable.
3.For the return request, Hiboy is not responsible for lost packages due to the carrier, or products received that cannot
be verified. Received products that have damaged determined to have been caused by the end-user may be subject
to denial of the return request.
LIMITED PRODUCT WARRANTY
1.Hiboy warrants the original purchaser that your Hiboy product shall be free from defects in materials and workmanship
under normal use for a period aforementioned.
2.Hiboy does not warrant the operation of the product will be uninterrupted or error-free.
3.Hiboy is not responsible for damage arising from failure to follow instructions relating to the product's usage.
Contact us if you experience issues relating to riding, maintenance and safety, or errors/faults with your Hiboy Ebike P6.
Lockwood Group Inc
4045 Cheyenne Ct Chino CA 91710
E-mail Service: ebike@hiboy.com
/