Electrolux ELM 6000 LAVAZZA A MODO MIO MAGIA Owner's manual

Category
Coffee makers
Type
Owner's manual

This manual is also suitable for

RU Инструкция ..........................51-66
Перед первым применением
устройства прочтите раздел о
мерах предосторожности на
стр. 52.
NO Bruksanvisning .................... 35-50
Les rådene vedrørende sikkerhet
på side 39 før du bruker apparatet
for første gang.
FI Käyttöohjeet .........................35-50
Lue sivun 38 turvallisuusohjeet
huolellisesti ennen kuin käytät
laitetta ensimmäistä kertaa.
DA Brugervejledning ...............35-50
Før apparatet bruges for første
gang, bør sikkerhedsrådene på
side 37 læses.
SV Bruksanvisning .................... 35-50
Läs säkerhetsanvisningen på sidan
36 innan du använder apparaten
första gången.
PL Instrukcja obsługi .............. 19-34
Przed pierwszym użyciem urzą-
dzenia przeczytaj uważnie zalece-
nia bezpieczeństwa na stronie 23.
PT Manual de instruções .... 19–34
Antes de utilizar o aparelho pela
primeira vez, leia os avisos de
segurança na página 22.
ES Instrucciones de uso ...... 19–34
Antes de utilizar el electrodomés-
tico por primera vez, lea la indica-
ción de seguridad de la página 21.
NL Gebruiksaanwijzing ......... 19–34
Lees het veiligheidsadvies op
pagina 20 voordat u het apparaat
voor het eerst gebruikt.
DE Anleitung ..................................3–18
Vor der ersten Inbetriebnahme
des Geräts lesen Sie bitte die
Sicherheitshinweise auf Seite 7.
FR Mode d'emploi .....................3–18
Avant d’utiliser cet appareil pour
la première fois, veuillez lire les
consignes de sécurité en page6.
EN Instruction book ..................3–18
Before using the appliance for the
first time, please read the safety
advice on page 5.
IT Libretto di istruzioni ...........3–18
Prima di utilizzare l’apparecchio
per la prima volta, leggere atten-
tamente le norme di sicurezza
riportate a pagina 4.
51-66 .....

FA


).54
51-66 ....................

AR
53

3
IT
EN
fR
DE
NL
ES
pT
pL
SV
DA
fI
NO
Ru
AR
fA
A
J
L
M
S
N
O
Q
R
P
K
K
J
B
C
DE
G
I
H
F
Teile
DE
A. Bedienfeld (Touchscreen)
B. Ein-/Aus-Taste
C. Temperatur-Einstelltaste
D. Anzeige für Temperatur-
Standardeinstellung
E. Anzeige für niedrige
Temperatur-Einstellung
F. Entkalkungsalarm-Anzeige
G. Espresso Taste
H. Espresso-Lungo-Taste
I. Caè-Crema-Taste
J. Hebel
K. Kapselfach
L. Wassertankdeckel
M. Wasserbehälter
N. Kaeeauslass
O. Tropfschalengitter
P. Auangschale
Q. Abwasserbehälter
R. Behälter für verbrauchte
Kapseln
S. Netzkabel mit Stecker
A. Panneau de commande
(Écran tactile)
B. Touche MARCHE/ARRET
C. Touche de réglage de la
température
D. Voyant de réglage de la
température - Par défaut
E. Voyant de réglage de la
température - Basse
F. Voyant d’alarme
Détartrage
G. Touche Espresso
H. Touche Espresso Lungo
I. Touche Caè Crema
J. Levier
K. Emplacement capsule
L. Couvercle du réservoir
d’eau
M. Réservoir d’eau
N. Sortie café
O. Plaque d’égouttage
P. Bac récolte-gouttes
Q. Récipient pour d’eau
usagées
R. Récipient pour capsules
usagées
S. Cordon et che
d’alimentation
Éléments
FR
A. Control Panel
(Touch screen)
B. ON/OFF button
C. Temperature setting
button
D. Temperature setting
default indicator
E. Temperature setting low
indicator
F. Descaling alarm indicator
G. Espresso button
H. Espresso Lungo button
I. Caè Crema button
J. Lever
K. Capsule compartment
L. Water tank lid
M. Water tank
N. Coee spout
O. Drip tray grid
P. Drip tray
Q. Waste water container
R. Used capsules container
S. Power cord & plug
Components
ENIT
A. Pannello di controllo
(Touch Screen)
B. Pulsante accensione
C. Pulsante per
l’impostazione della
temperatura caè
D. Indicatore impostazione
temperatura alta
E. Indicatore impostazione
temperatura bassa
F. Indicatore allarme
decalcicazione
G. Pulsante erogazione
espresso
H. Pulsante erogazione
Espresso Lungo
I. Pulsante erogazione
Caè Lungo.
J. Leva
K. Vano inserimento capsula
L. Coperchio serbatoio
dell’acqua
M. Serbatoio acqua
N. Beccuccio erogatore caè
O. Griglia cassetto raccogli
gocce
P. Cassetto raccogli gocce
Q. Cassetto acqua di scarico
R. Cassetto capsule usate
S. Cavo alimentazione
Componenti
5
IT
EN
fR
DE
NL
ES
pT
pL
SV
DA
fI
NO
Ru
AR
fA
EN
Read the following instruction carefully before using machine for the
rst time.
• Thisappliancecanbeusedbychildrenagedfrom8yearsandaboveonly
if they have been given supervision or instruction concerning use of
the appliance in a safe way and if they understand the hazards involved.
Cleaning and user maintenance shall not be made by children unless they
areagedfrom8yearsandaboveandsupervised.Keeptheapplianceand
itscordoutofreachofchildrenagedlessthan8years.
• Appliancescanbeusedbypersonswithreducedphysical,sensoryor
mental capabilities or lack of experience and knowledge only if they have
been given supervision or instruction concerning use of the appliance in a
safe way and if they understand the hazards involved.
• Childrenshallnotplaywiththeappliance.
• Theappliancemayonlybeconnectedtoapowersupplywhosevoltage
and frequency comply with the specications on the rating plate!
• Neveruseorpickuptheapplianceif
– the supply cord is damaged,
– the housing is damaged.
• Theappliancemustonlybeconnectedtoanearthedsocket.Ifnecessary
an extension cable suitable for 10 A can be used.
• Iftheapplianceorthesupplycordisdamaged,itmustbereplacedbythe
manufacturer, its service agent or a similarly qualied person in order to
avoid hazard.
• Alwaysplacetheapplianceonaat,levelsurface.
• Neverleavetheapplianceunattendedwhileconnectedtothesupply
mains.
• Theapplianceandaccessoriesbecomehotduringoperation.Useonly
designated handle, the side panels. Allow to cool down before cleaning or
storage.
• Whilemakingcoee,itisnormalthatthemachinecreatessomenoise
coming from the pump and the motor.
• Themainscablemustnotcomeintocontactwithanyhotpartsoftheap-
pliance.
• Donotimmersetheapplianceinwateroranyotherliquid.
• Donotexceedthemaximumllingvolumeasindicatedontheapplianc-
es.
• Fillthewatertankonlywithcold,potablewater,neverwithmilkorother
liquids.
• Donotusetheapplianceifthewatertankhasnotbeenlled.
• Thisapplianceisintendedfordomesticuseonly.Themanufacturercannot
accept any liability for possible damage caused by improper or incorrect
use.
• Donotcarrythemachinebythehandle.
• ThismachinecanonlybeusedwithLAVAZZAAMODOMIOcompatible
capsules. Do not put your ngers or any other object in the capsule com-
partment. The capsules can be used only once.
8
!
DE
Erste Schritte
1. Stellen Sie die Maschine auf eine
ebene Fläche. Reinigen Sie den
Behälter vor dem ersten Gebrauch.
Füllen Sie den Behälter mit kaltem
Wasser (trinkbar und nicht spru-
delnd). (Die Maschine darf nicht mit
einem leeren Behälter eingeschaltet
werden!) Stecken Sie das Netzkabel
in die Steckdose und drücken Sie
die Einschalttaste. Die Maschine
ist betriebsbereit, wenn die Tasten
aufhörenzublinkenundkonstant
leuchten.
2. Wenn Sie die Maschine zum
ersten Mal einschalten: Stellen
SieeineSchüssel(mindestens0,5l
Fassungsvermögen)unterdieKaf-
feedüse und brühen Sie dann zwei
Tassen Espresso Lungo auf.
3. Die Maschine darf nicht mit einem
leeren Tank verwendet werden!
Wird sie zu lange ohne Wasser
betrieben, kann die automatische
Ansaugung blockieren. Im Falle
einerStörunglesenSiebitteden
Abschnitt „Fehlersuche“ auf Seite 17.
1. Posez la machine sur une surface
plane. Rincez le réservoir avant de
l’utiliser. Remplissez le réservoir avec
de l’eau potable et non gazeuse. (La
machine ne doit pas être utilisée avec
un réservoir vide !) Branchez le cordon
d’alimentation au secteur et pressez
sur la touche MARCHE. La machine
estprêteàêtreutiliséelorsqueles
touches cessent de clignoter et
restent allumées en continu.
2. Lors de la première mise en ser-
vice de la machine : Placez un réci-
pient (d’une capacité minimale de
0,5l)souslebecàcaféetpréparez
2tassesdecaféEspressoLungo.
3. La machine ne doit pas être
utilisée avec le réservoir vide!
Si vous l’utilisez sans eau pendant
trop longtemps, l’amorçage auto-
matique pourrait se bloquer. En cas
de problème, veuillez vous reporter
auchapitre«Encasd’anomaliede
fonctionnement»àlapage17.
FR
Première utilisation /
EN
Getting started
3. The machine must not be used
with empty tank! If you use it with-
out water for a too long time the
auto priming could be blocked. If
there is an issue please check Trou-
bleshooting section on page 16.
2. When starting the machine for
the rst time: Place a bowl (0.5l ca-
pacity minimum) under the coee
spout, and brew 2 cups of Espresso
Lungo coee.
1. Place the machine on a at sur-
face. Rinse the tank before using
it. Fill the tank with cold, drinkable
and non sparkling water. (The ma-
chine must not be used with empty
tank!) Plug the power cord into the
mains and press the ON button.
The machine is ready to use when
thebuttonsstopashingandbe-
come steady.
Operazioni preliminari /
IT
3. La macchina non deve essere
usata con il serbatoio vuoto! Se
lasciate la macchina senz´acqua per
troppo tempo, l’autoinnesco potreb-
be bloccarsi. Per eventuali problemi
fare riferimento alla tabella “Ricerca
ed eliminazione guasti” a pag. 25.
1. Posizionare la macchina su una
supercie piana. Risciacquare
il serbatoio prima di utilizzarlo.
Riempire il serbatoio con acqua
fresca potabile e non gasata. (La
macchina non deve essere usata con
il serbatoio vuoto!) Inserire la spina
nella presa di corrente e premere il
pulsante ON. La macchina è pronta
all’uso quando le spie smettono di
lampeggiare e rimangono accese.
2. Primo utilizzo della macchina:
Posizionare un recipiente (capacità
minima 1,2 l) sotto il beccuccio di
erogazione del caè e preparare 4
tazzine di caè Espresso Lungo.
9
IT
EN
fR
DE
NL
ES
pT
pL
SV
DA
fI
NO
Ru
AR
fA
9 min Auto-o
1
2
3
Zusatzfunktionen
1. Positionierung der Auangschale für un-
terschiedlich große Tassen. Die Positio-
nierung der Auangschale lässt sich leicht
ändern,umeinegrößereTassedarauf
stellenzukönnen.HaltenSiedieSchalemit
Ihrem Daumen und Ihrem Zeigenger fest
und drücken Sie auf den Plastikhebel, der
sich unten an der Auangschale bendet,
um die Auangschale neu zu positionieren
oder zu entfernen. Positionieren Sie die
Auangschale so, dass Sie die Tasse, die Sie
verwendenmöchten,gutdaraufabstellen
können.WenndieAuangschaledierichti-
ge Position erreicht hat, rastet sie ein, und
SiehöreneinKlickgeräusch.Dasmetallene
Tropfschalengitter kann ebenfalls am So-
ckel der Auangschale angebracht werden.
3. Die Maschine ist mit einer
Energiesparfunktion ausgerüstet,
die die Maschine automatisch nach 9
Min. ausschaltet, wenn sie in dieser Zeit
nicht benutzt wird.
UmdieAbschaltautomatikauf30Mi-
nuten festzulegen, halten Sie die Tasten
füreinenCappuccinoundeinengroßen
Cappuccino gleichzeitig für mehr als
3Sekundengedrückt.WenndieTaste
für einen kleinen Cappuccino anfängt,
mit hoher Frequenz zu blinken, drücken
SiedieTastefüreinengroßenCappucci-
no.
1. Positionnement du bac d’égouttement
pour diérentes tailles de tasse. Vous
pouvez facilement retirer la plaque à tas-
ses et placer une plus grande tasse. Pour
la repositionner ou la retirer, saisissez le
bac avec le pouce et l’index, puis appuyez
sur le levier en plastique situé au bas du
bac d’égouttement. Remettez-la dans la
position adaptée à la taille de la tasse que
vous souhaitez utiliser. Un déclic se fait
entendre lorsque le bac est en position
correcte. La grille métallique du bac
d’égouttementpeutaussiêtreplacéesur
la base du bac.
3. La machine est équipée d’une fonc-
tion économie d’énergie qui éteint
automatiquement la machine après 9
minutes d’inactivité.
Vous pouvez régler la fonction
d’arrêtautomatiquesur30minutesen
appuyant simultanément sur les bou-
tons Cappuccino et Grand Cappuccino
pendantplusde3secondes.Peuaprès,
lorsque le bouton Petit Cappuccino
commence à clignoter rapidement, ap-
puyez sur le bouton Grand Cappuccino.
Fonctions supplémentaires /
Other functions
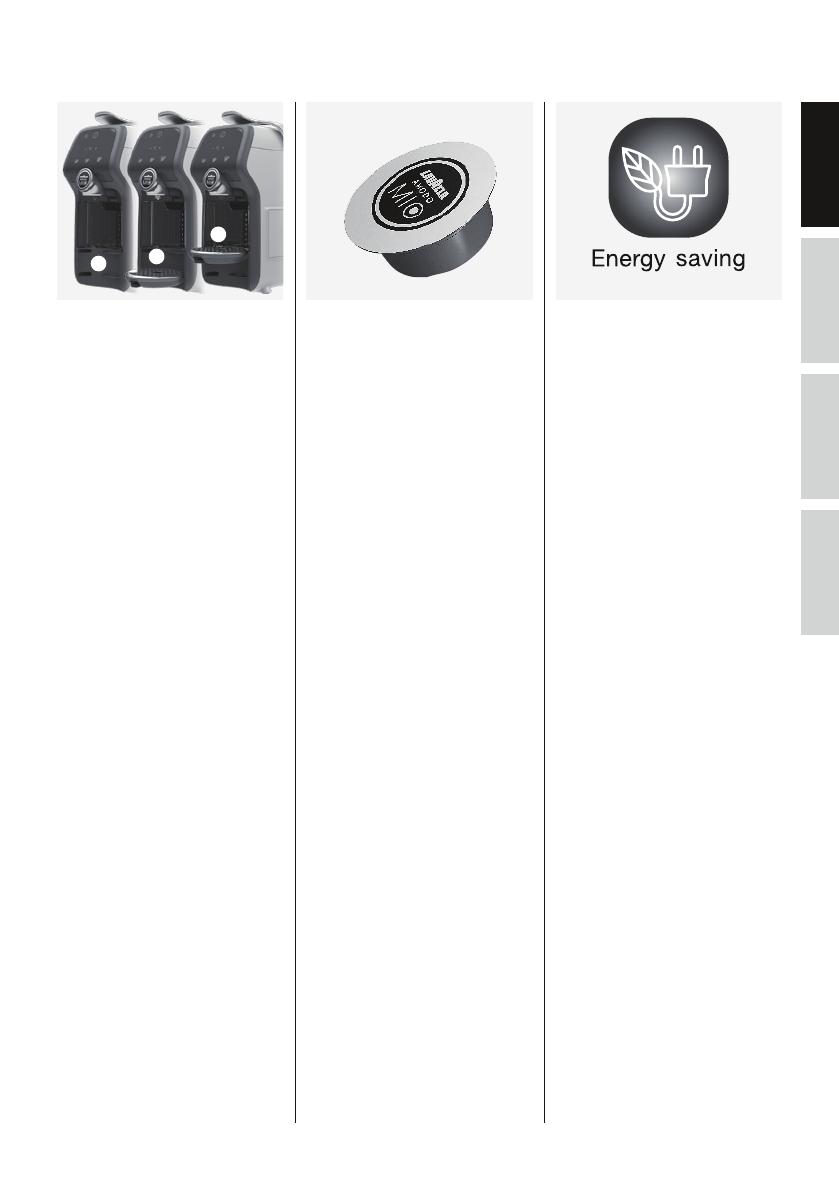
3. The machine is equipped with an en-
ergy saving function that automatical-
ly switches it o after 9 min of inactivity.
You can set the automatic switch o to
30 minutes by pressing the Cappuccino
and Large Cappuccino buttons at the
same time for more than 3 seconds,
afterwards when the Small Cappuccino
button starts blinking at high frequency
press the Large Cappuccino button.
1. Drip tray positioning for dierent
cup sizes. You can easily position the
drip tray and t a bigger cup on it. To
reposition or remove it, hold the tray
with your thumb and index nger and
press the plastic lever located at the
bottom of the drip tray. Place it back
to the position that ts the cup you
would like to use. You can hear a click-
ing sound when the tray is in the right
position. The metal drip tray grid can
be placed on drip tray base as well.
Caratteristiche aggiuntive /
1. Posizionamento della cassetto raccogli
gocce per tazze di dimensioni diverse.
Il cassetto raccogli gocce è facilmente
riposizionabile al ne di poter utilizzare
anche tazze più grandi. Per riposizionare
o rimuovere il cassetto raccogli gocce,
tenerlo tra il pollice e l’indice e premere
la leva in plastica situata sul fondo della
vaschetta. Riposizionarlo in base alla
grandezza della tazza che si desidera
utilizzare. Quando la vaschetta è nella
posizione corretta si sente uno scatto. La
griglia metallica del cassetto raccogli goc-
cepuòesserecollocatosullabasedella
vaschetta.
3. Grazie alla funzione di risparmio ener-
getico, la macchina si spegne automa-
ticamente dopo 9 minuti di inattività.
È possibile impostare lo spegnimento
automatico dopo 30 minuti premen-
do contemporaneamente i pulsanti
Espresso ed Espresso Lungo per più di
3 secondi; successivamente, quando
il tasto Espresso inizia a lampeggiare
velocemente, premere il tasto Espresso
Lungo. Al termine, premere il pulsante
ON/OFF per tornare alla modalità stand-
by.
2. Diese Maschine kann nur mit
Kapseln verwendet werden, die mit
LAVAZZA A MODO MIO kompatibel
sind. Mit Einzelportionskapseln
brühen Sie eine Tasse Kaee.
Verwenden Sie die Kapsel NICHT
MEHR als einmal. Werden zwei oder
mehr Kapseln eingesetzt, kann dies
zu einer Fehlfunktion der Maschine
führen.
2. Cette machine peut être utilisée
uniquement avec des capsules
compatibles avec LAVAZZA A
MODO MIO. Les capsules monodoses
permettent de préparer une tasse de
café. Ne pas réutiliser les capsules.
L’insertion de 2 ou plusieurs capsules
peut entraîner un dysfonctionnement
de la machine.
2. This machine can only be used with
LAVAZZA A MODO MIO compatible
capsules. Single dose capsules brew
a single coee/product. DO NOT use
the capsules more than once. Inserting
2 or more capsules can cause the
machine to malfunction.
2. Utilizzare questa macchina
esclusivamente con capsule
compatibili LAVAZZA A MODO
MIO. Le capsule monodose sono
predisposte per erogare una singola
dose di caè/prodotto. NON utilizzare
le capsule più di una volta. Inserire 2 o
più capsule nella macchina potrebbe
causare malfunzionamenti.
10
1
2
1. Sollevare la leva e inserire una
capsula nel vano inserimento
capsula. Abbassare la leva e pre-
mere il pulsante Espresso, Espresso
Lungo o Caè Lungo. Se si desidera
meno caè, premere nuovamente il
pulsante per interrompere l’eroga-
zione. Quando si raggiunge la dose
caè desiderata, sollevare la leva.
La capsula usata cadrà nel cassetto
capsule usate.
2. Selezione della temperatura.
Prima di premere il pulsante del
caè, è possibile scegliere tra due
diversetemperature:altaoinferiore
premendo il tasto “°C”. La tempe-
ratura predenita è indicata dal
segno“+”, mentre la temperatura
inferiore è indicata dal segno “-”.
3. Programmazione della quantità
di caè. Posizionare una tazzina
sulla cassetto raccogli gocce. Per
accedere alla modalità di modica,
premere e tenere premuto il pulsan-
te Espresso, Espresso Lungo o Caè
Lungo no a quando il pulsante
inizia a lampeggiare 3 volte al se-
condo. Tenere premuto il pulsante
e rilasciarlo al raggiungimento della
quantità di caè desiderata.
Kaffeezubereitung
1. Stellen Sie den Hebel nach oben
und setzen Sie eine Kapsel in das
Fach. Drücken Sie zuerst den Hebel
nach unten und drücken Sie dann die
Espresso-Taste, die Espresso-Lungo-
Taste oder die Caé-Crema-Taste.
WennSiemöchten,dasseinegerin-
gere Menge an Kaee in Ihrer Tasse
aufgebrüht wird, dann drücken Sie
dieselbe Taste noch einmal, um den
Brühvorgang zu beenden.
Sobald der Kaee fertig ist, stellen Sie
den Hebel nach oben und die Kapsel
fällt in den Behälter für verbrauchte
Kapseln.
2. Temperatureinstellung. Siekön-
nen vor dem Drücken einer Kaee-
Taste aus zwei verschiedenen
Zubereitungstemperaturenwählen:
Die Standard-Temperatur oder eine
niedrigere Temperatur durch Drück-
en der „°C“-Taste. Die Standard-
Temperatur wird durch ein „+“ und
eine niedrigere Temperatur durch
ein „-“ gekennzeichnet.
3. Einprogrammieren der Kaee-
menge. Stellen Sie eine Tasse auf
die Kaee-Auangschale. Drücken
Sie die Espresso-Taste, die Espresso-
Lungo-Taste oder die Caé-Crema-
Taste und halten Sie sie gedrückt,
bis sie dreimal pro Sekunde blinkt,
um in den Bearbeitungsmodus zu
wechseln. Halten Sie die Taste ge-
drückt, um mit dem Aufbrühen zu
beginnen und lassen Sie die Taste
wieder los, sobald die gewünschte
Kaeemenge erreicht ist.
DE
La préparation du café /
1. Soulevez le levier et insérez une
capsule dans le compartiment.
Rabattez le levier et appuyez sur la
touche Espresso, Espresso Lungo
ou Caè Crema. Si vous souhaitez
une tasse moins remplie, appuyez à
nouveausurlamêmetouchepour
interrompre l’écoulement. Lorsque
lecaféestprêt,soulevezlelevieret
la capsule tombe dans le récipient
de capsules usagées.
2. Sélection de la température.
Avant d’appuyer sur la touche café,
vous pouvez choisir deux tempé-
raturesdecafé:cellepardéfautou
une température inférieure. Pour
cela,appuyezsurlatouche«°C».La
température par défaut est indiquée
parun«+»;lestempératuresinfé-
rieuressontindiquéesparun«-».
3. Programmation de la quantité
de café. Placez une tasse sur le bac
d’égouttement de café. Appuyez sur
la touche Espresso, Espresso Lungo
ou Caè Crema jusqu’à ce que la
touchesemetteàclignoter3fois
parseconde;vouspassezainsien
mode de modication. Appuyez sur
la touche pour commencer la prépa-
ration du café et ne la relâchez que
lorsque vous avez atteint la quantité
de café souhaitée.
FR
Preparing coffee
EN
1. Lift the lever, insert a capsule in
the compartment. Close the lever
and press the Espresso, Espresso
Lungo or Caé Lungo button. If you
wish less coee brewed in your cup,
press the same button again to stop
the brewing. When the coee is
ready, lift the lever and the capsule
falls down into the used capsules
container.
2. Temperature selection.
Before pressing the coee button,
you can choose between two dif-
ferentcoeetemperatures:default,
or lower temperature by pressing
the “°C” button. The default tem-
perature is indicated by a “+”, lower
temperature is indicated by “-”.
3. Programming coee amount.
Place a cup on the coee drip
tray. Press and hold the Espresso,
Espresso Lungo or Caé Lungo but-
tonuntilthebuttonstartsashing
3 times per second; to enter edit
mode. Press and hold the button to
start brewing and release when the
desired coee amount is reached.
IT
La preparazione del caffè /
11
IT
EN
fR
DE
NL
ES
pT
pL
SV
DA
fI
NO
Ru
AR
fA
4. Solange Sie die Taste gedrückt
halten, blinkt sie weiterhin schnell.
Wenn Sie die Taste wieder loslassen,
blinkt sie dreimal hintereinander
auf, um anzuzeigen, dass diese
Kaeemenge nun als bevorzugte
Menge abgespeichert wurde. Die
Kaeemaschine schaltet dann
wieder in den Standby-Modus
zurück.
4. La touche continuera à clignoter
rapidement tant que vous appuyez
dessus. Lorsque vous la relâchez,
elle clignote trois fois pour indiquer
que votre préférence a été enregis-
trée. La machine revient en mode
de veille.
4. The button will continue to pulse
at high frequency while pressing.
When releasing the button, the but-
ton pulses three times to indicate
that your favourite cup is memo-
rized. The machine then returns to
standby mode.
4. Il pulsante continua a lampeggiare
velocemente mentre lo si preme.
Rilasciando il pulsante questo lam-
peggia tre volte per indicare che è
stata memorizzata la dimensione di
tazzina preferita. La macchina torna
quindi in stand-by.
5. Zur Standardeinstellung wechseln
Wenn Sie die Ein-/Aus-Taste für mehr
als5Sekundengedrückthalten,
setzen Sie die Maschine auf die Stand-
ardeinstellungen zurück.
5. Rétablir les paramètres par défaut
Vous pouvez rétablir les paramètres
par défaut de l’appareil en appuyant
surlatouchemarche/arrêtpendant
plusde5secondes.
5. Change to default setting
You can reset the machine to default
settings by pressing the on/o button
for more than 5 seconds.
5.
Ripristino delle impostazioni
predenite
È possibile ripristinare le impostazioni
predenite della macchina tenendo
premuto il tasto on/o per più di 5
secondi.
12
1. Spegnere la macchina, staccare
la spina e lasciarla rareddare.
Pulire tutte le superci esterne con
un panno umido. Svuotare e sciac-
quare il serbatoio dell’acqua una
volta al giorno.
2. Il contenitore delle capsule usate
è dotato di una nestrella traspa-
rente posta frontalmente per ve-
dere la quantità di capsule usate.
Ogni 2 o 3 giorni oppure dopo 10
caè, i contenitori delle capsule
usate e dell’acqua di scarico devo-
no essere rimossi, svuotati, lavati,
asciugati e riposizionati.
3. È possibile impostare la macchina
in base alla durezza dell’acqua di
rete . Per accedere alla modalità di
modica della durezza dell’acqua,
tenere premuti i pulsanti Espresso
Lungo e Caè Lungo contempora-
neamente per più di 2 secondi. Il
pulsante Espresso Lungo lampeggia
velocemente per indicare che è
stata selezionata la durezza media
(impostazione predenita).
DE
Reinigung und Pflege
1. Schalten Sie die Maschine aus,
ziehen Sie das Kabel aus der
Steckdose und lassen Sie die
Maschine abkühlen. Wischen Sie
das Gehäuse mit einem feuchten
Tuch ab. Leeren und reinigen Sie
den Wasserbehälter einmal am Tag.
2. Der Kapselbehälter mit den ver-
wendeten Kapseln verfügt über
ein transparentes Fenster an der
Vorderseite, durch das Sie sehen
können, wie viele Kapseln ver-
braucht wurden.
Alle 2 bis 3 Tage oder nach 10 Brüh-
vorgängen müssen die verbrauchten
Kapseln und Abwasserbehälter
entfernt, geleert, ausgewaschen,
getrocknet und wieder eingesetzt
werden.
3. Sie können die Einstellungen der
Kaeemaschine an die Wasserhär-
te Ihres Leitungswassers anpassen.
Halten Sie die Espresso-Lungo-Taste
und die Caè-Crema-Taste gleich-
zeitigmehrals2Sekundenlangge-
drückt, um in den Bearbeitungsmo-
dus für die Wasserhärte zu wechseln.
Die Espresso-Lungo-Taste blinkt dar-
aufhin schnell, um anzuzeigen, dass
die Einstellung „Mittlere Wasserhärte“
ausgewählt ist (Standardeinstellung).
FR
Nettoyage et entretien /
1. Eteignez la machine, débranchez
le cordon et laissez refroidir
la machine. Essuyez toutes les
surfaces externes avec un chion
humide. Videz et rincez le réservoir
une fois par jour.
2. Le bac à capsules usagées est doté
d’une fenêtre transparente sur le
devant vous permettant de voir la
quantité de capsules usagées qu’il
contient.
Tousles2ou3jours,ouaprès10cafés
moulus, les bacs pour les capsules
etl’eauusagéesdoiventêtreretirés,
vidés, lavés, séchés et remis en place.
3. Vous pouvez congurer la machine
de façon à l’ajuster à la dureté de
l’eau de votre robinet. Appuyez
simultanément sur les touches Es-
presso Lungo et Caè Crema pendant
2secondesminimumpouraccéder
au mode de modication de la dureté
de l’eau. La touche Espresso Lungo cli-
gnote alors rapidement pour indiquer
la sélection d’une dureté moyenne
(réglage par défaut).
3. You can set the machine to t the
water hardness of your tap water.
Hold the Espresso Lungo and Caè
Crema button simultaneously for
more than 2 seconds to enter hard-
ness edit mode. Then the Espresso
Lungo button blinks at a high
frequency to indicate that “medium
hardness” is selected (default set-
ting).
EN
Cleaning and care
2. The used capsules container
has a transparent window in the
front which helps you to see the
amount of used capsules. Every
2 or 3 days or after 10 brewed cof-
fees, the used capsules and waste
water containers shall be removed,
emptied, rinsed, dried and put back
in its place.
1. Turn the machine o, unplug the
cord and let the machine cool
down. Wipe all outer surfaces with
a damp cloth. Empty and rinse the
water tank once a day.
IT
Pulizia e manutenzione /
13
IT
EN
fR
DE
NL
ES
pT
pL
SV
DA
fI
NO
Ru
AR
fA
4. Drücken Sie die Espresso-Taste, um
die Einstellung „Niedrige Wasser-
härte“ auszuwählen oder drücken
Sie die Caè-Crema-Taste, um die
Einstellung „Hohe Wasserhärte“
auszuwählen. Die ausgewählte Taste
fängt daraufhin an zu blinken. Wenn
Sie alle Einstellungen vorgenommen
haben, drücken Sie die Ein-/Aus-
Taste, um wieder in den Standby-
Modus zu wechseln. Die ausgewählte
Taste leuchtet dreimal hintereinander
auf, um anzuzeigen, dass die neue
Einstellung gespeichert wurde.
Dann schaltet die Maschine in den
Standby-Modus zurück.
6. Austauschen des Wasserlters.
Der Wasserlter sollte nach einen
Verwendungszeitraumvon2Mona-
ten oder nach der Zubereitung von
100TassenEspressoausgetauscht
werden. Der Filter reduziert die An-
sammlung von Kalkablagerungen
und verlängert so die Lebensdauer
der Kaeemaschine. Die Verwen-
dung des Filters ist optional und die
Kaeemaschine kann für den tägli-
chen Gebrauch auch ohne Filter ver-
wendetwerden.Filter-Referenzcode:
EPAB 3, EPAB 6
5. Wasserlter.ImHandelkönnen
Sie einen optionalen Wasserlter
erwerben, der die Wasserhärte
von Leitungswasser mit hohem
Härtegrad auf ein optimales Niveau
reduziert und so die Lebensdauer
der Kaeemaschine verlängert.
Entfernen Sie die Plastikverpackung
des Filters und setzen Sie den Filter so
in den vorgesehenen Steckplatz an
der Unterseite des Wassertanks ein,
dassereinrastet.Filter-Referenzcode:
EPAB 3, EPAB 6
5. Filtre à eau. Vous pouvez acheter
un ltre à eau facultatif permettant
de réduire la dureté de l’eau de
votre robinet à un niveau optimal
et de prolonger la durée de vie de
votre machine. Sortez le ltre de
son emballage et insérez ce dernier
correctement dans sa fente en bas du
réservoir d’eau. Code de référence du
ltre:EPAB3,EPAB6
5. Water lter. You can buy an
optional water lter that decreases
the hardness of your hard tap water
to the optimal level and helps
to prolong the lifetime of your
machine. Remove the lter from the
packaging and place it rmly into
its slot at the bottom of the water
tank.Filterreferencecode:EPAB3,
EPAB 6
5. Filtro dell’acqua. È possibile acqui-
stare un ltro dell’acqua opzionale
che porta la durezza dell’acqua del
proprio rubinetto al livello ottimale
e aiuta a prolungare la durata
della macchina. Rimuovere il ltro
dall’imballaggio in plastica e posi-
zionarlo nella sua sede, sul fondo
del serbatoio dell’acqua. Codice di
riferimentodelltro:EPAB3,EPAB6
4. Appuyez sur la touche Espresso pour
sélectionner une eau plus douce, ou
sur la touche Caè Crema pour une
eau plus dure. La touche sélectionnée
se met à clignoter. Une fois terminé,
appuyezsurlatoucheMarche/Arrêt
pour revenir en mode de veille. La
touche sélectionnée clignote trois fois
pour conrmer l’enregistrement, puis
la machine revient en mode de veille.
6. Remplacement du ltre à eau. Vous
pouvez remplacer le ltre au bout de
2moisd’utilisationouaprèsavoirpré-
paré100tassesd’Espressos.Leltre
vous aide à réduire l’accumulation de
calcaire et, ainsi, à prolonger la durée
de vie de votre machine. Le ltre est
facultatif et nest pas nécessaire pour
un usage au quotidien. Code de réfé-
rencedultre:EPAB3,EPAB6
4. Press the Espresso button to
change to “low, or the Caè
Crema button to change to “high”.
The selected button will start to
blink. When done, press the on/o
button to return to standby. The
selected button pulses three times
to conrm that it is saved, then the
machine returns to standby.
6. Replacing the Water lter.
You can replace the lter after 2
months of use or after brewing 100
cups of Espressos. The lter helps
you prolong the lifetime of your
machine by reducing the build up
of limescale. The lter is optional,
and is not mandatory for daily use.
 Filterreferencecode:EPAB3,EPAB6
4.
Premere il pulsante Espresso per
passare a “low” (bassa), o il pulsante
Caè Lungo per passare a “high”
(alta). Il pulsante selezionato inizia
a lampeggiare. Al termine, premere
il pulsante di accensione/spegni-
mento per tornare alla modalità di
stand-by. Il pulsante selezionato
lampeggia tre volte per confermare
che la modica è stata salvata; la
macchina ritorna quindi in stand-by.
6. Sostituzione del ltro dell’acqua.
Illtropuòesseresostituitodopo2
mesi di utilizzo o dopo 100 tazzine
di caè Espresso. Il ltro consente di
prolungare la durata della macchina
riducendo gli accumuli di calcare. Il
ltro è opzionale e non è obbliga-
torio per l’uso quotidiano. Codice di
riferimentoltro:EPAB3,EPAB6
14
Max.
DE
2. Füllen Sie den Wasserbehälter bis zur Mar-
ke MAX mit kaltem Leitungswasser auf.
Nach dem Aufheizen: Stellen Sie eine
Schüssel unter die Kaeedüse. Halten
Sie die Espresso-Taste und die Caè-Cre-
ma-Tastegleichzeitigmehrals3Sekunden
lang gedrückt, um in den Entkalkungsmo-
dus zu wechseln. Die Kaee-Tasten auf der
linken und rechten Seite blinken während
des Entkalkungsvorgangs in einem wel-
lenförmigenMuster.DiebenötigteZeit
für den Entkalkungsvorgang beträgt etwa
20Minuten.SiekönnendenEntkalkungs-
vorgang manuell abbrechen, indem Sie
die Ein-/Aus-Taste drücken.
3. Sobald der Entkalkungsmodus
abgeschlossen ist, schaltet die
Kaeemaschine automatisch in den
Standby-Modus zurück. Wird die
Kaeemaschine erneut eingeschal-
tet, wird das Entkalkungs-Symbol
ausgeblendet. Reinigen Sie den
Wasserbehälter und füllen Sie ihn
mit frischem Wasser. Drücken Sie
die Espresso-Taste und lassen Sie
den halben Behälter mit frischem
Wasser durch die Maschine laufen,
um das System auszuspülen.
1. Entkalken. Wenn die Anzeige für den
Entkalkungsalarmaueuchtet,sollten
Sie die Kaeemaschine entkalken. Für
eine dauerhaft problemlose Funktions-
weise und eine gleichbleibend gute
Qualität der Kaeezubereitung wird
eineregelmäßigeEntkalkungempfoh-
len. Wir empfehlen die Electrolux Ent-
kalkungslösungEPD4/C/D/E/N/Rzu
verwenden (benutzen Sie auf keinen
Fall Essig). Wassertank entnehmen und
entleeren. Füllen Sie den Entkalker in
den Wasserbehälter (befolgen Sie die
Anweisungen des Herstellers).
DE
Entkalken
2. Remplissez le réservoir jusqu’au repère
MAX avec de l’eau froide. Après la
préchauage: Placez un récipient sous
le bec à café. Appuyez sur les touches
Espresso et Caè Crema pendant plus de
3secondespourlancerlemodededétar-
trage. Pour indiquer que le détartrage est
en cours, les touches de café gauche et
droite clignotent de façon séquentielle. Le
processusdedétartrageprend20minu-
tesenviron.Ledétartragepeutêtreinter-
rompu par simple pression sur le bouton
d’alimentation.
3. Une fois le détartrage terminé,
la machine revient en mode de
veille. Le symbole de détartrage
disparaîtra à la remise en marche
de la machine. Nettoyez le réservoir
d’eau et remplissez-le avec de l’eau
froide;faitescoulerlamoitiéduré-
servoir d’eau froide en appuyant sur
la touche Espresso pour nettoyer le
système.
1. Détartrage. Lorsque le voyant d’alerte
Détartrage s’allume, procédez au détar-
trage de la machine. Il est conseillé de
toujours procéder au détartrage pour
préserver la qualité de votre machine
et du café que vous préparez. Nous
vous conseillons d’utiliser la solution de
détartrage Electrolux EPD4/C/D/E/N/R
(n’utilisez jamais de vinaigre). Vider le
réservoir à eau. Remplissez le réservoir
d’eau avec la solution de détartrage
(suivez les instructions du produit).
FR
Détartrage /
2. Fill the water tank to MAX level using
cold tap water.
After preheating is done: Place a
bowl under the coee spout. Press the
Espresso button and the Cae Crema
button for more than 3 seconds to
start the descaling mode. To indicate
that descaling is in progress the left
and right coee buttons will pulse in a
wave. The descaling process will take
about 20 minutes. The descaling can be
aborted by pressing the power button.
3. When the descaling is complete,
the machine returns to standby
mode. The descaling symbol will be
hidden after restarting the machine.
Clean out the water tank and rell
it with fresh water; run through half
atankwithfreshwatertoushout
the system by pressing the Espresso
button.
1. Decalcifying. When the descaling
alert indicator lights up you should
decalcify the machine. Decalcifying
is always recommended in order to
maintain the quality of your machine
and your coee in the cup. We recom-
mend to use Electrolux decalcifying
solution EPD4/C/D/E/N/R (never use
vinegar). Remove and empty the water
tank. Fill the water tank with decalcify-
ing solution (follow product instruc-
tions).
EN
Decalcifying
IT
Decalcificazione /
2. Riempire il serbatoio dell’acqua no al
livello massimo (MAX) con acqua fredda
di rubinetto. Al termine del preriscalda-
mento: Sistemare un recipiente sotto al
beccuccio erogatore. Per avviare la moda-
lità di decalcicazione, premere i pulsanti
Espresso e Caè Lungo per più di 3 secondi.
Per indicare che la decalcicazione è in cor-
so, i pulsanti di destra e di sinistra del caè
lampeggiano ondeggiando. Il processo
di decalcicazione dura circa 20 minuti. È
possibile interrompere la decalcicazione
premendo il tasto di accensione.
3. Una volta terminata la decalci-
cazione, la macchina torna in
modalità stand-by. Il simbolo di
decalcicazione scompare al riavvio
della macchina. Pulire il serbatoio
dell’acqua e riempirlo no a metà con
acqua corrente; sciacquare l’impianto
premendo il tasto Espresso.
1. Decalcicazione. L’accensione dell’in-
dicatore di allarme decalcicazione
indica che la macchina necessita di
una decalcicazione. Si consiglia si
eseguire sempre la decalcicazione
al ne di mantenere la qualità della
macchina e del caè. Raccomandiamo
di utilizzare la soluzione decalcicante
EPD4/C/D/E/N/R Electrolux (non utiliz-
zare mai aceto). Rimuovere e svuotare
il serbatoio acqua. Riempire il serbatoio
con la soluzione decalcicante (seguen-
do attentamente le istruzioni riportate
sulla confezione del prodotto).
15
IT
EN
fR
DE
NL
ES
pT
pL
SV
DA
fI
NO
Ru
AR
fA
DE
Technische Daten
Spannung/Frequenz: 220-240 V, 50/60Hz. Automatische Abschaltung nach: 9 min, 30 min
Leistung: 1200 W Energieverbrauch im Standby-
Modus:
< 0,5 W
Thermoblock-Leistung: 1150 W Kaeespenderfunktion: Automatisches Anhalten
Außenlänge: 0,8m Kapseltyp: A Modo Mio
Pumpendruck: 15 bar Tropfschalengitter: Edelstahl
Fassungsvermögen Kapselfach: Max. 10 Kapseln Hebelwinkel: 0 - 102 Grad
Abwasserbehälter: 220 ml Abmessungen (L x B x H): 348mm*139.5mm*279mm
(bei nach unten gedrücktem Gri)
Gesamtfassungsvermögen Wasserbehälter: 900 ml Produktnettogewicht: 3.5 kg
Selbstansaugend: JA
Caractéristiques /
FR
Tension/Fréquence: 220-240 V, 50/60Hz. Arrêt automatique au bout de: 9 min, 30 min
Alimentation: 1200W Alimentation en mode veille: <0,5W
Alimentation du Thermoblock: 1150W Fonction de distribution du café: Arrêtautomatique
Longueur extérieure: 0,8m Type de capsule: A Modo Mio
Pression de la pompe: 15bar Plaque d’égouttage: Acier inoxydable
Capacité du compartiment à capsules: Max.10capsules Angle du levier: 0-102degrés
Réservoir d’eau usagée: 220ml Dimensions (L x l x H): 348mm*139.5mm*279mm
(avec poignée fermée)
Capacité du réservoir d’eau, totale: 900ml Poids net du produit: 3.5kg
Auto-aspiration: OUI
EN
Specifications
Voltage/Frequency: 220-240 V, 50/60Hz. Auto o after: 9 min, 30 min
Power: 1200W Standby power: < 0.5W
Thermoblock power: 1150W Coee dispenser function: Auto stop
Cord length, outside the product: 0.8m Capsule type: A Modo Mio
Pump pressure: 15 bar Drip tray grid: Stainless Steel
Capsule compartment capacity: Max 10 capsules Lever angle: 0 - 102 degrees
Waste water container: 220 ml Dimensions (L * W * H): 348mm*139.5mm*279mm
(with handle closed)
Water tank capacity, total: 900 ml Product net weight: 3.5 kg
Self priming: YES
Caratteristiche tecniche /
IT
Tensione/frequenza: 220-240 V, 50/60Hz. Spegnimento automatico dopo: 9 min, 30 min (opzionale)
Alimentazione: 1200 W Consumo di energia in modalità
Standby:
< 0,5 W
Potenza Thermoblock: 1150 W Funzione dosatore caè: Auto Stop
Lunghezza esterna cavo di alimenta-
zione:
0,8m Tipo capsula: A Modo Mio
Pressione pompa: 15 bar Griglia cassetto raccogli gocce: Acciaio inossidabile
Capacità cassetto capsule usate: Max. 10 capsule Angolo leva: 0 - 102 gradi
Capacità contenitore acqua di scarico: 220 ml Dimensioni (L* W * H): 348mm*139.5mm*279mm
(con leva chiusa)
Capacità complessiva serbatoio acqua: 900 ml Peso netto prodotto: 3.5 kg
Autoinnesco:
16
DE
Problems Causes Solutions
The machine does not turn on. The machine is not connected to the
power source.
Connect the machine to the power source.
Contact Electrolux customer service.
The pump is very noisy.
Nowaterow.
No water in the tank. Fill the tank with fresh drinking water.
Check correct water tank position.
The loading lever doesn’t reach the
brewing position.
Capsule inserted incorrectly. Empty the used capsule compartment.
Repeat the sequence, open and close the lever. If that
is not enough remove the capsule manually from the
compartment after unplugging the machine safely.
The coee is cold. Preheat the cup with hot water.
The coee is brewed too fast, the
brewed coee is not creamy.
Capsule already used. Open the lever and insert a new capsule.
Coee is not brewed or brewed in
drips only.
Coee spout is clogged. Brew water without the use of a capsule.
If the machine does not heat up. Thermoblock is not working properly. Contact Electrolux customer service.
The machine requires a lot of time
to heat up.
The machine has limescale build up. Descale the machine.
Coee is not brewed and coee light
ashesveryquickly(0.25sonand
0.25s o).
Thermal sensor is not working properly. Contact Electrolux customer service.
Capsule is stuck in the capsule com-
partment.
Used capsule stayed to long in the cap-
sule compartment.
Unplug the machine and remove the capsule manually
from the compartment.
If you cannot solve the trouble, contact Electrolux customer service.
EN
Troubleshooting
IT
Ricerca ed eliminazione dei guasti /
Anomalie Possibili cause Soluzioni
La macchina non si accende. La macchina non è collegata
all’alimentazione.
Collegare la macchina all’alimentazione.
Contattare il servizio assistenza Electrolux.
La pompa è molto rumorosa.
Nonc’èussod’acqua.
Non c’è acqua nel serbatoio. Riempire il serbatoio con acqua fresca potabile e non
gasata.
Vericare corretta posizione serbatoio. Spingere bene
verso il basso il serbatoio.
La leva non raggiunge la posizione di
erogazione.
Capsula inserita in modo scorretto. Svuotare il cassetto capsule usate.
Ripetere la sequenza, aprire e chiudere la leva. Se le
operazioni non sono sucienti rimuovere la capsula
manualmente dal vano dopo aver scollegato la mac-
china.
Il caé è freddo. Preriscaldare la tazza con acqua calda.
Il caé è stato fatto troppo
velocemente, il caé preparato
non è cremoso.
Capsula già usata. Aprire la leva ed inserire una nuova capsula.
Il caè non viene erogato o solo in
gocce.
Lerogatore caè è ostruito. Erogare solo acqua senza usare una capsula
La macchina non raggiunge la tem-
peratura.
Thermoblock non funziona corret-
tamente.
Contattare il servizio assistenza Electrolux.
La macchina impiega molto tempo
per raggiungere la temperatura.
Probabile formazione calcare. Eseguire procedura decalcicazione.
Il caè non viene preparato e la spia
corrispondente lampeggia molto
rapidamente (0,25 sec. accesa e 0,25
sec. spenta).
Il sensore termico non funziona corret-
tamente.
Contattare il servizio assistenza Electrolux.
La capsula è incastrata nel vano
capsule.
La capsula usata è rimasta troppo a
lungo nel vano di inserimento capsula.
Scollegare la macchina e togliere la capsula manual-
mente dal vano.
Se il problema persiste , contattare l’assistenza clienti Electrolux.
18
DE
Recyceln Sie Materialien mit dem Sym-
bol
. Entsorgen Sie die Verpackung
in den entsprechenden Recycling-
behältern.
Recyceln Sie zum Umwelt- und
Gesundheitsschutz elektrische und
elektronische Geräte.
Entsorgen Sie Geräte mit diesem
Symbol
nicht mit dem Hausmüll.
BringenSiedasGerätzuIhrerörtlichen
Sammelstelle oder wenden Sie sich an
Ihr Gemeindeamt.
Entsorgung
FR
Recyclez les matériaux portant le
symbole
. Déposez les emballages
dans les conteneurs prévus à cet eet.
Contribuez à la protection de
l’environnement et à votre sécurité,
recyclez vos produits électriques et
électroniques.
Ne jetez pas les appareils portant
le symbole
avec les ordures
ménagères. Emmenez un tel produit
dans votre centre local de recyclage ou
contactez vos services municipaux.
Mise au rebut /
EN
Do not dispose appliances marked
with
the symbol with the household
waste. Return the product to your local
recycling facility or contact your mu-
nicipal oce.
Recycle the materials with the symbol
. Put the packaging in applicable
containers to recycle it.
Help protect the environment and
human health and to recycle waste of
electrical and electronic appliances.
Disposal
IT
Smaltimento /
Riciclare i materiali con il simbolo .
Buttare l’imballaggio negli appositi
contenitori per il riciclaggio.
Aiutare a proteggere l’ambiente e la
salute umana e a riciclare riuti deri-
vanti da apparecchiature elettriche ed
elettroniche.
Non smaltire le apparecchiature che
riportano il simbolo
insieme ai
normali riuti domestici. Portare il pro-
dotto al punto di riciclaggio più vicino
o contattare il comune di residenza.
Share more of our thinking at
www.electrolux.com
Electrolux Appliances AB
St.Göransgatan143
S-105 45 Stockholm
Sweden
3480EELM320002010514
  • Page 1 1
  • Page 2 2
  • Page 3 3
  • Page 4 4
  • Page 5 5
  • Page 6 6
  • Page 7 7
  • Page 8 8
  • Page 9 9
  • Page 10 10
  • Page 11 11
  • Page 12 12
  • Page 13 13
  • Page 14 14
  • Page 15 15
  • Page 16 16
  • Page 17 17
  • Page 18 18
  • Page 19 19
  • Page 20 20
  • Page 21 21
  • Page 22 22
  • Page 23 23
  • Page 24 24
  • Page 25 25
  • Page 26 26
  • Page 27 27
  • Page 28 28
  • Page 29 29
  • Page 30 30
  • Page 31 31
  • Page 32 32
  • Page 33 33
  • Page 34 34
  • Page 35 35
  • Page 36 36
  • Page 37 37
  • Page 38 38
  • Page 39 39
  • Page 40 40
  • Page 41 41
  • Page 42 42
  • Page 43 43
  • Page 44 44
  • Page 45 45
  • Page 46 46
  • Page 47 47
  • Page 48 48
  • Page 49 49
  • Page 50 50
  • Page 51 51
  • Page 52 52
  • Page 53 53
  • Page 54 54
  • Page 55 55
  • Page 56 56
  • Page 57 57
  • Page 58 58
  • Page 59 59
  • Page 60 60
  • Page 61 61
  • Page 62 62
  • Page 63 63
  • Page 64 64
  • Page 65 65
  • Page 66 66
  • Page 67 67
  • Page 68 68

Electrolux ELM 6000 LAVAZZA A MODO MIO MAGIA Owner's manual

Category
Coffee makers
Type
Owner's manual
This manual is also suitable for

Ask a question and I''ll find the answer in the document

Finding information in a document is now easier with AI