HQ Power Flowerstar User manual
- Category
- Stroboscopes & disco lights
- Type
- User manual
This manual is also suitable for
Page is loading ...

14.10.2
0
How to
t
Controll
Modifie
r
Modific
a
Die Con
t
0
11
t
urn the cont
r
er line van 3-
p
r
la ligne du c
o
a
r la línea del
c
t
roller-Linie v
o
r
oller line fro
m
p
in naar 5-pin
o
ntrôleur de 3
c
ontrolador d
e
o
n 3-Pin nach
VDPL30
2
rés
i
m
3-pins into
5
aanpassen (
s
broches en 5
e
3 polos y 5
p
5-Pin anpass
e
0ME
terminat
o
eindweerst
a
i
stance de ter
m
terminaci
ó
Terminieru
5
-pins (plug a
n
s
tekker en co
n
broches (fich
e
p
olos (conect
o
e
n (Stecker u
n
o
r
a
nd
m
inaison
ó
n
ng
n
d socket)
n
tact).
e
et contact)
o
r y contacto)
n
d Buchse).
Re
v
©Velle
m
v
. 01
m
an nv

14.10.2
0
1. In
t
To all r
e
Import
a
Thank y
o
service.
I
For mor
our we
b
2. Sa
f
• This
quali
• Mak
e
man
u
• Do n
nece
• Resp
• Use
a
• Inst
a
subs
t
• Kee
p
3. Ge
Refer to
t
• Fami
by u
n
of th
e
• All
m
to th
• Mec
h
• Only
0
11
t
roduction
e
sidents of th
e
a
nt environme
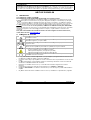
This symbol o
n
could harm th
e
waste; it shoul
to your distrib
u
If in doubt, c
o
o
u for choosing
I
f the device w
a
e info concer
n
b
site www.hq
p
f
ety Instru
c
Be ver
y
electro
s
Always
mainte
n
Indoo
r
liquids.
Keep t
h
Do not
- ep
- te
m
- pe
There a
service
device falls un
d
fied person car
r
e
sure that the
a
u
al.
ot crimp the po
ssary.
ect a minimum
a
n appropriate
s
a
ll the VDPL30
0
t
ances.
p
the air vents f
r
neral Guid
e
t
he Velleman
®
Keep th
are cle
a
the ope
Protect
liarise yourself
n
qualified peopl
e
device.
m
odifications of
t
e device is not
c
h
anical wear is
n
use the device
e
European Un
ntal informati
n
the device or
t
e
environment.
d be taken to a
u
tor or to a loc
a
o
ntact your lo
HQ-power! Ple
a
a
s damaged in
t
n
ing this prod
u
p
ower.eu.
c
tions
y
careful during
s
hocks.
disconnect mai
n
ance activities
r
use only. Kee
h
is device away
stare directl
y
ileptic seizure i
n
m
porarily loss
o
rmanent (irrev
e
re no use
r
-ser
v
and/or spare p
a
d
er protection cl
r
y out the elect
r
a
vailable voltag
wer cord and p
r
distance of 0.5
s
afety cable to
f
0
ME at a mini
m
r
ee at all times.
e
lines
®
Service and
Q
is device away
a
r at all times.
F
nings.
this device fro
m
with the functi
o
e. Any damage
t
he device are
f
c
overed by the
n
ot covered by
w
for its intende
d
VDPL3
0
3
User m
ion
on about this
t
he package in
d
Do not dispose
specialized co
m
a
l recycling ser
v
cal waste dis
p
a
se read the m
a
t
ransit, do not i
n
u
ct and the la
t
the installation
ns power when
are performed.
p this device a
w
from children
a
y
at the light s
o
n
sensitive peo
p
o
f sight (flash bl
e
rsible) eye da
m
v
iceable parts i
n
a
rts.
ass I. It is ther
e
r
ic connection.
e does not exc
e
r
otect it agains
t
m between the
f
ix the device (
e
m
al distance of
0
Never cover t
h
Q
uality Warr
a
from dust and
e
F
or sufficient ai
r
m
shocks and a
b
o
ns of the devic
e
that may occu
r
f
orbidden for sa
f
warranty.
w
arranty.
d
purpose. All o
t
0
0ME
anual
product
d
icates that dis
p
of the unit (or
b
m
pany for recy
c
v
ice. Respect th
e
p
osal authorit
i
a
nual thoroughl
y
n
stall or use it
a
t
est version o
f
: touching live
w
device not in u
Handle the po
w
w
ay form rain,
m
a
nd unauthorize
o
urce, as this
m
p
le
indness)
m
age
n
side the device
e
fore essential
t
e
ed the voltage
t
damage. Hav
e
device’s light
o
e
.g. VDLSC7 o
r
0
.5 m from fla
m
h
e device, nor p
a
nty on the last
e
xtreme heat.
M
r
circulation, le
a
b
use. Avoid bru
t
e
before actuall
r
will most prob
f
ety reasons. D
a
t
her uses may l
e
p
osal of the dev
i
b
atteries) as u
n
c
ling. This devic
e
e
local environ
m
i
es.
y
before bringin
a
nd contact you
f
this user ma
n
w
ires can cause
se or when ser
v
w
er cord by the
m
oisture, splas
h
d users.
m
ay cause
. Refer to an a
u
t
hat the device
stated in the s
p
e
an authorised
o
utput and any
i
r
VDLSC8).
m
mable and exp
l
artially, nor co
m
pages of this
m
M
ake sure the v
a
ve at least 1” (
t
e force when
o
y using it. Do n
ably be due to
a
mage caused
b
e
ad to short cir
c
©Velle
m
i
ce after its life
c
n
sorted municip
a
e
should be ret
u
m
ental rules.
g this device in
r dealer.
n
ual, please v
i
life-threatenin
g
v
icing or
plug only.
h
ing and drippi
n
u
thorized deale
r
be earthed. Ha
v
p
ecifications of
t
dealer replace i
lluminated surf
l
osive objects o
m
pletely.
m
anual.
entilation open
i
±2.5 cm) in fro
o
perating the d
e
ot allow operat
i
unprofessional
u
b
y user modific
a
c
uits, burns,
m
an nv
c
ycle
a
l
u
rned
to
i
sit
g
n
g
r
for
v
e a
t
his
t if
ace.
r
i
ngs
nt of
e
vice.
i
on
u
se
a
tions

VDPL300ME
14.10.2011 ©Velleman nv
4
electroshocks, lamp explosion, crash, etc. Using the device in an unauthorised way will void the
warranty.
• Damage caused by disregard of certain guidelines in this manual is not covered by the warranty and
the dealer will not accept responsibility for any ensuing defects or problems.
• A qualified technician should install and service this device.
• Do not switch the device on immediately after it has been exposed to changes in temperature.
Protect the device against damage by leaving it switched off until it has reached room temperature.
• This device is designed for professional use on stage, in discos, theatres, etc. The VDPL300ME can
be used indoor (<45°C, <50%RH) with an alternating current of max. 240V AC/50Hz.
• Lighting effects are not designed for permanent operation: regular operation breaks will prolong their
lives.
• Use the original packaging if the device is to be transported.
• Keep this manual for future reference.
4. Features
• perfect for small stages, in discotheques and theaters
• rugged housing with mounting bracket
• DMX-controlled operation or stand-alone operation with master/slave function
• DMX512 control via every standard DMX controller
• sound control via built-in microphone
• microphone sensitivity adjustable via rotary control
• each LED can be controlled individually
• create various patterns via LED matrix, with adjustable speed of the internal programs
• addressing via control panel with 4-digit LED display
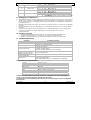
5. Overview
Refer to the illustrations on page 2 of this manual.
1 power input/fuse holder 5 safety eyelet
2 sound sensitivity adjustment knob 6 DMX input
3 microphone 7 DMX output
4 display + buttons 8 ground terminal
6. Installation
Refer to the illustrations on page 2 of this manual.
a) Overhead mounting
• Have the device installed by a qualified person, respecting EN 60598-2-17 and all other applicable
norms.
• The construction to which the device is attached should be able to support 10 times the weight of
the device for one hour without deformation.
• The installation must always be secured with a secondary attachment e.g. a safety cable.
• Never stand directly below the device when it is being mounted, removed or serviced. Have a
qualified technician check the device once a year and once before you bring it into service.
• Install the device in a location with few passers-by and inaccessible to unauthorised persons.
• Overhead mounting requires extensive experience: calculating workload limits, determining the
installation material to be used… Have the material and the device itself checked regularly. Do not
attempt to install the device yourself if you lack these qualifications as improper installation may
result in serious injuries.
• Adjust the desired inclination angle via the mounting bracket and tighten the bracket screws.
b) DMX-512 connection
• When applicable, connect an XLR cable to the female 3-pin XLR output of a controller (not incl.)
and the other side to the male 3-pin XLR input of the VDPL300ME. Multiple VDPL300ME’s can be
linked through serial linking. The linking cable should be a dual core, screened cable with XLR input
and output connectors.
• Maximum recommended serial data link distance is 500 meters (1640 ft). Maximum recommended
number of fixtures on a serial data link is 32 fixtures.
• A DMX terminator is recommended for installations where the DMX cable has to run a long distance
or is in an electrically noisy environment (e.g. discos). The terminator prevents corruption of the
digital control signal by electrical noise. The DMX terminator is simply an XLR plug with a 120Ω
resistor between pins 2 and 3, which is then plugged into the XLR output socket of the last device
in the chain.

14.10.2
0
c) gen
e
• Ha
v
• Co
gr
o
or
• Th
e
7. Op
Refer to
t
Contro
l
• Ac
c
dis
• Th
e
fu
n
m
e
• Us
e
<
E
th
e
N
o
aft
Menu
F
menu
Stand-
A
Auto
M
•
P
•
P
•
U
•
P
•
P
•
U
•
P
Soun
d
This
m
•
P
•
P
•
U
•
P
0
11
e
ral
v
e a qualified e
nnect the devic
o
unded switche
d
dimmer chann
e
e
installation h
a
eration
t
he illustration
s
l
Panel Navi
g
c
ess the control
play [4]. From
button
<MENU>
<UP>
<DOWN>
<ENTER>
e
control panel
n
ction is selecte
e
nu function. T
o
e
the <UP> an
d
E
NTER> to acce
s
e
previous optio
o
te: always pre
s
er a few secon
d
F
unctions
sub-men
u
A
lone Mode
M
ode
P
ress <MENU>
P
ress <ENTER>
U
se <UP> or <
D
P
ress <ENTER>
P
ress <MENU>
U
se <UP> or <
D
P
ress <ENTER>
d
-Active Mode
m
ode allows a si
P
ress <MENU>
P
ress <ENTER>
U
se <UP> or <
D
P
ress <ENTER>
lectrician carry
e to the mains
w
d
circuit and ca
n
e
l is used solely
a
s to be approv
e
s
on page 2 of t
h
g
ation
panel function
s
left to right:
used to acce
s
scrolls throu
g
scrolls throu
g
used to sele
c
display shows
t
d, the display
w
o
select a menu
d
<DOWN> but
t
s
s the menu fu
n
n or menu with
s
s <ENTER> to
d
s.
u
Stand-alo
n
The VDPL
3
Only the ru
Sound co
n
The VDPL
3
Set the se
n
Set interna
Set DMX st
until is
d
to confirm you
D
OWN> to sele
c
to confirm you
until is
D
OWN> to sele
c
to confirm you
ngle unit to run
until is
to confirm you
D
OWN> to sele
c
to confirm you
VDPL3
0
5
out the electric
w
ith the power
n
not be run off
for 0% to 100
%
e
d by an exper
t
h
is manual.
s
using the fou
r
s
s the menu or
g
h the menu o
p
g
h the menu o
p
c
t and store the
t
he menu items
w
ill show imme
d
item, press <E
t
ons to navigat
e
n
ction currently
out changing t
h
confirm a setti
n
n
e operation:
3
00ME will run
nning speed ca
n
trolled opera
t
3
00ME reacts t
o
n
sitivity with th
e
l program spee
d
arting address
b
d
isplayed.
r selection.
c
t auto mode (
r selection.
displayed.
c
t the desired p
r selection.
to the beat of
t
displayed.
r selection.
c
t sound mode
(
r selection.
0
0ME
al connection.
plug. All fixtur
e
a rheostat or d
i
%
switch.
t
before the de
v
r
panel buttons
function
to return to a
p
p
tions in ascend
p
tions in descen
current menu
o
you select fro
m
d
iately the first
a
NTER>.
e
the menu ma
p
displayed or t
o
h
e value, press
n
g. If not, the d
function / de
s
its internal pro
g
n be adjusted.
t
ion:
o
sound.
e
sound sensitiv
d
between 1 (sl
b
etween 1 and
).
rogram speed
(
t
he music.
(
).
e
s must be pow
e
i
mmer circuit,
e
v
ice is taken int
o
located directly
p
revious menu
o
ing orde
r
ding orde
r
o
r option within
m
the menu ma
p
a
vailable optio
n
p
and menu op
t
o
enable a men
u
the <MENU> b
u
evice will retur
n
s
cription
g
ram automatic
ity adjustment
owest) and 10
0
512.
(
~
©Velle
m
e
red directly of
f
e
ven if the rheo
s
o
service.
underneath th
e
o
ption
the menu
p
. When a men
u
for the selecte
t
ions. Press
u
option. To ret
u
u
tton.
n
to its initial s
e
ally.
knob [2].
0
(fastest).
).
m
an nv
f
a
s
tat
e
u
d
u
rn to
e
tting

14.10.2
0
•
U
s
m
Master
/
This m
•
U
e
•
C
m
•
P
•
O
•
P
•
U
DMX M
o
This
m
•
A
s
t
i
n
•
W
p
s
n
• I
(
•
P
•
P
•
U
•
P
DMX
C
cha
n
1
2
3
4
5
6
7
8
0
11
U
se the audio s
e
s
ensitive. The
V
m
icrophone [3]
/
Slave Mod
e
ode allows con
t
U
se standard D
M
e
ach fixture. Fo
r
C
hoose the first
m
ode ( ).
P
ress <ENTER>
O
n each of the
c
P
ress <ENTER>
U
se <UP> or <
D
o
de
m
ode allows you
A
ll DMX-controll
s
ignals. This dig
o the DMX con
t
n
dividual addre
W
hen all device
s
p
articular chan
n
s
imultaneously.
n
umber. Changi
n case of the 8
-
(
CH1~8), the s
e
P
ress <MENU>
P
ress <ENTER>
U
se <UP> or <
D
P
ress <ENTER>
C
hannel Value
s
n
nel fu
n
* s
c
*
interna
l
sound
3
spee
d
pr
o
4
s
5
re
d
6
gre
e
7
bl
u
8
whi
e
nsitivity knob
[
V
DPL300ME wil
.
e
t
rol several unit
s
M
X cables to da
r
longer cable r
u
unit in the cha
i
to confirm you
c
onnected slav
e
to confirm you
D
OWN> to set
t
to control the
f
ed devices nee
d
ital start addre
s
t
roller. The sam
ss can be set f
o
s
have the sam
e
n
el. In other wo
r
If you set indi
v
ng the settings
-
channel VDPL
3
e
cond unit to 9
(
until is
d
to confirm you
D
OWN> to set
t
to confirm you
s
n
ction
c
enes
l
programs/
controlled
d
internal
o
grams
trobe
d
LEDs
e
n LEDs
u
e LEDs
te LEDs
VDPL3
0
6
[
2] on the bac
k
l react to the l
o
s
simultaneousl
isy-chain your
u
u
ns we suggest
i
n to function a
s
r selection.
e
units, press <
M
r selection.
t
he DMX startin
g
f
ixture by any
u
d
a digital start
s
s is the chann
e
e starting addr
e
o
r every device.
e
address, all t
h
r
ds: changing t
h
v
idual addresse
s
of one channel
3
00ME, you wi
l
(
1 + 8) (CH9~
1
d
isplayed.
r selection.
t
he DMX startin
g
r selection.
from to
000 00
0
001 20
8
209 25
5
000 01
0
011 02
0
021 03
0
... ...
231 24
0
241 25
0
251 25
5
000 25
5
000 01
0
011 25
5
000 10
0
101 25
5
000 10
0
101 25
5
000 10
0
101 25
5
000 10
0
101 25
5
0
0ME
k
of the fixture
t
o
w frequencies
o
y.
u
nits together
v
using a termin
a
s
the master fix
M
ENU> until
g
address to
u
niversal DMX c
o
address so tha
t
e
l number from
e
ss can be use
d
h
e units will “lis
t
h
e settings of o
s
, each device
w
will only affect
l
l have to set t
h
1
6), the third to
g
address (
0
blackout
8
scene 1 ~
2
5
all LEDs on
0
no function
0
Program 1
0
Program 2
...
0
Program 2
3
0
Program 2
4
5
Sound con
t
5
slow ~ fas
t
0
No functio
n
5
strobe effe
c
0
red LEDs o
n
5
red LEDs o
f
0
green LED
s
5
green LED
s
0
blue LEDs
o
5
blue LEDs
o
0
white LEDs
5
white LEDs
* Note: c
h
t
o make the fix
t
o
f the music via
v
ia the DMX con
a
tor on the last
ture. Press <M
E
is display
e
.
o
ntroller.
t
the correct de
v
which the devi
c
d
for a whole gr
o
t
en” to the con
t
ne channel will
w
ill “listen” to a
the device in q
h
e start address
17 (9 + 8) (C
H
~ ).
descripti
o
CH2
2
04
3
4
t
rolled
t
n
c
t (slow ~ fast)
n
f
f
s
on
s
off
o
n
o
ff
on
off
h
annel 2 has pr
i
©Velle
m
t
ure more or le
s
the internal
nector on the r
e
fixture (see §
6
E
NU> and choo
e
d.
v
ice responds t
o
c
e starts to “list
o
up of devices
o
t
rol signal on o
n
affect all devic
e
separate chann
uestion.
of the first uni
t
H
17~24), and s
o
o
n
= 000 ~ 010
i
ority over chan
m
an nv
s
s
e
ar of
6
b).
se a
o
the
en”
o
r an
n
e
e
s
el
t
to 1
o
on.
nel 1.

VDPL300ME
14.10.2011 ©Velleman nv
7
8. Cleaning and maintenance
• All screws should be tight and free of corrosion.
• The housing, the lenses, the mounting supports and the installation location (e.g. ceiling, suspension,
trussing) should not be deformed, modified or tampered with e.g. do not drill extra holes in mounting
supports, do not change the location of the connections …
• Mechanically moving parts must not show any signs of wear and tear.
• The electric power supply cables must not show any damage. Have a qualified technician maintain
the device.
• Regularly remove dust from the housing and the air vents using a slightly damp cloth.
• There are no user-serviceable parts inside. Refer to an authorized dealer for service and/or spare
parts.
Fuse Replacement
• Wedge the fuse holder out of its housing with a flat-head screwdriver.
• Remove the damaged fuse from its holder and replace with exact same type of fuse.
• Insert the fuse holder back in its place and reconnect power.
9. Troubleshooting
problem possible solution
fuse keeps blowing check total load placed on fixture
chase is too slow check user manual for speed adjustment
fixture has no power
check for power on mains
check fixture’s fuse
fixture is not responding
check DMX settings for correct addressing
check DMX cables
check DMX indicator on display
fixture is powered on but
there is no movement to the
audio
check audio mode on the display
adjust sound sensitivity knob
light will not come on after
power failure
check fuse
signal loss
use DMX cables only
install terminator
keep DMX cables separated from power cables or blacklight
10. Technical specifications
power supply 230 VAC / 50 Hz
fuse 2A / 250Vac
power consumption 95 W
DMX control 8 channels
DMX connection 3-pin XLR in-and output
LEDs 256pcs (64pcs of each color)
beam angle 36°
dimensions 305 x 275 x 280mm
weight 3 kg
Use this device with original accessories only. Velleman nv cannot be held responsible in the
event of damage or injury resulted from (incorrect) use of this device.
The information in this manual is subject to change without prior notice.
© COPYRIGHT NOTICE
The copyright to this manual is owned by Velleman nv. All worldwide rights reserved.
No part of this manual or may be copied, reproduced, translated or reduced to any electronic medium or
otherwise without the prior written consent of the copyright holder.
Page is loading ...
Page is loading ...
Page is loading ...
Page is loading ...
Page is loading ...
Page is loading ...
Page is loading ...
Page is loading ...
Page is loading ...
Page is loading ...
Page is loading ...
Page is loading ...
Page is loading ...
Page is loading ...
Page is loading ...
Page is loading ...
Page is loading ...
Page is loading ...
Page is loading ...
Page is loading ...
Page is loading ...

Velleman® Service and Quality Warranty
Velleman® has over 35 years of experience in the electronics world
and distributes its products in more than 85 countries.
All our products fulfil strict quality requirements and legal
stipulations in the EU. In order to ensure the quality, our products
regularly go through an extra quality check, both by an internal
quality department and by specialized external organisations. If, all
precautionary measures notwithstanding, problems should occur,
please make appeal to our warranty (see guarantee conditions).
General Warranty Conditions Concerning Consumer Products
(for EU):
• All consumer products are subject to a 24-month warranty on
production flaws and defective material as from the original date of
purchase.
• Velleman® can decide to replace an article with an equivalent
article, or to refund the retail value totally or partially when the
complaint is valid and a free repair or replacement of the article is
impossible, or if the expenses are out of proportion.
You will be delivered a replacing article or a refund at the value of
100% of the purchase price in case of a flaw occurred in the first
year after the date of purchase and delivery, or a replacing article at
50% of the purchase price or a refund at the value of 50% of the
retail value in case of a flaw occurred in the second year after the
date of purchase and delivery.
• Not covered by warranty:
- all direct or indirect damage caused after delivery to the article
(e.g. by oxidation, shocks, falls, dust, dirt, humidity...), and by the
article, as well as its contents (e.g. data loss), compensation for loss
of profits;
- frequently replaced consumable goods, parts or accessories such as
batteries, lamps, rubber parts, drive belts... (unlimited list);
- flaws resulting from fire, water damage, lightning, accident, natural
disaster, etc. …;
- flaws caused deliberately, negligently or resulting from improper
handling, negligent maintenance, abusive use or use contrary to the
manufacturer’s instructions;
- damage caused by a commercial, professional or collective use of
the article (the warranty validity will be reduced to six (6) months
when the article is used professionally);
- damage resulting from an inappropriate packing and shipping of
the article;
- all damage caused by modification, repair or alteration performed
by a third party without written permission by Velleman®.
• Articles to be repaired must be delivered to your Velleman®
dealer, solidly packed (preferably in the original packaging), and be
completed with the original receipt of purchase and a clear flaw
description.
• Hint: In order to save on cost and time, please reread the manual
and check if the flaw is caused by obvious causes prior to presenting
the article for repair. Note that returning a non-defective article can
also involve handling costs.
• Repairs occurring after warranty expiration are subject to shipping
costs.
• The above conditions are without prejudice to all commercial
warranties.
The above enumeration is subject to modification according
to the article (see article’s manual).
Velleman® service- en kwaliteitsgarantie
Velleman® heeft ruim 35 jaar ervaring in de elektronicawereld en
verdeelt in meer dan 85 landen.
Al onze producten beantwoorden aan strikte kwaliteitseisen en aan
de wettelijke bepalingen geldig in de EU. Om de kwaliteit te
waarborgen,
ondergaan onze producten op regelmatige tijdstippen een extra
kwaliteitscontrole, zowel door onze eigen kwaliteitsafdeling als door
externe gespecialiseerde organisaties. Mocht er ondanks deze
voorzorgen toch een probleem optreden, dan kunt u steeds een
beroep doen op onze waarborg (zie waarborgvoorwaarden).
Algemene waarborgvoorwaarden consumentengoederen
(voor Europese Unie):
• Op alle consumentengoederen geldt een garantieperiode van 24
maanden op productie- en materiaalfouten en dit vanaf de
oorspronkelijke aankoopdatum.
• Indien de klacht gegrond is en een gratis reparatie of vervanging
van een artikel onmogelijk is of indien de kosten hiervoor buiten
verhouding zijn, kan Velleman® beslissen het desbetreffende artikel
te vervangen door een gelijkwaardig artikel of de aankoopsom van
het artikel gedeeltelijk of volledig terug te betalen. In dat geval krijgt
u een vervangend product of terugbetaling ter waarde van 100% van
de aankoopsom bij ontdekking van een gebrek tot één jaar na
aankoop en levering, of een vervangend product tegen 50% van de
kostprijs of terugbetaling van 50 % bij ontdekking na één jaar tot 2
jaar.
• Valt niet onder waarborg:
- alle rechtstreekse of onrechtstreekse schade na de levering
veroorzaakt aan het toestel (bv. door oxidatie, schokken, val, stof,
vuil, vocht...), en door het toestel, alsook zijn inhoud (bv. verlies van
data), vergoeding voor eventuele winstderving.
- verbruiksgoederen, onderdelen of hulpstukken die regelmatig
dienen te worden vervangen, zoals bv. batterijen, lampen, rubberen
onderdelen, aandrijfriemen... (onbeperkte lijst).
- defecten ten gevolge van brand, waterschade, bliksem, ongevallen,
natuurrampen, enz.
- defecten veroorzaakt door opzet, nalatigheid of door een
onoordeelkundige behandeling, slecht onderhoud of abnormaal
gebruik of gebruik van het toestel strijdig met de voorschriften van
de fabrikant.
- schade ten gevolge van een commercieel, professioneel of collectief
gebruik van het apparaat (bij professioneel gebruik wordt de
garantieperiode herleid tot 6 maand).
- schade veroorzaakt door onvoldoende bescherming bij transport
van het apparaat.
- alle schade door wijzigingen, reparaties of modificaties uitgevoerd
door derden zonder toestemming van Velleman®.
• Toestellen dienen ter reparatie aangeboden te worden bij uw
Velleman®-verdeler. Het toestel dient vergezeld te zijn van het
oorspronkelijke aankoopbewijs. Zorg voor een degelijke verpakking
(bij voorkeur de originele verpakking) en voeg een duidelijke
foutomschrijving bij.
• Tip: alvorens het toestel voor reparatie aan te bieden, kijk nog
eens na of er geen voor de hand liggende reden is waarom het
toestel niet naar behoren werkt (zie handleiding). Op deze wijze kunt
u kosten en tijd besparen. Denk eraan dat er ook voor niet-defecte
toestellen een kost voor controle aangerekend kan worden.
• Bij reparaties buiten de waarborgperiode zullen transportkosten
aangerekend worden.
• Elke commerciële garantie laat deze rechten onverminderd.
Bovenstaande opsomming kan eventueel aangepast worden
naargelang de aard van het product (zie handleiding van het
betreffende product).
Garantie de service et de qualité Velleman®
Velleman® jouit d’une expérience de plus de 35 ans dans le monde
de l’électronique avec une distribution dans plus de 85 pays.
Tous nos produits répondent à des exigences de qualité rigoureuses
et à des dispositions légales en vigueur dans l’UE. Afin de garantir la
qualité, nous soumettons régulièrement nos produits à des contrôles
de qualité supplémentaires, tant par notre propre service qualité que
par un service qualité externe. Dans le cas improbable d’un défaut
malgré toutes les précautions, il est possible d’invoquer notre
garantie (voir les conditions de garantie).
Conditions générales concernant la garantie sur les produits
grand public (pour l’UE) :
• tout produit grand public est garanti 24 mois contre tout vice de
production ou de matériaux à dater du jour d’acquisition effective ;
• si la plainte est justifiée et que la réparation ou le remplacement
d’un article est jugé impossible, ou lorsque les coûts s’avèrent
disproportionnés, Velleman® s’autorise à remplacer ledit article par
un article équivalent ou à rembourser la totalité ou une partie du prix
d’achat. Le cas échéant, il vous sera consenti un article de
remplacement ou le remboursement complet du prix d’achat lors
d’un défaut dans un délai de 1 an après l’achat et la livraison, ou un
article de remplacement moyennant 50% du prix d’achat ou le
remboursement de 50% du prix d’achat lors d’un défaut après 1 à 2
ans.
• sont par conséquent exclus :
- tout dommage direct ou indirect survenu à l’article après livraison
(p.ex. dommage lié à l’oxydation, choc, chute, poussière, sable,
impureté…) et provoqué par l’appareil, ainsi que son contenu (p.ex.
perte de données) et une indemnisation éventuelle pour perte de
revenus ;
- tout bien de consommation ou accessoire, ou pièce qui nécessite un
remplacement régulier comme p.ex. piles, ampoules, pièces en
caoutchouc, courroies… (liste illimitée) ;
- tout dommage qui résulte d’un incendie, de la foudre, d’un
accident, d’une catastrophe naturelle, etc. ;
- out dommage provoqué par une négligence, volontaire ou non, une
utilisation ou un entretien incorrect, ou une utilisation de l’appareil
contraire aux prescriptions du fabricant ;
- tout dommage à cause d’une utilisation commerciale,
professionnelle ou collective de l’appareil (la période de garantie sera
réduite à 6 mois lors d’une utilisation professionnelle) ;
Page is loading ...
-
 1
1
-
 2
2
-
 3
3
-
 4
4
-
 5
5
-
 6
6
-
 7
7
-
 8
8
-
 9
9
-
 10
10
-
 11
11
-
 12
12
-
 13
13
-
 14
14
-
 15
15
-
 16
16
-
 17
17
-
 18
18
-
 19
19
-
 20
20
-
 21
21
-
 22
22
-
 23
23
-
 24
24
-
 25
25
-
 26
26
-
 27
27
-
 28
28
-
 29
29
-
 30
30


HQ Power Flowerstar User manual
- Category
- Stroboscopes & disco lights
- Type
- User manual
- This manual is also suitable for
Ask a question and I''ll find the answer in the document
Finding information in a document is now easier with AI
in other languages
- français: HQ Power Flowerstar Manuel utilisateur
- español: HQ Power Flowerstar Manual de usuario
- Deutsch: HQ Power Flowerstar Benutzerhandbuch
- Nederlands: HQ Power Flowerstar Handleiding