e 702 xte

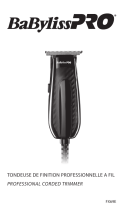
BaByliss e 702 xte, E702XTE, e702yte, E70YTE Owner's manual

  • Hello! I am an AI chatbot trained to assist you with the BaByliss e 702 xte Owner's manual. I’ve already reviewed the document and can help you find the information you need or explain it in simple terms. Just ask your questions, and providing more details will help me assist you more effectively!
7
CLIPPER
E702XTE/E702YTE
1. 2 cutting guides for 22
lenghts (from 3 to 18mm and
from 21 to 36mm, in 1.5mm
steps)
2. 1 precision guide
5 positions (0.5 to 2.5mm)
3. Blades:
Moveable blade:
- Sharpened using 3D etching
process: for an exceptionally
sharp cutting edge.
Fixed Blade:
- Titanium coating: for longer
life.
These two technologies provide
perfect surface condition and their
combination is optimal for reducing
the friction coecient.
4. Turbo function
5. ON/OFF switch
6. Cutting length control knob
7. Lateral display of selected
length
8. Charging indicator light
9. Plug for use on the mains and
for charging
10. Cleaning brush and comb
IMPORTANT INFORMATION
REGARDING THE NI-MH
BATTERIES OF THIS UNIT
To obtain and maintain the
longest battery autonomy
possible, allow it to charge for 16
hours before using it for the rst
time and then approximately
every three months. Full
autonomy of the unit will only be
obtained after three complete
recharge cycles.
CHARGING THE CLIPPER
Before using the clipper for the
rst time, allow it to charge for 16
hours.
1. Connect the transformer to the
mains and the plug into the
unit. (Fig. 1)
2. Check that the charging
indicator light is lit and that the
switch on the trimmer is in the
OFF position.
3. A fully charged trimmer will run
for 30 minutes.
MAINS USE
Connect the transformer into the
mains, wait 1 minute and then
switch into the ON position.
IMPORTANT! Use only the
transformer provided with the
E702XTEXDE/E702YTE clipper
Voltage = 3.0V - Tension =
1000mA
TURBO
For an extra burst of power,
push the TURBO button on the
top side of the clipper. This will
boost the motor of your clipper,
producing faster cutting action
and increased cutting power for
the more dicult cutting tasks.
USING THE CUTTING GUIDES
Very practical, the cutting guide
guarantees equal cutting length.
IMPORTANT: Always attach the
ENGLISH
8
cutting guide BEFORE turning the
trimmer on, and turn it o before
changing the guide.
To attach the cutting guide,
rst adjust the cutting length to
3mm or 21mm and place it on
the support guide adjusting rst
both sides and then pushing on
the bottom of the guide until you
hear a click. (Fig. 2)
To remove the cutting guide, rst
adjust the cutting length to 3mm
or 21mm and push the guide out
of the support lifting it up with
your thumb. (Fig. 3)
NOTE: The precision guide must
be placed like the cutting guides
but it is adjusted manually and
independently of the grooved
wheel.
TURNING ON AND USING
To adjust the clippers cutting
length, turn the grooved wheel
(6) up or down.
The selected length is displayed
on the right or left side of the
clipper.
Switch the ON/OFF button.
You can change the cutting length
at any time.
Thanks to the SMART ADJUSTING
SYSTEM, the length of the cut is
maintained even if the angle of
the clipper varies, so it guarantees
precise result.
CUTTING TECHNIQUES AND
ADVICE FROM THE EXPERTS
Use the clipper on clean, dry
hair.
To familiarize yourself with the
clipper, begin with the cutting
guide for a longer cut, then, if
you want a shorter cut, adjust
it by pushing the knob. You will
soon know the lengths of each
guide and each position.
Always move the clipper against
the direction of hair growth.
Begin at the nape. Place the
guide on the scalp and move the
clipper toward the crown of your
head. Move your clipper slowly,
pointing the teeth of the guide
slightly upward. Keep the clipper
in contact with your head at all
times. (Fig. 4)
For the crown of the head, move
from front to back, that is, from
your forehead to the crown of
your head.
For thenishing touches, that is,
around the nape and sideburns,
use the clipper without a cutting
guide. Turn your clipper over
and move it from top to bottom.
(Fig. 5)
If you want a length greater than
30 mm, or if you are experienced,
you can create comb’ or ‘nger’
cuts:
- Work without a cutting guide.
- Take up a small section of hair
with a comb or in your ngers.
- Move the comb or your ngers
along the section of hair to the
desired length.
9
- Cut your hair along the comb or
your ngers.
- Remove the cut hair using a
comb and check the evenness of
the cut regularly. (Fig. 6)
MAINTENANCE
Remove the cutting guide after
each use.
Cleaning the clipper blades
regularly will maintain their
optimal performance.
Removable blades
To make cleaning easier, the
BaByliss clipper blades can be
removed. Make sure the clipper
is turned o. Hold the clipper
with the blades pointing up and
remove them by pressing the top
of the blade. (Fig. 7)
Brush the blades using the
cleaning brush to remove any
hair.
Self-lubricating blades
The blades of your clipper have
a reservoir pad that dispenses
the amount of oil necessary for
your clipper to operate properly,
every time. It is nevertheless
recommended that you occa-
sionally rell, when you notice the
clipper isn’t performing as well.
Remove the blades as described
above.
Carefully squeeze a few drops of
BaByliss oil onto the pad. (Fig. 8)
Then put the blades back on the
clipper.
BaByliss oil is specially formulated
for clippers, it will not evaporate
or slow the blades down.
You can get new blades when
these are worn or damaged.
/