Page is loading ...

Stand / Date of issue: 08-2007
Bedienungsanleitung
Owner’s Manual
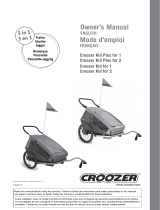
Croozer Kid for 1
Croozer Kid for 2
Originalbedienungsanleitung - für spätere Verwendung aufbewahren
Original Manual - keep in a safe place for future reference
DANGER
You should not use the Croozer Child Carrier if you have not read and understood the contents of this Owner‘s Manual. Failu-
re to heed this warning may result in serious or fatal injury.
GEFAHR
Der Croozer Kindertransporter darf nicht in Betrieb genommen werden, wenn diese Bedienungsanleitung nicht gelesen oder
verstanden worden ist. Nichtbeachtung dieser Warnung kann zu schweren oder tödlichen Verletzungen führen.

33
Owner’s Manual

34
Table of Contents
1. General Items...................................................................
2. Overview of Components.................................................
3. Safety................................................................................
3.1 Explanation of symbols and instructions........................
3.2 General safety instructions............................................
3.3 Safety instructions for all travelling situations................
3.4 Safety instructions when carrying infants.........................
3.5 Safety instructions for maintenance and repairs............
3.6 Warning against unauthorised modifi cations.................
4. Description of the Ready Chassis.....................................
4.1 Supplied as standard.....................................................
4.2 Assembly and folding up................................................
4.3 Wheel assembly.............................................................
4.4 The two-in-one weather cover........................................
4.5 Access............................................................................
4.6 Fitting the handlebar......................................................
4.7 Seat................................................................................
4.8 Seatbelts........................................................................
4.9 Storage bags..................................................................
4.10 Straps for the Baby Seat..............................................
4.11 Operating the parking brake.........................................
5. Use as a Bicycle Trailer.....................................................
5.1 Safety instructions for use as a Bicycle Trailer...................
5.2 Performance characteristics when used as a Bicycle
Trailer................................................................................
5.3 Legal requirements........................................................
5.4 Fixing the hitcharm to the Carrier...................................
5.5 Fixing the hitcharm to the bicycle..................................
5.6 Fitting the safety fl ag......................................................
5.7 Points to note during use...............................................
6. Use as a Jogger................................................................
6.1 Safety instructions for use as a Jogger..........................
6.2 Performance characteristics when used as a Jogger......
6.3 Fitting the wheel arms.......................................................
6.4 Fitting the jogger wheel....................................................
6.5 Fitting and use of the safety wrist strap............................
6.6 Points to note during use..................................................
7. Use as a Stroller................................................................
7.1 Safety instructions for use as a Stroller..........................
7.2 Performance characteristics when used as a Stroller......
7.3 Fitting the stroller wheel....................................................
7.4 Fitting and use of the safety wrist strap............................
7.5 Points to note during use..................................................
8. List of Accessories............................................................
9. Service, Care and Storage...............................................
10. Specifi cations..................................................................
11. Warranty and Guarantee.................................................
35
36
36
36
37
37
38
38
38
39
39
39
42
43
44
45
46
46
47
48
48
49
49
50
50
50
52
55
55
57
57
57
57
58
59
59
60
60
60
60
61
61
62
62
63
63

35
1. General Items
Congratulations on buying this Child Carrier!
Your new Child Carrier is characterised by excellent quality,
user-friendliness, high safety standards and great versatility.
The 3 in 1 System means you can go for bike rides, walks or
go jogging with your children without having to keep a „fl eet“
of special vehicles in the garage or basement.
The child transporter consists of the Ready Chassis
(passenger compartment with chassis, parking brake,
safety wrist strap, two-in-one weather cover, handlebar and
two 20“ wheels) and the 3 in 1 pack:
Hitcharm
8“ swivelling stroller wheel
16“ jogger wheel with wheel arms
Who is this Manual intended for?
This Manual is intended for the owner and user of Croozer
Kid for 1 and Croozer Kid for 2 Child Carriers. The owner
and user is responsible for keeping it in proper condition and
carrying out maintenance as prescribed.
When using this Carrier, please also follow the
Owner’s Manual of the bicycle used for towing and the
specifi cations given there regarding the permissible full load
for the bicycle.
Performance characteristics
Cargo load of the Croozer Kid for 1 35 kg, 1 child
Cargo load of the Croozer Kid for 2 45 kg, max. 2 children
Maximum age of the children 6 years old
Maximum size of the children 117 cm
•
•
•
Intended Use
Use as intended
The Carrier is intended for use, within the performance ranges
specifi ed above, for the carrying of children in daylight hours
on public roads and hard-surface paths. Luggage may also be
carried in the storage bags intended for that purpose,
provided the children in the Carrier are not put at risk.
If the Child Carrier is used as a Bicycle Trailer in conditions of
poor visibility, at dusk or in the hours of darkness, it must be
fi tted with the following lighting equipment:
In the case of the Kid for 1 model: a red rear light, fi tted on
the left-hand side (or fi tted on the right-hand side for countries
where you drive on the left).
In the case of the Kid for 2 model: a red rear light, fi tted on
the left-hand side (or fi tted on the right-hand side for countries
where you drive on the left) and a white light facing forwards,
fi tted on the left-hand side (or fi tted on the right-hand side for
countries where you drive on the left).
Fitting of the lights is described in Section 5.3.
As part of the use as intended, you should also follow this
Owner’s Manual and comply with the prescribed maintenance
requirements.
Use not as intended
Any use that goes beyond the above is not as intended.
Use not as intended is primarily the conveying of people
together with animals, use of this Carrier on off-road terrain,
use for commercial purposes, overloading, excessive speed
and improper rectifi cation of defects.
The manufacturer is not liable for damages arising from use
that is not as intended – this is at the risk of the user.

36
2. Overview of Components
3. Safety
The purpose of this section is to acquaint you with the sym-
bols and safety instructions and make you aware of general
dangers that might arise in using the Carrier. In addition this
will cover the particular dangers of using the carrier in road
traffi c, as well as warning against unauthorised modifi cations.
This section, which is entitled »Safety«, is the most important
section in this Owner’s Manual. For this reason, you need to
read it thoroughly and note the instructions.
3.1 Explanation of symbols and
instructions
In this Owner’s Manual all items relating to safety are
provided with a warning.
In the designation of the possible hazards, distinctions are
drawn based on the severity of the possible harm that may
arise.
WARNING
Instructions introduced with this symbol indicate possible
risk of material damage. Failure to heed this warning may
result in material damage.
TIP
Here you will fi nd instructions that will make using the
product easier for you.
DANGER
Here you will fi nd instructions where failure to comply may
result in risk to life and limb, both for the user and
occupants of the Carrier.

37
3.2 General safety instructions
Basics
Before using the Carrier, please read through the Owner’s
Manual carefully. Failure to comply with the safety
instructions may result in risk to health, life and limb, both
of the user and the occupants of the Carrier.
When using the Carrier, always comply with local safety
and accident prevention regulations, as well as the local
Road Traffi c Act, all of which may restrict use in some way.
Safe and appropriate use of the Carrier is your
responsibility. Before using the Carrier for the fi rst time,
acquaint yourself with its handling characteristics away
from public roads and without carrying children. An empty
Carrier will tip over more easily when negotiating obstacles
with one wheel only than one carrying a load. A fully laden
Carrier makes greater demands than an empty one on the
braking system.
Negotiate downward paths and bends with the utmost
caution and reduce speed when doing so.
As regards the children carried
Never leave your child unsupervised in the Carrier.
Regularly check that your children are appropriately clothed
and that they feel comfortable (e.g. heat or cold).
Only children who can sit up without support may be
carried, unless the Weber Baby Seat (Accessory) is
used.
The maximum height of children who may be carried is
117 cm, and the maximum age is 6 years old.
In the Croozer Kid for 2 a maximum of 2 children may be
carried, and in the Croozer Kid for 1 only one child may be
carried.
Make sure that the limbs, clothing or toys of the children do
not come into contact with the Carrier wheels or the rear
wheel of the bicycle that is towing.
As regards the Carrier
Items of luggage should be well secured so that they
cannot move around during the journey. Unsecured items
of luggage and overloading reduce stability and make the
Carrier more diffi cult to handle.
The Carriers must never be towed behind motorised ve-
hicles.
The Carriers must not be carried on the roof of a vehicle,
even when folded.
At various points on the Carrier, self-locking nuts are used.
If these have been loosened they must not be reused.
Once they have been loosened they lose their original
function, and this can lead to unexpected loosening of the
screw connection with potentially serious consequences.
Do not use the Carrier at temperatures below -20°C (-4°F)
and do not store it at these temperatures, as the windows
might crack.
When opening out or folding up the Carrier, there is a risk
of trapping your hand or fi ngers.
•
•
•
•
•
•
•
•
•
•
•
•
•
•
•
•
As regards the children in the Carrier
When converting the Carrier from Bicycle Trailer mode to
Jogger or Stroller mode, or vice-versa, there should not
be a child sitting in the Carrier. The same applies when
maintenance or repair work is being carried out.
The permitted cargo load of the Croozer Kid for 2 is limited
to 45 kg, and that of the Kid for 1 is limited to 35 kg. The
permitted cargo load must not be exceeded. The cargo
load is the weight of the children together with any luggage
there might be.
Please explain to your child that he/she must not bounce,
fi dget or lean out of the Carrier.
There is a tendency for tyres to smell at higher tempera-
tures. This smell penetrates the fabric materials. This may
subsequently result in the children being exposed to the
smell.
For this reason you should always store the wheels
separately from the other Carrier components.
3.3 Safety instructions for all travelling
situations
As regards the children carried
Never carry items of luggage on the seat next to your child.
Never carry animals together with your children.
As regards the Carrier
Always avoid going over obstacles with one wheel of the
Carrier only, especially on bends – the Carrier might tip
over, even at walking pace!
In the event of the Carrier tipping over, the handlebar acts
as a safety bar. For this reason, keep it permanently fi tted.
The safety wrist strap needed for use as a Jogger and
Stroller should always be attached to the handlebar as
required by the instructions. During use as a Bicycle Trailer,
hang the safety wrist strap up inside under the storage
space cover.
Before each journey check the tyre pressure. The mini-
mum recommended pressure is 30 psi (1.5 bar) and the
maximum is 35 psi (2.5 bar). Even if a higher pressure is
permitted for the tyres fi tted, we recommend that 35 psi
(2.5 bar) not be exceeded.
Do not use compressed air lines (e.g. at service stations).
The tyres may burst due to the small volume of the tubes.
Never negotiate steps with the Carrier.
Before each journey, check that the wheels are fully
engaged.
Before each journey, check that the Auto-lock disk is fully
engaged.
Before each journey, check that the security pins of the
handlebar are correctly inserted and secured.
Always insert the security pin for the stroller wheel in
the hole provided on the stroller wheel bearing bushing.
Secure it with the safety clip.
•
•
•
•
•
•
•
•
•
•
•
•
•
•
•
•
•

38
As regards the children in the Carrier
Never carry children without fastening the seatbelts in the
proper manner, otherwise they could be seriously or even
fatally injured in the event of an accident. Always make
sure the seatbelts are properly adjusted to the height of
your child.
When travelling faster than walking pace, always keep the
two-in-one weather cover closed.
The plastic windows of the Carriers only provide limited
protection against UV radiation. You should therefore
provide protection for your children as if they were in the
open air.
As the children get in and out, both parking brakes must be
on to prevent the Carrier from running away by accident.
3.4 Safety instructions for carrying infants
Children who cannot sit up without support may only be
carried using the Weber Baby Seat (accessory).
The Manufacturer accepts no liability for use of other
seating aids or baby seats.
Please make sure you follow the safety instructions in the
Weber Baby Seat Owner’s Manual
3.5 Safety instructions for maintenance
and repairs
The maintenance work specifi ed (see Section 9) is
absolutely essential for the long-term safe operation of the
Carrier.
Only use original spare parts.
When replacing safety-related parts, such as the frame,
wheels, hitcharm and fabric, only have this carried out by a
specialist retailer.
Regularly check all safety-related parts, such as the frame,
wheels, hitcharm, fabric and seatbelts, for damage or
tearing. At the fi rst sign of damage have the relevant part
replaced by your specialist retailer.
Tears in the fabric actually represent a high safety risk.
Due to tears in the fabric, your child could come into con-
tact with the wheels or the road surface.
If you fi nd a tear in the fabric, contact your specialist retailer
immediately: the fabric can either be repaired or replaced.
Never try to straighten out bent safety-related parts such
as the frame, wheels or hitcharm. Have the relevant part
replaced by your specialist retailer – there is a risk of it
breaking.
We recommend annual maintenance of the wheels by your
specialist retailer.
•
•
•
•
•
•
•
•
•
•
•
•
•
•
•
3.6 Warning against unauthorised
modifi cations and additions
Unauthorised modifi cations of the Carrier are not permitted
for reasons of safety and render the warranty invalid.
The fi tting of a car safety seat or other seats or seat
supports that do not carry the express approval of the
Manufacturer is not permitted.
Do not fi t any additional extension parts, such as a luggage
rack, for instance.
Attaching other child transport systems to the carrier is
prohibited.
•
•
•
•

39
4. Description of the Ready Chassis
4.1 Supplied as standard
Passenger compartment, 20“ wheels, handlebar, safety
fl ag, safety wrist strap, hitcharm with hitch, a second hitch,
8“ stroller wheel, 16“ jogger wheel with wheel arms
4.2 Assembly and folding up
Assembling the Ready Chassis
Before assembling the Ready Chassis, undo the transport
safety lock at the rear of the carrier. Fold the tape up and stow
it away in the pocket under the fabric roof.
You can use the transport safety lock each time you fold the
Carrier up, to stop it accidentally unfolding.
To assemble the passenger compartment, pull the upper
frame tube upwards, at the same time holding the lower part
of the frame with your other hand.

40
Hold the upper frame tube in position and pull the seat frame
towards the rear.
Now close the left Auto-lock disk in the direction of travel.
The left Auto-lock disk is properly closed once the red catch
has snapped into place over the frame tube that points
upwards.
Now close the right-hand Auto-lock disk: Pull the red
sliding button backwards, at the same time as pressing the
Auto-lock disk outwards.
Let go of the red sliding button. The locking pin should now
click into its designated hole in the frame tube that points
upwards. To achieve this, once you have let go of the sliding
button, you might have to move the Auto-lock disk backwards
and forwards slightly.
DANGER
Before each journey make sure that both Auto-lock disks
are engaged. If this does not happen, the passenger
compartment may collapse unintentionally and injure your
child, or cause you to lose control of the Carrier.
The locking pin serves as additional protection against the
carrier accidentally folding up.
Always check to see if the locking pin has engaged properly
by pulling it back, without moving the sliding button.

41
Folding the Ready Chassis
First release the locking pin on the right-hand Auto-lock disk
by pulling the sliding button backwards.
Turn the Auto-lock disk inwards.
Open the left-hand Auto-lock disk.
Press the seat frame forwards and the upper frame tube
downwards.
As you do this, pull the fabric outwards to the right and left.
If you do not do this, there is a risk that it will be caught
between the frame tubes and get damaged.
WARNING
Never attempt to fold up the passenger compartment
without releasing the Auto-lock disks.
WARNING
There is a tendency for tyres to smell at higher tempera-
tures. This smell penetrates the fabric materials. This may
subsequently result in the children being exposed to the
smell.
For this reason you should store the wheels separately
from the other Carrier components.

42
4.3 Wheel assembly
The wheels of Croozer Carriers are fi tted with so-called
push-button axles. Pressing on the rubber cap in the wheel
centre will loosen the retaining balls that lock the axle in the
axle socket. The wheels can only be fi tted and removed with
the plastic cap pushed in.
TIP
The easiest way to fi t the wheel is to lay the Carrier on its
side.
To fi t the wheel, press the rubber cap in and insert the wheel
axle into the axle socket until it can go no further. Release the
rubber cap. By moving the wheel from side to side, check that
it is locked in the axle socket and cannot be pulled off.
When fi tting the wheels, the parking brakes (see Section 4.11)
must be in their released position.
Always make sure that the axle socket is kept free.
The material must not project over the ring-shaped surround
of the axle socket. If it does, the wheel axle cannot be pushed
far enough into the axle socket, making it impossible for the
retaining balls to lock fully.
DANGER
Before each journey make sure that the wheels are secure-
ly locked in the axle socket and that they cannot be pulled
off without pushing the rubber cap in.

43
4.4 The two-in-one weather cover
The Croozer models are fi tted with a two-in-one weather
cover, allowing climate control for the passengers. It covers
the access opening and when fully closed gives protection
against the elements.
The two-in-one cover consists of a roll-up transparent window
with an insect net underneath it.
The transparent window is stitched onto the fabric surround of
the two-in-one weather cover and held in place at the bottom
by means of two Velcro fasteners.
When rolled up, the transparent window is held in place by
means of an elastic loop at each side.
The entire two-in-one weather cover can also be rolled up and
held in place by means of a strap in the centre.
For this, the transparent window must be rolled down and
attached in place to its fabric surround.
When the strap is not needed, it can also be stored away in
the pocket for the transport safety lock (see Section 4.2).
The two-in-one weather cover is secured at the bottom by a
double Velcro fastener on each side. First the Velcro tab of the
two-in-one weather cover is pressed onto the Velcro surface
on the Carrier. Then the Velcro on the Carrier is pressed from
the outside onto the Velcro tab of the two-in-one weather
cover.
Between the two double Velcro fasteners there are three more
Velcro fasteners fi tted to ensure a good fi t between the two-in-
one weather cover and the fabric.
Opening the two-in-one weather cover:
First undo the outer tabs of the assembly at both Velcro
fasteners. Then draw the two-in-one weather cover upwards,
pulling equally on both of its bottom corners.

44
For better ventilation of the Carrier, and particularly when there is
an increase in the outside temperature, the storage space cover
can also be rolled up and held in place at the top using Velcro.
The two-in-one weather cover can be completely removed for
repair and cleaning. To do this, open the snap fasteners on
the sides and the strap on the inside.
The snap fasteners on the Carrier are each attached to a
loop. To make it easier when it comes to refastening the snap
fasteners, slide a fi nger under the loop.
TIP
We recommend that especially long rear wheel mudguards
and a rubber splash guard be fi tted to the bicycle used for
towing to reduce the amount of dirt on the front end of the
Carrier.
WARNING
When travelling faster than walking pace, always keep the
two-in-one weather cover closed. If you do not do this, your
child might be at risk from insects or grit thrown up from the
road.
DANGER
The plastic windows of the Carriers only provide limited
protection against UV radiation. You should therefore
provide protection for your children as if they were in the
open air.
4.5 Access
Make sure that, on getting into the Carrier, your child does not
step on the front area of the fabric. Doing so will consequently
result in the bottom seams of the opening splitting or tearing.

45
4.6 Fitting the handlebar
Before you fi t the handlebar for the fi rst time, if there are
transport safety locks in the ends of the upper frame tubes,
please remove them.
Push the rear end of the two-in-one weather cover forwards
slightly so that the drilled holes are visible.
Insert both ends of the handlebar simultaneously in the ends
of the upper frame tubes. The part of the handlebar that is
held should be pointing upwards.
Push the ends of the handlebar in as far as they will go, so
that the holes drilled in the handlebar and frame tube line up
with each other.
Engage the handlebar in position by inserting the two
security pins through the aligned holes in the handlebar and
frame tube as described. Secure the security pin in position by
letting the safety clip snap over the pin.
TIP
Manufacturing tolerances may result in the handlebar
sticking as it is being inserted in the frame tubes.
A good remedy here is to apply a touch of silicon spray.
DANGER
Make sure that the handlebar is always secured by both
security pins. If this is not the case, the handlebar can
come loose when the Carrier is being pushed, and this may
lead to it rolling away unintentionally, resulting in serious
accidents.
WARNING
In the event of the Carrier tipping over, the handlebar acts
as a safety bar. For this reason always have it fi tted, even
when you use the Carrier as a Bicycle Trailer.
Pull the rear end of the two-in-one weather cover back over
the security pin again. Make sure the snap fasteners that hold
the two-in-one cover in place are closed (see Section 4.4).

46
4.7 Seat
The seat of the Croozer Carriers is fi xed to the frame with ad-
justable straps. The tension of the seat cover can be adjusted
using the adjustable straps.
WARNING
The seat straps should be pulled tight, but not too tight.
Pulling the straps too tight may adversely affect folding.
At the top of the seat back the Croozer Carriers have a cus-
hion attached by Velcro, this can be removed for cleaning.
4.8 Seatbelts
With the Croozer‘s tried and tested 5-point seatbelt system,
your children are securely and comfortably strapped in.
To strap your child in, proceed as follows:
Put your child on the seat with the buckle undone.
Make sure that the crotch belt is between the child’s legs.
Fasten the buckle by inserting the male buckles of the two
shoulder harness/waist belt combinations into the female
buckle of the crotch belt.
•
•
•
Both male buckles must engage in the female buckle with a
clearly noticeable click. Check that the buckles are properly
engaged by pulling on the belt.
Adjust the length of all three straps using the length adjusters.

47
Adjust the straps so that the buckle is in the lower region of
the child‘s chest.
The straps should be tight up against the child‘s body, without
exerting any pressure.
DANGER
Always make sure the seatbelts are properly fi tted. If this is
not the case, your child could be seriously or even fatally
injured in the event of an accident. Always make sure the
seatbelts are properly adjusted to the height of your child.
DANGER
Check the buckles before each journey. If you do not do
this, the restraining function of the belt system could fail in
the event of an emergency, with the serious consequences
mentioned above.
4.9 Storage bags
The Croozer models are fi tted with a large storage bag behind
the seat, a small inside pocket at the rear end of the frame,
and two small mesh pockets next to the seat.
DANGER
Items of luggage should be well secured so that they
cannot move around during the journey. Unsecured items
of luggage and overloading reduce riding stability and
make the Carrier more diffi cult to handle.
DANGER
Depending on the type of use, the storage bags may only
be loaded to a certain weight. Please note the instructions
relating to load in Sections 6.6 and 7.5.
DANGER
Never carry any heavy or protruding items in the large
storage bag if you are carrying children at the same time
(risk of injury on braking).

48
4.10 Straps for the Baby Seat
For attaching the Weber Baby Seat, the following straps are
provided on the Croozer models:
Croozer Kid for 1: 2 straps on the seat and 2 straps
in the foot space
Croozer Kid for 2: 5 straps on the seat and 2 straps
in the foot space
•
•
Ask your specialist retailer about the Weber Baby Seat.
The Croozer models are equipped with a parking brake on
each wheel. The two parking brakes have to be operated
individually.
To lock a given brake, hold the operating lever by means of
the red button and pull it upwards until the front end of the
operating lever engages in the locking disk of the wheel. If
the lever does not immediately engage without any problem,
slowly pull the Carrier forwards or backwards.
To release the brake, press the lever downwards as far as it
will go.
DANGER
When parking the Carrier, always secure it with both
parking brakes. Operating only one of the parking brakes
does not secure the Carrier adequately.
WARNING
Operating the brake by foot can result in damage to the
brake mechanisms and wheels.
WARNING
The parking brake is not suitable for deceleration of a
moving Carrier.
4.11 Operating the parking brake

49
5. Use as a Bicycle Trailer
Fully assembled Bicycle Trailer with hitcharm and safety fl ag
5.1 Safety instructions for use as a Bicycle
Trailer
General safety instructions for use as a
Bicycle Trailer:
Basics
Please make sure you read the safety instructions in the
“Safety” section at the beginning of this Owner’s Manual.
Only cyclists who are experienced and strong enough may
tow Bicycle Trailers. If you wish to carry children in the
Bicycle Trailer, you must be 16 years old or more.
Make sure that your bicycle is in good and safe condition.
We recommend you have your bicycle regularly serviced
by a specialist retailer.
If you are not sure whether your bicycle is suitable for
towing a Carrier, please ask your specialist retailer.
We recommend that an especially long rear wheel
mudguard with splashguard, as well as rear-view mirrors,
be fi tted to the bicycle that is to be used for towing.
When using this Carrier, please also follow the Owner’s
Manual of the bicycle used for towing. Find out whether
your bicycle is permitted for use in towing Bicycle Trailers
and the permitted overall weight of the bicycle/Carrier outfi t.
When parking the bicycle/trailer-combination, make
sure it stands safely. Attaching the Carrier to the bicycle
changes the latter’s centre of gravity, so that certain types
of kickstands cannot be used in connection with a Carrier.
The bicycle may tip over. The Carrier and bicycle may get
damaged. If in doubt consult your specialist retailer.
•
•
•
•
•
•
•
As regards the children carried
Never carry any heavy or protruding items in the storage
space of the Carrier if you are carrying children at the same
time (risk of injury on braking).
For riders of bicycles and children being carried who can
sit without support, we recommend wearing a suitable
approved helmet.
As regards the Carrier
When used as a Bicycle Trailer, the stroller wheel must
never be attached to the bumper.
Remember that on right-hand bends the radius is
restricted. If the rear wheel of the bicycle comes into
contact with the hitcharm, there is a risk of the cyclist falling
off and getting injured.
When manoeuvring, make sure that the Carrier is not set
at an angle of more than 90° to the bicycle, otherwise the
hitch may be damaged.
Make sure that the hitcharm is correctly fi tted and secured
to the Carrier (see Section 5.4).
As regards the children in the Carrier
Please remember that the Carrier should only be coupled
or uncoupled if there is no child inside.
Never cycle without closing the two-in-one weather cover,
otherwise your child might be injured by insects, dirt or
stones thrown up from the road.
Please ensure the following before each
journey:
Make sure that the hitcharm is correctly fi tted and secured
to the Carrier (see Section 5.4).
Make sure the hitch is fi rmly connected to the bicycle.
A hitch that is not securely fi tted may work loose from the
rear axle and result in the loss of the Carrier.
Make sure that the hitcharm is correctly coupled up and
secured to the bicycle (see Section 5.5).
Before each journey, check the following warning devices:
spoke refl ectors, front and rear refl ectors, safety fl ag, and
lights, if present.
Remember that at dusk and in the dark, the bicycle
and Carrier must be equipped with lighting relevant to
the rules and regulations of the country in which the
carrier is being used (see Section 1, „Use as Intended“).
Before each journey, make sure that the maximum Carrier
cargo load is not exceeded and the specifi ed permissible
hitcharm load (nose weight) is maintained.
Pay attention to the following when travelling:
Always cycle with care and look well ahead. Avoid hard
braking. When fully applying the brakes, there is the risk
that the rear wheel of the bicycle may pull to one side and
you lose control of the bicycle/Carrier outfi t.
The maximum permissible speed for towing this Carrier is
25 km/h. Take bends at walking pace, as there is a risk of
tipping over.
Remember that the steering and braking characteristics of
your bicycle are different when towing a Carrier.
Always avoid going over obstacles with one wheel of the
Carrier only, especially on bends – the Carrier might tip
over, even at walking pace!
•
•
•
•
•
•
•
•
•
•
•
•
•
•
•
•
•
•

50
5.2 Performance characteristics when used
as a Bicycle Trailer
Maximum speed 25 km/h (15 mph)
Maximum speed on bends Walking pace
Permitted hitcharm load, nose weight
(to be ensured by good
load distribution if necessary) 1 to 10 kg
Permissible rear wheel size of the
bicycle towing 26 or 28 inches
5.3 Legal requirements
If the child Carrier is used as a Bicycle Trailer in conditions of
poor visibility, at dusk or in the hours of darkness, it must be
fi tted with the following lighting equipment:
In the case of the Kid for 1 model: a red rear light, fi tted on
the left-hand side (or fi tted on the right-hand side for countries
where you drive on the left).
In the case of the Kid for 2 model: a red rear light, fi tted on
the left-hand side (or fi tted on the right-hand side for countries
where you drive on the left) and a white light facing forwards,
fi tted on the left-hand side (or fi tted on the right-hand side for
countries where you drive on the left).
Rear battery-powered lights, for instance, are suitable as
working lighting for the Carrier. Ask your specialist retailer
about suitable lights.
The rear light can be attached to a fl ap near the top of the
rear end.
The front light can be fi tted to the front bumper. Make sure
that the light is vertical and pointing in the direction of travel.
Ask your specialist retailer about suitable lights and how to
attach them.
5.4 Fixing the hitcharm to the Carrier
The hitcharm is always attached to the left-hand side as
seen in the direction of travel.
When you fi rst fi t the hitcharm we recommend that you tip the
Carrier onto its rear end on an even and clean surface. This
will give you a better overall view of the hitcharm and allow
you to fi nd your way around it.
For subsequent fi tting, all you need to do is lift up the front of
the Carrier.
First remove the security pin from the hitcharm attachment
bracket under the front bumper.

51
The hitcharm should be attached to the Carrier so that the
hole at its rear end is facing upwards.
Insert the rear end of the hitcharm into the rear end of the
hitcharm attachment bracket.
The bolts on the sides must engage in the slots of the attach-
ment bracket.
Press the hitcharm upwards so that the bolts slide upwards
into the slots.
WARNING
Make sure that you do not trap the tape holding the
security pin.
Press the hitcharm fully into the attachment bracket so that
you can insert the security pin under the hitcharm through the
two holes at the bottom of the attachment bracket. Insert the
security pin from the outside through the holes in the
attachment bracket.
/