Instrucciones que incluyen
información importante.
Acciones prohibidas.
Microsoft es una marca comercial registrada
de Microsoft Corporation.
Windows es una marca comercial o una marca
comercial registrada de Microsoft Corporation
en EE UU y/u otros países.
Windows Vista es una marca comercial o una
marca comercial registrada de Microsoft
Corporation en EE UU y/u otros países.
Internet Explorer es una marca comercial
o una marca comercial registrada de Microsoft
Corporation en EE UU y/u otros países.
Macintosh, Mac y AirPort son marcas
comerciales de Apple Inc., registradas en
EE UU y en otros países.
Bonjour es una marca comercial de Apple Inc.,
registrada en EE UU y en otros países.
•
•
•
•
•
•
En esta guía, para referirse al sistema operativo
Windows 7 se utiliza el término Windows 7 y para
referirse al sistema operativo Windows Vista se
utiliza el término Windows Vista.
Las pantallas de esta guía se basan en
Windows 7 Home Premium y Mac OS X v.10.6.x.
(A menos que se indique lo contrario, las
pantallas serán de Windows 7).
•
•
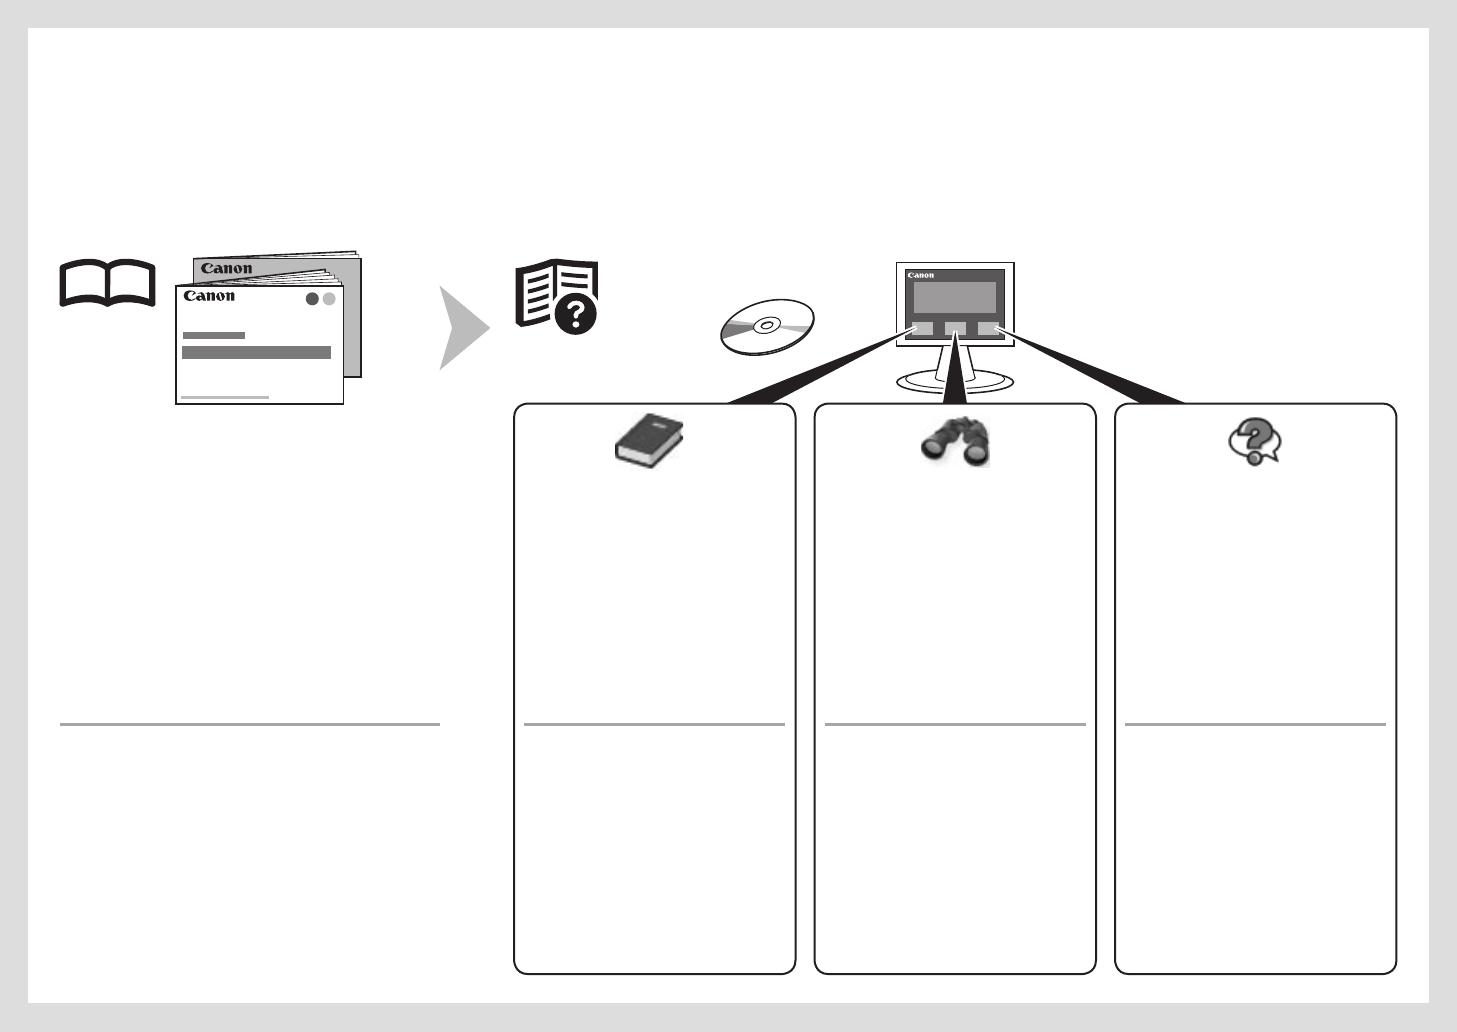
Símbolos utilizados en este
documento
■
Número de modelo: K10360 (MG6120)
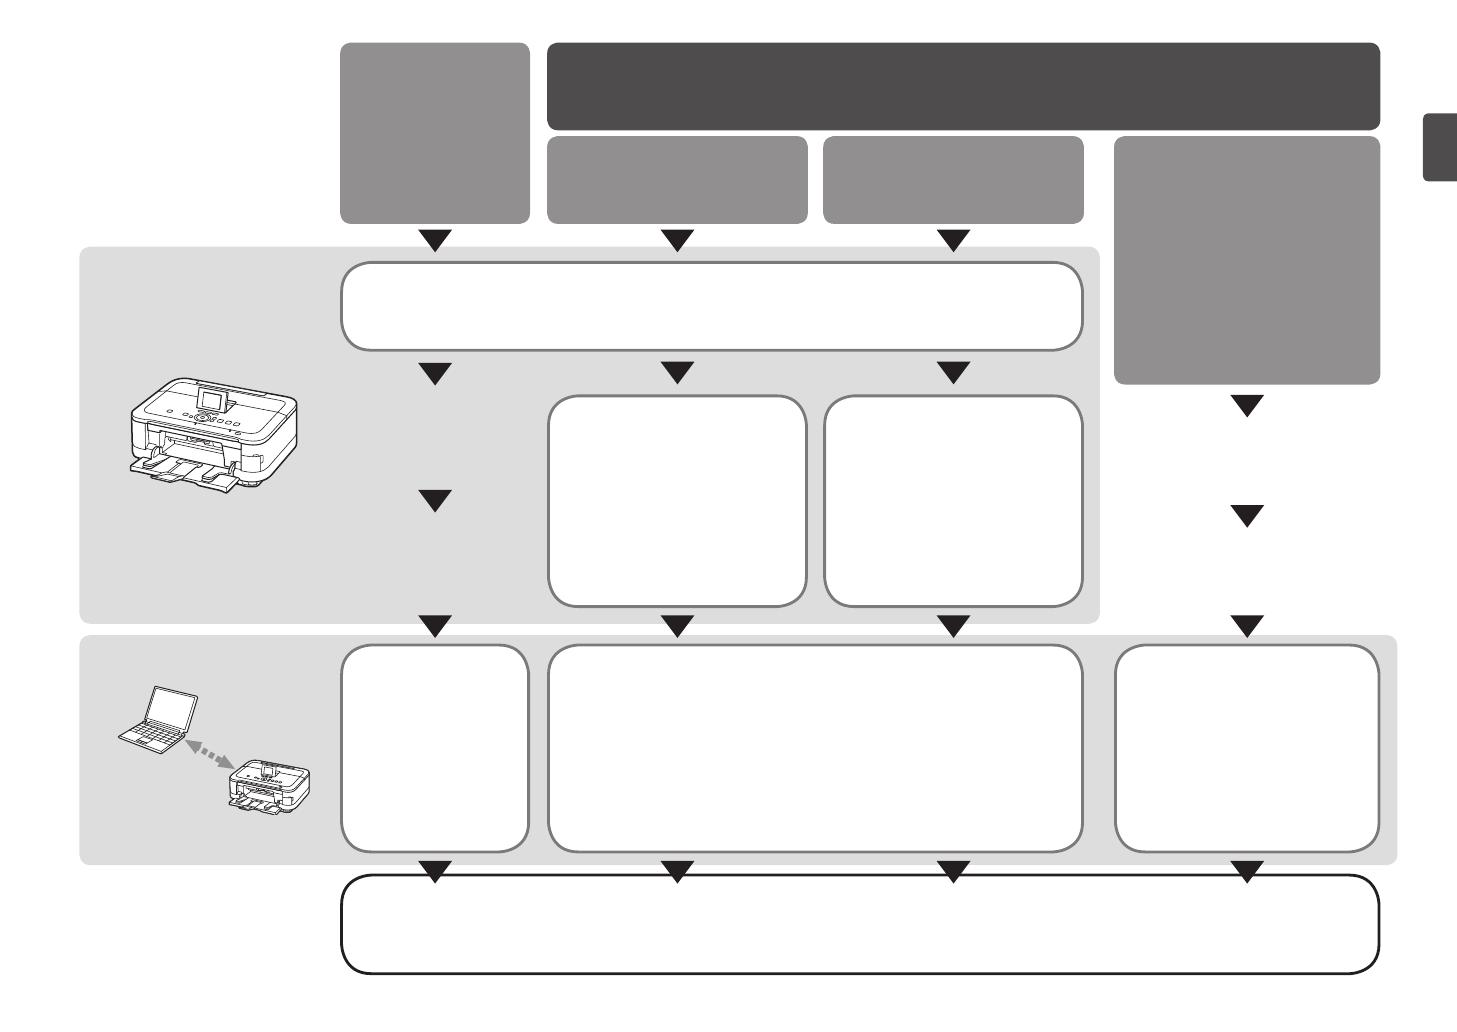
Contenido■
7 Instalación del software (Conexión USB)
P.20
6 Selección del método de conexión P.19
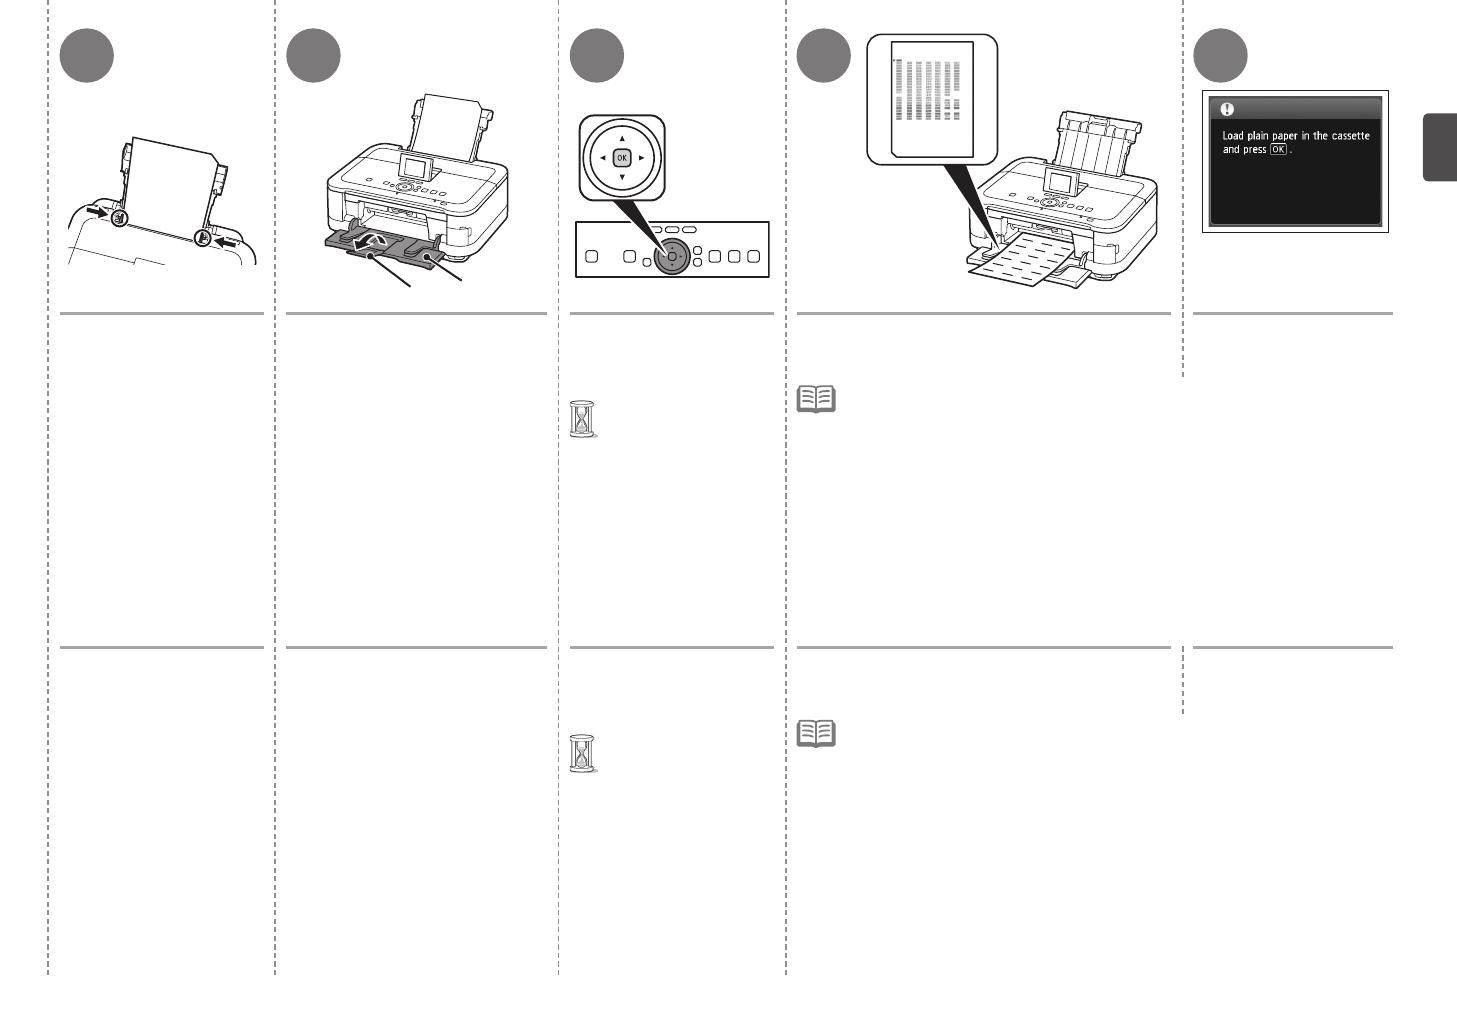
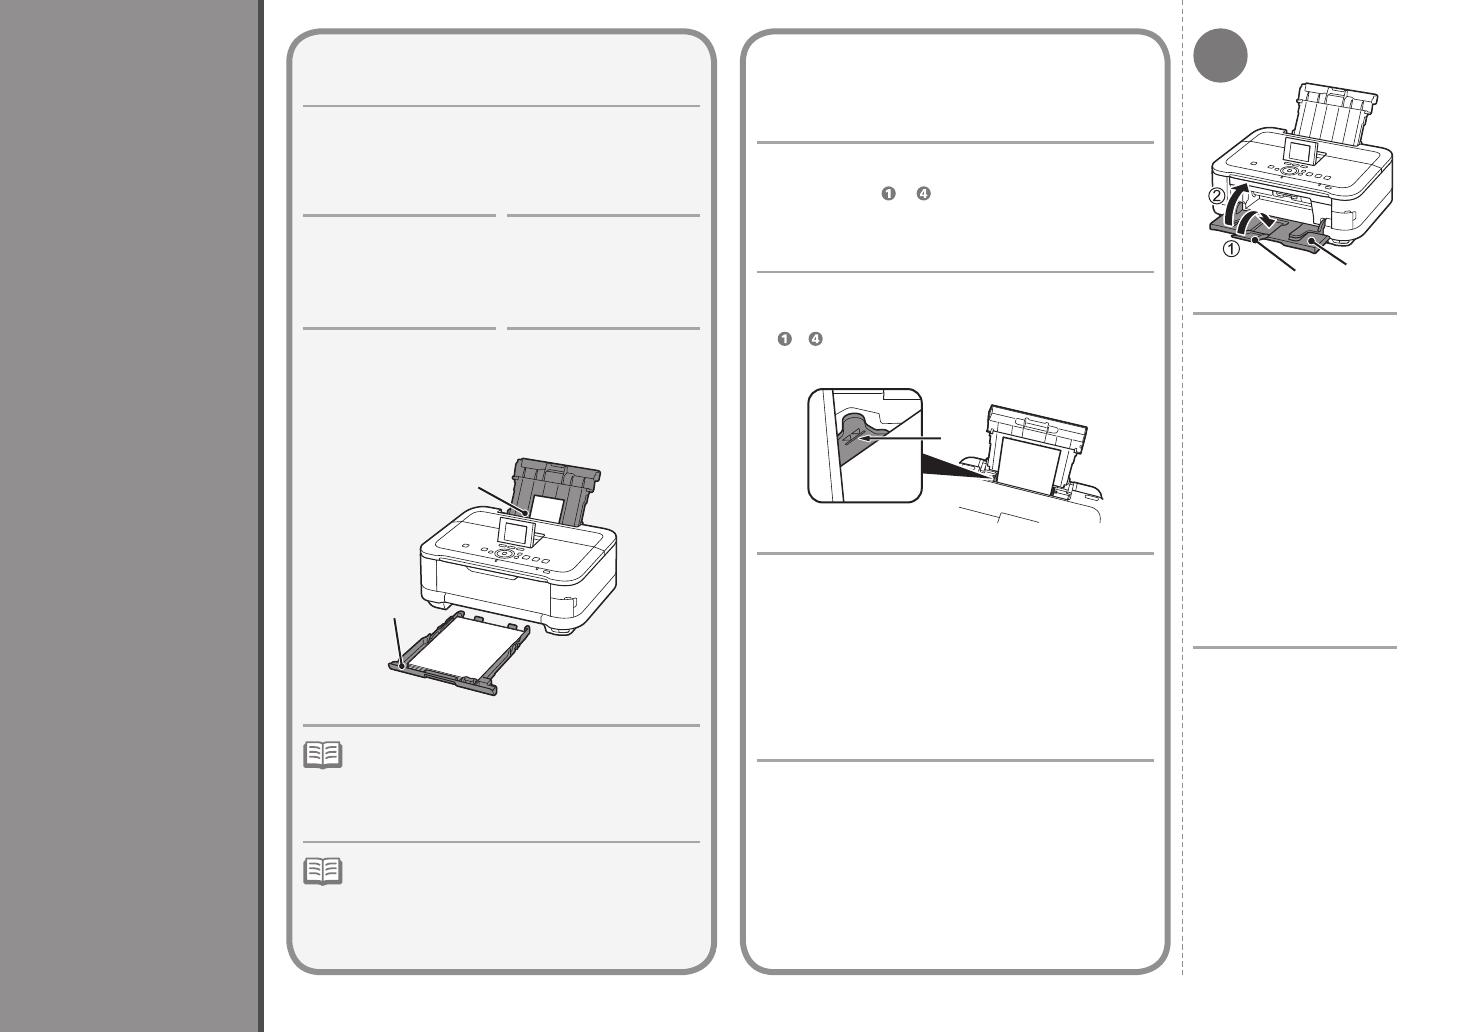
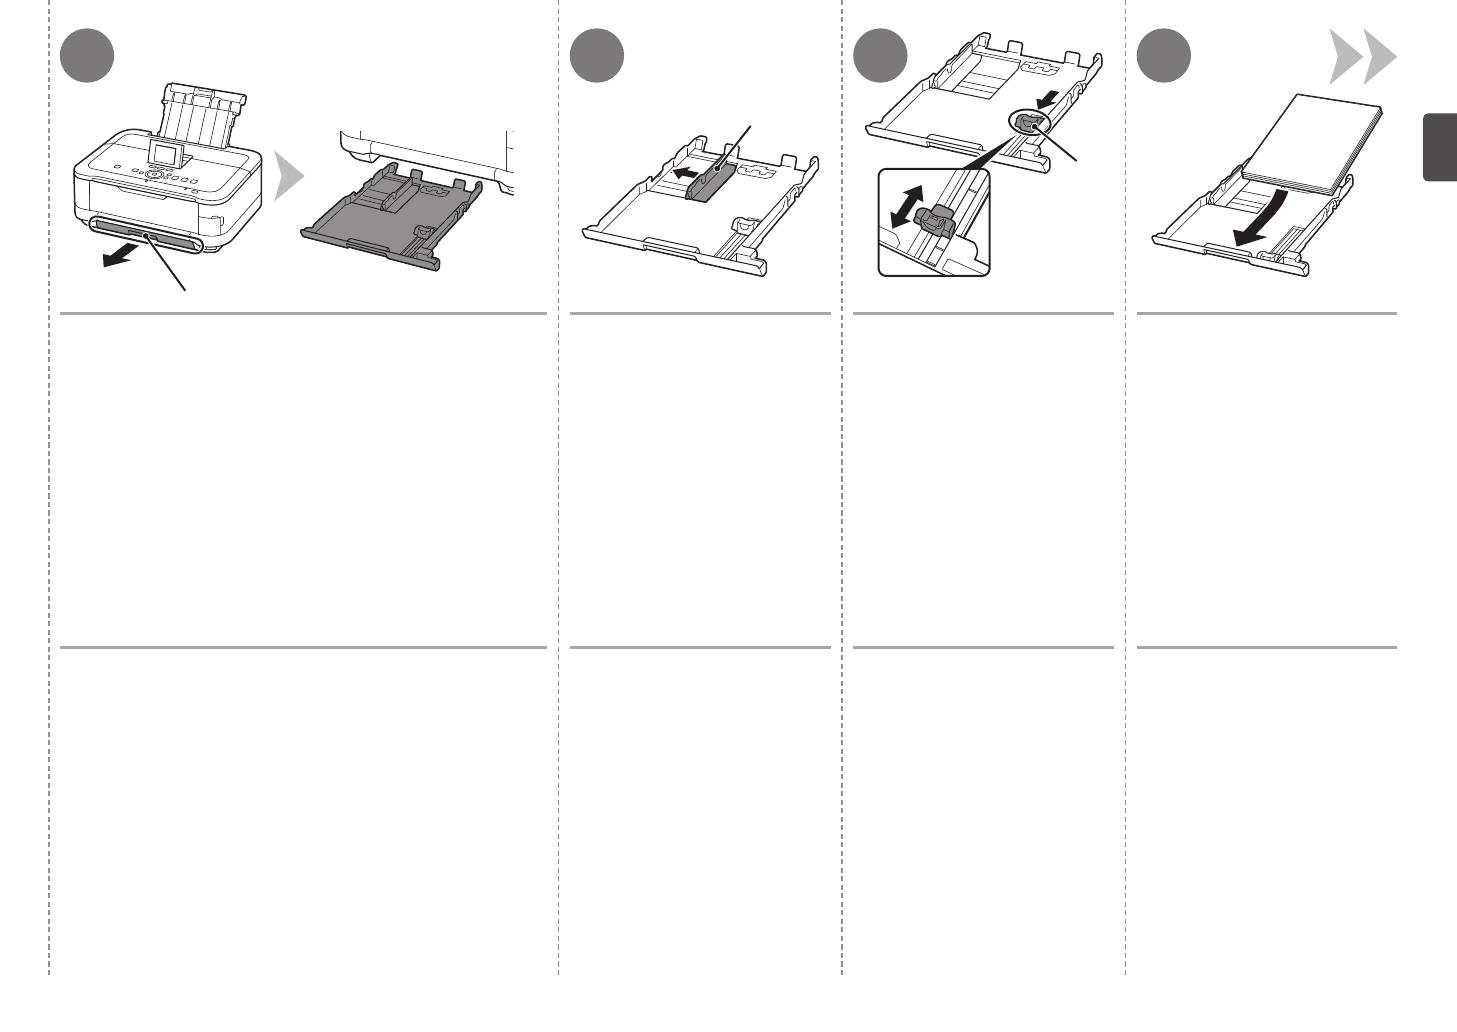
5 Carga del papel P.16
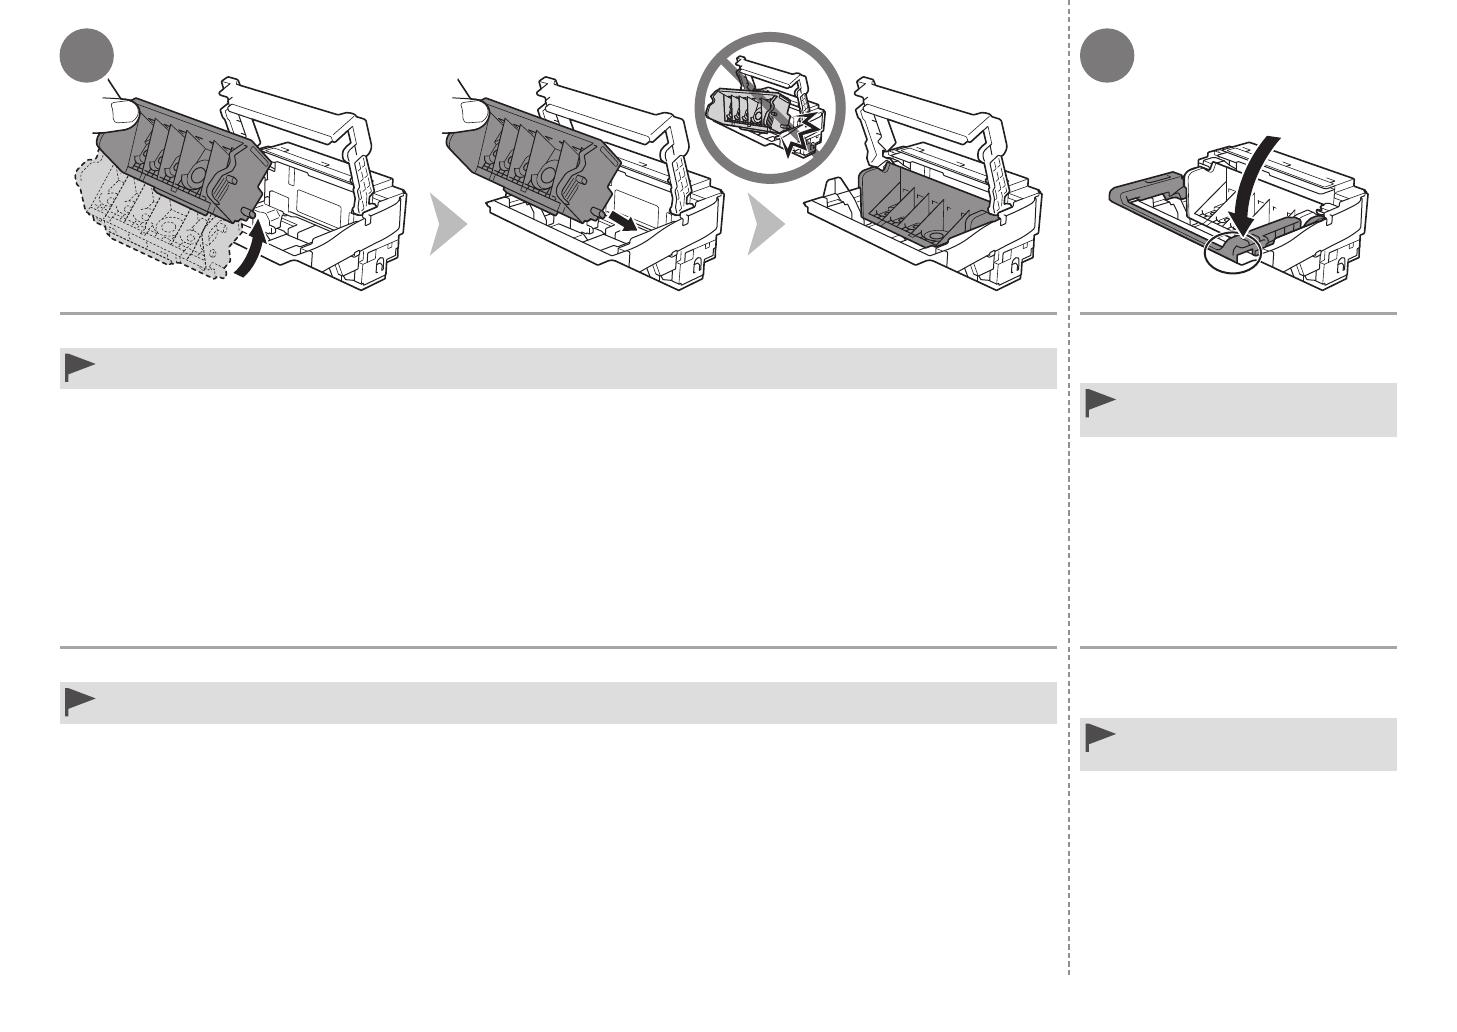
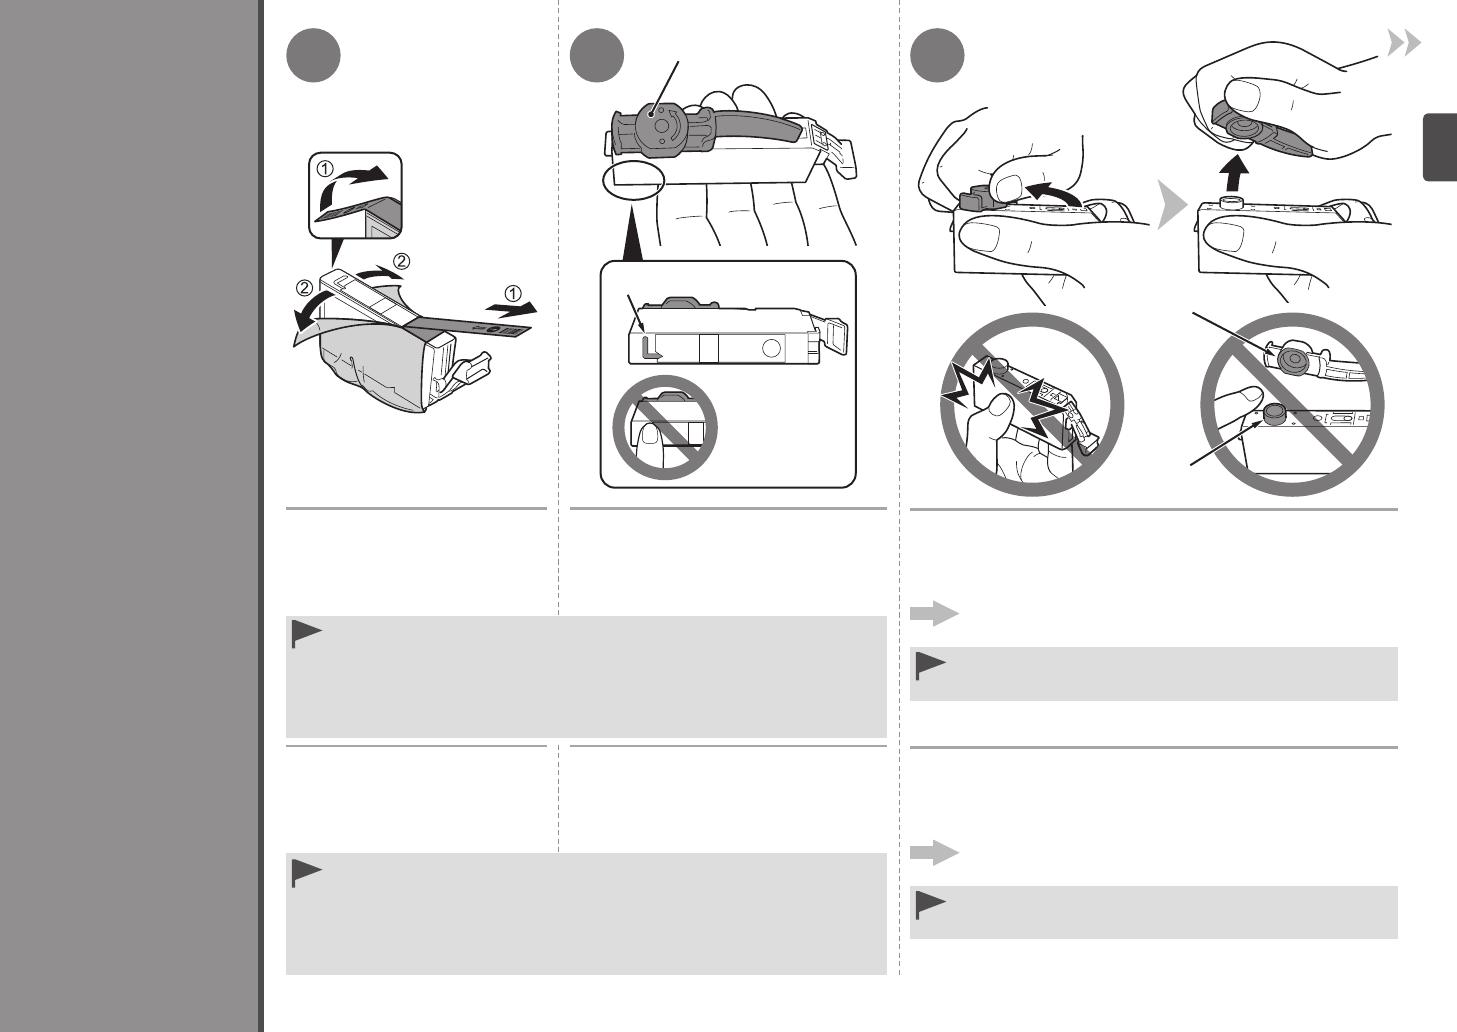
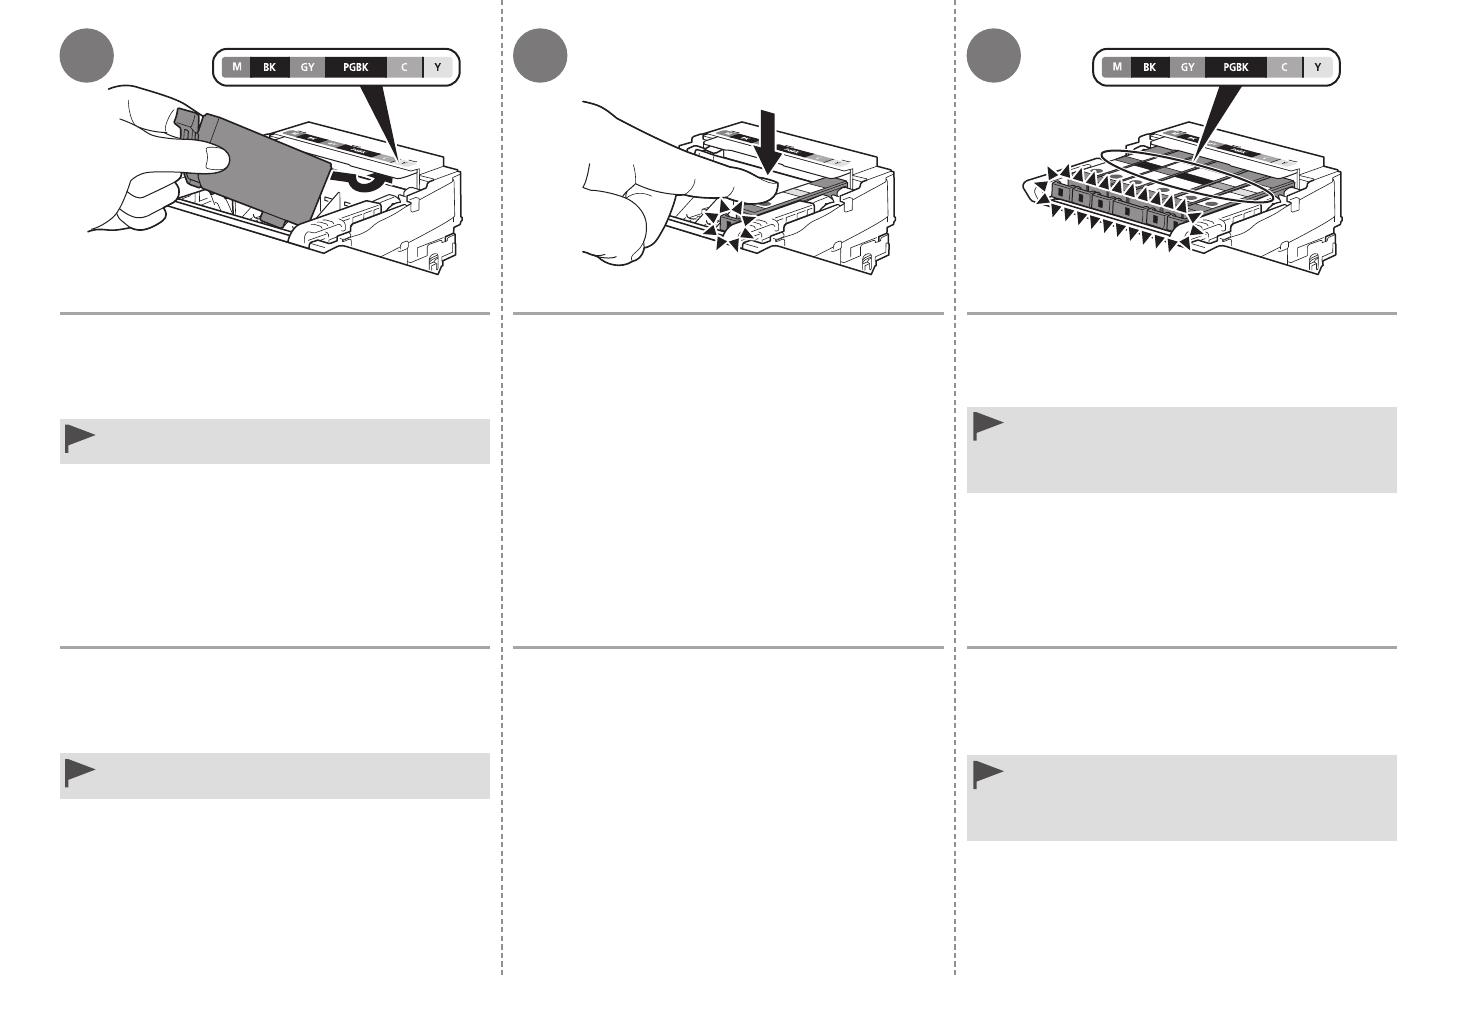
3 Instalación de los depósitos de tinta P.11
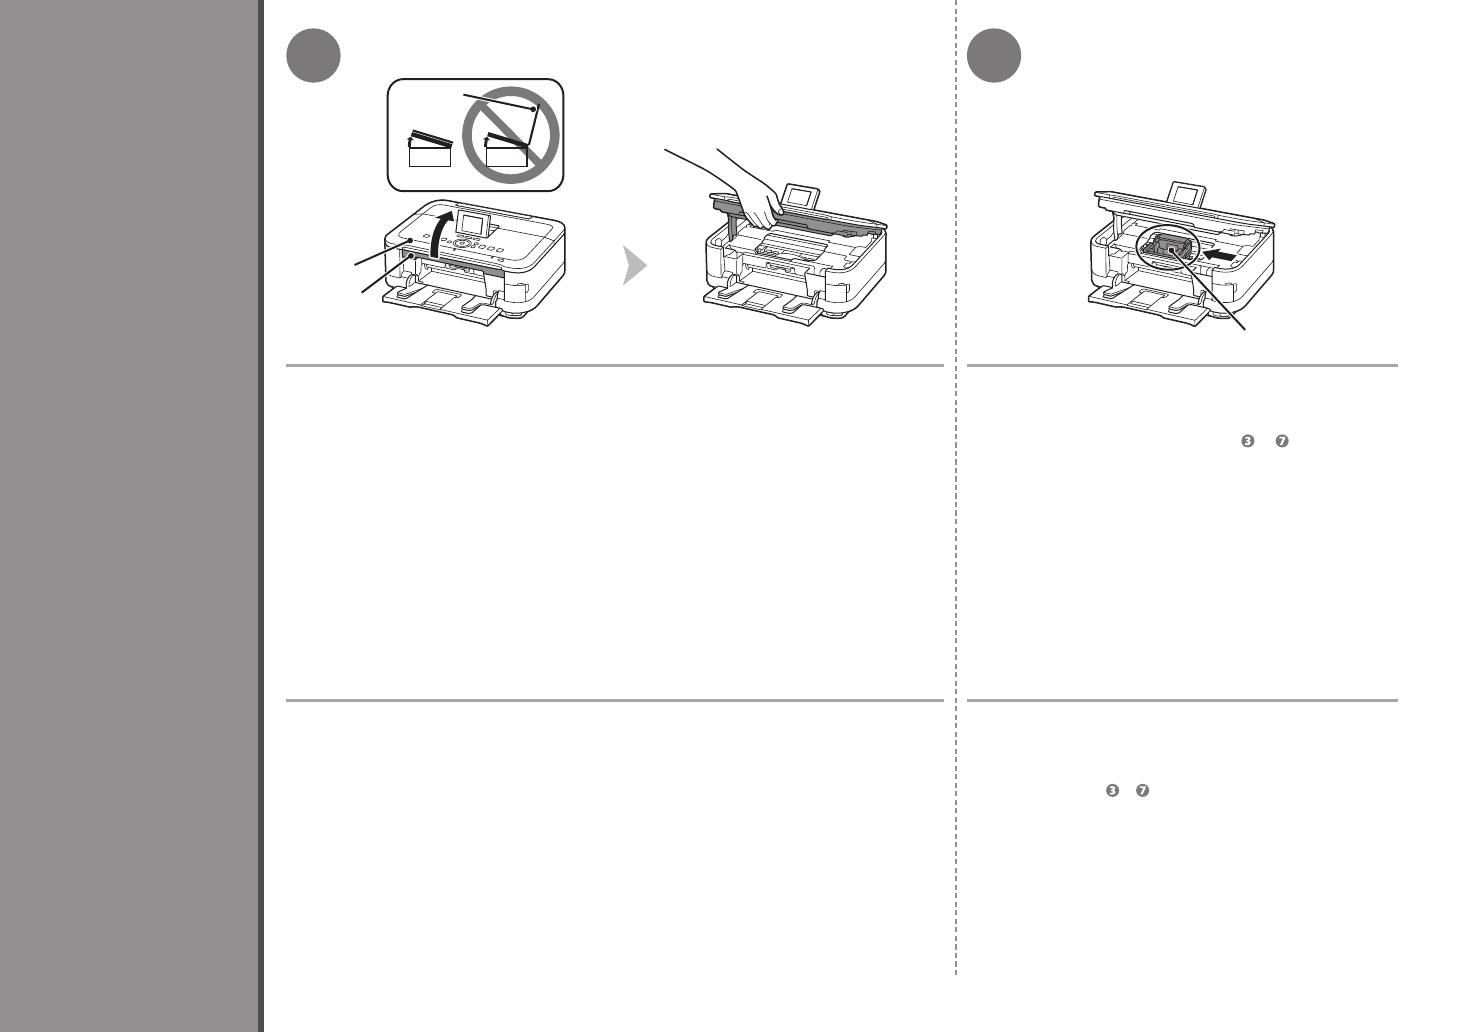
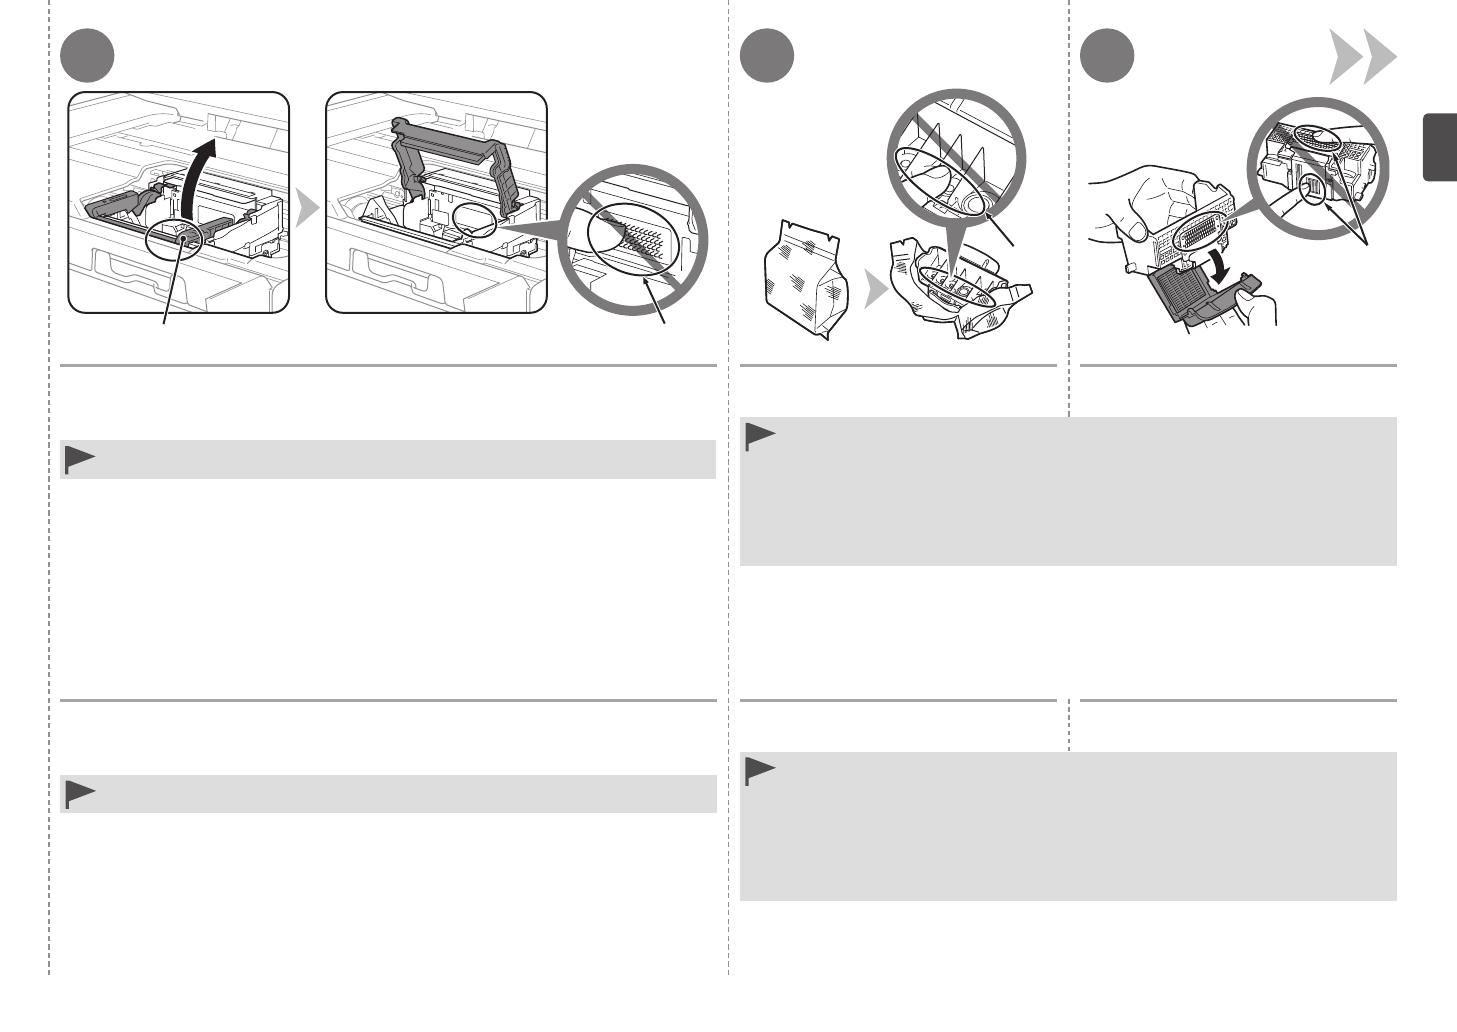
2 Instalación del cabezal de impresión P.8
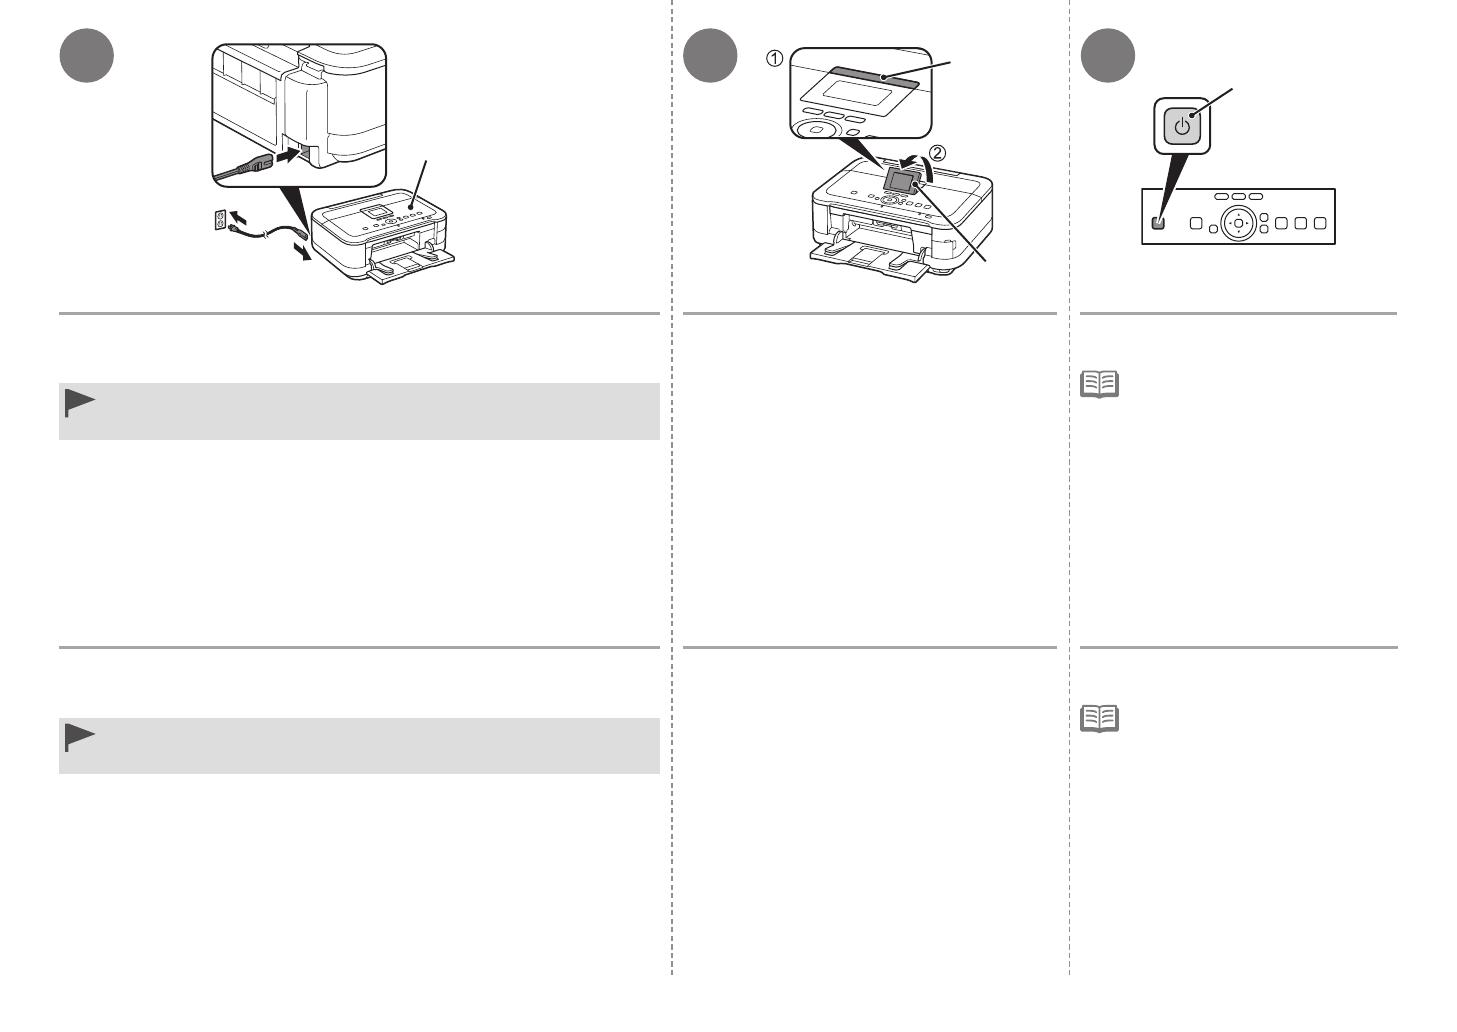
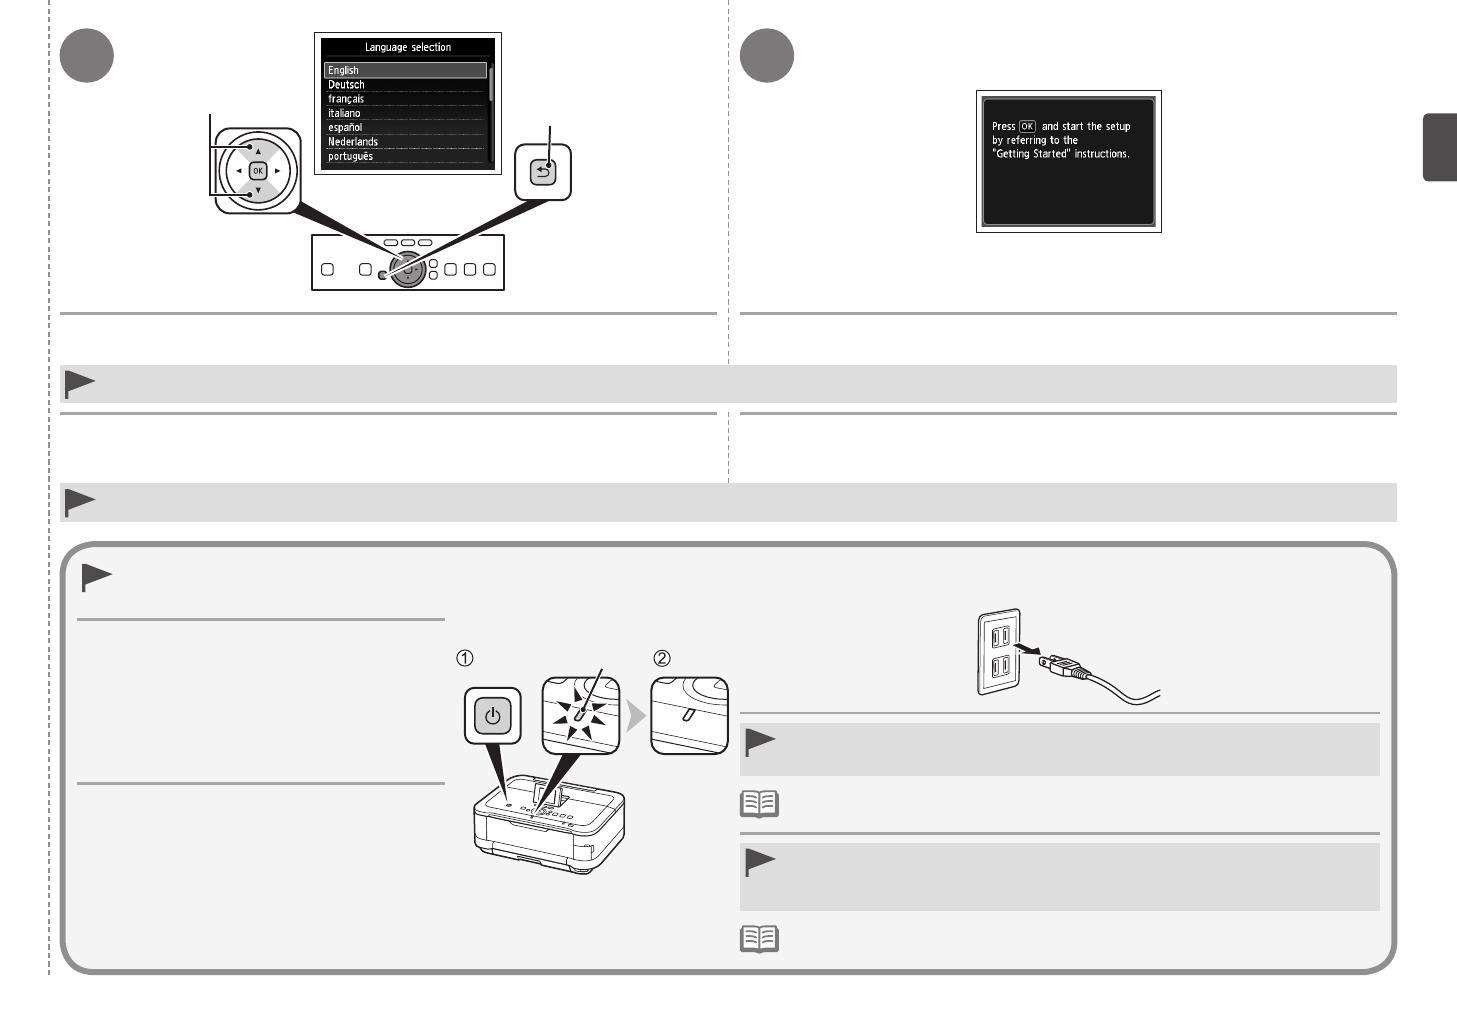
1 Preparativos P.4
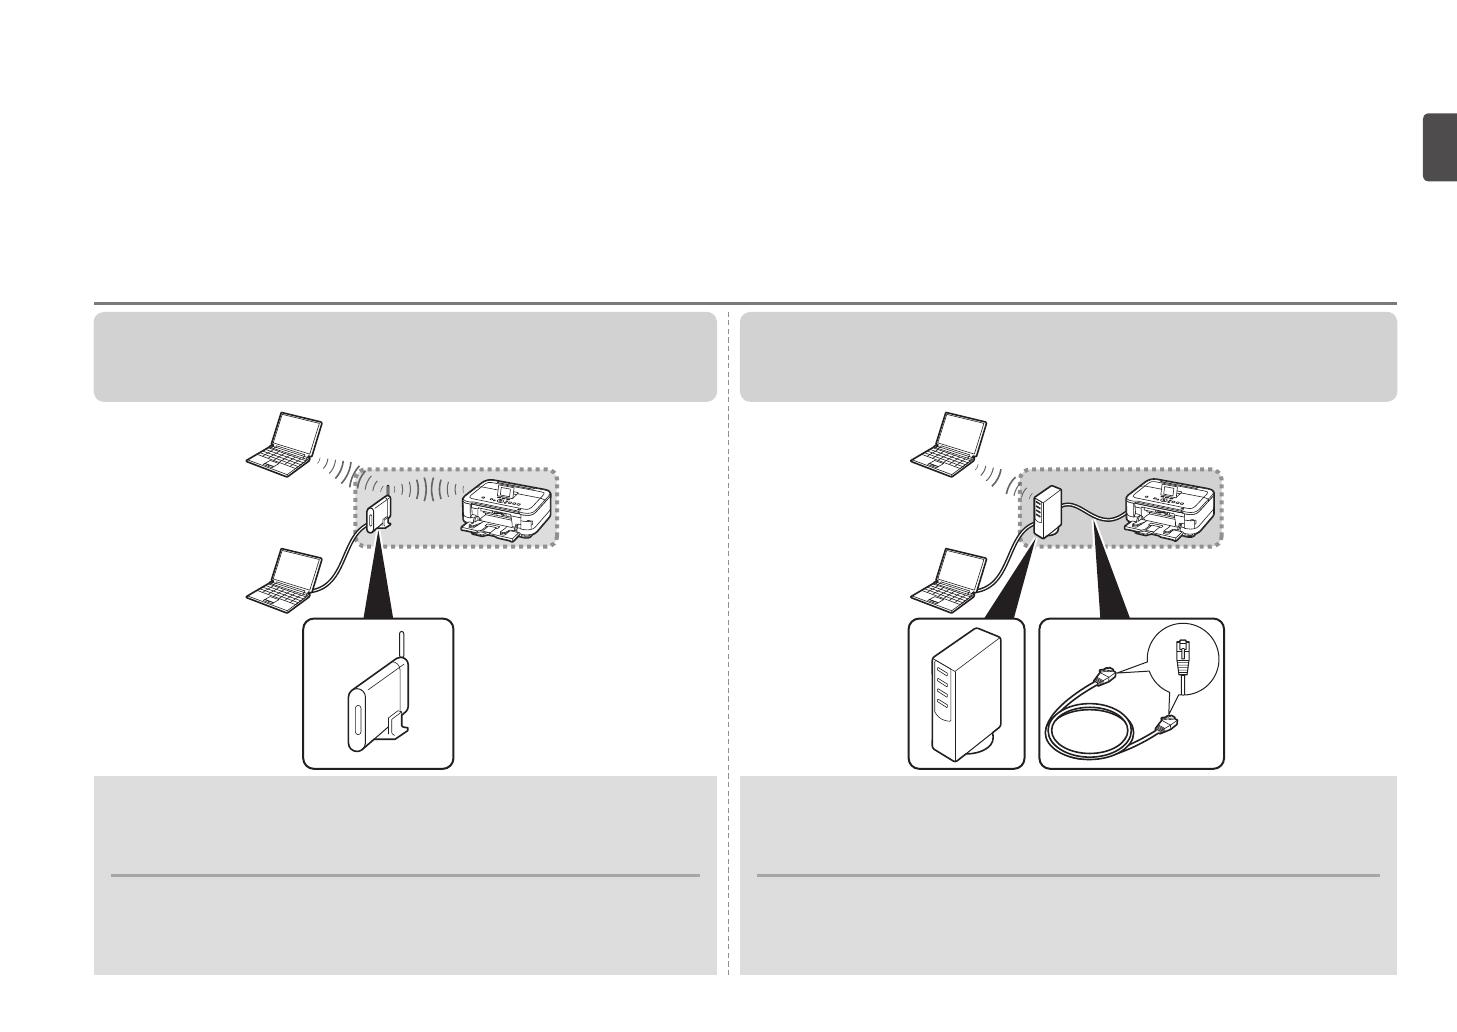
Conguración inalámbrica mediante
Conguración fácil (Easy Setup) P.27
Conguración inalámbrica mediante WPS
(Wi-Fi Protected Setup) P.31
Conguración inalámbrica mediante WCN
(Windows Connect Now) P.34
8 Conguración inalámbrica P.26
11 Uso desde ordenadores adicionales P.48
13 Especicaciones P.57
Impresión de fotos desde una tarjeta de
memoria P.50
Realice una prueba de copia P.53
Impresión de fotografías desde un ordenador P.55
10 Instalación del software (Conexión
de red) P.38
Instalación del software P.39
Registro (Macintosh) P.42
Información P.45
12 Pruebe el equipo P.49
4 Alineación del cabezal de impresión P.14
9 Conexión por cable P.35
Instructions including important
information.
Prohibited actions.
Microsoft is a registered trademark of Microsoft
Corporation.
Windows is a trademark or registered trademark
of Microsoft Corporation in the U.S. and/or other
countries.
Windows Vista is a trademark or registered
trademark of Microsoft Corporation in the U.S.
and/or other countries.
Internet Explorer is a trademark or registered
trademark of Microsoft Corporation in the U.S.
and/or other countries.
Macintosh, Mac, and AirPort are trademarks
of Apple Inc., registered in the U.S. and other
countries.
Bonjour is a trademark of Apple Inc., registered
in the U.S. and other countries.
•
•
•
•
•
•
In this guide, Windows 7 operating system is
referred to as Windows 7 and Windows Vista
operating system as Windows Vista.
In this guide, the screens are based on
Windows 7 Home Premium and Mac OS X
v.10.6.x. (Unless noted otherwise, the screens
are those of Windows 7.)
•
•
Symbols Used in This
Document
■
Model Number: K10360 (MG6120)
Contents■
7 Install the Software (USB Connection)
P.20
6 Select Connection Method P.19
5 Load Paper P.16
3 Install the Ink Tanks P.11
2 Install the Print Head P.8
1 Preparation P.4
Wireless Setup Using Easy Setup P.27
Wireless Setup Using WPS (Wi-Fi Protected
Setup) P.31
Wireless Setup Using WCN (Windows
Connect Now) P.34
8 Wireless Setup P.26
Print Photos from a Memory Card P.50
Try Copying P.53
Print Photos from a Computer P.55
12 Try Using the Machine P.49
11 Use from Additional Computers P.48
13 Specications P.56
10 Install the Software (Network
Connection) P.38
Install the Software P.39
Registration (Macintosh) P.42
Information P.45
4 Align the Print Head P.14
9 Wired Setup P.35