176

Duerkopp Adler 176, 175 User manual

  • Hello! I am an AI chatbot trained to assist you with the Duerkopp Adler 176 User manual. I’ve already reviewed the document and can help you find the information you need or explain it in simple terms. Just ask your questions, and providing more details will help me assist you more effectively!
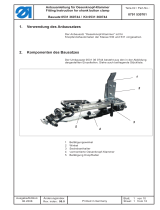
1. Verwendung des Teilesatzes
Der Teilesatz “Netzteil für Nähleuchten” ist für Kettenstichmaschinen
der Klasse 175; Klasse 176 und Klasse 178 vorgesehen.
2. Komponenten des Teilesatzes
Der Teilesatz besteht aus folgenden Bauteilen:
Netzteil
Befestigungsmaterial
Anbauanleitung Netzteil für Nähleuchten
Fitting instructions - Power supply for sewing lamps
Teilesatz / Kit 9850 001089
Teile-Nr./ Part-No.:
0791 100701
Änderungsindex
Rev. index: 00.0
Ausgabe/Edition:
12.2008
Printed in Germany
Blatt: 1 von 8
Sheet: 1 from 8
3. Netzteil montieren
Vorsicht Verletzungsgefahr!
Alle Arbeiten an der elektrischen Ausrüstung der
Spezialnähmaschine dürfen nur von Elektrofachkräften oder
entsprechend unterwiesenen Personen durchgeführt werden.
Während der Arbeiten an der elektrischen Ausrüstung muss der
Netzstecker herausgezogen sein!
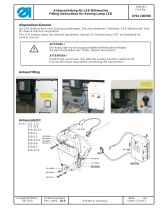
Netzteil 4 mit zwei Schrauben neben die Motorsteuerung 1
schrauben.
Alle vier Schrauben 3 herausdrehen.
Der Steuerkasten 1 klappt etwas nach unten.
Schrauben 4 lösen und Frontplatte 2 abnehmen.
Anbauanleitung Netzteil für Nähleuchten
Fitting instructions - Power supply for sewing lamps
Teilesatz / Kit 9850 001089
Teile-Nr./ Part-No.:
0791 100701
Blatt: 2 von 8
Sheet: 2 from 8
Ausgabe/Edition:
12.2008
Änderungsindex
Rev. index: 00.0
Printed in Germany
241
43 2 1
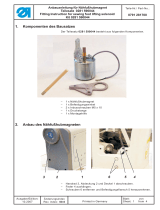
Zuleitung 5 des Netzteils von hinten über den Steuerkasten 1
führen.
Dichtungsgummi 6 auf die Leitung schieben und in den
Steuerkasten einsetzen.
Ader der Anschlussleitung in die Federklemme 7 drücken.
Die Kontakte der Federklemmen durch Druck auf den Hebel
öffnen und die Adern der Anschlussleitungen einführen.
Frontplatte 2 des Steuerkastens wieder aufsetzen und mit
Schrauben 4 festschrauben.
Steuerkasten mit den 4 Schrauben 3 wieder an der Frontplatte 2
befestigen.
Anbauanleitung Netzteil für Nähleuchten
Fitting instructions - Power supply for sewing lamps
Teilesatz / Kit 9850 001089
Teile-Nr./ Part-No.:
0791 100701
Änderungsindex
Rev. index: 00.0
Ausgabe/Edition:
12.2008
Printed in Germany
Blatt: 3 von 8
Sheet: 3 from 8
67
651
241
321
Anbauanleitung Netzteil für Nähleuchten
Fitting instructions - Power supply for sewing lamps
Teilesatz / Kit 9850 001089
Teile-Nr./ Part-No.:
0791 100701
Blatt: 4 von 8
Sheet: 4 from 8
Ausgabe/Edition:
12.2008
Änderungsindex
Rev. index: 00.0
Printed in Germany
Für Ihre Notizen:
1. Use of the kit
The kit “Power supply for sewing lamps” is designed for the
chainstitch machines class 175, 176 and 178.
2. Kit components
The kit consists of the following components:
Power supply
Fixing material
Anbauanleitung Netzteil für Nähleuchten
Fitting instructions - Power supply for sewing lamps
Teilesatz / Kit 9850 001089
Teile-Nr./ Part-No.:
0791 100701
Änderungsindex
Rev. index: 00.0
Ausgabe/Edition:
12.2008
Printed in Germany
Blatt: 5 von 8
Sheet: 5 from 8
3. Mounting the power supply
Caution: Risk of injury!
All work on the electrical equipment of this special sewing
machine may only be carried out by qualified electricians or other
appropriately trained persons.
The mains plug must be removed during any work on the electric
equipment!
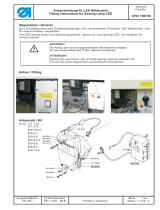
Fix the power supply 4 next to the motor-control 1 using the two
screws.
Unscrew the four screws 3.
The control box 1 will lean downward.
Loosen the screws 4 and remove the front plate 2.
Anbauanleitung Netzteil für Nähleuchten
Fitting instructions - Power supply for sewing lamps
Teilesatz / Kit 9850 001089
Teile-Nr./ Part-No.:
0791 100701
Blatt: 6 von 8
Sheet: 6 from 8
Ausgabe/Edition:
12.2008
Änderungsindex
Rev. index: 00.0
Printed in Germany
241
43 2 1
Push the cable 5 of the power supply from the back through the
control box 1.
Put the cable through the rubber grommet 6 and insert it in the
control box.
Insert the strands of the cable in the spring terminal 7.
Press on the spring terminal to release the openings and insert
the strands of the cable.
Put the front plate 2 of the control box again and fasten it with the
screws 4.
Fix the control box to the front plate 2 again using the four
screws 3.
Anbauanleitung Netzteil für Nähleuchten
Fitting instructions - Power supply for sewing lamps
Teilesatz / Kit 9850 001089
Teile-Nr./ Part-No.:
0791 100701
Änderungsindex
Rev. index: 00.0
Ausgabe/Edition:
12.2008
Printed in Germany
Blatt: 7 von 8
Sheet: 7 from 8
67
651
241
321
Anbauanleitung Netzteil für Nähleuchten
Fitting instructions - Power supply for sewing lamps
Teilesatz / Kit 9850 001089
Teile-Nr./ Part-No.:
0791 100701
Blatt: 8 von 8
Sheet: 8 from 8
Ausgabe/Edition:
12.2008
Änderungsindex
Rev. index: 00.0
Printed in Germany
For your notes:
/