Page is loading ...

User Manual
1/7 Update version-V2
English
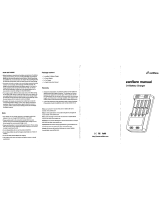
User Manual IQ328+
Please read the manual carefully before using this charger.
We thank you that you have decided to purchase our intelligent charger.
Please follow the safety and care instructions in this manual, to be able to use this device
efficiently and safely.
Included in delivery:
• Charger IQ328+
• Power supply
• User Manual
9 120004 642790

User Manual
2/7 Update version-V2
English
Important notes:
• Use the IQ328+ charger only with Li-Ion cells with 3.6V-3.7V and NiCd, NiMH cells with
1.2V rechargeable batteries.
• With the IQ328+ you can automatically charge the following types of cells:
Li-Ion: 26650, 26700, 22650, 18700, 18650, 17670, 18490, 18500, 17500, 17355, 16340,
(RCR123), 14500, 14650, 10440
NiMh / NiCd: AA, AAA, A, Sub-C, C-Baby
Do not use the charger with other types of batteries (for example: Alkaline or other
Systems).
• Use the charger only in dry and closed rooms with normal conditions.
• If the charger is not in use, we recommend to disconnect the power cable from the socket.
• During the charging process, you should not leave the charger unattended.
• Keep the batteries out of the reach of children.
• When new batteries are in use for the first time, it might be required that the batteries need
to be charged and discharged several times before they reach their optimum capacity.
• The charger must be used on a non flammable base.
• Always use the right charging current for each battery. You can look for the right current in
the manufacturer specification.
• Heat get produced if batteries get charged. It is very important to ensure that the charger is
placed in an incombustible area (pay attention to carpets, paper, flammable liquids,
furniture and so on).

User Manual
3/7 Update version-V2
English
Inputs: DC 12V / 2A
Outputs: Four independent charging slots
Buttons:
• Battery slot select buttons (1, 2, 3, 4)
• Mode selection button (MODE)
• Charging current selection key
(CURRENT)
Display:
The following values are apparent on the display during a charging process:
• Program (Charge, Charge Test, Discharge Test)
• Battery Voltage (V)
• Capacity (mAh)
• Elapsed time (hh:mm)
• Internal resistance (mR)
• Charging current (mA)
• „End“ (Appears if actual charging process finished)
• Channel number
Display Description

User Manual
4/7 Update version-V2
English
Function Description:
You can choose the following programs:
Charge
In this program you can charge the inserted batteries.
Charge Test
With „Charge Test” program you can measure the charged capacity of the batteries. The
charger discharges the batteries in the first step, during the discharge process the LC
Display starts to count the discharged capacity. After that, the battery gets charged
completely in the 2
nd
step. Both capacity values (discharged as charged) are stored in the
charger’s memory and can be retrieved after finish. So this test consists of the following
steps:
1) Discharge (The capacity gets measured and stored and is available after end of the
test)
2) Charge (The capacity gets measured and stored and is also available after end of
the test)
If the channel button gets pressed for the first time, only the display lights up. After
pressing it again, the shown capacity on the display switches between the measured
charging and discharging capacity. Which one of them is displayed, is symbolized by
the label “CH” for charged and “DISCH” for discharged value over the unit “mAh”. Also
the current is changing depending on the chosen current during the Charge Test. The
used charging current is symbolized by „CH-CURRENT“ as well as the discharging
current by „DISCH-CURRENT“.
Generally, the charging capacity value can be different to the discharging capacity
value because of efficiency of the chemical reaction in the batteries.
This mode can also be used very well for refreshing batteries.
Discharge Test
The difference of „Discharge Test” program to „Charge Test” program is, that the batteries
will get charged in the 1
st
step so that it can be discharged afterwards with the full capacity.
This happens in the 2
nd
step. To complete the process, the battery gets charged
completely again in the 3
rd
step. The process is as follows:
1) Charge (This capacity gets measured and displayed but not stored till the end)
2) Discharge (The capacity gets measured and stored and is available after end of the
test)
3) Charge (The capacity gets measured and stored and is also available after end of
the test)

User Manual
5/7 Update version-V2
English
The measured capacities can be, as well as in the “Charge Test”, retrieved by pressing the
channel button. If a high charging current is chosen, it can happen in some cases that the
full charging capacity is not reached (this depends on the quality and condition of the
battery).
A lower charging current is able to put more energy into the battery but therefore the
procedure lasts longer. The procedure to see the chosen currents and the measured
capacities is the same as for “Charge Test”. This is the best way to measure the current
state of health of the battery (still available capacity of the cell).
At “Charge Test” and “Discharge Test” the discharging current will be selected
automatically to 500 mAh. The table below shows the selectable charging current values
followed by its discharging current.
Selected charging current
300 mA
500 mA
700 mA
1000 mA
Following discharge current
300 mA
300 mA
500 mA
500 mA
Charge:
If you like to charge one or more batteries, it distinguishes between same type or different
cells:
• Batteries of the same type
Firstly, insert the batteries into the charger. The charger registers the inserted
batteries and starts to identify the battery chemistry. By default, the charge process
and a charging current of 500 mA gets selected automatically. The same conditions
will be used for all inserted batteries and can be changed through pressing the
mode button. If you want to change the settings, you can do that as long as the font
is flashing. The desired program can be selected by pressing the MODE button as
well as the charging current can be selected with the CURRENT button. After the
font stops flashing, the program is activated and starts to charge/discharge the
batteries.
TIP: Disconnect the charger from the power, insert the batteries in the channels,
connect the charger to the power again and select the wanted conditions through
the LC Display flashes, as mentioned above.
• Individual setting:
If you want to charge different batteries with individual settings, it is recommended
to insert the batteries separately one by one. Only when all the settings via the
appropriate keys were selected for the first battery and the font on the LC display
stops flashing, the battery is taken from the charger. Now the next battery can be
inserted and selected as described before. If you like to change the selected
program, press the mode button for some seconds till the font starts to flash on the
LC display and then it is possible to change the function through pressing the mode
button again. If you like to change the current you can change it through pressing
the CURRENT button, that’s possible as long as the function flashes on the LC
display, after some seconds the charger accepts the now selected information and
stops flashing.
If the charger started the selected program, it can only be interrupted through removing the
cells from the slots or pressing the mode button for some seconds. Short pressing of the
mode button cannot interrupt the running program. This is a protection against
unintentional cancel the program.

User Manual
6/7 Update version-V2
English
Because the charger shows important extensive information to each slot, the whole LC
Display will be used for the selected slot, if you like to see the information for another slot,
you have to press the selection button of the slot you like to check. Changing the selected
slot does not influence the charging program.
Disclaimer:
• The manufacturer and supplier is not responsible for incorrect or improper use and the
resulting consequences.
• Any repair or modification that is not performed by the original supplier will void the
warranty.
• The device may be used only by people who have read and understood such instructions.
• The specifications are subject to change without previously pointed out.
• This product is not a toy. Keep out of reach of children.
• The reproduction of this manual or parts of there is permitted only with written permission of
the manufacturer.
Safety instructions:
Please observe the following safety instructions:
• Use as described in the instructions, only NiCd, NiMH or Li-Ion batteries!
• The device is not approved for outdoor use. Protect it from high humidity, water, rain or
snow. Keep the device away from excessive heat and direct sunlight.
• Do not dispose batteries in a fire!
• Do not use other than the supplied accessories. In particular, attention is drawn to use the
supplied original power adapter for the battery charger.
• Unplug the power cord from the outlet when not in use.
• The device should not be used if it has received a blow or damaged in any other form.
• Don’t use the charger for any other purposes than described in the instruction.
• Do not open or disassemble the unit, otherwise there is a risk for electric shock or fire.
Note on disposal:
Please inform yourself about the local collection points for electronic devices.
Please check local environmental standards and do not dispose your old products with
normal household waste. The charging unit may only be disposed of in waste management
authorities set up collection points. The proper disposal of your old product will help the
environment and health.
Rechargeable batteries must not to be disposed in domestic waste. Return used batteries
to your dealer or to an authorised battery collecting point.

User Manual
7/7 Update version-V2
English
Technical specification IQ328+
Input Voltage
AC Input: 100-240V (for AC Power supply);
DC Input: 12V (11-14V) / 2A
Monitoring / Display
LCD display live view with backlight:
Shows the charge status, capacity, voltage, charge
current, operating time and internal resistance.
Size:70mm * 25mm
Display Backlight Yes
Controls Six Buttons „easy to use“ function (easy handling).
Operating Modes
Charge; Charge Test; Discharge Test
Charge Method
CC/CV for lithium types Li-Ion batteries,
Delta-peak Sensitivity for NiMH / NiCd
Safety Temp. Control Charge Cutoff Max. Temperature (50°C)
Charge Voltage
NiCd / NiMH: Delta peak detection
Li-Ion: 4.2V/cell
Charge Current
300mA, 500mA, 700mA, 1000mA
independently adjustable for each channel
Discharge Cut-off Voltage
NiCd / NiMH:0.9V/cell
Li-Ion: 2.8/cell
Battery Types/Size
NiCd / NiMH: AA, AAA, A, Sub-C, C
Li-Ion: 26650, 26700, 22650, 18700, 18650, 17670,
18490, 18500, 17500, 17355, 16340, (RCR123), 14500,
14650, 10440
Battery Capacity Range
NiCd / NiMH: 300 - 16,000mAh
Li-Ion: 300 - 20,000mAh
Case Material / Size Plastic / L: 159mm; W: 92mm; H: 34mm
Weight
200g for charger unit
AC Power supply: AC Input: 100-240V; DC Output: 12V /2A
AccuPower Research, Development and Distribution Ltd.
Pirchaeckerstrasse 27, A-8053 Graz, AUSTRIA
Tel.: +43 (0) 316 26 29 11-10; Fax: +43 (0) 316 26 29 11-36
E-Mail: [email protected] Web: www.accupower.at
NOTE:
Information and contents in this datasheet are for reference purpose only. They do not constitute any warranty or
representation and are subject to change without notice.
/