Technoline WS 8610 User manual
- Category
- Weather stations
- Type
- User manual
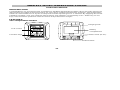
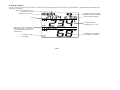
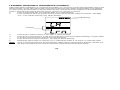
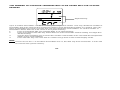
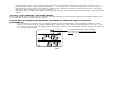
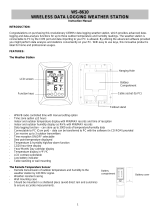
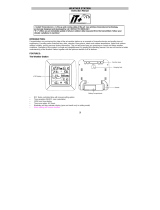
Technoline WS 8610 is a wireless temperature station that provides accurate indoor and outdoor temperature and humidity readings. It can store up to 3000 sets of data and connect to a PC for data analysis and statistics. With its smart software, users can conveniently perform data analysis and statistics on their PC.
Technoline WS 8610 is a wireless temperature station that provides accurate indoor and outdoor temperature and humidity readings. It can store up to 3000 sets of data and connect to a PC for data analysis and statistics. With its smart software, users can conveniently perform data analysis and statistics on their PC.


-
 1
1
-
 2
2
-
 3
3
-
 4
4
-
 5
5
-
 6
6
-
 7
7
-
 8
8
-
 9
9
-
 10
10
-
 11
11
-
 12
12
-
 13
13
-
 14
14
-
 15
15
-
 16
16
-
 17
17
-
 18
18
-
 19
19
-
 20
20
-
 21
21
-
 22
22
-
 23
23
-
 24
24
-
 25
25
-
 26
26
-
 27
27
-
 28
28
-
 29
29
-
 30
30
-
 31
31
-
 32
32
-
 33
33
-
 34
34
-
 35
35
-
 36
36
-
 37
37
-
 38
38
-
 39
39
-
 40
40
-
 41
41


Technoline WS 8610 User manual
- Category
- Weather stations
- Type
- User manual
Technoline WS 8610 is a wireless temperature station that provides accurate indoor and outdoor temperature and humidity readings. It can store up to 3000 sets of data and connect to a PC for data analysis and statistics. With its smart software, users can conveniently perform data analysis and statistics on their PC.
Ask a question and I''ll find the answer in the document
Finding information in a document is now easier with AI
Related papers
-
Techno line WS 9032 Owner's manual
-
Technoline WS 7018 Datasheet
-
Technoline WS 9611-IT User manual
-
Techno line WS-9274-IT Owner's manual
-
Techno line WS 9273-IT Owner's manual
-
Techno line WS 2350 Owner's manual
-
-
Techno line WS9040 Owner's manual
-
-
Other documents
-
 ATP Electronics TH-986 User manual
-
Skmei 1099 Owner's manual
-
 La Crosse Technology Portable Radio Outdoor Sensor User manual
-
 La Crosse Technology WS-8610 User manual
-
TFA 30.3018.10.IT User manual
-
-
 La Crosse Technology wireless weather station User manual
-
La Crosse WS9032 Owner's manual
-
-


