Page is loading ...

INSTRUCTION
MANUAL
Track light
Black Finish
White Finish
Home Depot SKU 680-068(UPC008938273688) BK
Home Depot SKU 555-119(UPC008938273602) WH
1

Thank you for purchasing this Hampton Bay interior track light. This product has been
manufactured with the highest standards of safety and quality.
FEATURES:
1. Black accent baffle included.
2. Uses 120V, R30 type 75W bulbs (not included).
3. Track head is multi-directional.
4. Adapter can be located anywhere along the track section.
QUESTIONS, PROBLEMS, MISSING PARTS:
Before returning to your local Home Depot, please call our Customer Service Team at 1-
877-527-0313 or visit www.homedepot.com. Please reference SKU 680-068, UPC
008938273688, or SKU 555-119, UPC 008938273602.
GENERAL:
1. Be sure to read these installation instructions and review the diagrams thoroughly
before installing the track system.
2. All electrical connections must be in accordance with local codes and the
National Electrical Code. If you are unfamiliar with methods of installing
electrical wiring, secure the services of a qualified licensed electrician.
3. Before starting the installation, disconnect the power by turning off the circuit
breaker or by removing the appropriate fuse at the fuse box. Turning the power
off using the light switch is not sufficient to prevent electrical shock.
Note: The important safeguards and instructions appearing in this manual are not meant to
cover all possible conditions and situations that may occur. It must be understood that
common sense, caution and care are factors that cannot be built into any product. These
factors must be supplied by the person(s) caring for, installing and operating the fixture. If
at any time you are uncomfortable or are unsure of what to do, please contact a qualified
licensed electrician for further assistance.
IMPORTANT SAFETY INSTRUCTIONS
1. Read all instructions. Save these instructions and refer to them when additions to
or changes in the track configuration are made.
2. Do not install any part of a track system less than7feet (2.2m) above the floor.
3. Do not install any fixture assembly closer than 6 inches (15.25cm) from any
curtain, or similar combustible material.
4. Do not attempt to energize anything other than lighting track fixtures on the track.
To reduce the risk of fire and electric shock, Please do not attempt to connect
power tools, extension cords, appliances and the like to the track.
5. Lighted lamp is hot! Turn off power and allow it to cool before replacing lamp.
Do not touch lamp at any time.
6. CAUTION: To reduce the risk of a burn, remove the fixture from the track
before re-lamping.
7. For installation with HAMPTON BAY EC SERIES track systems only.
SAVE THESE INSTRUCTIONS
TOOLS REQUIRED FOR ASSEMBLY & INSTALLATION (not included):
Ladder Gloves R30 bulb
2

INSTALLATION
1. Push the top portion of the head adapter into the slot of the track section.
2. Pull down the adapter’s locking tab.
3. Turn “Ground Indicator” tab towards the ground groove on track to align ground
tab with ground conductor.
4. Adapter can move to any position along the track section. Lighting fixture will
adjust to any position.
REMOVAL
1. Pull down the adapter’s locking tab.
2. At the same time, rotate the adapter 90 degrees and remove from track.
INSTALLING NEW BULB OR RE-LAMPING
1. Turn the power off. Make sure that the bulb is cool before re-lamping the fixture.
2. Remove the head from the track. The track head sleeve must be pulled down the
twist 1/4 turn.
3. Twist to remove bulb from the socket, Replace with new bulb.
4. Replace the track head onto the track. Pull down the locking sleeve and reverse
the 1/4 turn.
CAUTION: Please refer to the re-lamping label located on the fixture for recommended
maximum wattage.
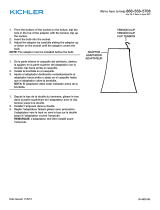
ASSEMBLY DIAGRAM:
CAUTION: Adapter is designed to lock into the track section by turning adapter in one
direction only. Turn the “ground indicator” tab towards the “ground groove” on the track
to align the ground tab with the ground conductor inside the track.
)
GROUND GROOVE
GROUND INDICATOR
TRACK (sold separately)
3

TROUBLE SHOOTING:
PRODUCT MAINTENANCE:
1. To clean the fixture, first disconnect power to the fixture by turning off the circuit
breaker or by removing the fuse at the fuse box.
2. Use a dry or slightly dampened clean cloth (use clean water, never use a solvent)
to wipe the interior and exterior surfaces of the fixture.
3. Allow the fixture to dry thoroughly before power is restored.
CAUTION: Do not use chemical solvents or harsh abrasives to clean fixture as damage
to the fixture or various components may occur remedying the fixture inoperable.
LIMITED WARRANTY
The manufacturer warrants this lighting fixture to be free from defects in materials and
workmanship for a period of five (5) years from date of purchase. This warranty applies
only to the original consumer purchaser and only to products used in normal use and
service. If this product is found to be defective, the manufacturer’s only obligation, and
your exclusive remedy, is the repair or replacement of the product at the manufacturer’s
discretion, provided that the product has not been damaged through misuse, abuse,
accident, modifications, alterations, neglect or mishandling. This warranty shall not apply
to any product that is found to have been improperly installed, set-up, or used in any way
not in accordance with the instructions supplied with the product. This warranty shall not
apply to a failure of the product as a result of an accident, misuse, abuse, negligence,
alteration, or faulty installation, or any other failure not relating to faulty material or
workmanship. This warranty shall not apply to the finish on any portion of the product,
such as surface and/or weathering, as this is considered normal wear and tear. The
manufacturer does not warrant and specially disclaims any warranty, whether express or
implied, of fitness for a particular purpose, other than the warranty contained herein. The
manufacturer specifically disclaims any liability and shall not be liable for any
consequential or incidental loss or damage, including but not limited to any labor/expense
costs involved in the replacement or repair of said product.
Problem Possible Cause Corrective Action
1. Light bulb is burned out. 1. Replace light bulb.
2. Power is off. 2. Make sure power supply is
on.
3. Faulty wire connection. 3. Check wiring.
Light Bulb will not illuminate.
4. Faulty switch. 4. Test or replace switch.
Fuse blows or circuit breaker
trips when light bulb is
illuminated.
Crossed wires or power wire
is grounding out.
Check wire connections.
4

MANUAL DE
INSTRUCCIONES
Luz de Riel
Acabado Negro
Acabado Blanco
Home Depot SKU 680-068(UPC008938273688) BK
Home Depot SKU 555-119(UPC008938273602) WH
9

SOLUCIÓN DE PROBLEMAS:
MANTENIMIENTO DEL PRODUCTO:
1. Para limpiar la lámpara, desconecta primero la electricidad apagando el
cortacircuito o quitando el fusible correspondiente en la caja de fusibles.
2. Usa un paño limpio, seco o ligeramente húmedo (usa sólo agua limpia, nunca un
solvente) para limpiar el interior y exterior de la lámpara.
3. Deja secar la lámpara completamente antes de restablecer la electricidad.
PRECAUCIÓN: No uses solventes químicos o abrasivos duros para limpiar la lámpara
porque se puede dañar o los diversos componentes o la lámpara pueden quedar
inoperables.
GARANTÍA LIMITADA
El fabricante garantiza que esta lámpara no tiene defectos materiales o de fabricación por
el período de cinco (5) años a partir de la fecha de compra. Esta garantía es válida sólo
para el comprador original y sólo para los productos en uso y servicio normales. Si se
descubre que este producto presenta defectos, la única obligación del fabricante y la
solución exclusiva que se le dará será la reparación o reemplazo del producto, a criterio del
fabricante, siempre que el producto no se haya dañado por mal uso, abuso, accidente,
modificaciones, alteraciones, negligencia o manejo indebido. Esta garantía no cubre
ningún producto que se instale, configure o use incorrectamente sin regirse por las
instrucciones adjuntas al producto. Esta garantía no cubre fallas del producto como
consecuencia de un accidente, mal uso, abuso, negligencia, alteración o instalación
defectuosa, o cualquier otra falla no relacionada con defectos materiales o de fabricación.
Esta garantía no se aplica al acabado de ninguna parte del producto, como por ejemplo la
superficie, ni tampoco al deterioro por condiciones ambientales, ya que esto se considera
desgaste normal. El fabricante no garantiza y niega especialmente cualquier garantía, ya
sea expresa o implícita, de idoneidad para un propósito en particular, distinto de la
garantía indicada aquí. El fabricante niega específicamente cualquier responsabilidad y no
es responsable de daños o pérdida directa o indirecta, incluido, pero sin limitarse a,
cualquier costo de mano de obra o gastos que esté involucrado en el reemplazo o
reparación de dicho producto.
Problema Causa posible Medida correctiva
1. La bombilla se fundió. 1. Reemplaza la bombilla.
2. No hay electricidad.
2. Asegúrate de que el
suministro de electricidad está
encendido.
3. Conexión defectuosa del
cable.
3. Verifica el cableado.
La lámpara no se
enciende.
4. Interruptor defectuoso. 4. Prueba o reemplaza el
interruptor.
El fusible se funde o el
cortacircuitos se activa
en el momento en que
enciendes la luz.
Los cables están pelados o el
cable de corriente está en
cortocircuito.
Verifica las conexiones de cable.
EC736 12
/