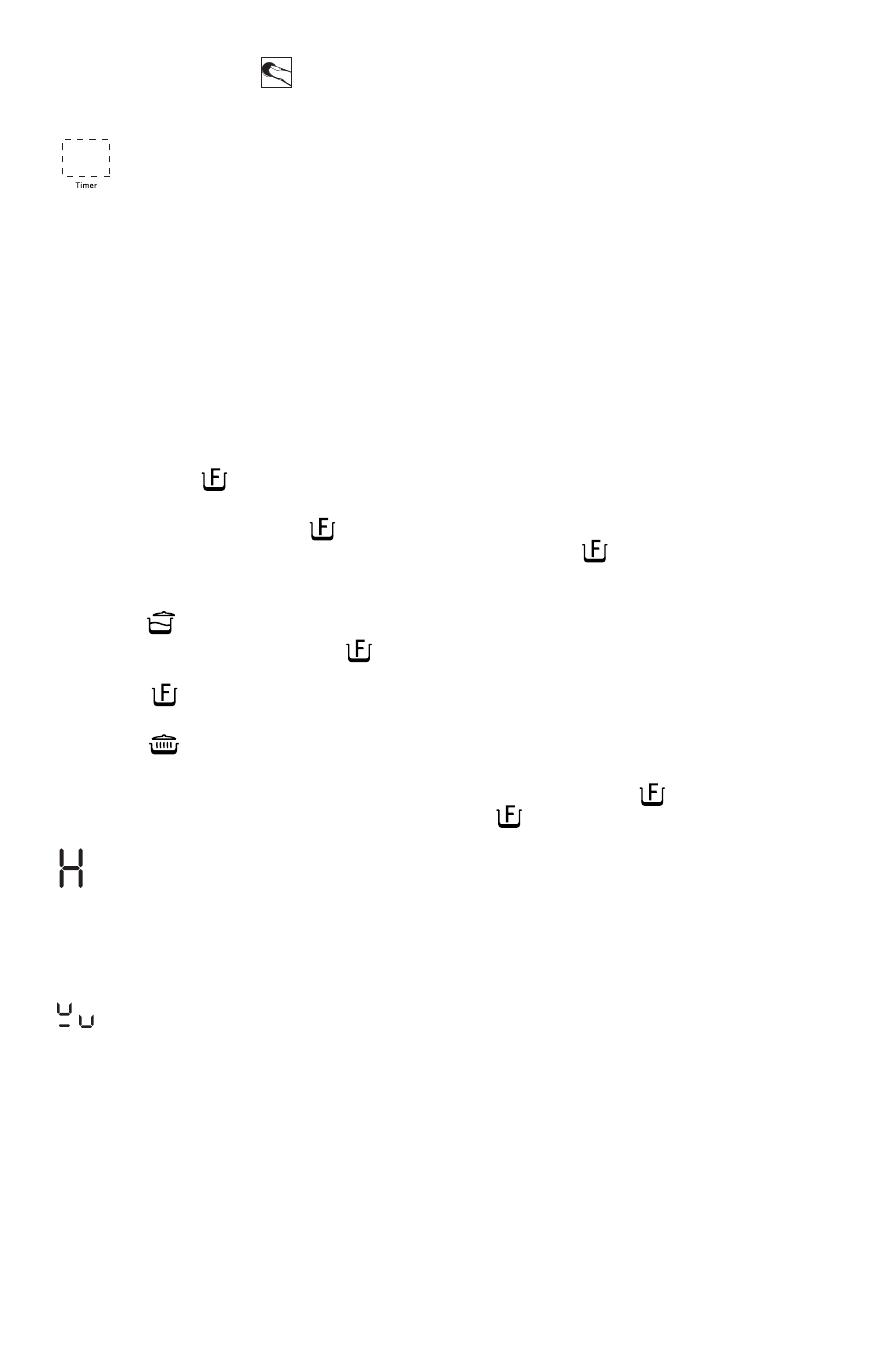
KitchenAid KHID4 65510 User guide

Category
Hobs
Type
User guide

KitchenAid KHID4 65510 is an induction hob with four cooking zones and a variety of features to make cooking easier and more efficient. The hob has a sleek, modern design with a black glass surface and touch controls. It also has a number of safety features, including a child lock and a residual heat indicator. The hob's cooking zones have different power levels, so you can choose the right temperature for your food. The hob also has a boost function, which allows you to quickly bring water to a boil or sear meat.

KitchenAid KHID4 65510 is an induction hob with four cooking zones and a variety of features to make cooking easier and more efficient. The hob has a sleek, modern design with a black glass surface and touch controls. It also has a number of safety features, including a child lock and a residual heat indicator. The hob's cooking zones have different power levels, so you can choose the right temperature for your food. The hob also has a boost function, which allows you to quickly bring water to a boil or sear meat.

Instructions for use
Installation diagrams 4
Important safety instructions 6
Safeguarding the environment 9
Eco Design Declaration 9
Before use 9
Using existing pots and pans 10
Recommended pan base diameters 10
Installation 10
Electrical connection 11
Instructions for use 12
Cleaning 16
Troubleshooting guide 16
Noises made by the hob 16
After-Sales Service 17
Power level table 18
Functions table 19
4
Installation diagrams
235 mm
235 mm
483 mm
553 mm
30 mm
+1
0
580/585 mm
650/655 mm
700/705 mm
510/515 mm
52 mm
R = Min. 6,5 mm
Max. 8 mm
490 mm
560 mm
0
+2
0
+2
513 mm
583 mm
0
+2
0
+2
6 mm
560 mm
490 mm
R = 11,5 mm
R = Min. 6,5 mm
Max. 8 mm
R = 11,5 mm
0
+2
0
+2
Min. 50 mm
Min. 5 cm
Min. 10 cm
Min. 3 cm
Max. 6 cm
5 mm
5
Installation diagrams
6
These instructions are also available on our website: docs.kitchenaid.eu
IMPORTANT SAFETY INSTRUCTIONS
YOUR SAFETY AND THAT OF OTHERS IS VERY IMPORTANT
This manual and the appliance itself provide important safety
messages, to be read and always observed.
This is the danger symbol, regarding safety, warning of potential
risks to users and others.
All safety messages will be preceded by the danger symbol and the
following words:
DANGER
Indicates a hazardous situation which, if not
avoided, will result in serious injury.
WARNING
Indicates a hazardous situation which, if not
avoided, could cause serious injury.
All messages relevant to safety specify the potential risk to which they
refer and indicate how to reduce the risk of injury, damage and electric
shocks due to incorrect use of the appliance.
Make sure to comply with the following:
- Use protective gloves to perform all unpacking and installation
operations.
- The appliance must be disconnected from the power supply before
carrying out any installation operation.
- Installation and maintenance must be carried out by a specialised
technician, in compliance with the manufacturers instructions and
the local safety regulations in force. Do not repair or replace any part
of the appliance unless specically stated in the user manual.
- The appliance must be earthed.
- The power cable must be long enough for connecting the
appliance, tted in the cabinet, to the power supply.
- For installation to comply with the current safety regulations, an
omnipolar switch with minimum contact gap of 3mm is required.
- Do not use multi-sockets or extension cords.
7
- Do not pull the appliances power cable.
- The electrical parts must not be accessible to the user after
installation.
- The appliance is designed solely for domestic use for cooking food.
No other use is permitted (e.g. heating rooms). The Manufacturer
declines any liability for inappropriate use or incorrect setting of the
controls.
- The appliance and its accessible parts become hot during use. Care
should be taken to avoid touching heating elements. Very young
(0-3 years) and young children (3-8 years) shall be kept away unless
continuously supervised.
- Children from 8 years and above and persons with reduced physical,
sensory or mental capabilities or lack of experience and knowledge
can use this appliance only if they are supervised or have been given
instructions on safe appliance use and if they understand the
hazards involved. Children shall not play with the appliance.
Cleaning and user maintenance shall not be made by children
without supervision.
- Do not touch the appliance heating elements during and after use.
Do not allow the appliance to come into contact with cloths or other
ammable materials until all the components have cooled down
completely.
- Do not place ammable materials on or near the appliance.
- Overheated oils and fats catch re easily. Pay attention when
cooking food products rich in fat and oil.
- A separator panel (not supplied) must be installed in the
compartment under the appliance.
- If the surface is cracked, switch o the appliance to avoid the
possibility of electric shock (only for appliances with glass surface).
- The appliance is not intended to be operated by means of an
external timer or separate remote control system.
- Unattended cooking on a hob with fat or oil can be dangerous and
may result in re. NEVER try to extinguish a re with water, but
switch o the appliance and then cover ame e.g. with a lid or a re
blanket.
Danger of re: do not store items on the cooking surfaces.
- Do not use steam cleaners.
8
- Metallic objects such as knives, forks, spoons and lids should not be
placed on the hob surface since they can get hot.
- A
fter use, switch o the hob element by its control and do not rely
on the pan detector (only for appliances with glass surface).
Disposal of household appliances
- This product is built from recyclable or reusable materials. Disposal must be carried out in accordance
with local regulations for waste disposal. Before scrapping, cut o the power supply cable.
- For further information on the treatment, recovery and recycling of household appliances, contact the
competent local authority, the domestic waste collection service or the shop where you purchased the
product.
-
CAUTION: The cooking process has to be supervised. A short term
cooking process has to be supervised continuousy.
9
Eco Design Declaration
This appliance meets the eco design requirements of European regulation N.66/2014, in conformity to the
European standard EN 60350-2.
Safeguarding the environment
Disposal of packaging materials
The packaging material is entirely recyclable and
marked with the recycling symbol (
). Do not
dispose of the various packaging materials
carelessly, but do so responsibly and in full
compliance with local authority regulations
governing waste disposal.
Scrapping
This appliance is marked in compliance with
European Directive 2012/19/EU on Waste Electrical
and Electronic Equipment (WEEE).
By ensuring this product is disposed of correctly,
you will help prevent potential negative
consequences for the environment and human
health.
The symbol
on the appliance or accompanying
documentation indicates that this product should
not be disposed of as unsorted municipal waste
but must be taken to a collection point for the
treatment of WEEE.
Energy saving tips
For optimum results, observe the following advice:
Use pots and pans whose bottom diameter is
equal to that of the cooking zone.
Only use at-bottomed pots and pans.
If possible, keep pot lids on during cooking.
Cook vegetables, potatoes, etc. with little water
in order to reduce cooking time.
Use a pressure cooker to save even more
energy and time (except for use in “SENSOR”
mode).
Make sure you place the pot or pan in the
centre of the cooking zone outlined on the
hob.
Before use
IMPORTANT: the cooking zones will not switch on if pots and pans are not of
the correct dimensions. Only use pots bearing the “INDUCTION SYSTEM”
symbol (see gure opposite). Before switching the hob on, position the pot on
the desired cooking zone.
10
Using existing pots and pans
Use a magnet to check whether pots or pans are suitable for use on the induction hob: pots are unsuitable
if they cannot be magnetically detected.
- Ensure pots have a smooth bottom, otherwise they may scratch the hobs glass ceramic surface. Check
dishes.
- Never place hot pots or pans on the hobs control panel. This could result in damage.
OK NO
Recommended pan base diameters
XL
Ø 28 cm Ø 17 cm min. 28 cm max.
M
Ø 18 cm Ø 12 cm min. 18 cm max.
L
Ø 21 cm Ø 15 cm min. 21 cm max.
S
Ø 14.5 cm
Ø 10 cm min. 14.5 cm max.
Flexible zone
Ø
12 cm
39 cm
23 cm
Max Min
IMPORTANT: Refer to the “SENSOR” section for correct pan base diameters for cooking zones with SENSOR
function.
When adapter plates (not provided) are being used or if a pan is empty, the internal temperature of the
system exceeds the established limit, resulting in a shutdown of the power output.
This happens on purpose to protect the internal components from overow.
It is advisable to switch the hob o and allow for the cooking zone to automatically cool down to the point
at which the indicators on the control panel switch o.
Installation
After unpacking the hob, check that there has been no damage during transport.
If in doubt, contact the dealer or After-Sales Service.
PREPARING THE HOUSING UNIT
WARNING
- Install a separator panel under the hob.
- The lower part of the product must not be accessible after installation.
- If there is an oven beneath the hob, do not install the separator panel.
For the distance between the underside of the appliance and the
separator panel below, observe the dimensions given in the gure.
Do not obstruct the minimum required clearance between the hob
and the top of the unit to ensure the correct operation of the product.
Cut the worktop to t before installing the hob and carefully remove
any shavings or sawdust.
In case of installation of an oven under the hob, make sure the oven has
a cooling system.
Do not install the hob over a dishwasher or washing machine, as the electronic circuits could become
damaged by steam and humidity.
min 5 mm
min 20 mm
min 5 mm
11
Electrical connection
WARNING
- Disconnect the appliance from the mains power supply.
- Installation must be carried out by a qualied electrician who is fully aware of current safety and
installation regulations.
- The manufacturer declines all liability for injury to persons or animals and for damage to
property resulting from failure to observe the regulations provided in this chapter.
- The power supply cable must be long enough to allow the hob to be removed from the worktop.
- Make sure the voltage specied on the appliance rating plate is the same as that of the house
electrical system.
- Do not use extension leads.
Connecting to the terminal board
For the electrical connection, use an H05RR-F or H05V2V2-F cable as specied in the table below.
Conductors Amount x size
220-240 V ~ +
3 x 4 mm²
220-240 V 3 ~ +
5 x 1.5 mm²
380-415 V 3 N ~ +
5 x 1.5 mm²
380-415 ~ +
4 x 1.5 mm²
CBA
Important:
- Based on the wiring diagram (see gure) either keep or remove the metal jumpers between the screws
on the terminal block L1-L2 and N1-N2.
- If the cable is provided, see the connection instructions attached to the cable.
- Make sure all six screws on the terminal block are tightened after connecting the cables.
Example of jumper present (left) or removed (right). See the
wiring diagram for details (the jumpers can be between L1-L2
and between N1-N2).
Connect the yellow/green earth wire to the terminal with the
symbol
.
This wire must be longer than the other wires.
1. Remove the terminal block cover (A), undoing the screw and
inserting the cover in the terminal block hinge (B).
2. Insert the power cable in the cable clamp and connect the wires to the terminal block as indicated in
the connection diagram located near it.
3. Secure the power cable with the cable clamp.
4. Close the cover (C) and screw it on the terminal block with the previously removed screw.
Each time the power is connected, the hob performs an automatic check for a few seconds.
If the hob already has a power cable, follow the instructions attached to the cable. Connect the appliance
to the power supply by means of a multipole switch with minimum contact gap of 3mm.
230 V
230 V
230 V
230 V
230 V
230 V
230 V
230 V
230 V
230 V
230 V
380-415 V 3 N ~
220-240 V ~
220-240 V ~
(AU and UK)
380-415 V 2N ~
220-240 V 3 ~
(Belgium only)
380-415 V 2N ~
(NL only)
12
Control panel description
The control panel is equipped with touch controls: to use them, just press the corresponding symbol (a
light touch is sucient).
Power
management
step 1 On/O
Timer
Cooking zone controls and corresponding display
Control panel lock/Special function/
Power management step 2 and 4
Power
management
step 1
Switching the hob ON/OFF
To switch the hob on, press the
button for approx. 2seconds until the cooking zone displays light up.
To switch o, press the same button until the displays switch o.
All the cooking zones are deactivated If the hob has been in use, the residual heat indicator “H” remains lit
until the cooking zones have cooled down.
If within 10seconds of switching on, no function is selected, the hob switches o automatically.
Switching on and adjusting cooking zones
0.
Power indicator display
Selected cooking zone indication
Cooking zone positioning
Place the pot on the cooking zone, switching the hob on, activate the required cooking zone by pressing
the corresponding “+” button “0” appears on the display. It is possible to select the required power level,
from min. 0 to max. 9, or booster “P if available. To increase the power level, push the “+” button. To
decrease the power level push the “-” button.
Deactivation of cooking zones
To switch o the cooking zone, press the corresponding “+” and “-” button for more than 3 seconds.
The cooking zone switches o and, if still hot, the letter “H” appears on the zone display.
Control panel lock
This function locks the controls to prevent accidental activation of the hob. To activate the control panel
lock, switch the hob on and press the
indicator near the padlock symbol signal activation. The control panel is locked except for the
o function. To deactivate the control lock, repeat the activation procedure. The luminous dot
the hob is active again.
The presence of water, liquid spilled from pots or any objects resting on the button below the symbol can
accidentally activate or deactivate the control panel lock.
Instructions for use
for three seconds; an acoustic signal and
Control panel lock button
a luminous
switching
goes o and
13
Timer
The timer can be used to set the cooking time for a maximum of 99minutes (1hour and
39minutes) for all the cooking zones.
Select the cooking zone to be used with the timer, press the timer and a beep signals the function
(see gure). The display shows “00” and the LED indication comes on. The Timer value can be decreased
and increased by keeping the slider function “+” and “-” buttons pressed. When the set time has elapsed, an
acoustic signal sounds and the cooking zone switches o automatically. To deactivate the timer, keep the
Timer button pressed for at least 3seconds.
To set the timer for another zone, repeat the above steps. The timer display always shows the timer for the
selected zone or the shortest timer.
To modify or deactivate the timer, press the cooking zone selection button for the timer in question.
Control panel warnings.
Special functions (If available)
Some models have special functions:
Multifunction key
This key allows you to select the simmering, melting or keep warm function with a specic cooking zone.
After selecting the zone, press the
key; the indicator light near the special function symbols next to
each cooking zone indicates the automatic function selected. Press the
key repeatedly to set the
required function.
Simmering
After bringing to the boil, press the key and the hob will automatically set the correct power level to
keep the pot simmering. A appears on the display: the indicator light lights up. To deactivate the function,
simply press
button.
Keep Warm
Identies a power level that is suitable for keeping meals warm. After positioning the pot/accessory on the
chosen cooking zone, switch on the hob and select the cooking zone. Press the
key repeatedly to
select the function. To deactivate the function, simply press
on the slide touchscreen.
The hob is tted with a residual heat indicator for each cooking zone. These indicators alert the user
when cooking zones are still hot. If the display shows
H, the cooking zone is still hot. If the residual
heat indicator of a given cooking zone is lit, that zone can be used, for example, to keep a dish warm or to
melt butter. When the cooking zone cools down, the display goes o.
Incorrect or missing pot indicator.
If you are using a pot that is not suitable, not correctly positioned or not of the correct dimensions
for your induction hob, the message “no pot” will appear in the display (see gure at side). If no pot is
detected within 60seconds, the hob switches o.
Fast boil function (Booster)
This function, only present on some cooking zones, makes it possible to exploit the hobs maximum power
(for example to bring water to the boil very quickly).
To activate the function, press the “+” button until “P appears on the display. After 10 minutes’ use of the
booster function, the appliance automatically sets the zone to level9.
Instructions for use
14
“Power management” (Function where it is available)
Thanks to the “Power management” function, the user can set the maximum power the hob can reach, as
required.
This setting is possible at any time and is maintained until the next change.
By setting the required maximum power, the hob automatically adjusts distribution in the various cooking
zones, ensuring that this limit is never exceeded; with the advantage of also being able to manage all the
zones simultaneously, but without overload problems.
4 maximum power levels are available and showed on display: 2.5 – 4.0 – 6.0 – 7.2 kW (7.2 kW is considered
as max power of cooktop) At the time of purchase, the hob is set to maximum power After plugging the
appliance into the electrical socket, in the rst 60 seconds it is possible to set the required power level by
running the following points:
Step Control Panel Display
1
Press for approximately 3seconds
both Power management button
(step 1)
2
Press the Power Management
button (step 2) to conrm the
previous step
The display shows
PL
3
Press to set the chosen level
amongst the dierent options
available
The light comes on together with the in-use
lights for the individual cooking zones
4
Press the Power Management
button (step 4) to conrm the
previous step
The display shows the set level which ashes
for approximately 2seconds; after which the
hob emits an acoustic signal and then turns
itself o; it is now ready for use
In case of an error when setting the power, the symbol EE appears in the middle and an acoustic signal
sounds for about 5seconds. In this case repeat the conguration procedure from the beginning. If the
error occurs again, contact the After-Sales Service.
During normal use, if the user tries to increase the maximum available power level when reached, the level
of the zone in use ashes twice and an acoustic signal sounds.
To obtain a higher power in that zone, it is necessary to manually decrease the power level of one or more
already active cooking zones.
Activation/deactivation of the acoustic signal
After switching the hob on, press and hold the “-” of the rst cooking zone and the external button on the
right simultaneously for at least ve seconds (“as shown below”).
Instructions for use
15
Flexible zone
Where present, this function allows the cooking zone to be used as two separate zones or as a single extra
large zone.
It is perfect for oval, rectangular and elongated pans (with maximum base dimensions of 38x23 cm) or
more than one standard pan in the same time. In order to activate the exicook function, switch on the
hob, press simultaneously the 2 selecting buttons of the zones as shown in the picture below: the two
cooking zone displays show level “0”; both dots next to the level number are lit, indicating that the Flexible
zone is activated.
To change the power level (from 1 to max. 9 or P) press the -/+ buttons. To deactivate the Flexible zone
function, press simultaneously the 2 selecting buttons of the zones.
To switch o the zones instantly, hold one of the zone selection button for 3seconds.
i
The message “no pot” will appear on the display of the zone that is not able to detect any pot
(because of missing pot, or misplaced or not suitable for induction hob). This message remains active for
60 seconds: in this time you can add or slide pots within the exicook area as you prefer.
After 60 seconds if no pan is placed on the zone, the system stops “searching pots on that zone, the
symbol remains visible on the display to remind that the zone is disabled.
To reactivate the Flexicook function, press one of the 2 respective buttons
.
The Flexible zone function is also able to detect when a pot is moved from one zone to the other one
within the Flexible zone area keeping the same power level of the zone where the pan originally was
placed (see the example in the gure below: if the pot is moved from the front heater to the rear heater,
the power level will be shown on the display corresponding to the zone where the pot is placed).
It is also possible to operate the Flexible zone area as two independent cooking zones, using the
corresponding button of the single zone. Place the pot in the centre of the single zone and adjust the
power level with the slide touchscreen.
i
Important: make sure to place the pans centred on the cooking zone in the way to cover the centre of
the single cooking zone.
In case of big pot, oval, rectangular and elongated pans make sure to place the pans centred on the
cooking zone.
Examples of good pot placement and bad pot placement:
Instructions for use
16
Cleaning
WARNING
- Never use steam cleaners.
- Before cleaning, ensure that the cooking zones are switched o and that the residual heat
indicator (“H”) is not displayed.
IMPORTANT: Do not use abrasive sponges or scouring pads. Their use could eventually ruin the glass.
After each use, clean the hob (when it is cool) to remove any deposits and stains due to food residuals.
Sugar or foods with a high sugar content damage the hob and must be immediately removed.
Salt, sugar and sand could scratch the glass surface.
Use a soft cloth, absorbent kitchen paper or a specic hob cleaner (follow the Manufacturers
instructions).
Troubleshooting guide
Read and follow the instructions given in the section “Instructions for use.
Check that the electricity supply has not been shut o.
Dry the hob thoroughly after cleaning it.
If, when the hob is switched on, alphanumeric codes appear on the display, consult the following table
for instructions.
If the hob cannot be switched o after using it, disconnect it from the power supply.
ERROR CODE DESCRIPTION POSSIBLE CAUSES ERROR ELIMINATION
C81, C82 The control panel
switches o because of
excessively high
temperatures
The internal
temperature of
electronic parts is too
high
Wait for the hob to cool
down before using it
again
F42 or F43 The connection
voltage is wrong
The sensor detects a
discrepancy between
the appliance voltage
and that of the mains
supply
Disconnect the hob
from the mains and
check the electrical
connection
F12, F21, F25, F36, F37,
F40, F47, F56, F58, F60
Call the After-Sales Service and specify the error code.
Noises made by the hob
Induction hobs can make whistling or crackling sounds during normal operation, these actually come
from the pots and pans as a result of the characteristics of the bottoms (for example, bottoms made of
several layers of material, or uneven bottoms). These noises vary depending on the pots and pans used
and the amount of food they contain, and are not indicative of a defect of any kind.
In addition, the induction hob is equipped with an internal cooling system to control the temperature of
electronic parts; as a result, during operation and for several minutes after the hob has been switched o,
the noise of the cooling fan will be audible. This is perfectly normal and indeed essential for proper
functioning of the appliance.
17
After-Sales Service
Before contacting the After-Sales Service
1. See if you can eliminate the problem on your own by referring to the Troubleshooting guide”.
2. Turn the hob o and on again to check if the problem has been eliminated.
If the fault persists after the above checks, contact the nearest After-Sales Service.
Always specify:
a brief description of the fault;
the type of product and exact model;
the Service number (the number after the word Service on the rating plate) located under the
appliance (on the metal plate). The Service number is also given in the warranty booklet;
your full address;
your telephone number and area code.
If any repairs are required, please contact an authorised After-Sales Service (to guarantee that original
spare parts will be used and repairs carried out correctly). Replacement parts will be available for 10years.
18
Power level table
Power level Type of cooking
Level use
(indicating cooking experience and habits)
Max.
power
Boost Fast heating
Ideal for rapidly increasing the temperature of
food to fast boiling in the case of water or
rapidly heating cooking liquids
8-9 Frying - boiling
Ideal for browning, starting to cook, frying
deep frozen products, fast boiling
High power
7-8
Browning - sautéing
- boiling - grilling
Ideal for sautéing, maintaining a lively boil,
cooking and grilling (for a short period of time,
5-10 minutes)
6-7
Browning - cooking -
stewing - sautéing -
grilling
Ideal for sautéing, maintaining a light boil,
cooking and grilling (for a medium period of
time, 10-20 minutes), preheating accessories
Medium
power
4-5
Cooking - stewing -
sautéing - grilling
Ideal for stewing, maintaining a gentle boil,
cooking (for a long period of time). Creaming
pasta
3-4
Cooking - simmering
- thickening - creaming
Ideal for long-cooking recipes (rice, sauces,
roasts, sh) with liquids (e.g. water, wines,
broth, milk), creaming pasta
2-3
Ideal for long-cooking recipes (less than a litre
in volume: rice, sauces, roasts, sh) with liquids
(e.g. water, wines, broth, milk)
Low
power
1-2
Melting - defrosting -
keeping food warm -
creaming
Ideal for softening butter, gently melting
chocolate, thawing small products and keeping
just-cooked food warm (e.g. sauces, soups,
minestrone)
1
Ideal for keeping just-cooked food warm, for
creaming risottos and for keeping serving
dishes warm (with induction-suitable
accessory)
OFF
Zero
power
Support surface
Hob in stand-by or o mode (possible end-of-
cooking residual heat, indicated by an “H”)
NOTE:
When making quick-cook foods that require perfect heat distribution (e.g. pancakes) on the 28cm double
cooking zone (where present), use pans no greater than 24cm in diameter. For delicate cooking (for
example, melting chocolate or butter) use the smaller diameter single zones.
19
Functions table
Function Description of automatic functions
Simmering
Identies a power level that is suitable for simmering long-cooking
recipes. Suitable for cooking tomato sauce, ragu, soups,
minestrone, maintaining a constant cooking level; ideal for cooking
in a bain-marie (creams) and regenerating cooked food. Prevents
food from boiling over or sticking to the bottom and burning, as
often happens with these recipes. Use this function after bringing
the food to boiling point.
Keep warm
Identies a power level that is suitable for keeping meals or serving
dishes warm.
Flexible zone
This function combines two cooking zones to oer an extra-large
cooking surface for rectangular and oval containers or grilling pans.
To grill large or many food items (sh, kebabs, vegetables, steaks,
wurstels).
To cook recipes with liquids or broth such as roulades and whole
sh in casseroles/sh kettles/pans.
GB
Printed in Italy
400011187031
WHIRLPOOL EMEA S.p.A.
Via Pisacane n.1
20016 PERO (MI) ITALY
www.whirlpool.eu
Carlo
05/17
  • Page 1 1
  • Page 2 2
  • Page 3 3
  • Page 4 4
  • Page 5 5
  • Page 6 6
  • Page 7 7
  • Page 8 8
  • Page 9 9
  • Page 10 10
  • Page 11 11
  • Page 12 12
  • Page 13 13
  • Page 14 14
  • Page 15 15
  • Page 16 16
  • Page 17 17
  • Page 18 18
  • Page 19 19
  • Page 20 20

KitchenAid KHID4 65510 User guide

Category
Hobs
Type
User guide

KitchenAid KHID4 65510 is an induction hob with four cooking zones and a variety of features to make cooking easier and more efficient. The hob has a sleek, modern design with a black glass surface and touch controls. It also has a number of safety features, including a child lock and a residual heat indicator. The hob's cooking zones have different power levels, so you can choose the right temperature for your food. The hob also has a boost function, which allows you to quickly bring water to a boil or sear meat.

Ask a question and I''ll find the answer in the document

Finding information in a document is now easier with AI