Page is loading ...

12. With the power turned off, ground fixture by connect-
ing the bare copper ground wire from the fixture to the
bare copper ground wire from the junction box using a
Wirenut. (
If house wiring does not include a ground wire,
consult your local electrical code for approved grounding
methods
).
13. Use Wirenuts to connect brown or clear fixture wire to
the black power supply wire and brown or clear ribbed
fixture wire to the white power supply wire. See Fig. 4.
FOR PROPER CONNECTION, PLACE WIRENUT OVER
WIRES, TWIST CLOCKWISE UNTIL TIGHT.
14. Tuck wires into junction box.
15. Raise Canopy up to ceiling and fully thread Canopy
Nut onto Canopy Loop.
16. Unscrew Ballast Lock Rings from the Ballasts.
17. Place Glass Shades over the Ballasts and reinstall the
Ballast Lock Rings.
18. Insert Lamps. See Fig. 2.
19. Turn on electricity at fuse or circuit breaker box and verify
success of installation.
Trouble Shooting Guide
If this fixture fails to operate properly, use the guide
below to diagnose and correct the problem.
Verify that correct lamp is used.
Make sure lamp is properly seated in socket.
Replace defective lamp(s).
Verify that fixture is wired properly.
Verify that fixture is grounded correctly.
The line voltage at the fixture is correct.
Twist ballast clockwise to verify that ballast is properly
seated in ballast socket.
If further assistance is required, contact:
Consumer Products Technical Support at: (800) 748-5070
To clean, wipe fixture with a soft cloth. Clean glass shades
with a mild soap and water. Do not use abrasive materials
such as scouring pads or powders, steel wool or abrasive
paper.
To replace the Ballast: Turn off electricity at fuse or circuit
breaker box. Unscrew the Ballast Lock Ring and remove the
Glass Shade. Grasp the Ballast and rotate counterclockwise to
disconnect Ballast from Ballast socket. Obtain replacement bal-
last and reinstall in reverse order.
For availability of replacement parts contact Technical
Support or visit:
Learn to light your home like a pro!
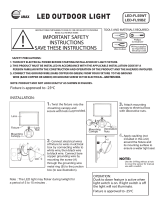
INSTALLATION INSTRUCTIONS - ENGLISH
STEP-BY-STEP GUIDE
Page 5Page 4Page 2
GUÍA DE PASO-A-PASO
1. Remove fixture components and parts pack(s). Check that
all parts are included. See Page 2.
Fixture assembly:
2. Hold fixture wires and fully thread Inner Center Pipe (17)
onto Coupling (18) in center of Fixture. See Fig. 2.
3. Slide Center Pipe & Pipe Cover (13), Decorative Cap (11)
and Cup (12) over Inner Center Pipe and thread Hexnut (4)
onto Inner Center Pipe to secure Cup to Center Pipe
assembly. See Fig. 2.
4. Install Support Rods (15) to Cup (12), by removing Spring
Washers and Hexnut from Support Rods and threading
short extension of Rods through holes in Cup and secure
each with one Spring Washer & Hexnut (14). See Fig. 3.
5. Slide Cup Cover over Cup (Note: R
otate Support Rods to
the side for Cup Cover to fit between Rods)
. Slide top
Decorative Cap over Inner Center Pipe and thread Loop (10)
onto Inner Center Pipe.
6. Secure Support rods to Fixture bar using two 1/4" Screws
(16) installed in Fixture bar. Set Fixture assembly aside.
See Fig. 2.
NOTE: Turn off power on circuit breaker box!
7. Mounting hardware assembly: Thread Threaded Pipe (5)
about 1/2" into center hole of Crossbar (1). Hold short end of
Threaded Pipe, installed in center of Crossbar and place
Canopy (7) over opposite end (Note: Crossbar will be inside
of canopy). Thread Canopy Loop & Nut (6), attached to end
of chain, onto end of Threaded Pipe. See Fig. 4.
Assistance may be required to support fixture during installation.
8. Determine desired length of chain: use Lockable Link (9)
and hook Chain (8) to Loop (10). Hold fixture up to ceiling
and determine desired length of Chain. If chain length
adjustment is needed, unhook chain at Lockable Link and
remove chain links. (Note:
Use pliers to remove links or call
Technical Support to purchase additional chain).
Reattach
Chain to Loop with Lockable Link.
9. Trim Ground & Fixture supply wires to extend approxi-
mately 8" beyond Chain length and strip 1/2" insulation from
ends of wires.
10. Route the ground & fixture supply wires through every
fourth link of chain and through center of Threaded Pipe in
Crossbar. See Fig. 4.
11. Take fixture assembly by the chain, loosen Canopy Nut
completely and slide Canopy down. Support fixture while
mounting Crossbar to junction box with two Screws (2).
See Fig. 4.
WIRING AND FIXTURE OPERATION CAUTION:
Connect fixture to supply wires rated for at least 90°C
(194°F). Do not use fixture on dimming circuits.
1. Remueva los componentes del luminario y paquete(s) de pieza(s).
Asegure que todas las piezas estén incluidas. Vea la Pagina 2.
Ensamblaje del Luminario:
2. Sostenga los alambres del luminario y rosque totalmente el Tubo de
Centro Interior (17) al Acoplador (18) en el centro del Luminario.
Vea Fig. 2.
3. Deslice el Tubo de Centro y su Cubierta (13), Tapa Decorativa (11) y
Copa (12) sobre el Tubo de Centro Interior e rosque la Tuerca
Hexagonal (4) al Tubo de Centro Interior para asegurar la Copa al
ensamblaje del Tubo de Centro. Vea Fig. 2.
4. Instale Varillas de Soporte (15) a la Copa (12), quitando las Arandelas
de Resorte y Tuerca Hexagonal de las Varillas de Soporte y roscando la
extensión corta de las Varillas a través se los agujeros en la Copa y
asegure cada una con una Arandela de Resorte y una Tuerca Hexagonal
(14). Vea Fig. 3.
5. Deslice la Cubierta de la Copa sobre la Copa (Nota:
Gire las Varillas de
Soporte al lado para que la Tapa de la Copa para que quepan entre las
Varillas)
. Deslice la Tapa Decorativa de arriba sobre el Tubo de Centro
Interior y rosque el Lazo (10) al Tubo de Centro Interior.
6. Asegure Varillas de Soporte a la barra del Luminario usando dos Tornillos
de 1/4" (16) instalados en la barra del Luminario. Ponga el Ensamblaje
del Luminario a un lado. Vea Fig. 2.
NOTA: ¡Apague la electricidad en la caja de cortacircuitos!
7.
Montaje del ensamblaje de herraje: Rosque el Tubo Roscado (5) a como
1/2" dentro del agujero de centro de la Barra Transversal (1). Sostenga el
extremo corto del Tubo Roscado, instalado en el centro de la Barra
Transversal y coloque el Espaciador de Sobrecielo (7) sobre el extremo
opuesto (Nota: La Barra Transversal estará dentro del Espaciador de
Sobrecielo). Rosque el Lazo del Espaciador de Sobrecielo y Tuerca (6),
atado al extremo de la cadena, al extremo del Tubo Roscado. Vea Fig. 4.
8.
Para determinar la longitud deseada de la cadena: use el Eslabón de
Cerradura (9) y enganche la Cadena (8) al Lazo (10). Sostenga el
luminario hasta el techo para determinar longitud deseada de la Cadena y
si la longitud de la cadena necesita ajuste, desenganche el Eslabón de
Cerradura quite eslabones. Nota:
Use alicates para quitar los eslabones o
llame a Soporte Técnico para comprar cadena adicional).
Sujete la
Cadena de nuevo con el Eslabón de Cerradura.
9. Corte los alambres de Hacer Tierra y los de suministro de electricidad del
Luminario para que extiendan aproximadamente 8" más allá de la
longitud de la Cadena y quite 1/2" del material aislante del extremo de los
alambres.
10. Encamine los alambres de hacer tierra y de suministro de
electricidad del luminario a través de cada cuarto eslabón de la
cadena y a través del centro del Tubo Roscado en la Barra
Transversal. Vea Fig. 4.
11. Agarre el ensamblaje del luminario por la cadena, suelte la
Tuerca del Espaciador de Sobrecielo totalmente y deslice
el Espaciador hacia abajo. Sostenga el luminario mientras este
montando la Barra Transversal a la caja de ensambladura con dos
Tornillos (2). Vea Fig. 4.
CUIDADO EN El ALAMBRADO Y EN LA OPERACIÓN DEL LUMINARIO:
Conecte el luminario con alambres clasificados a por lo menos 90°C (194°F).
No use el luminario en circuitos con atenuador de intensidad.
12. Con la electricidad apagada, ponga a tierra el luminario
conectando el alambre de cobre descubierto del luminario
al alambre de conexión a tierra de cobre descubierto de la caja
de ensambladura usando un Capuchón de Alambres. (
Si el
alambrado de la casa no incluye un alambre de conexión a tierra,
consulte su código eléctrico local para métodos de hacer tierra
aprobados
).
13. Use Capuchones de Alambres para conectar el alambre
marrón o transparente del luminario al alambre de suministro
de energía negro y el alambre del luminario marrón o
transparente acanalado al alambre de suministro de
electricidad blanco. Vea Fig. 4.
PARA UNA CONEXION APROPIADA, PONGA EL CAPUCHÓN DE
ALAMBRE SOBRE LOS ALAMBRES, TUERCE HACIA SU
DERECHA HASTA QUE ESTE APRETADO.
14. Meta los alambres dentro de la caja de ensambladura.
15. Levante el Espaciador de Sobrecielo hacia arriba hasta el
techo y rosque la Tuerca del Espaciador de Sobrecielo
completamente al Lazo del Espaciador de Sobrecielo.
16. Desenrosque los Anillos de Cerradura del Balastro de los
Balastros.
17. Coloque las Pantallas de Cristal sobre los Balastros y instale
de nuevo los Anillos de Cerradura del Balastro.
18. Inserte las Lámparas. Vea Fig. 2.
19. Encienda la electricidad en caja de fusible o cortacircuitos y
verifique el éxito de la instalación.
Guía de Ayuda a Resolver Problemas
Si este luminario deja de funcionar correctamente, use la guí a bajo
para diagnosticar y corregir el problema.
Verifique que este usando la Lámpara correcta.
Asegure que la Lámpara esta correctamente asentada en el enchufe.
Sustituya la (s) Lámpara (s) defectuosa (s).
Verifique que el luminario este alambrado correctamente.
Verifique que el luminario este correctamente haciendo tierra.
El voltaje del cable en el luminaro es el correcto.
Gire el Balastro hacia su derecha para verificar que el Balastro este
correctamente asentado en su enchufe.
Si requere ayuda adicional, contacte:
Consumer Products Technical Support al: (800) 748-5070
Para limpiar el luminario, use un paño suave. Limpie el difusor con
un jabón suave y agua. No utilice materias abrasivas tales como
almohadillas o polvos de restregar, “steel wool” o papel de lija.
Para reemplazar el Balastro: Apague la electricidad en la caja fusible o
cortacircuitos. Desenrosque el Anillo de Cerradura del Balastro y quite la
Pantalla de Cristal. Agarre el Balastro gírelo hacia su derecha para
desconectar el Balastro de su enchufe. Obtenga el Balastro de reemplazo e
instale de nuevo en lorden inversa.
Para disponibilidad de piezas de repuesto póngase en contacto con
Soporte Técnico o visite lightahome.com.
FIXTURE PACKING LIST
Descripción Cantidad
*1) Barra Transversal ....................................... 1
*2) Tornillos ...................................................... 2
*3) Capuchones de Alambre ............................... 3
4)Tuerca Hexagonal ...................................... 1
*5) Tubo Roscado de 1-3/4" ........................... 1
*6)
Tuerca
y L
azo del Espaciador de Sobrecielo ..... 1
*7) Espaciador de Sobrecielo.......................... 1
*8)Cadena ........................................................ 1
*9)Eslabón de Cierre ....................................... 1
10) Lazo ........................................................... 1
11) Tapas Decorativas ..................................... 2
12) Copa y tapa de la Copa ............................ 1
13) Tubo de Centro y Tapa de Tubo de Centro .. 1
14) Arandela & Tuerca Hexagonal................... 2
15) Varilla de Soporte del Difusor ................... 2
16) Tornillos ..................................................... 2
17) Tubo de Centro Interior .............................. 1
18) Acoplador .................................................. 1
19) Balastro ..................................................... 4
20) Pantalla de Cristal ..................................... 4
21) Anillo de Cerradura del Balastro ............... 4
22) Lámpara .................................................... 4
*Contenido en el Paquete de Piezas
LISTA DE EMBALAJE
REQUIRED TOOLS
HERRAMIENTAS REQUERIDAS
OUTILS REQUIS
LISTE DES PIECES
Lamps & Mounting Hardware
Included
Lámparas y Herraje para Montaje
Incluidas
Lampes et Quincaillerie de Montage
Incluses
Description Quantity
*1) Crossbar ..................................................... 1
*2) Screws ........................................................ 2
*3) Wirenuts ...................................................... 3
4) Hexnut ......................................................... 1
*5) Threaded Pipe............................................. 1
*6) Canopy Loop & Nut..................................... 1
*7) Canopy ........................................................ 1
*8) Chain ........................................................... 1
*9) Lockable Link .............................................. 1
10) Loop ............................................................ 1
11) Decorative Caps ......................................... 2
12) Cup & Cup Cover ....................................... 1
13) Center Pipe & Center Pipe Cover .............. 1
14) Spring Washer & Hexnut ............................ 2
15) Support Rods ............................................. 2
16) 1/4" Screws ................................................ 2
17) Inner Center Pipe ....................................... 1
18) Coupling ..................................................... 1
19) Ballast ......................................................... 4
20) Glass Shade ............................................... 4
21) Ballast Lock Ring ....................................... 4
22) Lamp ........................................................... 4
*Contained in Part Packs
Description Quantité
*1) Traverse ....................................................... 1
*2) Vis ............................................................... 2
*3) Capuchons de connexion ............................... 3
4) Écrou hexagonal ......................................... 1
*5) Tube fileté de 1-3/4 po ................................ 1
*6) Anneau et écrou du pavillon ....................... 1
*7) Pavillon de recouvrement ........................... 1
*8) Chaîne......................................................... 1
*9) Maillon de fermeture ................................... 1
10) Boucle......................................................... 1
11) Capots décoratifs ....................................... 2
12) Coupelle et cache coupelle ........................ 1
13) Tuyau central et couvercle .......................... 1
14) Rondelle & Écrou hexagonal ..................... 2
15) Tiges de soutien du diffuseur ..................... 2
16) Vis ............................................................... 2
17) Tuyau central interne .................................. 1
18) Raccord ...................................................... 1
19) Ballast ......................................................... 4
20) Abat-jour en verre....................................... 4
21) Bague de retenue du ballast ...................... 4
22) Lampe ......................................................... 4
*Compris dans les sacs d’emballage
Figure 2
12) Cup
14) Spring Washer
& Hexnut
20) Glass Shade
6) Canopy Nut
11) Decorative Cap
13) Center Pipe &
Center Pipe Cover
19) Ballast
4) Hexnut
8) Chain
7) Canopy
10) Loop
21) Ballast Lock Ring
10) Loop
17) Inner Center Pipe
16) 1/4" Screws
15) Support Rods
9) Lockable Link
22) Lamp
11) Decorative Cap
18) Coupling
Figure 3
12) Cup Cover
1) Crossbar
6) Canopy Loop
5) Threaded Pipe
3) Wirenuts
Figure 4
2) Screws
/