Page is loading ...

PEARL MANTELS CORP. Installation for Mantels and Shelves using the Hanger Board
Wood and MDF are considered combustible materials. Heat clearances must be adhered to. Before installing,
check your local building codes and the manufacturer’s instructions for your specific fireplace insert or stove.
The hanger board is only a suggested method. Your installer may also have additional methods for mounting your mantel or shelf.
Mounting hardware for hanger rail and scribe moldings is not included.
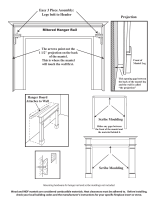
For hanging your mantel or shelf, we suggest that you use the hanger board included in this box. The type of
hardware (not included) you will use for mounting your hanger board will depend on the medium your mantel or
shelf will be attached to (i.e. brick, stone, drywall…). Please consult a professional for advice on the proper
hardware.
Mantels
Put the mantel together by putting the main shelf on the floor, upside down.
Next bolt on each leg with the hardware included with your mantel.
4- 3x5/16 bolts and nuts, 8- Flat Washers, 4- Lock Washers
Shelves (If Applicable)
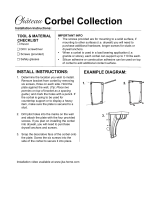
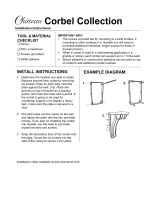
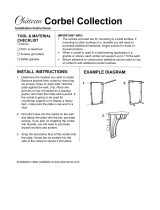
Put the shelf together by putting it on the floor, upside down.
Next bolt on each corbel with the hardware included with your shelf.
Measuring
The hanger board measurement should be taken from the floor or the hearth (where the mantel legs will sit or the
shelf will hang) to the bottom edge of the hanger board. When mounted correctly, the mantel or shelf will
simply hang on the hanger board and in the case of the mantel; the legs will touch the floor or the hearth.
While the mantel’s shelf is on the floor, put the loose wall hanger board that is in the box on to the hanger board
that is mounted on the mantel shelf. Use your hand to hold the 2 pieces together. When together correctly, the 2
hanger boards will form a complete board.
Measure from the bottom of the leg down to the wall hanger board and record this measurement. Measure both
the left and right sides to insure that you have a correct measurement.
Mark your recorded measurement on your wall, both left and right. Take the wall hanger board and mount it on
the wall so that the bottom of the board is on your recorded marks. Check to see that your wall hanger board is
centered over your firebox before mounting.
Once mounted, if the mantel or shelf doesn’t seem to fit snugly to the wall, you may put a small shim of paper,
cardboard, etc., to fill the gap where the 2 halves of the hanger board meet.
A hanger board may be fabricated using a 1x4, cut at a 45-degree angle. You may also cut a piece of wood that
runs the length of the mantel shelf or use 2 blocks of wood that will be placed at either end of the mantel shelf.
See above for measuring. Set the mantel on the length of wood or blocks. Use finishing nails on back side of
legs (right underneath the back overhang of the shelf) to fasten to length of wood or blocks.
Scribe Molding (If Applicable)
Once your mantel is installed, put the molding to the inside of each leg and just below the mantel shelf. Slide the
molding back until it touches your surround. It is meant to hide the gap between the leg and the surround on the
inside. You may attach it using small finishing nails or glue.
Suggested Preparation Prior to Painting or Staining of Wood Mantels
Please consult a professional for preparation of your mantel before applying paint or stain.
Pearl Inlay
If you have purchased an unfinished piece, your pearl inlay is masked so that you may paint or stain over it.
After you have completed the paint/stain process, remove the mask.
9-6-16
We suggest that pilot holes
be drilled prior to inserting
the appropriate hardware for
final installation on the wall
surface.
/

