Page is loading ...

Owner's Manual
WATERTIGHT
Jumpstart Kit
FULLY CHARGE BEFORE FIRST USE!
•
18 amp/hr Sealed Lead-acid Battery
LED Level Indicator
•
Rechargeable
LED Charging Indicator
•
12 Volt Power Port
•
Convenient Worklight
•
Corrosion Resistant
•
Maintenance Free
•
Waterproof
Model 3742152
®

West Marine
Limited Warranty
WHAT IS COVERED:
Any defect in material and workmanship
FOR HOW LONG:
1 Year Unconditional / 3 Year Pro-rate
LIMITATIONS: Implied warranties, including those of
fitness for a particular purpose and merchantability (an
unwritten warranty that the product is fit for ordinary
use), are limited to 1 year from the date of purchase. We
will not pay for loss of time, inconvenience, loss of use
of your product or property damage caused by your prod-
uct or its failure to work, or any other incidental or con-
sequential damages including personal injury.
Some states do not allow limitations on how long an implied
warranty lasts or the exclusion or limitation of incidental or
consequential damages, so the above exclusions or limitations
may not apply to you.
WHAT THIS WARRANTY DOES NOT COVER: Among other
things this warranty does not cover defects resulting from
accidents, damage while in transit to our service location, alter-
ations, unauthorized repair, failure to follow instructions, mis-
use, fire, flood, and acts of God.
This limited warranty is the only one we give on your product,
and it sets forth all our responsibilities regarding your product.
There are no warranties which extend beyond the description
set forth above.
STATE LAW RIGHTS: This warranty gives you specific legal
rights and you may also have other rights which may vary from
state to state.
Be Sure To Fully Charge Before First Use!

THANK YOU FOR CHOOSING WEST MARINE SEAVOLT
Your West Marine SeaVolt Watertight Jumpstart Kit has been carefully designed
and manufactured to give you years of dependable operation. This manual
contains all the information you will need to operate your Watertight Jumpstart Kit
at optimum efficiency. Please read the instructions carefully before storing the
manual in a safe place for future reference.
IMPORTANT WARNINGS:
• Fully charge before first use.
• Never allow the unit’s positive and negative booster clamps to come into
contact with each other or touch the same piece of metal at any time. It may
cause sparking, an explosion or permanent damage to the unit.
• When jumpstarting your craft, set switch in the off position and ensure that
the positive and negative clamps are securely connected to both the
battery and the jumpstart unit. Failure to do so may cause sparking, an
explosion or permanent damage to the unit.
• Always wear eye protection when working with batteries.
• Always remove all metal items such as rings, watches, necklaces etc.,
before working with batteries.
• If battery acid comes into contact with your eyes, flood your eyes with water
for at least ten minutes and seek immediate medical attention.
• If battery acid comes into contact with your skin or clothing, wash the
affected area with soap and water and seek immediate medical attention.
• Never attempt to use the unit in extremely hot conditions.
• Always turn the unit off when not in use.
• Do not unscrew the unit’s casing. There are no serviceable parts inside unit
and opening it will void your warranty.

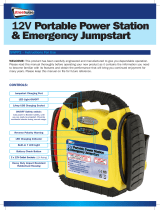
CONTENTS:
1. Charging Cords Storage Pouch
2. ON/OFF Switch
3. Charging Port
4. Charging Indicator LED
5. Battery Level Button
6. 12V DC Power Cord
7. DC Charging Cord
8. 12 Volt Power Port
9. Battery Level Indicator LED
10. Worklight
11. Positive (Red) and Negative (Black) Booster Clamps
11
10
3
2
1
4
9
8
6
7
5

INSTRUCTIONS FOR USE:
Recharging The Battery
Your Watertight Jumpstart Kit comes complete with a built-in lead acid battery.
Fully char
ge before first use.
To Recharge Using The 120V AC Power Cord:
Plug one end of the AC charging cord into the Charging Port of the Jumpstart
System. Plug the other end into any standard 120 volt wall outlet. The red
Charging LED Indicator will illuminate to show that the unit is charging. Full
charging will take approximately 20 hours.
To Recharge Using The 12V DC Power Cord:
Plug one end of the 12V DC power cord into the Charging Port of the Jumpstart
System. Plug the other end into your craft’s cigarette lighter socket or 12 volt DC
power port. The red Charging LED Indicator will illuminate to show that the unit is
charging. Full charging will take approximately 11 hours.
Note: Some cigarette lighters/12 volt power ports will not operate unless the
ignition switch is in the accessory position.
Note: Never attempt to continuously recharge the unit for more than 36 hours.
Use only the AC and DC recharging cords that were provided with the unit or
permanent damage to the unit may result.
Checking Battery Status
Press and hold down the battery level button
➄
. The battery level indicator LEDs
will light up to show the level of charge remaining in the unit. When you release
the battery level button, the battery level indicator LEDs will switch off.
When all three LEDs light up, the battery is FULLY charged.
When the amber and red LEDs light up, the battery is 50% charged.
When only the red LED lights up, you must recharge the system before using again.

Jumpstarting An Engine
If your craft’s battery is too weak to start your motor, you can use the unit’s booster
clamps to start it. Before doing so, remember to switch off all the craft’s
accessories such as lights, AC, radio, etc.
To obtain maximum power, ensure there are no 12 volt accessories connected
to the unit and that the worklight is disconnected. To avoid sparking in a boat’s
gasoline engine compartment, be sure the ON/OFF switch is in the OFF position.
Securely connect the red positive (+) booster clamp
➅
to corresponding positive
(+) terminal of your vehicle’s battery. Next, securely connect the black negative (–)
booster clamp
➅
to a grounding point such as the metal of the vehicle’s frame,
your boat’s frame or engine block, keeping it as far away from the battery as
possible. Never connect the unit’s black negative (–) booster clamp to
the vehicle’s negative (–) battery terminal. Turn the ON/OFF switch to the
ON position.
Note: If your vehicle fails to start within 10 seconds, allow the unit’s interior
battery to cool down for at least 3 minutes before attempting to jumpstart
the vehicle again.
Powering Your 12 Volt Accessories
Your Watertight Jumpstart Kit’s 12 volt power port will run most accessories with
a power draw of 10 amps or less. When fully charged, the unit will run a 10 amp
accessory for approximately 1 hour, a 6 amp accessory for approximately 2 hours
and a 4 amp accessory for approximately 3 hours.
Using The Unit’s Worklight
Simply unclip the Worklight and plug it into the unit’s 12 volt power port. Turn the
Worklight ON using the ON/OFF switch at the back of the yellow bulb casing. The
Worklight comes complete with a flexible stem that you can bend into the position
most convenient for you. When you have finished using the Worklight, turn it OFF,
and place it back in its housing.

TROUBLE SHOOTING TIPS:
Battery Indicator LEDs Not Lighting Up During Recharging?
Make sure the power cord is securely connected to the AC/DC input.
Unit Failing To Jumpstart Your Craft?
Make sure the unit is fully charged before using.
Make sure the booster clips are securely connected.
SPECIFICATIONS:
Battery: Sealed lead-acid
12 volts DC
18 amp/hour
450 amp CCA
900 amps peak
Charging Time: 20 hour with AC adapter
11 hour with 12 volt car cord
Booster Cables: 400A cables, 24” length
Power Port: 12 volt DC, 12 amp max.
Worklight: 3 watt bulb
Customer Service 1-800 262-8464
FULLY CHARGE BEFORE FIRST USE

For further information about this or other quality West Marine SeaVolt products,
log on to our website www.westmarine.com or call our Customer Service
Department at 1-800 BOATING.
500 Westridge Drive, Watsonville, CA
/


