the mixing tools and some of their uses
K-beater
O
For making cakes, biscuits, pastry, icing, fillings, éclairs and mashed
potato.
whisk
O
For eggs, cream, batters, fatless sponges, meringues, cheesecakes,
mousses, soufflés. Don’t use the whisk for heavy mixtures (eg creaming
fat and sugar) - you could damage it.
dough hook
O
For yeast mixtures.
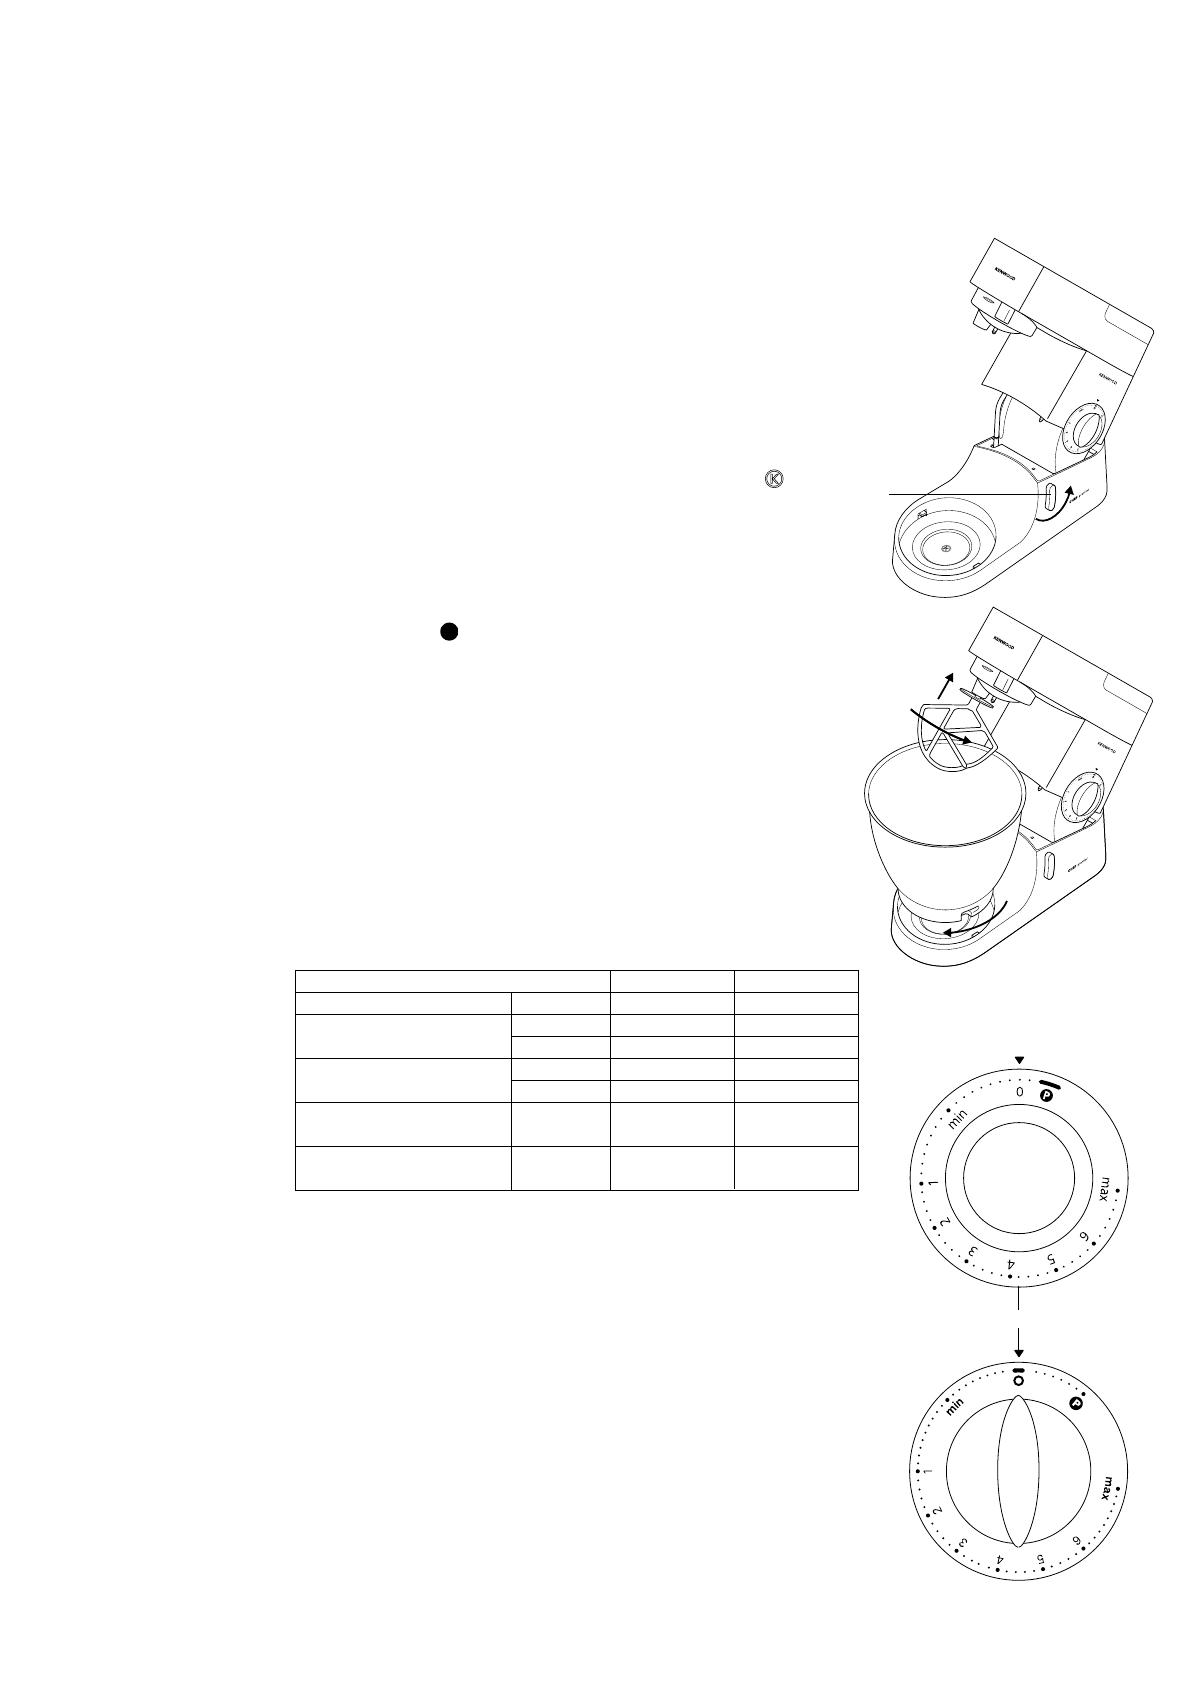
to use your mixer
1 Turn the head-lift lever clockwise and raise the mixer head till it
locks. Ensure the bowl seating pad is correctly fitted with the
symbol
uppermost.
to insert a tool
2 Push up till it stops then turn.
3 Fit the bowl onto the base - press down and turn clockwise
4 Lift the mixer head slightly then turn the head-lift lever anti-clockwise and lower
the mixer head till it locks.
5 Switch on by turning the speed switch to the desired setting.
O
Switch to pulse
for short bursts.
6 Switch off and unplug after use.
to remove a tool
7 Turn and remove.
hints
O
Switch off and scrape the bowl with the spatula frequently.
O
Eggs at room temperature are best for whisking.
O
Before whisking egg whites, make sure there’s no grease or egg yolk
on the whisk or bowl.
O
Use cold ingredients for pastry unless your recipe says otherwise.
points for bread making
important
O
Never exceed the maximum capacities below - you’ll overload the
machine.
O
If you hear the machine labouring, switch off, remove half the dough
and do each half separately.
O
The ingredients mix best if you put the liquid in first.
* Egg sizes used = medium sized (Weight 53-63g)
speed switch
K-beater
O
creaming fat and sugar start on min, gradually increasing to ‘max’.
O
beating eggs into creamed mixtures 4 - ‘max’.
O
folding in flour, fruit etc Min - 1
O
all in one cakes start on min speed, gradually increase to max.
O
rubbing fat into flour min - 2.
whisk
O
Gradually increase to ‘max’.
dough hook
O
Start on ‘min’, gradually increasing to 1.
important
Ensure that no bowl tool is fitted or
stored in the bowl when using other
outlets.
the mixer
4
Maximum capacities CHEF MAJOR
Shortcrust pastry Flour weight 680g/1lb 8oz 910g/2lb
Bread dough (stiff yeasted) Flour weight 1.36Kg/3lb 1.5Kg/3lb 5oz
Total weight 2.18Kg/4lb 13oz 2.4Kg/5lb 5oz
Soft yeasted dough (enriched Flour weight 1.3Kg/2lb 14oz 2.6Kg/5lb 12oz
with butter and eggs) Total weight 2.5Kg/5lb 8oz 5Kg/11lb
Fruit cake mix (creaming fat Total weight 2.72Kg/6lb 4.55Kg/10lb
and sugar method) (9 egg mix) (15 egg mix)
Egg whites Number 12 16
Weight (455g) (605g)


