Kenmore 415.16303800 Owner's manual

Category
Barbecues & grills
Type
Owner's manual
Use and Care Guide
LiquidPropaneGasGrill
KenmoreModelNo.415.1612380t
KmartItemNo.640-641215405
®
This Grill isfor OutdoorUseOnly
Read and follow all Safety, Assembly,
and Use and Care instructionsin this
Guide before assembling and cooking
with this grill.
Failure to follow all irstructions in this
Use and Care Guide may lead to fire or
explosion, which could result in property
damage, personal injuryor death.
Safety
Parts
Use and Care
Assembly
AssemblyQuestions.'?
Call 1-800-241-7548
Tools needed for assembly:
Adjustable wrench (not provided)
Screwdriver (not provided)
7/16" Combinationwrench (not provided)
SAVETHESEINSTRUCTIONS!
Sears, Roebuck and Co., Hoffman Estates, IL 60179 U.S.A.
©2008Sears,RoebuckandCo.,AllRightsReserved PrintedinChina
464310209•46431100980018056 10_07_08
if you smell gas:
1. Shut off gas to the appliance.
2. Extinguish any open flame.
3. Open lid.
4. ifodor continues, keep away from the
appliance and immediately call your gas
supplier or your fire department.
1. Do not store or use gasoline or other
flammable liquids or vapors in the vicinity of
this or any other appliance.
2. An LP cylinder not connected for use shall not
be stored in the vicinity of this or any other
appliance.
Call Grill Service Center For Help And Parts
If you havequestions or need assistance during assembly,
please call 1-800-241-7548. You will be speaking to a
representative ofthe grill manufacturerand not a Sears
employee. Toorder new parts call Sears at 1-800-4-MY-HOME.°
Product Record
IMPORTANT:Fillouttheproductrecordinformationbelow.
Model Number
Serial Number
Date Purchased
Seeratinglabelongrillforserialnumber.
CAUTION
For residential use only. Do not use for commercial
cooking.
2 °464310209° 464311009
CALIFORNIA PROPOSITION65
1. Combustion by-products produced when using
this product contain chemicals known to the State of
California to cause cancer, birth defects, and other
reproductive harm.
2. This product contains chemicals, including lead
and lead compounds, known to the State of
California to cause cancer, birth defects or other
reproductive harm.
Wash your hands after handling this product.
installation Safety Precautions
Use grill, as purchased, only with LP (propane) gas and the
regulator/valve assembly supplied. A conversion kit mustbe
purchased for use with naturalgas.
Grill installation must conform with local codes, or in their
absence of local codes, with either the National Fuel Gas
Code,ANSI Z223.1/NFPA 54, Natural Gas and Propane
Installation Code,CSAB149.1, or Propane Storage and
Handling Code,B149.2, orthe Standardfor Recreational
Vehicles,ANSI A 119.2/NFPA1192,and CSAZ240 RV Series,
Recreational VehicleCode, as applicable.
All electrical accessories (such as rotisserie) must be
electrically grounded in accordance with local codes, or
National Electrical Code,ANSI / NFPA70or Canadian
Electrical Code,CSA C22.1. Keep any electrical cordsand/or
fuel supply hoses away from any hot surfaces.
This grill issafety certified for use in the United States and/or
Canada only. Donot modify for use in any other location.
Modification wilt result in a safety hazard.
Safety Symbols
The symbols and boxes shown below explain what each heading
means. Read and follow all of the messagesfound throughout
the manual.
DANGER: Indicates an imminentlyhazardous situation
which, if not avoided,will result indeath or serious injury.
WARNING: Indicatesan potentiallyhazardous situation
which, if not avoided, could result in death orserious injury.
CAUTION
CAUTION: Indicatesa potentiallyhazardoussituationor
unsafepracticewhich, ifnotavoided, may result in minor
or moderateinjury.
For Your Safety...................................... 2
Grill Service Center................................... 2
Product Record Information ............................ 2
Safety Symbols...................................... 2
Installation Safety Precautions .......................... 2
Kenmore Grill Warranty ............................... 3
Use and Care .................................... 4-10
Parts List .......................................... 11
Parts Diagram...................................... 12
Assembly ....................................... 13-22
Troubleshooting.................................. 23-25
Repair Protection Agreements
Congratulations on making a smart purchase. Your new
Kenmore®productisdesigned and manufactured for years of
dependable operation. But like all products,it may require repair
from time to time. That's when having a Repair Protection
Agreement cansave you money andaggravation.
Purchase a Repair ProtectionAgreement now and protect
yourself from unexpected hassle and expense.
Here's what the Repair ProtectionAgreement* includes:
171 Expert service by our 10,000 professional repairspecialists
[] Unlimited service and no charge for partsand labor on all
covered repairs
[] Product replacement up to $1500 ifyour coveredproduct
can't be fixed
[] Discount of 10% from regular price of service and related
installed parts not covered by the agreement; also, 10% off
regular priceof preventive maintenance check
[] Fast help by phone -we call it Rapid Resolution-
phone support from a Sears representative.Think of us
as a "talking owner's manual."
Once you purchase the Repair ProtectionAgreement, a simple
phone call isall that it takes for you to scheduleservice. You can
call anytime day or night, or schedule a service appointment
online.
The Repair ProtectionAgreement isa risk-free purchase. Ifyou
cancel for any reason duringthe product warranty period, we will
provide a full refund.Or, a prorated refund anytime after the
product warranty periodexpires. Purchase your Repair
ProtectionAgreement today!
Some limitations and exclusions apply.
For prices and additional information call 1-800-827-6655.
Sears Installation Service
For Sears professional installation of home appliances, garage
door openers, water heaters, and other major home items, in the
U.S.A. call 1-800-4-MY-HOME®
KENMORE GRILL WARRANTY
One Year Full Warranty on Kenmore Grill
If this grill fails due to a defect in material or workmanship
within one year from the date of purchase, call 1-800-4-MY-
HOME% arrange for free repair (or replacement if repair
proves impossible).
Five-Year Limited Warranty on Burners
Forfive years from the date of purchase,any burner that
ruststhrough wilt be replaced free of charge.After the first
yearfrom the date of purchase,you payfor labor ifyou wish
to have it installed.
All warranty coverage excludes ignitor batteries and grill part
paint loss, discoloration or rusting,which are either
expendable parts that can wear out from normal usewithin
thewarranty period, or are conditions that can bethe result
of normal use, accident or improper maintenance.
All warranty coverage is void if this grill is ever used for
commercial or rental purposes.
All warranty coverage applies only if this grill is used inthe
United States.
This warranty gives you specific legal rights, and you may
also have other rights which vary from state to state.
Sears, Roebuck and Co., Hoffman Estates, IL 60179
464310209' 464311009'3
NEVERstore a spare LP cylinder under or near the
appliance or in an enclosed area.
Never fill a cylinder beyond 80% full.
If the information in two points above is not
followed exactly, afire causing death or serious
injury may occur.
An over filled or improperlystored cylinder isa
hazard due to possible gas releasefrom the safety
relief valve. This could cause an intense fire with
risk of property damage, serious injury or death.
If you see, smell or hear gas escaping, immediately
get away from the LP cylinderlapplianceand call
your fire department.
LP Tank Removal, Transport And Storage
Turn OFF all control knobs and LP tank valve. Turn coupling
nut counterclockwise by hand only -do not use tools to
disconnect. LiftLP tank wire upward off of LPtank collar, then
lift LP tank up and off of support bracket. Installsafety cap onto
LP tank valve.Always use cap andstrap supplied withvalve.
Failure to use safety cap as directed may result in serious
personal injuryand/or property damage.
LPTankValve
SafetyCap
RetainerStrap
A disconnected LP tank in storage or being transported must
have a safety cap installed (as shown). Do notstore an LPtank
in enclosed spaces such as a carport, garage, porch, covered
patio or other building. Never leavean LP tank inside a vehicle
which may become overheated bythe sun.
Do not store an LPtank in an area where children play.
LP Cylinder
The LP cylinder used with your grill must meet the
following requirements:
Use LP cylinders only with these required measurements: 12"
(30.5cm) (diameter) x 18" (45.7 cm) (tall) with 20 lb. (9 kg.)
capacity maximum.
LP cylinders must be constructed and marked in accordance
with specifications for LP cylinders of the U.S. Department of
Transportation (DOT) or for Canada, CAN/CSA-B339,
cylinders, spheres and tubes for transportation of dangerous
goods. Transport Canada (TC). SeeLP cylinder collar for
marking.
LP cylinder valve must have:
Type 1 outlet compatiblewith
regulatoror grill.
Safety reliefvalve.
ULlisted Overfill Protection OPDHandWheel
Device (OPD). This OPD safety
feature is identified by a unique triangular hand wheel. Use
only LP cylinders equipped with this type of valve.
LP cylinder must be arranged for vapor withdrawal and include
collar to protect LPcylinder valve.Always keep LPcylinders in
upright position during use, transit or storage.
i i_;i__:>_ilji¸
LP cylinder in upright position for vapor withdrawal
LP (Liquefied Petroleum Gas)
LPgas is nontoxic, odorless and colorless when produced. For
Your Safety, LPgas has been given an odor (similar to rotten
cabbage) so that it can be smelled.
LPgas is highly flammable and may ignite unexpectedly when
mixedwith air.
LP Cylinder Filling
Use only licensed and experienced dealers.
LPdealer must purge new cylinder before filling.
Dealershould NEVERfill LP cylinder more than 80% of LP
cylinder volume. Volumeof propanein cylinder wilt vary by
temperature.
A frosty regulator indicates gas overfill. Immediately close LP
cylinder valve and call local LP gas dealer for assistance.
Donot releaseliquid propane (LP) gas into the atmosphere.
This is a hazardous practice.
Toremove gas from LP cylinder,contact an LP dealer or call a
local fire department for assistance. Check the telephone
directory under "Gas Companies" for nearest certified LP
dealers.
4 °464310209° 464311009
LP Tank Exchange
•Many retailers that sell grills offer you the option of replacing
your empty LP tank through an exchangeservice. Use only
those reputable exchange companiesthat inspect, precision fill,
test and certify their cylinders. Exchange your tank only for
an OPD safety feature-equipped tank as described inthe
"LP Tank" section of this manual.
•Always keep new and exchanged LP tanks in upright position
during use, transit or storage.
•Leak test new and exchanged LP tanks BEFORE
connecting to grill.
Connecting Regulator To The LP Tank
1.LP tank must beproperly secured onto grill. (Referto
assembly section.)
2.Turn all control knobs to the OFF position.
3.Turn LP tank OFF byturning OPD hand wheel clockwiseto a
full stop.
4.Remove the protectivecap from LP tank valve.Always use
cap and strap supplied with valve.
LP Tank Leak Test
For your safety
Leak test must be repeated each time LPtank isexchanged or
refilled.
*Do notsmoke during leak test.
*Do notuse an open flame to check for gas leaks.
*Grill must be leak tested outdoors in a well-ventilated area,
away from ignition sources such as gas fired or electrical
appliances. Duringleak test, keep grill away from open flames
or sparks.
•Usea clean paintbrush and a 50/50 mild soap and water
solution. Brush soapy solution onto areas indicated byarrows
in figure below. Leaks are indicated bygrowing bubbles.
If "growing" bubbles appear do not use or move the LPtank.
Contact an LP gas supplier or your fire department!
A Do not use household cleaning agents. Damage to gas
train components can result.
OPDHandWheel
j Type 1outlet with
threadon outside
Safety Relief Valve
!
Strapand Cap
Do not use a POL transport plug
(plastic part with external threads)!
It will defeat the safety feature of
the valve.
5.Hold regulatorand insert nipple into LP
tank valve. Hand-tightenthe coupling
nut, holding regulator in a straight line
with LPtank valve so as not to cross-
thread the connection.
Nipplehasto be centered
intothe LPtankvalve.
464310209. 464311009.5
Holdcoupling nut and regulator
asshown for properconnection
to LP tank valve.
Leak Testing Valves, Hose and Regulator
1.Turn all grill control knobs to OFF.
2.Be sure regulator istightly connected to LPtank.
3.Completely open LP tank valve by turning OPD handwheel
counterclockwise. If you hear a rushing sound, turn gas off
immediately.There is a major leak at the connection. Correct
before proceeding by calling Sears for replacement parts at
1-800-4-MY-HOME.°
4.Brush soapy solution onto areaswhere bubbles are shown in
picture below:
6.Turn the coupling nut clockwiseand tighten to a full stop. The
regulatorwill seal on the back-checkfeature in the LP tank
valve, resulting in some resistance.An additional one-half to
three-quarters turn is required to complete the
connection. Tighten by hand only - do not use tools.
NOTE:
If you cannot complete the connection, disconnect regulatorand
repeat steps 5 and 6. If you are still unable to completethe
connection, do not use this regulator!
A Neverremovethreaded
orifice atend of valve.
Do not insertanytool or foreignobject intothevalve
outlet or safety relief valve.You may damagethe valve
and cause a leak. Leaking propane may result in
explosion,fire, severepersonal injury,ordeath.
5.If "growing" bubbles appear, there is a leak. Close LP tank
valve immediately and retighten connections. If leaks cannot
be stopped do not try to repair. Call Searsfor replacement
parts at 1-800-4-MY-HOME.°
6.Always close LP tank valve after performingleak test by
turning handwheel clockwise.
Outdoorgas applianceis not intendedto beinstalled
in or on a boat.
Outdoorgas applianceis not intendedto beinstalled
in or on an RV.
. Never attemptto attach this grill to the self-contained
LPgas system of a campertrailer or motorhome.
. Do not usegrill until leak-tested.
. If a leak is detectedat any time, STOPand callthe fire
department.
. If you cannotstopa gas leak,immediately close
LPcylindervalve and call LPgas supplier or yourfire
department!
6,464310209. 464311009
For Safe Use of Your Grill and to Avoid Serious
Injury:
Do not letchildrenoperate or play neargrill.
Keepgrill area clear and freefrom materials that burn.
Do not blockholes in sidesor backof grill.
Check burnerflames regularly.
Use grill only inwell-ventilated space. NEVERuse in
enclosedspace suchas carport,garage, porch,
covered patio,or under anoverhead structure of any
kind.
Do not usecharcoal orceramic briquetsin a gasgrill.
(Unlessbriquets aresupplied with your grill.)
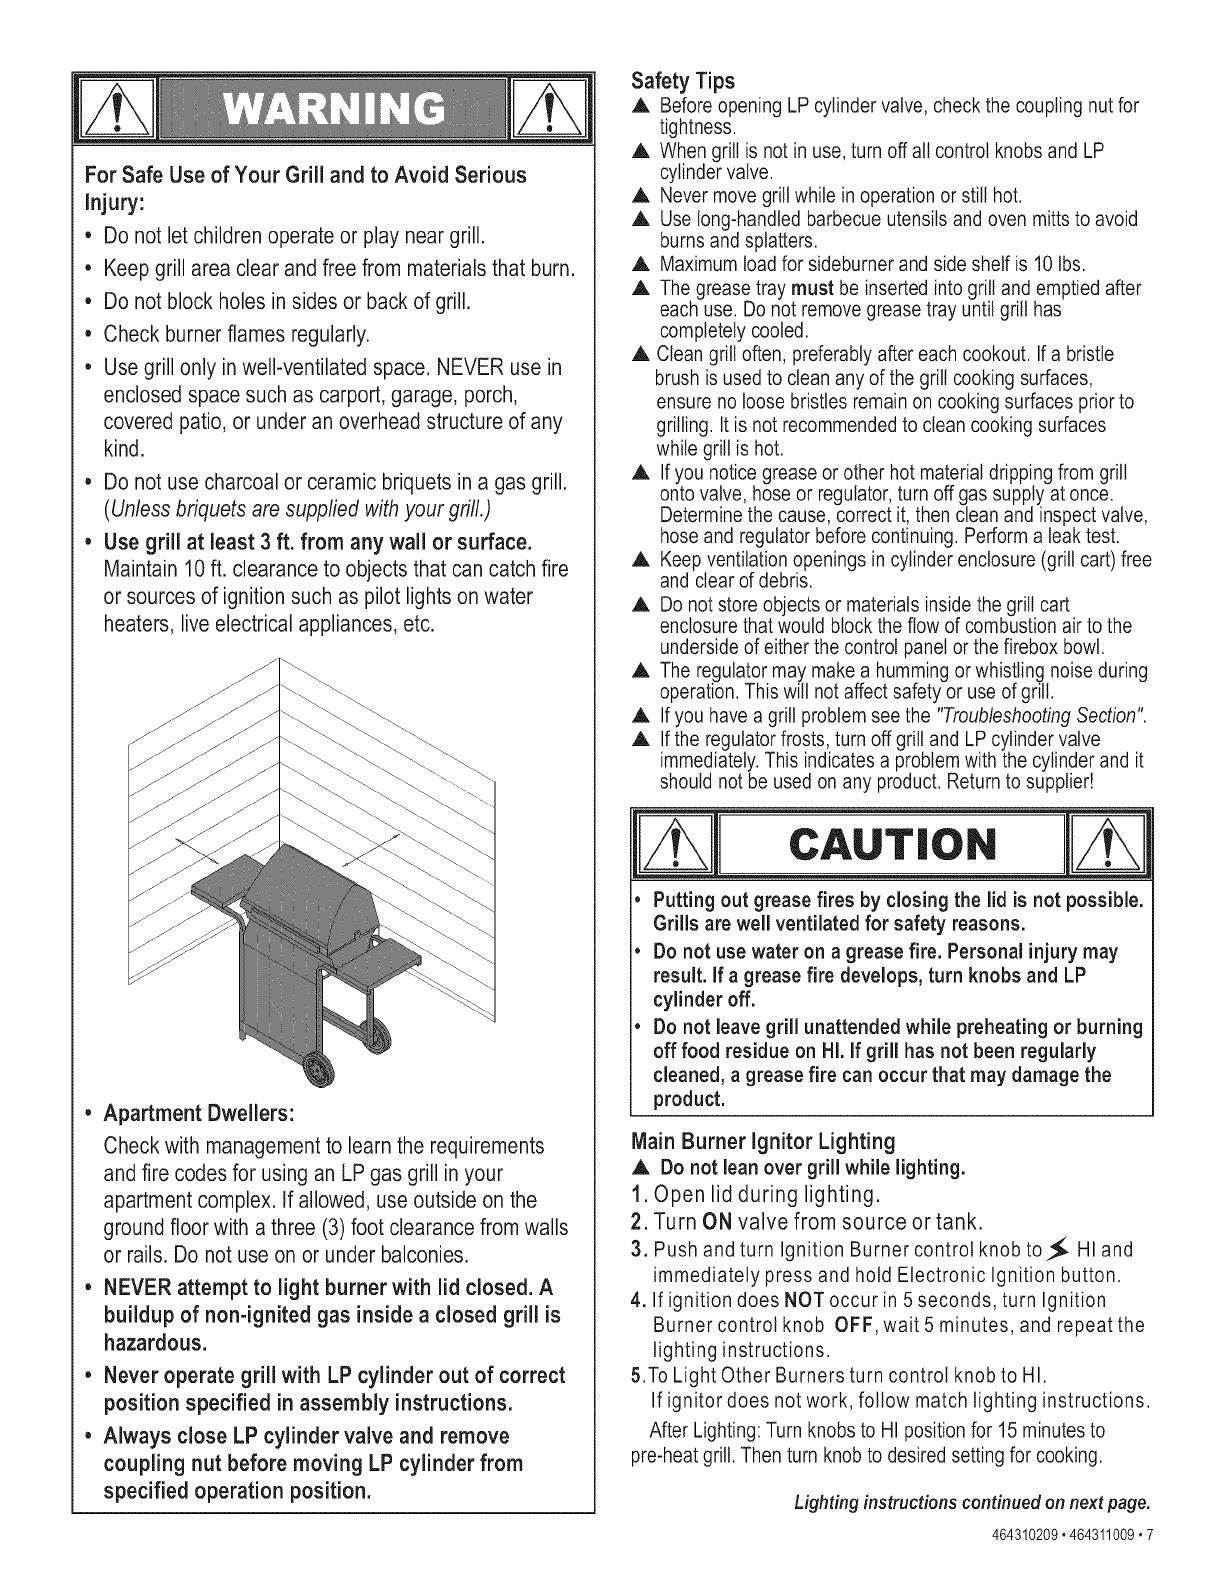
Usegrill at least 3 ft. from any wall or surface.
Maintain 10ft. clearanceto objects that cancatch fire
or sourcesof ignition such as pilot lightsonwater
heaters,live electrical appliances,etc.
Apartment Dwellers:
Checkwith managementto learnthe requirements
and firecodes for using an LPgasgrill inyour
apartmentcomplex.If allowed, useoutside onthe
ground floorwith a three (3)foot clearance fromwalls
or rails. Do not useonor under balconies.
NEVERattempt to light burner with lid closed.A
buildup of non-ignited gas insidea closed grill is
hazardous.
Never operategrill with LP cylinderout of correct
position specified in assembly instructions.
Always close LP cylinder valve and remove
coupling nut before moving LP cylinder from
specified operation position.
Safety Tips
,A, Beforeopening LP cylinder valve, check the coupling nutfor
tightness.
,A, When grill is not in use, turn off all control knobs and LP
cylinder valve.
,A, Nevermove grill while in operation or still hot.
,A, Uselong-handled barbecue utensils and oven mitts to avoid
burnsand splatters.
,A, Maximumload for sideburner and side shelf is 10 Ibs.
,A, The grease tray must be inserted into grill and emptied after
each use. Do not remove grease tray until grill has
completely cooled.
,A, Clean grill often, preferablyafter each cookout. If a bristle
brush is used to clean any of the grill cooking surfaces,
ensure no loose bristles remain on cooking surfaces prior to
grilling. It is not recommendedto clean cooking surfaces
while grillis hot.
,A, Ifyou notice grease or other hot materialdripping from grill
onto valve, hoseor regulator, turn off gas supplyat once.
Determinethe cause, correct it, then clean and inspect valve,
hoseand regulator before continuing. Perform a leak test.
,A, Keepventilation openings in cylinder enclosure (grill cart) free
and clear of debris.
,A, Donot store objects or materials inside the grill cart
enclosure that would block the flow of combustion air to the
undersideof either the control panel or the firebox bowl.
,A, The regulatormay make a humming orwhistling noiseduring
operation. This will notaffect safety or use of grill.
,A, Ifyou have a grill problem see the "Troubleshooting Section".
,A, Ifthe regulator frosts, turn off grill and LP cylinder valve
immediately.This indicates a problemwith the cylinder and it
should notbe used on any product. Return to supplier!
CAuT,o.
Putting out grease fires by closingthe lid is not possible.
Grills are well ventilated for safety reasons.
Do not use water on a grease fire. Personal injury may
result, if a grease fire develops, turn knobs and LP
cylinder off.
Do not leave grill unattended while preheating or burning
off food residue on HI. if grill has not been regularly
cleaned, a grease fire can occur that may damage the
product.
Main Burner Ignitor Lighting
A Do not lean over grill while lighting.
1. Open lid during lighting.
2. Turn ON valve from source or tank.
3, Push and turn Ignition Burner control knobto_ HI and
immediately press and hold Electronic Ignition button.
4. If ignition does NOT occur in 5 seconds, turn Ignition
Burner control knob OFF, wait 5 minutes, and repeat the
lighting instructions.
5.To Light Other Burners turn control knob to HI.
If ignitor does not work, follow match lighting instructions.
After Lighting: Turn knobs to HI position for 15 minutesto
pre-heat grill. Then turn knob to desired setting for cooking.
Lighting instructionscontinued on next page.
464310209,464311009,7
Turn controls and gas source or tank OFF when not
in use.
CAUT,o.
If ignition does NOToccur in 5seconds, turn the
burner controls OFF,wait 5 minutes and repeat the
lighting procedure. If the burner does not ignitewith
the valve open, gas will continue to flow out of the
burner and could accidently ignite with risk of injury.
Match-Lighting
,L. Do not lean over grill while lighting.
1. Open lid during lighting.
2. Place match into match holder (hanging from side of cart).
Light match, place into lighting holeon rightside of firebox.
3. Push inand turn right knob to HIGH position. Be sure burner
lights and stays lit.
4. Light other burners by pushing knob in and turning to_ HI
position.
Sideburner Ignitor Lighting
,A.Do not lean over grill while lighting.
1. Open lid or cover for Side Burner during lighting.
2. Turnon valve from source or tank.
3. Push andturn Side Burner control knob to _;: HI and
immediately press and hold Electronic Ignition button.
4. Ifignition does NOT occur in 5 seconds, turn Side Burner
control knob OFF,wait 5 minutes, and repeatthe lighting
instructions.
Sideburner Match Lighting
1.Open sideburner lid. Turn on gas at LP cylinder.
2.Place lit match near burner.
3.Turnsideburner knobto HI.
Be sure burner lights and
stays lit.
8,464310209,464311009
Burner Flame Check
•Remove cooking grates and flame tamers. Light burners, rotate
knobs from HIGHto LOW.You should see a smaller flame in
LOW positionthan seen on HIGH.Perform burner flame check
on sideburner, also.Always check flame prior to each use. If
only low flame is seen refer to "Sudden drop or low flame" in
the TroubleshootingSection.
Turning Grill Off
•Turn allknobs to OFF position. Turn LP cylinder off by turning
hand-wheel clockwise to a full stop.
ignitor Check
Turn gas off at LP cylinder. Press and hold electronic ignitor
button. "Click" should be heard and spark seen each time
between collector box or burner and electrode. See
"Troubleshooting" if no click or spark.
Valve Check
•important: Makesure gas is off at LP cylinder before
checking valves. Knobs lock in OFF position.To check
valves, first push in knobs and release, knobs should spring
back. Ifknobs do not spring back, replace valve assembly
before using grill. Turn knobs to LOW position then turn back to
OFF position.Valves should turn smoothly.
Hose Check
•Before each use, check to see if hoses are cut or worn.
Replace damaged hoses before usinggrill. Useonly
valve/hose/regulator specified by manufacturer.
General Grill Cleaning
•Do not mistake brown or black accumulationof grease and
smoke for paint. Interiorsof gas grills are not painted at the
factory (and should never be painted). Apply astrong solution
of detergent and water or usea grill cleanerwith scrub brush
on insides of grill lid and bottom. Rinse and allow to completely
air dry. Do not apply a caustic grill/oven cleaner to painted
surfaces.
Plastic parts: Wash with warm soapy water and wipe dry.
A Donot use citrisot,abrasive cleaners, degreasersor a
concentrated grill cleaner on plastic parts. Damage to and
failure of partscan result.
•Porcelain surfaces: Becauseof glass-like composition, most
residuecan be wiped away with baking soda/water solution or
specially formulated cleaner. Use nonabrasive scouring powder
for stubborn stains.
Painted surfaces: Wash with milddetergent or nonabrasive
cleaner and warm soapy water. Wipe dry with a soft
nonabrasive cloth.
Stainless steel surfaces: Tomaintain your grill's high quality
appearance, wash with mild detergent and warm soapy water
and wipe dry with a soft cloth after each use. Baked-on grease
deposits may require the use of an abrasive plastic cleaning
pad. Use only indirection of brushed finishto avoid damage.
Do not use abrasive pad on areas with graphics.
Cooking surfaces: If a bristle brushis usedto clean any of
the grill cooking surfaces, ensure no loose bristles remain on
cooking surfaces prior to grilling. It isnot recommendedto
clean cooking surfaces while grill is hot.
cAuTioN
f
SP|DNR ALNRT!
If you noticethat your grill is getting hard tolight or thatthe
flame isn't asstrong as it should be, takethe time to checkand
clean theventuri's.
CONTROLPANEL
SPIDERWEBS
INSIDE VENTURI
BURNER
Insomeareasofthecountry,spidersor smallinsectshavebeen
knowntocreate"flashback"problems.Thespidersspinwebs,build
nestsand layeggsinthegrill'sventuritube(s)obstructingtheflowof
gastotheburner.Thebacked-upgascanigniteintheventuribehind
thecontrolpanel.Thisisknownasa flashbackandit candamage
yourgrillandevencauseinjury.
Topreventflashbacksandensuregoodperformancetheburnerand
venturiassemblyshouldbe removedfromthegrillandcleaned
beforeusewheneverthegrill hasbeenidleforanextendedperiod.
\ J
Cleaning the Burner Assembly
Follow these instructions to clean and/or replace parts of burner
assembly or if you have trouble igniting grill,
1. Turn gas off at control knobs and LP cylinder.
2. Remove cookinggrates and flame tamers.
3. Remove screwsand carryover tubes from rearof burners.
4. Remove screw andwashers to disengage burner from
bracket on firebox.
5. Remove screwsto detach electrode from burner.Electrode
should remain in firebox.
6. Carefully lifteach burner up and away from valve openings.
We suggest three ways to clean the burner tubes. Use the one
easiest for you.
(A) Benda stiff wire (a light weight coat hangerworks well)
into a small hook. Run the hook through each burner
tube several times.
,.D
(B) Usea narrow bottle brushwith a flexiblehandle (do not
use a brass wire brush), run the brush through each
burner tube several times.
(C) Wear eye protection: Use an airhose to force air into
the burner tube and out the burner ports. Check each
port to make sure air comes out each hole.
7. Wire brush entire outer surface of burner to remove food
residue and dirt.
8. Clean any blocked ports with a stiff wire such as an open
paper clip.
9. Check burner fordamage, due to normal wear and corrosion
some holes may become enlarged. If any large cracks or
holes are found replace burner.
VERY IMPORTANT: Burner tubes must reengage valve
openings. See illustrations at right.
10. Attach electrode to burner. Correct
burner-to-valve
11. Carefully replace burners, engagement
12. Attach burners to brackets onfirebox.
13. Reposition carryover tubes andattach
to burners. Replace flame tamers and
cooking grates.
Storing Your Grill
•Clean cooking grates.
•Store indry location.
•When LP cylinder is connected to grill, store outdoors in a well-
ventilated space and out of reachof children.
•Cover grill if stored outdoors. Choose from a variety of grill
covers offered by manufacturer.
•Store grill indoors ONLYif LP cylinder is turned off and
disconnected, removed from grill and stored outdoors.
•When removing grill from storage, follow "Cleaning the Burner
Assembly" instructions before starting grill.
Firebox
burner
bracket
Electrode
464310209°464311009'9
Indirect Cooking
Poultry and large cuts of meat cook slowly to perfectionon the
grill by indirect heat. The heatfrom selected burnerscirculates
gently throughout the grill, cooking meat or poultry without the
touch of a direct flame. This method greatly reduces flare-ups
when cooking extra fatty cuts because there is no direct flame to
ignite the fats and juices that drip during cooking.
1Burner Cooking
Cook with direct or indirect heat.
Best for smaller meals or foods.
Consumes less fuel.
Indirect Cooking Instructions
Always cook with the lid closed.
Due to weather conditions, cooking times may vary. During
cold and windy conditions the temperature setting may need
to be increased to insure sufficient cooking temperatures
2 Burner Cooking
Great indirect cooking on low.
Produces slow, even heating.
Ideal for slow roasting and baking.
Sear and Grill TM Burner Feature
This grill includes a high output BTU burner on the far right side
of the grill (far right control knob). This burner gets hotter than the
other burners when the knob isin the Searing position.This is
excellent for searing steaks, chops and other foods.
Tooperate this feature, follow the normal lighting instructions.
Then turn the far right control knob to the Searing position.Allow
burner to heat upfor 5 minutes. Sear your food for 2 minutes on
each side, then grill on lowto desired doneness.
When not using the Searing feature, adjust the knobto the same
temperature as the other burners.
Food Safety
Food safety isa very important part of enjoying the outdoor
cooking experience. To keep foodsafe from harmful bacteria,
follow these four basic steps:
Clean: Washhands, utensils, and surfaces with hot soapy water
beforeand after handling raw meat and poultry.
Separate: Separate raw meats and poultry from ready-to-eat
foods to avoid cross contamination. Use a clean platter and
utensils when removingcooked foods.
Cook: Cook meat and poultry thoroughly to kill bacteria. Use a
thermometer to ensure proper internalfood temperatures.
Chill: Refrigerate prepared foods and leftovers promptly.
For more information call: USDA Meatand Poultry Notline at
1-800-535-4555 (in Washington, DC (202) 720-3333, 10:00 am-
4:00 pm EST).
How To Tell If Meat is Grilled Thoroughly
Meat and poultry cooked on a grill often browns very fast on the
outside. Usea meat thermometer to be sure food has reached
a safe internal temperature, and cut into food to check for
visual signs of doneness.
Whole poultry should reach 165° F.Juices should run clear and
flesh should not be pink.
Hamburgers madeof any ground meat or poultry should reach
160° F,and be brown in the middlewith no pinkjuices. Beef,
veal and lamb steaks, roasts and chops can be cooked to 145°
F.All cuts of pork should reach 160° F.
NEVER partially grill meat or poultry and finish cooking later.
Cook food completely to destroy harmful bacteria.
When reheating takeout foods orfully cooked meats like hot
dogs, grill to 165° F,or until steaming hot.
WARNING: Toensure that it is safe to eat, food must be cooked
to the minimum internal temperatures listed inthe table below,
USDA* Safe Minimum Internal Temperatures
Fish 145°F
Pork 160°F
Egg Dishes 160°F
Steaks and Roasts of Beef,
Veal or Lamb 145°F
Ground Beef, Veal or Lamb 160°F
Whole Poultry(Turkey,
Chicken, Duck, etc.) 165°F
Ground or Pieces Poultry 165°F
(Chicken Breast,etc.)
*United States Department of A( ricutture
10'464310209 °464311009
1 1 LEFT LEG ASSEMBLY 80008566
2 1 MATCH HOLDER 80004320
3 1 RIGHT LEG ASSEMBLY 80014375
4 1 BOTTOM SHELF 8000854g
5 1 AXLE ROD 80008572
6 2 WHEEL 80013777
7 1 LEG EXTENDER, FRONT 80008596
8 1 LEG EXTENDER, REAR 80000076
9 1 BACK RAIL 80012064
10 1 LOWER FRONT PANEL, W/PIN 80011105
11 1 UPPER FRONT PANEL, W/O PIN 8000856g
12 1 TOP LID 80009023
13 1 LOGO PLATE 80010544
14 1 TEMPERATURE GAUGE 80009025
15 1 BEZEL, F/TEMPERATURE GAUGE 80008585
16 1 HANDLE F/TOP LID 80009026
17 2 _ _ , 80006983
F/MAIN LID
18 2 _ _ , 80005833
F/MAIN LID
19 1 TOP LID HARDWARE 80017646
20 1 FIREBOX 80009022
21 3 MAIN BURNER TUBE, NO 8001836g
22 1 ELECTRODE, MAIN BURNER 8000902g
23 2 FLAME CARRY OVERTUBE 80009028
24 1 MAIN CONTROL PANEL 80018371
25 1 ELECTRONIC IGNITION MODULE 80018396
26 1 HOSE VALVE REGULATOR 80018398
27 4 BEZEL, F/CONTROL KNOB 80014406
28 4 CONTROL KNOB 80014405
29 1 RIGHTSIDE SHELF 80008553
30 1 FASCIA, F/RIGHT SHELF 80015592
31 1 SlDEBURNER SHELF 80008534
32 1 DRIP PAN, F/SlDEBURNER 80014344
33 1 SlDEBURNER LID 80015642
34 1 FASCIA, F/SIDEBURNER SHELF 80018372
35 1 SlDEBURNER 80014461
36 1 ELECTRODE, F/SlDEBURNER 80017596
37 1 IGNITOR WIRE, F/SIDEBURNER 80012457
38 1 BURNER CLIP F/SIDE BURNER 80001424
39 1 SlDEBURNER GRID 80018052
40 1 HEAT SHIELD, F/FIREBOX 80018044
41 3 HEAT DIFFUSER 80018051
42 3 COOKING GRATE 80014381
i i i iii:ii iii i i!iiiii!I i iiiiiiii!ii ii;iii i!ii iii1i iiiii i!ii!i!i!ii!i!ii!i!ii!i!ii!i!ii!i!ii!i!ii!i!ii!i!ii!i!ii i jii! iiiii , !
43 1 SWING AWAY GRATE 80008532
44 1 BUTTON, F/El MODULE 80014444
45 1 CLIP, F/GREASE CUP 80000271
46 1 GREASE CUP 80000270
47 1 TANK THUMBSCREW 80006484
NOT Pictured
" 1 HARDWARE PACK 80009345
.. 1 PRODUCT MANUAL, ENGLISH 80018056
"" 1 PRODUCT MANUAL, SPANISH 80018057
If you are missing hardware or have damaged parts,
please call 1-800-241-7548for replacement.
464310209' 464311009' 11
\
12'464310209 '464311009
Bottom Shelfto Legs
[] Placebottomshelfendwithcutoutholefor LPcylinderbetweenlegswithaxleholes.Attachtorightandleft legassemblieswith
(4)1/4-20x1-1/2"screws and1/4-20flange nuts.
[] Tightensecurely,
1/4-20Flangenuts
Qty,4
Match Holder
1/4-20x1-1/2"Screws
Qty,4
/
Axle hole
Front
1
Y
Bottom Shelf
Left Leg Assembly
Rear
Right LegAssembly
/
464310209,464311009,13
Wheels and LegExtendersto Cart
[] Turnassemblyupsidedown.
[] Insertaxlerodthroughwheel,wheelspacer,legs,wheelspacerandotherwheel.Attachwith(1)Axlewasherandhitchpin.
[] Hammerlegextendersintorightlegs.
WheelSpacer
Qty.2
AxleWasher
Qty.1
HitchPin
Qty.1
Leg ExtenderFront
\
LegExtenderRear
\
Axle Rod
"Cone" sideofwheelagainst leg
WheelSpacer
T
Wheel
WheelSpacer
HitchPin
/
AxleWasher
14°464310209°464311009
Front Panels
[] Standcartupright.
[] Attachbackbracetotopofcartwith(4)#8x3/8"self-tapscrews.
[] Attachlowerfront paneltolowerhalfofcartwith(4)#8x3/8"self-tap screws.
[] Attachupperfrontpanelto upperhalfofcartwith(4)#8x3/8"self-tap screws.
Back Brace
Upper Front Panel
\
Lower Front Panel
Back of cart
T
#8x3/8"
self-tapscrews
Qty.12
464310209o464311009o15
Grill Head to Cart
[] Standcart upright.
[] Thissteprequirestwo peopleto liftandpositiongrill headontocart.
[] Carefullylowerthegrillheadontothecart.Makesuretheregulatorhoseishangingoutsidethecart.Attachwith(4)
1/4-20x1/2"screws, 7ramlock washersand7ramflat washers.
1/4-20xl/2"screws 7mmlockwashers 7mmflatwashers
Qty.4 Qty.4 Qty.4
GrillHead
7mm
7mmlockwashers
1/4-20x1/2"
16.464310209 °464311009
Right Side Shelf
[] Hooksidewallofshelfoversupportbracketson sideoffirebox(A).
[] Insert(2) 7mmfiber washersand1/4-20x1/2"screws throughinsidefrontoffirebox
and(2)throughoutsidebackoffireboxforeachsideasshown(B).
[] Attachshelfwith (4)1/4-20flange nuts (C).
B
RightSideShelf
1/4-20xl/2"screws 7mmFiberWasher 1/4-20FlangeNut
Qty:4 Qty:4 Qty:4
FasciaRight SideShelf
[] Attachfasciaandsideshelftofireboxwith#8x3/8"self-tap screw.
[] CAUTION:Fasciamustbesecurelytightenedtofireboxtosafelymovegrill.
!"
#8x3/8"
self-tapscrews
Qty.2
Fascia,RightSideShelf
464310209.464311009.17
Side Burner Shelf
[] Hooksidewallofsideburnershelfoversupportbracketson sideoffirebox(A).
[] Insidefireboxinsertfiber washersand1/4-20x1/2"screws asshown(B).
[] Attachshelfusingfiber washersand 1/4-20flangenuts oneachside(C).
Lid removed for clarity
1/4-20x1/2"screws
Qty.4
SideBurnerShelf
/
7mmFiberWasher
Qty.4
1/4-20
FlangeNuts
Qty.4
Q Left Fascia
[] Attachfasciatofireboxwith(2)#8x3/8"self-tap screws.
[] CAUTION:Fasciamustbesecurelytightenedtofireboxtosafelymovegrill.
18'464310209 °464311009
LeftFascia
!"
#8x3/8"
self-tapscrews
Qty.2
SideburnerValve,Sideburner,SideburnerBezel,ignitorWire, Control Knob
[] Positionvalvebehindfasciaand lineupholes.
[] Insert(1)ofthe#8-32x3/8"stainlesssteelscrews,do notfullytighten.
[] Slipbezelunderinsertedscrewandpositionasshown(A).
[] Lineupotherholeandinsertscrew#8-32x3/8"throughbezelandintovalve.
[] Tightenbothsecurely.
[] Placesideburnerintoshelf(B).Makesurevalveisinsidesideburnertube.Attachsideburnerwith(1)wing nut (C). Under
sideburnershelf,installsideburnercliptosideburnertubeandvalve.Attachsideburnerignitorwiretoelectrodeasshown(D).
[] Placegrateontosideburnershelf(E).
[] Presscontrolknobontosideburnervalvestem(F).
SideburnerValve
,/
SideburnerValve
BurnerClip
Sideburner
Grid
Correctly assembledburner-to-valveengagement
ControlKnob
#8-32X3/8"SSScrew WingNut
Qty.2 Qty.1
464310209' 464311009' 19
Heat Shield
[] Attach heat shield to firebox with (2) #8=3/8" self=tap screws.
Lid removed for clarity
T
#8x3/8"
self-tapscrews
Qty.2
Heat Shield
20 '464310209 '464311009
  • Page 1 1
  • Page 2 2
  • Page 3 3
  • Page 4 4
  • Page 5 5
  • Page 6 6
  • Page 7 7
  • Page 8 8
  • Page 9 9
  • Page 10 10
  • Page 11 11
  • Page 12 12
  • Page 13 13
  • Page 14 14
  • Page 15 15
  • Page 16 16
  • Page 17 17
  • Page 18 18
  • Page 19 19
  • Page 20 20
  • Page 21 21
  • Page 22 22
  • Page 23 23
  • Page 24 24
  • Page 25 25
  • Page 26 26
  • Page 27 27
  • Page 28 28

Kenmore 415.16303800 Owner's manual

Category
Barbecues & grills
Type
Owner's manual

Ask a question and I''ll find the answer in the document

Finding information in a document is now easier with AI