Performance Editor Essential Owner’s Manual 4
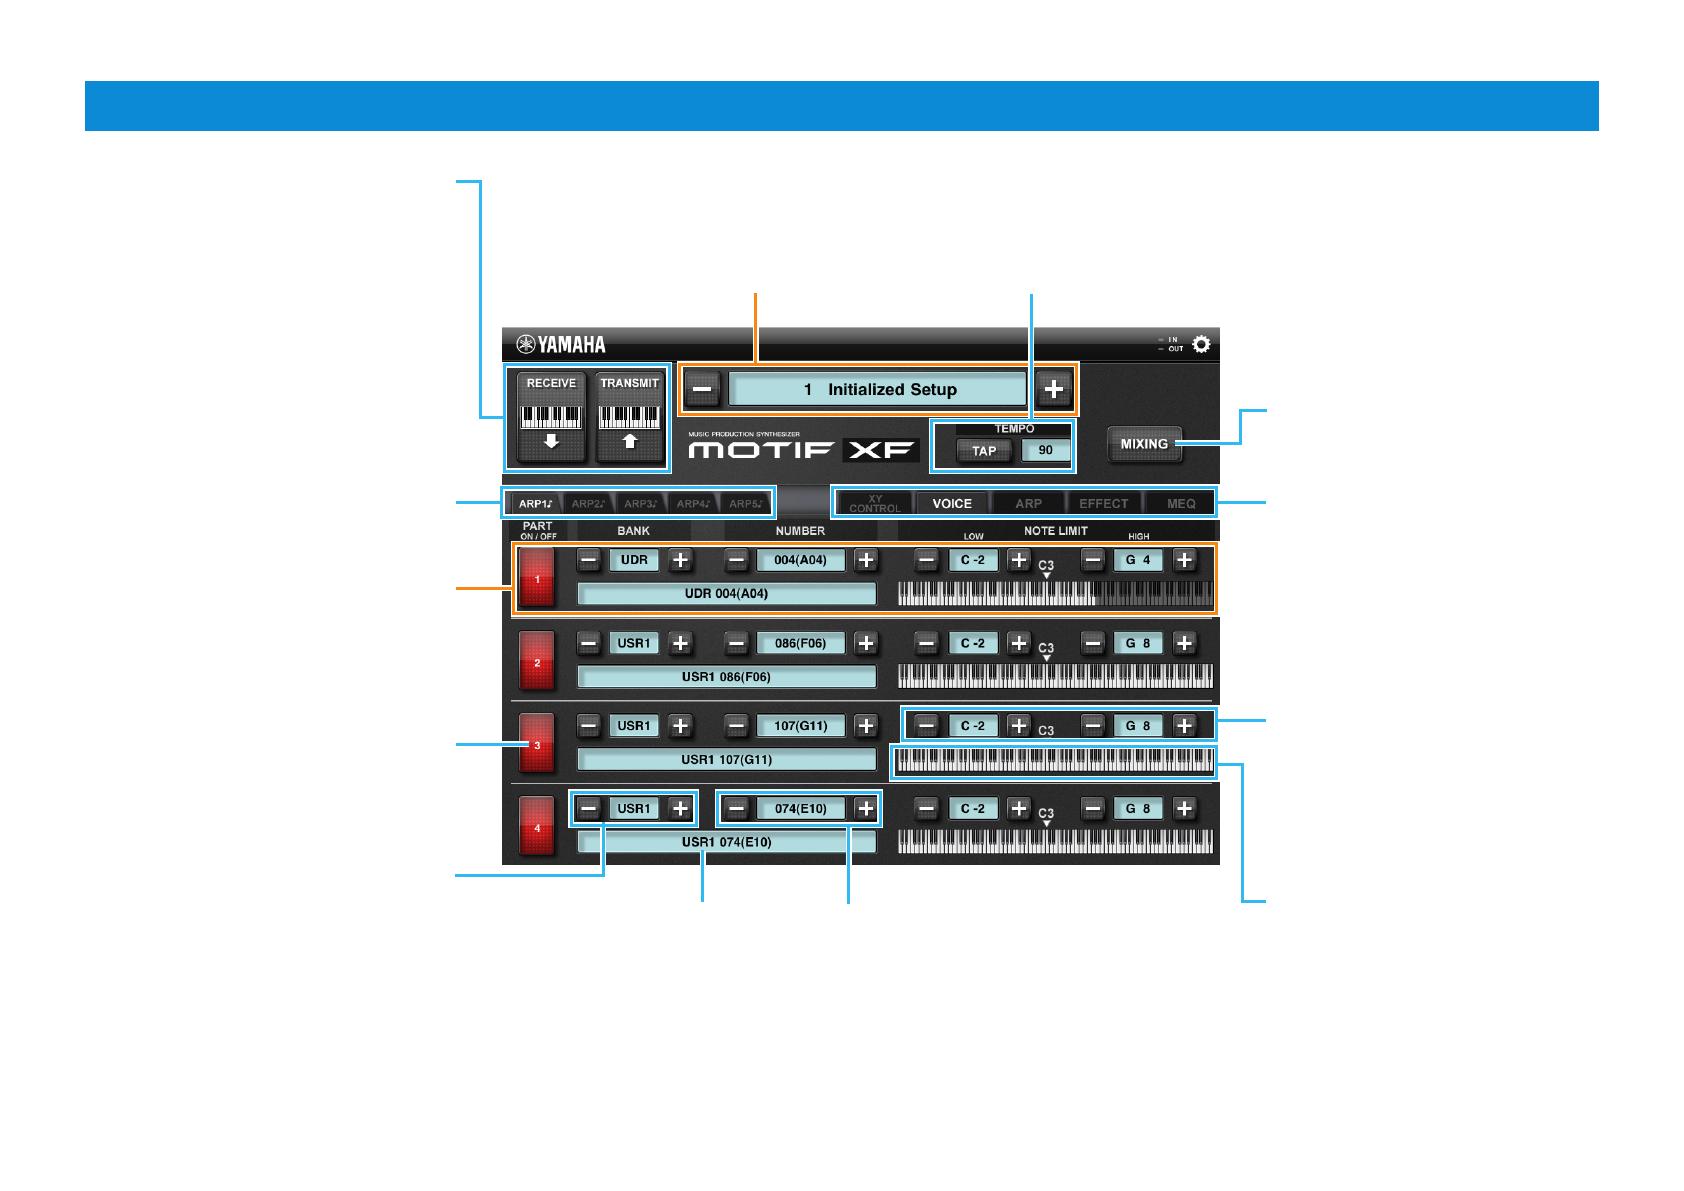
VOICE display
Tapping [RECEIVE] starts reception of
the settings from the instrument.
NOTE
The Voice name on the iPad may be different from
that of the instrument during Arpeggio playback
with “Voice with ARP”= ON and “Change Timing”=
ON. To remedy this situation, tap [RECEIVE].
Tapping [TRANSMIT] starts transmission
of the current settings to the instrument.
NOTE
When the Voice with ARP function is set to on,
tapping [TRANSMIT] will change the current Voice
to the one assigned to the new Arpeggio type.
Changes the Arpeggio type of the
current Part. This is equivalent to the
[SF1] – [SF5] buttons.
Lets you edit the Part 1 parameters.
Likewise, the parameters for the Parts
2 – 4 can be edited in the corresponding
area.
Template Name
Selecting a Template calls up all the settings
of all the displays. To change the Template,
tap [+] /[-], or tap the Template Name to call
up the Template list, then tap the desired
Template.
Indicates the Arpeggio tempo. To change
the tempo, tap the Tempo value to call up
the slider then operate the slider, or tap
[TAP] three times at the desired tempo.
Turns the Part Switch on/off. The red
color indicates “on” while the gray color
indicates “OFF.” The number on the
button refers to the Part Number.
Determines the Voice Bank. Tapping
[+] /[-] changes the Voice Bank. Tapping
the Bank Name between [+] and [-] calls
up the Voice List.
Determines the Voice Number.
Tapping [+]/[-] changes the Voice
number. Tapping the Voice name
between [+] and [-] calls up the Voice
List.
Indicates the Part Voice Name.
Tapping here calls up the Voice List.
Tapping here calls up the MIXING
window.
Determines the Note Limit Low and
Note Limit High. Tapping [-]/[+]
changes the value in single steps.
Tapping the Note name between [-]
and [+] calls up the slider which lets
you set the Limit value.
Shows the note range specified
via the Note Limit Low and High
parameters.
Tapping here alternately calls up
the XY CONTROL display, VOICE
display, ARP display, EFFECT
display and MEQ display.


