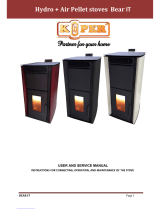
WARNINGS AND SAFETY DEVICES
7
The stoves produced by our establishment are built with
attention to the individual components in a way to protect
both the user and the installer from any accidents. It is
therefore recommended that after any intervention on the
product, authorised sta pay particular attention to the
electric connections, especially the stripped parts of the
wires. These must not escape from the terminal board in any
situation, thus preventing possible contact with the live parts
of the wire.
Installation must be carried out by authorised sta , who
must provide the buyer with a declaration of conformity
for the system and will assume full responsibility for nal
installation and as a consequence the correct functioning
of the installed product. It is necessary to bear in mind all
laws and national, regional, provincial and town council
Standards present in the country the appliance has been
installed.
Extra ame S.p.A. cannot be held responsible for the
failure to comply with such precautions.
The instruction manual is an integral part of the product:
make sure that it always accompanies the appliance, even
if transferred to other owners or user or is transferred to
another place. If it is damaged or lost, request another copy
from the area technician.
This stove must be destined for the use for which it has been
expressly realised. The manufacturer is exempt from any
liability, contractual and extracontractual, for injury/damage
caused to persons/animals and objects, due to installation,
adjustment and maintenance errors and improper use.
After the packaging has been removed, check the integrity
and completeness of the contents. If this does not comply,
contact the dealer where the appliance was purchased.
All electric components that make up the stove must be
replaced with original spare parts exclusively by an authorised
after-sales centre, thus guaranteeing correct functioning.
The stove must be serviced at least once a year,
programming it in advance with the technical after-sales
service.
Nota bene: In case of thermo product or boiler, the
product or system venting is not covered by the
warranty.
For safety reasons, remember that:
The stove must not be used by children or unassisted
disabled persons.
Do not touch the stove when you are barefoot or when
parts of the body are wet or humid.
The safety and adjustment devices must not be
modi ed without the authorisation or indications of the
manufacturer.
Do not pull, disconnect, twist electric cables leaving the
stove, even if disconnected from the electric power supply
mains.
Do not close or reduce the dimensions of
the airing vents in the place of installation.
The airing vents are indispensable for correct combustion.
Do not leave the packaging elements within reach of
children or unassisted disabled persons.
The hearth door must always be closed during normal
functioning of the product.
Avoid direct contact with parts of the appliance that
tend to heat up during functioning.
Check for the presence of any obstructions before
switching the appliance on following a prolonged standstill
period.
The stove has been designed to function in
any climatic condition (also critical). In particularly
adverse conditions (strong wind, freezing) safety
systems may intervene that switch the stove o .
If this occurs, contact the technical after-sales service and
always disable the safety system.
If the ue should catch re, be equipped with suitable
systems for su ocating the ames or request help from the
re service.
MAJOLICAS
The company have chosen majolica tiles, which are the
result of high-quality artisan work and therefore the
majolica may present crackles, speckles, and shadings.
These characteristics certify their precious origin.
Enamel and majolica, due to their di erent coe cient
of dilatation, produce microcrackles, which show their
authentic feature.
For the cleaning of the majolica we suggest you use a soft
and dry cloth; if you use a detergent or liquid, the latter
might soak in and make the crackles more visible.
WARNINGS AND SAFETY DEVICES