This appliance complies with European Safety Standard EN 60335-2-30, and European Standards EN 55014, EN 60555-2 and EN60555-3 for Electromagnetic
Compatibility. These standards cover the requirements of the EEC Directives 73/23 and 89/336.
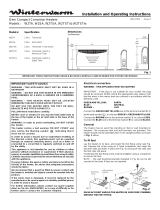
Symbol Function Description
Frost Protection
Heater will switch on to provide frost
protection if the room drops below
5ºC
Economy (set back)
Heater will maintain a lower
temperature level for background
heating (comfort less 3.5ºC)
Comfort
Heater will maintain the temperature
set on the thermostat dial
Off Heater will not function
Programme
Heater will be controlled by a
programming device
Operation
Off
Note: If the programme function is selected but no programming device is being
used, the heater will function in comfort mode
The following Dimplex programmers are available:
Pilot Wire Wall Mounted Controller (2 Zone) – Part no. RX010006
MBS Wall Mounted Programmer (2 Zone) – Part no. RX010007
MBS Slot in Receiving Cassette – Part No. RX9913
MBS Slot in Programming Cassette (Single Zone) – Part no. RX9912
Pilot Wire Programming Cassette (Single Zone) – Part no. RX9911
Function Display (B)
Neon indicators adjacent to the function selector will light to show the mode
selected
Setting the Comfort Temperature (C)
Use the thermostat dial (C) to select your desired room temperature. The
markings on the dial are in approximately 3.5ºC increments. The settings are
numbered 1-10 (MAX). The quickest way to find your comfort setting is to turn the
thermostat dial to the maximum setting. When your ideal comfort level is
achieved, turn the thermostat dial down until the thermostat switches off (the neon
light will go out) Leave at this setting and the heater will automatically maintain the
desired temperature.
Thermostat Light (D)
The neon indicator below the thermostat will light when the heater is operating.
Background (set back)
The economy setting is preset at – 3.5ºC this is the amount the room temperature
will be allowed to drop when you switch the function selector from comfort to
economy.
Reverting to comfort mode will automatically cause the temperature to rise to the
setting on the main thermostat.
Advice on Using your Heater
• For greatest economy switch the heater to economy (setback) if
you leave the room for long periods of time or before going to bed.
• Do not set the comfort level too high. Even small reductions on the
thermostat setting can save a lot of energy.
• If you go away for a long period of time select the frost protection
setting on the function dial or reduce the thermostat setting to a
lower level.
Locking the Thermostat Setting (C)
If necessary you can lock the thermostat dial to a single setting or
range.
To lock the settings, use a small pair of narrow nosed pliers to pull out
the locking pins at the rear of the thermostat dial.
The following settings can be obtained: (see Fig.4)
• Single setting – Set thermostat dial to desired setting (eg no.6).
Locate one pin directly opposite the setting required
• Minimum setting – Set thermostat dial to desired setting (e.g.
no.6). Locate one pin opposite the setting required and one hole to
the left. (The thermostat will now be adjustable from 6-9 only)
• Maximum setting – Set thermostat dial to desired setting (eg
no.6).Locate one pin opposite the setting required and one hole to
the right. (The thermostat dial will now be adjustable from 1-6 only)
• Minimum - maximum setting – (e.g. no.2-4) Locate both pins and
space apart until desired range is found
To Lock the Control Cover (F)
A screw is provided to permanently lock the cover in position. It is
located on the back of the control box, under the thermostat dial.
Remove this and screw through the notch below the lifting tab into the
plastic housing. (see also Fig.4 above)
Safety
A thermal cut-out will switch off the heater if, for any reason, it
overheats. Should the cut-out operate, switch off the mains supply and
allow the heater to cool. Once the heater has cooled sufficiently remove
the obstruction and switch on the mains supply.
Cleaning
Before cleaning your heater, switch off the heater and allow it to cool.
Disconnect the electricity supply to the appliance. The outside can be
cleaned by wiping it over with a soft damp cloth and then dried. Do not
use abrasive cleaning powders or furniture polish, as this can damage
the surface finish. To release the heater from the wall bracket for
cleaning or redecoration, depress latch on both brackets and hinge
forward.
After Sales Service
Your product is guaranteed for one year from the date of purchase.
Within this period, we undertake to repair or exchange this product free
of charge (subject to availability) provided it has been installed and
operated in accordance with these instructions.
Your rights under this guarantee are additional to your statutory rights,
which in turn are not affected by this guarantee.
Should you require after sales service you should contact our customer
services help desk on 0870 727 0101. It would assist us if you can
quote the model number, series, date of purchase, and nature of the
fault at the time of your call. The customer services help desk will also
be able to advise you should you need to purchase any spares.
Please do not return a faulty product to us in the first instance as this
may result in loss or damage and delay in providing you with a
satisfactory service.
Please retain your receipt as proof of purchase.
Glen Dimplex UK Ltd
Millbrook House
Grange Drive
Hedge End
Southampton
SO30 2DF
UK Customer Help Line (8am-6pm Mon-Fri; 8:30am-1pm Sat.)
Customer Services: Tel: (0870) 727 0101
Fax: (0870) 727 0102
E-mail:customer.services@glendimplex.com
Web-site: www.dimplex.co.uk
Republic of Ireland Tel: 01 842 4833
Mode Selection Dial (A)
Use this rotary dial to select the function you require
Fig.4