Mazda Tribute 2010 Owner's manual

Category
Navigators
Type
Owner's manual

This manual is also suitable for

JOBNAME: No Job Name PAGE: 1 SESS: 6 OUTPUT: Thu May 13 11:58:31 2010 SUM: 35D3E355
/ford_pdm/ford/supplement/ng2/navi
Introduction
4
System introduction 4
Driving restrictions 4
Safety information 5
How to get going 5
System overview
10
Map display options 13
Display voice commands 13
Status bars 14
Home screen 14
Loading pictures 15
Reverse camera 17
Quick reference chart 18
Setting the clock 19
Voice recognition system overview
23
How to use voice commands 24
Adjusting the voice prompt volume 26
Voice recognition tutorial 28
Tutorial voice commands 28
Voice name tags 29
User profiles 29
User profile voice commands 31
Audio features
33
AM/FM 33
HD Radio™ 36
Radio voice commands 36
SIRIUSt satellite radio voice commands 42
Satellite radio 43
CD 46
CD voice commands 49
Playing a DVD in the system 49
DVD voice commands 51
Video CD voice commands 51
Disc voice commands 52
Table of Contents
1
REVIEW COPY ——
2011 Nav in a Box (ng2), Supplement (supplement), 2nd Printing, Market:
USA (fus)
PAGE: 1 OP: root EDIT SESSION: 6 DATE: MAY 13 2010 at 11:58
JOB: @ibm2/ford_pdm/CLS_ford/GRP_supplement/JOB_ng2/DIV_navi
JOBNAME: No Job Name PAGE: 2 SESS: 8 OUTPUT: Thu May 13 11:58:31 2010 SUM: 2A757FFF
/ford_pdm/ford/supplement/ng2/navi
Jukebox features 52
Recording (saving) music to your jukebox 53
Accessing the music in your jukebox 53
Creating a playlist 55
Jukebox voice commands 57
Information menu
60
Where am I? 60
Hybrid information 60
SIRIUSt Travel Link™ 67
SIRIUSt Travel Link™ voice commands 72
Accessing your calendar 73
Accessing the help screen 73
Sound menu features
75
Setting a destination
77
Setting a destination by voice 78
Quick destination options 78
Standard destination options 80
POI categories 85
Route selection 91
Destination voice commands 92
Quick touch buttons 95
Map icons 97
Navigation route preferences
99
Map preferences 101
Route preferences 102
Navigation voice commands 105
General Information
107
Map updates 107
Navigation end user license agreement 107
Glossary 113
Table of Contents
2
REVIEW COPY ——
2011 Nav in a Box (ng2), Supplement (supplement), 2nd Printing, Market:
USA (fus)
PAGE: 2 OP: root EDIT SESSION: 8 DATE: MAY 13 2010 at 11:58
JOB: @ibm2/ford_pdm/CLS_ford/GRP_supplement/JOB_ng2/DIV_navi
JOBNAME: No Job Name PAGE: 3 SESS: 10 OUTPUT: Thu May 13 11:58:31 2010 SUM: 0D6F4482
/ford_pdm/ford/supplement/ng2/navi
Index
118
All rights reserved. Reproduction by any means, electronic or mechanical
including photocopying, recording or by any information storage and retrieval
system or translation in whole or part is not permitted without written
authorization from Mazda Motor Corporation. Mazda may change the contents
without notice and without incurring obligation.
Copyright © 2010 Mazda Motor Corporation
Table of Contents
3
REVIEW COPY ——
2011 Nav in a Box (ng2), Supplement (supplement), 2nd Printing, Market:
USA (fus)
PAGE: 3 OP: root EDIT SESSION: 10 DATE: MAY 13 2010 at 11:58
JOB: @ibm2/ford_pdm/CLS_ford/GRP_supplement/JOB_ng2/DIV_navi
JOBNAME: No Job Name PAGE: 4 SESS: 12 OUTPUT: Thu May 13 11:58:31 2010 SUM: 3D5B413C
/ford_pdm/ford/supplement/ng2/navi
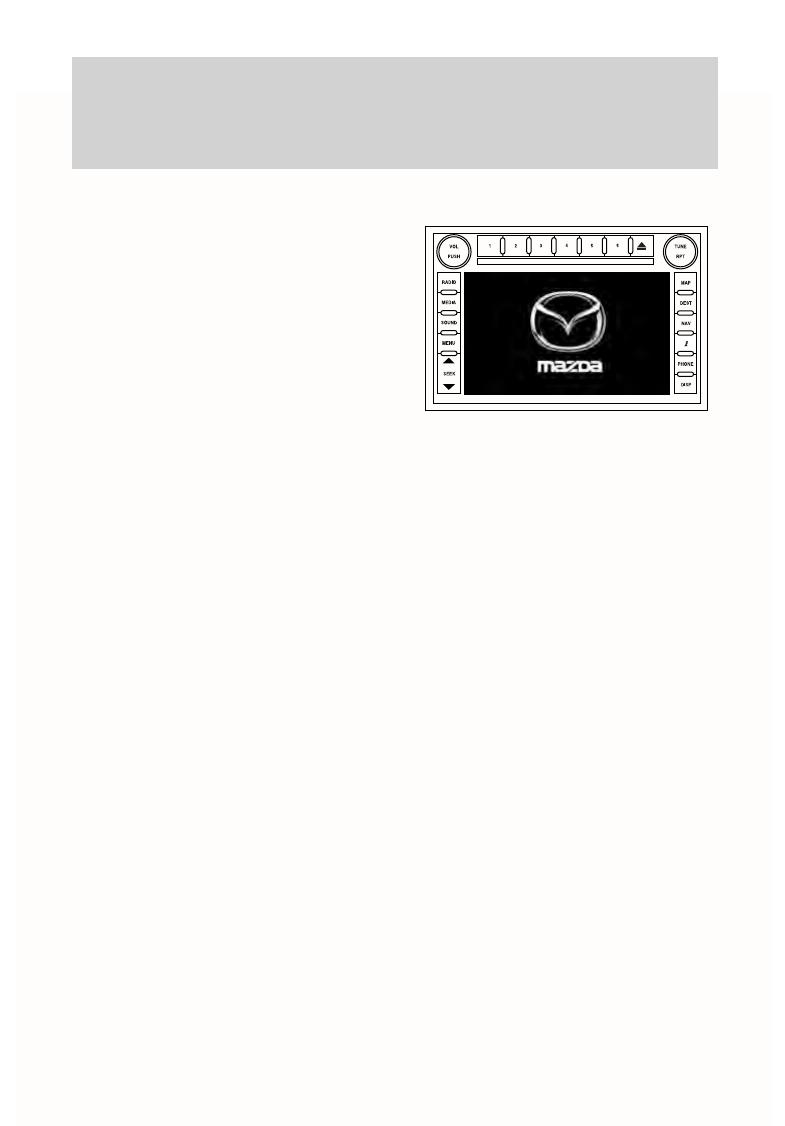
MOBILE MEDIA NAVIGATION SYSTEM
Your vehicle is equipped with a
mobile media navigation system
which allows you to listen to, record
and save music, play DVDs (audio
and video) and to navigate the
vehicle.
Your system has a large range of features, yet is easy to use. The display
screen is the primary means for operating the system through the use of
its vertically tabbed menus, text screens and menu displays. Screen
selections are made by touching the desired selection on the touch
screen. The “tabs” along the left side of the screen represent the major
components of the system. The status bars at the top and bottom of the
screen will stay present for the majority of the time once the system is
turned on and ready for operation. The top status bar will contain menu
names, icons, and a clock. The lower status bar contains icons and
advisory messages. Please refer to Status bars in the System Overview
chapter for more information. Navigation guidance is shown on the
display touch screen and is supplemented with voice prompts.
DRIVING RESTRICTIONS
In order to prevent the navigation system from distracting you while
driving, access to certain functions are restricted when the vehicle is
traveling above 5 mph (8 km/h). At this time, only the Quick Destination
menu items are available for destination entry. Restricted functions
include:
Touchscreen keyboard during destination entry (Street address, POI,
Freeway Entrance/Exit, Intersection)
Scrolling of long lists
Travel Link subscriptions (if active) such as movie times, ski
conditions, sports scores and scrolling of the weather map
Editing/Adding entries in the Address Book
Editing/Adding entries in the Avoid Areas List
Jukebox restrictions such as creating/editing playlists, sorting playlists,
editing track, artist and album names
Introduction
4
CIMS # com_sysoverngn.maz
itdseq=1
art=expec659_a
REVIEW COPY ——
2011 Nav in a Box (ng2), Supplement (supplement), 2nd Printing, Market:
USA (fus)
PAGE: 4 OP: root EDIT SESSION: 12 DATE: MAY 13 2010 at 11:58
JOB: @ibm2/ford_pdm/CLS_ford/GRP_supplement/JOB_ng2/DIV_navi
JOBNAME: No Job Name PAGE: 5 SESS: 1 OUTPUT: Thu May 13 11:58:31 2010 SUM: 5FD9ABD5
/ford_pdm/ford/supplement/ng2/navi
Uploading photographs
When the vehicle begins to move, and the Select Route Screen is shown,
the highlighted route is automatically selected and guidance begins.
When the vehicle speed is reduced to 5 mph (8 km/h) or less, system
restrictions are lifted and you have full access to the system.
SAFETY INFORMATION
WARNING: Driving while distracted can result in loss of vehicle
control, accident and injury. Mazda strongly recommends that
drivers use extreme caution when using any device or feature that may
take their focus off the road. Your primary responsibility is the safe
operation of the vehicle. We recommend against the use of any
handheld device while driving and that you comply with all applicable
laws.
Do not attempt to service or repair the system. See your authorized
dealer.
Do not operate playing devices if the power cords and/or cables are
broken, split or damaged. Carefully place cords and/or cables where
they will not be stepped on or interfere with the operation of pedals,
seats and/or compartments, or safe driving abilities.
Do not leave playing devices in the vehicle in extreme conditions as it
could cause damage to your device. Refer to your device’s user guide
for further information.
For your safety, some functions are speed dependent and cannot be
performed when the vehicle is traveling at speeds 5 mph (8 km/h) and
below.
QUICK START
WARNING: Driving while distracted can result in loss of vehicle
control, accident and injury. Mazda strongly recommends that
drivers use extreme caution when using any device that may take their
focus off the road. The drivers primary responsibility is the safe
operation of their vehicle. Only use cell phones and other devices not
essential to the driving task when it is safe to do so.
TO PLAY A RADIO STATION
1. Ensure that the navigation system is on.
2. Press the RADIO hard button.
Introduction
5
CIMS #1683381
com_safetyinfo.maz
itdseq=2
CIMS #1683158
com_ngnqkst.maz
itdseq=3
REVIEW COPY ——
2011 Nav in a Box (ng2), Supplement (supplement), 2nd Printing, Market:
USA (fus)
PAGE: 5 OP: root EDIT SESSION: 1 DATE: MAY 13 2010 at 11:58
JOB: @ibm2/ford_pdm/CLS_ford/GRP_supplement/JOB_ng2/DIV_navi
JOBNAME: No Job Name PAGE: 6 SESS: 1 OUTPUT: Thu May 13 11:58:31 2010 SUM: 1EFD0FEF
/ford_pdm/ford/supplement/ng2/navi
3. Select the ‘AM’ or ‘FM’ tab on
the touchscreen.
Turn the TUNE knob to the
right/left to go up/down the
frequency band in individual
increments.
Or, press SEEK to find the next strong station up/down the frequency
band.
Note: If RDS is ON and PTY (Program type) is selected, the station
selection will be limited to that specific genre. In satellite radio mode (if
activated), seek is limited to the selected genre.
TO PLAY SATELLITE RADIO (IF ACTIVATED)
1. Ensure that the navigation system is on.
2. Press the RADIO hard button on the navigation system.
3. Select the ‘SAT’ tab on the
touchscreen. (If your vehicle is
equipped with Satellite Radio,
the SAT tab will be present on
the radio screen).
For further information on Satellite
Radio, refer to Satellite Radio in
the Audio Features chapter.
TO LOAD A CD OR DVD:
1. Insert a CD or DVD into the slot.
2. A CD will begin to play. A DVD will play audio and video if the
vehicle is in Park (P). Otherwise, only the audio will play.
Introduction
6
art=expec226_a
art=expec212_a
art=expec272_a
REVIEW COPY ——
2011 Nav in a Box (ng2), Supplement (supplement), 2nd Printing, Market:
USA (fus)
PAGE: 6 OP: root EDIT SESSION: 1 DATE: MAY 13 2010 at 11:58
JOB: @ibm2/ford_pdm/CLS_ford/GRP_supplement/JOB_ng2/DIV_navi
JOBNAME: No Job Name PAGE: 7 SESS: 1 OUTPUT: Thu May 13 11:58:31 2010 SUM: 1F578C95
/ford_pdm/ford/supplement/ng2/navi
3. Use the touch controls on the
screen to advance tracks, scan,
pause, view the track list, etc.
TO PLAY A PREVIOUSLY LOADED CD:
1. Ensure that the navigation system is on.
2. Press the MEDIA hard button on the navigation system.
3. Select CD/DVD tab on the
touchscreen (if there is not a
disc loaded into the system, the
tab will be disabled and NO
DISC will appear in the Status
Bar when you try to select it).
4. A CD will begin to play. A DVD
will begin to play audio and
video if the vehicle is in Park
(P). Otherwise, only audio will
play.
TO SET A DESTINATION USING THE NAVIGATION SYSTEM:
1. Ensure that the navigation system is on.
2. Press the DEST hard button on the navigation system.
3. Select the ‘Standard’ tab on the
touchscreen and then press
‘Street Address’ to enter a
specific street address as your
destination. (From this screen
you can also choose POI,
Address book entry, previous
destination, Phone number,
Freeway Entrance/Exit , Map or
intersection as your
destination).
Introduction
7
art=expec302_a
art=expec302_a
art=expec306_a
REVIEW COPY ——
2011 Nav in a Box (ng2), Supplement (supplement), 2nd Printing, Market:
USA (fus)
PAGE: 7 OP: root EDIT SESSION: 1 DATE: MAY 13 2010 at 11:58
JOB: @ibm2/ford_pdm/CLS_ford/GRP_supplement/JOB_ng2/DIV_navi
JOBNAME: No Job Name PAGE: 8 SESS: 1 OUTPUT: Thu May 13 11:58:31 2010 SUM: 1E7D4805
/ford_pdm/ford/supplement/ng2/navi
4. Enter the required information.
Please note that:
The system uses a Smart Speller, which helps facilitate entering
information through the keyboard.
Accented characters in English, Spanish and French are converted
internally to non-accented characters for search purposes.
5. The screen will show the point entered on a map. If this is the
intended destination, press ‘Set As Dest’. A message will pop up
while the system is computing the route.
6. Select the desired route on the
right hand side of the screen.
There will be up to three routes
possible (fastest, shortest and
unrestricted) from which to
choose, each highlighted with a
different color. For each route,
the overall distance, route
conditions and the estimated
travel time are displayed.
7. Press ‘Start Route’ and follow the instructions.
USING THE AUXILIARY INPUT JACK:
Your vehicle is equipped with an auxiliary input jack which allows a
portable audio device to be listened to through your vehicle’s audio
system. To access the auxiliary input jack mode:
1. Press the MEDIA hard button on the navigation system.
Introduction
8
art=expec329_a
art=expec249_a
REVIEW COPY ——
2011 Nav in a Box (ng2), Supplement (supplement), 2nd Printing, Market:
USA (fus)
PAGE: 8 OP: root EDIT SESSION: 1 DATE: MAY 13 2010 at 11:58
JOB: @ibm2/ford_pdm/CLS_ford/GRP_supplement/JOB_ng2/DIV_navi
JOBNAME: No Job Name PAGE: 9 SESS: 1 OUTPUT: Thu May 13 11:58:31 2010 SUM: 1323F2CC
/ford_pdm/ford/supplement/ng2/navi
2. Select the ‘LINE IN’ tab on the
touchscreen.
Once a 3.5 mm input jack is plugged into the Line In jack, sound from
the device will be heard through the vehicle speakers.
For information on the auxiliary input jack location, please refer to
Auxiliary input jack in the Entertainment chapter in your Owner’s
Manual.
VOICE RECOGNITION
Your navigation system is equipped with a voice activated feature that
allows you to “speak” certain commands to the system. For further
information, please refer to Voice recognition system overview chapter.
Introduction
9
art=expec505_a
REVIEW COPY ——
2011 Nav in a Box (ng2), Supplement (supplement), 2nd Printing, Market:
USA (fus)
PAGE: 9 OP: root EDIT SESSION: 1 DATE: MAY 13 2010 at 11:58
JOB: @ibm2/ford_pdm/CLS_ford/GRP_supplement/JOB_ng2/DIV_navi
JOBNAME: No Job Name PAGE: 10 SESS: 1 OUTPUT: Thu May 13 11:58:31 2010 SUM: 36F83087
/ford_pdm/ford/supplement/ng2/navi
NAVIGATION SYSTEM
WARNING: Driving while distracted can result in loss of vehicle
control, accident and injury. Mazda strongly recommends that
drivers use extreme caution when using any device or feature that may
take their focus off the road. Your primary responsibility is the safe
operation of the vehicle. We recommend against the use of any
handheld device while driving and that you comply with all applicable
laws.
1. Memory presets: In radio
and satellite radio mode (if
activated): Press 1-6 to access
your previously saved preset
stations/channels. To save to a preset: Tune to the desired
station/channel. Press and hold the desired preset button in which
you would like to store the station/channel. The sound will
momentarily mute and then return when the preset is saved.
System overview
10
CIMS # com_navinabox.maz
itdseq=4
art=expec189_a
art=expec192_a
REVIEW COPY ——
2011 Nav in a Box (ng2), Supplement (supplement), 2nd Printing, Market:
USA (fus)
PAGE: 10 OP: root EDIT SESSION: 1 DATE: MAY 13 2010 at 11:58
JOB: @ibm2/ford_pdm/CLS_ford/GRP_supplement/JOB_ng2/DIV_navi
JOBNAME: No Job Name PAGE: 11 SESS: 1 OUTPUT: Thu May 13 11:58:31 2010 SUM: 2CFDF3DD
/ford_pdm/ford/supplement/ng2/navi
2. CD/DVD slot: Insert a CD or
DVD, label side up.
3.
(Eject): Press (Eject)
to eject the disc in the slot.
4. TUNE: In radio or satellite
radio mode (if activated),
turn to advance in individual
increments up/down the
frequency/channel listing.
In MP3 mode, turn to advance to the next/previous folder.
RPT: In navigation mode, press the knob in while navigation
guidance is active to repeat the last spoken navigation guidance
prompt.
5. MAP: Press MAP to access the
navigation map. Press while the
map display is active to center
the map on the current vehicle position. Press while the map display
is active and a route is active to step through the different map
guidance views.
6. DEST: Press DEST to access
the navigation destination entry
menu. Press while the
navigation destination entry
menu is active to show additional destination entry techniques.
7. NAV: Press NAV to access the
navigation menu. Press while
the navigation menu is active to
step through the navigation
menu tabs.
8. I (Information): Press I to
access the information menu.
Press while the information
menu is active to step through
the information tabs of: Where am I?, HEV (if equipped), SIRIUS
Travel Link (if activated), the Calendar, System Info., and Help.
System overview
11
art=expec207_a
art=expec193_a
art=expec194_a
art=expec195_a
art=expec196_a
art=expec197_a
art=expec198_a
REVIEW COPY ——
2011 Nav in a Box (ng2), Supplement (supplement), 2nd Printing, Market:
USA (fus)
PAGE: 11 OP: root EDIT SESSION: 1 DATE: MAY 13 2010 at 11:58
JOB: @ibm2/ford_pdm/CLS_ford/GRP_supplement/JOB_ng2/DIV_navi
JOBNAME: No Job Name PAGE: 12 SESS: 1 OUTPUT: Thu May 13 11:58:31 2010 SUM: 2923B0F6
/ford_pdm/ford/supplement/ng2/navi
9. PHONE: This control is not
operational.
10. DISP: Press the DISP button to
step through the following
display modes: On, Status Bar
Only, and Off.
11. SEEK:In radio and satellite
radio mode (if activated),
Press
/ to seek to the
previous/next available station
or channel within the currently selected Category/Genre.
In CD/DVD mode, press
/ to access the previous/next track
or chapter.
12. MENU: Press MENU to access
the system menu. Press while
the system menu is active to
step through the system menu tabs of Display, Clock, Feedback
Settings, System Settings and Valet Mode.
13. SOUND: Press SOUND to
access the sound menu. Press
while the sound menu is active
to step through the sound menu
tabs of Bass/Treble, Balance/Fade, SCV (Speed compensated
volume), DSP and the Visualizer.
14. MEDIA: Press MEDIA to access
the media menu. Press while
the media menu is active to step
through the available media
sources of CD/DVD, Jukebox, User Device, Rear DVD (if equipped)
and Rear AUX (if equipped).
15. RADIO: Press RADIO to access
the radio menu. Press while the
radio menu is active to step
through the available radio sources of AM, FM1, FM2, SAT1, SAT2,
and SAT3 (satellite radio, if activated).
System overview
12
art=expec199_a
art=expec200_a
art=expec201_a
art=expec202_a
art=expec203_a
art=expec204_a
art=expec205_a
REVIEW COPY ——
2011 Nav in a Box (ng2), Supplement (supplement), 2nd Printing, Market:
USA (fus)
PAGE: 12 OP: root EDIT SESSION: 1 DATE: MAY 13 2010 at 11:58
JOB: @ibm2/ford_pdm/CLS_ford/GRP_supplement/JOB_ng2/DIV_navi
JOBNAME: No Job Name PAGE: 13 SESS: 1 OUTPUT: Thu May 13 11:58:31 2010 SUM: 4898218F
/ford_pdm/ford/supplement/ng2/navi
16. VOL (On/off/volume): Press to
turn the audio system on/off.
Press and hold to turn the
navigation radio completely off.
Turn to adjust the volume of the audio system or the navigation
voice prompts as they are being given.
Note: If a route is active when the navigation system is turned off,
the route is resumed when the system is turned on again.
After the system initializes, the screen will be divided in two sections:
Status bars: This is the top and bottom portion of screen that
displays the clock or date and useful information, depending on the
current mode.
Display area: The interactive screen that is activated by finger touch
and changes depending on current system operation. Graphical
buttons are displayed in this area depending on the current screen for
you to make choices.
SCREEN DIFFERENCES
Depending on your vehicle line and option package, your screen may
vary in appearance from the screens shown in this supplement. These
differences could include: background color, tab options, climate controls
and other features. Your features may also be limited depending on your
market. (For example, SIRIUSt Travel Link™ is only available in the
continental United States). Please check with your authorized dealer for
availability.
Display options
You can choose to turn your screen on/off and also if you would like to
view the status bars on the top and bottom of the screen. To access:
Press DISP repeatedly to cycle through these options.
Voice commands in display mode (if equipped)
While in display mode, press
or VOICE on the steering wheel
controls. When prompted, you may say any of the following commands:
Display on Auto
Day Night
Status bar Display off
Brighter Dimmer
System overview
13
CIMS #1678491
com_differnces.ngn
itdseq=5
CIMS #1659995 com_display-
button itdseq=6
CIMS #1660455 com_display-
vx-cmds itdseq=7
art=expec206_a
REVIEW COPY ——
2011 Nav in a Box (ng2), Supplement (supplement), 2nd Printing, Market:
USA (fus)
PAGE: 13 OP: root EDIT SESSION: 1 DATE: MAY 13 2010 at 11:58
JOB: @ibm2/ford_pdm/CLS_ford/GRP_supplement/JOB_ng2/DIV_navi
JOBNAME: No Job Name PAGE: 14 SESS: 1 OUTPUT: Thu May 13 11:58:31 2010 SUM: 36F74391
/ford_pdm/ford/supplement/ng2/navi
Help
Note: If you are not in display mode, press
or VOICE on the steering
wheel controls. When prompted, say, “Display mode” and then any of the
above commands.
STATUS BARS
Your screens may have status bars on the top and bottom of each screen.
The status bar on the top of the
screen will tell your current mode,
the exterior temperature, the time
as well as display icons if you have
enabled Bluetooth, or are using headphones with your Rear overhead
mounted Family entertainment DVD system among other options.
The status bar on the bottom of the
screen may list the Home icon, the
current temperature selected for the
Driver and Passenger as well as the fan speed and air flow direction, the
current mode being used (if equipped), the Artist and Title of the
currently playing CD (if available), Artist and Title for Jukebox (if
available) and satellite radio (if activated).
Note: As climate controls are vehicle dependent, some vehicles may not
display climate readings in the status bar.
HOME SCREEN
Your navigation system has a Home Screen where you can save/view
favorite pictures, view your current audio and climate control settings as
well as display the audio visualizer or the hybrid fuel economy (if
equipped). You can split the screen in to two or three different sections,
or you can choose to have one main view.
To access your home screen, press the house icon (
) at the bottom
left hand corner of any screen.
System overview
14
CIMS #1655927
com_statusbars itdseq=8
CIMS #1693681
com_homescreen.maz
itdseq=9
art=expec250_a
art=expec251_a
REVIEW COPY ——
2011 Nav in a Box (ng2), Supplement (supplement), 2nd Printing, Market:
USA (fus)
PAGE: 14 OP: root EDIT SESSION: 1 DATE: MAY 13 2010 at 11:58
JOB: @ibm2/ford_pdm/CLS_ford/GRP_supplement/JOB_ng2/DIV_navi
JOBNAME: No Job Name PAGE: 15 SESS: 1 OUTPUT: Thu May 13 11:58:31 2010 SUM: 24076BDA
/ford_pdm/ford/supplement/ng2/navi
The left side of the screen will
display an uploaded photo or the
map screen. The right side can also
display the uploaded photo. The
upper right panel will only display
the current audio settings. The
lower right panel displays the
vehicle’s climate settings (if
equipped), the visualizer or the
hybrid fuel economy (if equipped). Press
on the bottom of the
display to access the settings screen for the left or right side.
Loading pictures
Your navigation system allows you to save and view up to 32 photos. To
access:
1. Ensure that you are on the
Home Screen. (Press
at the
bottom left of any screen to
access.)
2. Touch the left side of the home
screen to initiate the left screen
photo display and saved photos
screen.
3. Select the ‘Add’ button on the
touchscreen. The following
disclaimer will appear, “Please
confirm the supported photo
formats”.
System overview
15
CIMS #1693682 com_loading-
pics.maz itdseq=10
art=expec658_a
art=expec658_a
art=expec253_a
REVIEW COPY ——
2011 Nav in a Box (ng2), Supplement (supplement), 2nd Printing, Market:
USA (fus)
PAGE: 15 OP: root EDIT SESSION: 1 DATE: MAY 13 2010 at 11:58
JOB: @ibm2/ford_pdm/CLS_ford/GRP_supplement/JOB_ng2/DIV_navi
JOBNAME: No Job Name PAGE: 16 SESS: 1 OUTPUT: Thu May 13 11:58:31 2010 SUM: 2441EF40
/ford_pdm/ford/supplement/ng2/navi
4. When the pop-up dialog box
with the disclaimer appears,
press OK and ensure that you
are using the proper format.
5. Insert a CD-ROM which contains
your photos as jpegs.
6. Press OK. The photos will be
listed on the right half of the
screen.
7. Select either ADD or ADD ALL. The photos are now saved to the
hard drive.
Photo display limitations:
The file must be 1.5MB or less.
The extension of the file must be one of JPE/JPG/JPEG.
The CD or DVD must be ISO 9660 format, UDF format is not
supported.
The file path must be 255 characters or less.
Up to 256 files or folders can be displayed in one folder.
Not compatible with discs written in Packet Write mode.
Only the photograph(s) which meet these conditions will be displayed.
Note: When burning a CD, ensure that you ‘close’ or ‘finalize’ the disc
when the CD-burning process finishes (you should select this option
before you start burning). Consult your software manual or the program’s
help files if you’re not sure how to finalize the disc. Also, write the audio
data into the first session of a multi-session CD as audio systems won’t
be able to sort through other sessions to find more audio tracks.
Editing and deleting photos
1. Press to access the home screen.
2. Touch the current photo on the home screen.
3. To edit the photo:
Select the Edit button.
You can adjust the photo by zooming in or out, moving right, left, up
or down and also rotating left or right.
Press the Reset button to return to the original image.
4. To delete the photo, select the Delete button.
System overview
16
art=expec294_a
REVIEW COPY ——
2011 Nav in a Box (ng2), Supplement (supplement), 2nd Printing, Market:
USA (fus)
PAGE: 16 OP: root EDIT SESSION: 1 DATE: MAY 13 2010 at 11:58
JOB: @ibm2/ford_pdm/CLS_ford/GRP_supplement/JOB_ng2/DIV_navi
JOBNAME: No Job Name PAGE: 17 SESS: 1 OUTPUT: Thu May 13 11:58:31 2010 SUM: 2E04CDB9
/ford_pdm/ford/supplement/ng2/navi
5. To delete all stored photos:
Press the Menu hard button.
Select the System Settings tab on the touchscreen.
Press the View button for Delete Stored Items.
Select Saved photos.
REVERSE CAMERA (IF EQUIPPED)
Your vehicle may be equipped with a reverse camera on the tailgate
which provides a video image of the area behind the vehicle. When the
transmission is in R (Reverse), an image will automatically display on the
navigation screen. Once the vehicle is back in D (Drive), the image will
continue to display until you are driving over 5 mph (8 km/h). To remove
this image from the screen, press any hard button on the navigation
system.
When the vehicle is in P (Park),
press SETTINGS to make
adjustments to the brightness of the
display as well as the rear camera
display.
When the rear camera delay
function is ON, it extends the
display of the camera image into
Drive mode until vehicle speed is
greater than 5 mph (8 km/h). This
is useful when trying to
engage/disengage a trailer. Once you
shift out of R (Reverse), the image
will be removed from the screen.
The default for the rear camera
delay is off.
Prior to using, ensure that the camera lens is clear of any debris, mud,
etc. and that both reverse lamps are operational if using at night.
Depending on your vehicle, you may have a Zoom button (if equipped)
as well as additional selections under the Settings button.
System overview
17
CIMS #1659986 com_reverse-
camera itdseq=11
art=expec563_a
art=expec562_a
REVIEW COPY ——
2011 Nav in a Box (ng2), Supplement (supplement), 2nd Printing, Market:
USA (fus)
PAGE: 17 OP: root EDIT SESSION: 1 DATE: MAY 13 2010 at 11:58
JOB: @ibm2/ford_pdm/CLS_ford/GRP_supplement/JOB_ng2/DIV_navi
JOBNAME: No Job Name PAGE: 18 SESS: 1 OUTPUT: Thu May 13 11:58:31 2010 SUM: 3426FB2C
/ford_pdm/ford/supplement/ng2/navi
For complete information, refer to Rear-view Camera System in the
Driving chapter in your Owner’s Manual.
QUICK REFERENCE CHART
Below is a quick listing of the functions of your steering wheel controls
and navigation system controls.
Navigation
bezel control
Steering wheel
control
Function
N/A VOICE Press to activate Voice Recognition.
Press and hold to end an active
voice session.
Refer to the Voice recognition
system overview chapter for further
information.
SEEK ,
Press to access the previous/next
track.
MEDIA MEDIA Press repeatedly to access all
available media sources in your
vehicle such as: CD, DVD, Jukebox
and Line In.
SYSTEM MENU FEATURES
Your system has many menu features such as allowing you to adjust the
touchscreen brightness, adjusting the time and languages, adjusting the
feedback and system settings. To access, press the MENU hard button on
the navigation system.
System overview
18
CIMS #1683384
com_swchart.maz
itdseq=12
CIMS #1675935
com_menufts-intro
itdseq=13
REVIEW COPY ——
2011 Nav in a Box (ng2), Supplement (supplement), 2nd Printing, Market:
USA (fus)
PAGE: 18 OP: root EDIT SESSION: 1 DATE: MAY 13 2010 at 11:58
JOB: @ibm2/ford_pdm/CLS_ford/GRP_supplement/JOB_ng2/DIV_navi
JOBNAME: No Job Name PAGE: 19 SESS: 1 OUTPUT: Thu May 13 11:58:31 2010 SUM: 29560F53
/ford_pdm/ford/supplement/ng2/navi
Display options
1. Press the MENU hard button on
the navigation system.
2. Select the ‘Display’ tab on the
touchscreen. Select from the
following display options:
Brightness: Select AUTO DIM to
manually adjust the brightness by
pressing + or —.
Contrast: Press + to increase and
to decrease the level of contrast
on the screen.
Day/Night Mode: Select ‘Day’ to always display day mode or ‘Night’ to
always display night mode. Select ‘Auto’ for the screen to automatically
change between day and night mode.
Daytime color: Press to select Light color or Dark color for the screen
lighting.
Note: When the headlamps are on
under high ambient light conditions,
the system will remain in day mode,
even if night is selected.
Setting the clock
1. Press the MENU hard button.
2. Select the ‘Clock’ tab on the
touchscreen. Select from the
following display options:
Time set buttons: To set the time, press +, to increase/decrease the
time and select AM or PM.
System overview
19
CIMS #1683160
com_displayopts.maz
itdseq=14
CIMS #1658261
com_clock.ngn itdseq=15
art=expec243_b
art=expes005_a
art=expec264_b
REVIEW COPY ——
2011 Nav in a Box (ng2), Supplement (supplement), 2nd Printing, Market:
USA (fus)
PAGE: 19 OP: root EDIT SESSION: 1 DATE: MAY 13 2010 at 11:58
JOB: @ibm2/ford_pdm/CLS_ford/GRP_supplement/JOB_ng2/DIV_navi
JOBNAME: No Job Name PAGE: 20 SESS: 1 OUTPUT: Thu May 13 11:58:31 2010 SUM: 325D50C5
/ford_pdm/ford/supplement/ng2/navi
Display clock: Press to turn the clock display on/off.
Format: Press to select between 12 hour and 24 hour format.
Auto time zone: If enabled, the system will automatically adjust the
time when you enter into a new time zone. If disabled, you will have to
manually adjust the time when entering different time zones. Note: The
system does not implement daylight savings time.
Restore defaults: Select ‘Reset’ to reset to the default settings.
Note: If your vehicle is equipped with an in-dash analog clock, you can
set the time on this screen but it may not appear in status bar for
viewing purposes.
Feedback settings
1. Press the MENU hard button.
2. Select the ‘Feedback Settings’
tab on the touchscreen. Select
from the following display
options:
Voice recognition user profile: You can ‘train’ the system to better
recognize your voice. Two profiles can be created. Refer to the Voice
Recognition section for more information.
Button tone: Select to select/adjust when the system will sound a tone.
Press ‘Button tone’ to then select from:
All Buttons: Select to have the system sound a tone when any hard
or soft key is touched.
Touch Screen: Select to have the system only sound a tone when a
selection is made on the touch screen.
Off: Select to turn off all tones.
Voice volume: Press + to increase or to decrease the volume level of
the navigation voice. Voice volume adjustment also includes the volume
level of chimes.
Voice recognition interaction mode: This feature determines the level
of interaction/feedback you will receive from the system.
Standard: This is the default setting. The ‘Standard setting’ provides
you with the most interaction / feedback in the form of prompts.
System overview
20
CIMS #1658262
com_feedback.ngn
itdseq=16
art=expec265_b
REVIEW COPY ——
2011 Nav in a Box (ng2), Supplement (supplement), 2nd Printing, Market:
USA (fus)
PAGE: 20 OP: root EDIT SESSION: 1 DATE: MAY 13 2010 at 11:58
JOB: @ibm2/ford_pdm/CLS_ford/GRP_supplement/JOB_ng2/DIV_navi
  • Page 1 1
  • Page 2 2
  • Page 3 3
  • Page 4 4
  • Page 5 5
  • Page 6 6
  • Page 7 7
  • Page 8 8
  • Page 9 9
  • Page 10 10
  • Page 11 11
  • Page 12 12
  • Page 13 13
  • Page 14 14
  • Page 15 15
  • Page 16 16
  • Page 17 17
  • Page 18 18
  • Page 19 19
  • Page 20 20
  • Page 21 21
  • Page 22 22
  • Page 23 23
  • Page 24 24
  • Page 25 25
  • Page 26 26
  • Page 27 27
  • Page 28 28
  • Page 29 29
  • Page 30 30
  • Page 31 31
  • Page 32 32
  • Page 33 33
  • Page 34 34
  • Page 35 35
  • Page 36 36
  • Page 37 37
  • Page 38 38
  • Page 39 39
  • Page 40 40
  • Page 41 41
  • Page 42 42
  • Page 43 43
  • Page 44 44
  • Page 45 45
  • Page 46 46
  • Page 47 47
  • Page 48 48
  • Page 49 49
  • Page 50 50
  • Page 51 51
  • Page 52 52
  • Page 53 53
  • Page 54 54
  • Page 55 55
  • Page 56 56
  • Page 57 57
  • Page 58 58
  • Page 59 59
  • Page 60 60
  • Page 61 61
  • Page 62 62
  • Page 63 63
  • Page 64 64
  • Page 65 65
  • Page 66 66
  • Page 67 67
  • Page 68 68
  • Page 69 69
  • Page 70 70
  • Page 71 71
  • Page 72 72
  • Page 73 73
  • Page 74 74
  • Page 75 75
  • Page 76 76
  • Page 77 77
  • Page 78 78
  • Page 79 79
  • Page 80 80
  • Page 81 81
  • Page 82 82
  • Page 83 83
  • Page 84 84
  • Page 85 85
  • Page 86 86
  • Page 87 87
  • Page 88 88
  • Page 89 89
  • Page 90 90
  • Page 91 91
  • Page 92 92
  • Page 93 93
  • Page 94 94
  • Page 95 95
  • Page 96 96
  • Page 97 97
  • Page 98 98
  • Page 99 99
  • Page 100 100
  • Page 101 101
  • Page 102 102
  • Page 103 103
  • Page 104 104
  • Page 105 105
  • Page 106 106
  • Page 107 107
  • Page 108 108
  • Page 109 109
  • Page 110 110
  • Page 111 111
  • Page 112 112
  • Page 113 113
  • Page 114 114
  • Page 115 115
  • Page 116 116
  • Page 117 117
  • Page 118 118
  • Page 119 119

Mazda Tribute 2010 Owner's manual

Category
Navigators
Type
Owner's manual
This manual is also suitable for

Ask a question and I''ll find the answer in the document

Finding information in a document is now easier with AI