Page is loading ...

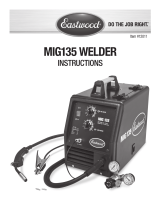
MIG WELDER
120 Amp
Gas/Gasless
Instruction Manual
3 Year Replacement Warranty
MWR-135
WARNING! Read all safety warnings and all instructions. Failure to follow the
warnings and instructions may result in electric shock, fire and/or serious injury.
Save all warnings and instructions for future reference.
To view the full range visit: www.ozito.com.au
0312
!!

SPECIFICATIONS - MODEL NO. MWR-135
1
6
7
13
3
15
10
12
1
16
14
2
4
5
8
9
11
Input: 230-240V ~ 50Hz
Current Range: 40 - 120 Amp
Duty Cycle: 60% @ 40 Amp, 8% @ 120 Amp
Welding Wire Size:
(0.6-0.8mm General Wire) (0.8-0.9mm Flux-Cored Wire)
Insulation Type: Earthed Appliance (Class I)
Welding wire spool weight: 0.2kg to 5kg
Weight (tool only): 22.2kg
Front Back
1. On/off switch
2. Overload protection LED
3. Wire feed speed control
4. Carry handle
5. Mains cable and plug
6. Side cover
7. Output voltage contr
ol switch
8. Side cover release lever
9. Earth clamp
10. MIG torch
11. Shroud
12. Torch tip
13. Welder gas intake barb
14. Internal cooling fan
15. Welding mask
16. Combination chipping hammer
and wire brush
17. Terminal spanner
KNOW YOUR PRODUCT
17

TABLE OF CONTENTS
2
SPECIFICATIONS……………………………………………
KNOW YOUR PRODUCT…………………………………..
INTRODUCTION……………………………………………
ELECTRICAL SAFETY……………………………………….
GENERAL SAFETY INSTRUCTIONS………………………
ADDITIONAL SAFETY INSTRUCTIONS FOR WELDERS ……
ADDITIONAL SAFETY INSTRUCTIONS FOR MIG
WELDERS……………………………………………………
ASSEMBLY……………………………………………………
OPERATION…………………………………………………
MAINTENANCE……………………………………………..
SPARE PARTS………………………………………………..
DESCRIPTION OF SYMBOLS………………………………
PACK CONTENTS…………………………………………..
WARRANTY…………………………………………………..
Page 1
Page 1
Page 3
Page 3
Page 4
Page 5
Page 6
Page 7
Page 14
Page 16
Page 17
Page 17
Page 18
Page 19

INTRODUCTION
3
ELECTRICAL SAFETY
WARNING! When using mains-powered equipment, basic safety
precautions, including the following, should always be followed to reduce
the risk of fire, electric shock, personal injury and material damage.
Please read and understand the manual prior to operating this tool.
Save these instructions and other documents supplied with this tool for future reference.
The electric motor has been designed for 230V and 240V only. Always check that
the power supply corresponds to the voltage on the rating plate.
Note: The supply of 230V and 240V on Ozito tools are interchangeable for
Australia and New Zealand.
If the supply cord is damaged, it must be replaced by a qualified electrician or a
power tool repairer in order to avoid a hazard.
Note: Double insulation does not take the place of normal safety precautions when
operating this tool. The insulation system is for added protection against injury
resulting from a possible electrical insulation failure within the tool.
Using an Extension Lead
Always use an approved extension lead suitable for the power input of this
electrical equipment. Before use, inspect the extension lead for signs of damage,
wear and ageing. Replace the extension lead if damaged or defective. When using
an extension lead on a reel, always unwind the lead completely. Use of an
extension lead not suitable for the power input of the equipment or which is
damaged or defective may result in a risk of fire and electric shock.
It is recommended that the extension lead is a maximum of 25m in length. Do Not
use multiple extension leads.
Congratulations on purchasing an Ozito Gas/Gasless
MIG Welder. We aim to provide quality tools at an
affordable price.
We hope you will enjoy using this tool for many years.
Your Gas/Gasless MIG Welder MWR-135 has been
designed for home projects and is ideal for use on
trailers, gates, all steel sections, car panels, thin
materials and general fabrication.
This product is intended for DIY use only.
!!
!
!

4
GENERAL POWER TOOL SAFETY WARNINGS
WARNING! Read all instructions. Failure to follow all instructions listed
below may result in electric shock, fire and/or serious injury. The term
"power tool" in all of the warnings listed below refers to your mains-
operated (corded) power tool or battery-operated (cordless) power tool.
Save these instructions
1. Keep work areas clean.
Cluttered work areas and benches can cause accidents.
2. Consider work area environment. Do not expose your equipment to high
humidity or rain. Do not use your equipment in damp or wet conditions. Keep
the work area well lit. Do not use your tool where there is a risk of causing fire
or explosion, e.g. in the presence of flammable liquids and gases.
3. Keep children away. Do not allow children, visitors or animals to come near
the work area or to touch the equipment or accessories.
4. Dress appropriately. Wear the appropriate protective clothing. Wear a protective
hair covering to keep long hair out of the way.
5. Guard against electric shock. Prevent body contact with earthed or grounded
surfaces. Electrical safety can be further improved by using a high sensitivity (30
mA / 30 mS) residual current device (RCD).
6. Do not overreach. Keep proper footing and balance at all times.
7. Stay alert. Watch what you are doing. Use common sense. Do not operate the
equipment when tired.
8. Secure work piece. If required, use clamps or a vice to hold the work piece.
9. Extension leads. Before use inspect the extension leads and replace if
damaged. When using the equipment outdoors, only use extension leads
intended for outdoor use and marked accordingly.
10. Use appropriate equipment. Only use the equipment as outlined within this
instruction manual. Do not force the equipment to the job of heavier duty
equipment. The equipment will do the job better and safer at the rate for
which it was intended. Do not force the equipment.
WARNING!The use of any accessory or attachment, or performance of
any operation with this equipment other than those recommended in this
instruction manual may present a risk of personal injury.
11. Check for damaged parts. Before use carefully check the equipment and
power lead for damage. Check for misalignment and seizure of moving parts,
breakage of parts, damage to guards and switches and any other conditions
that may affect its operation. Ensure the equipment will operate properly and
perform its intended function. Do not use the equipment if any parts are
damaged or defective. Do not use the equipment if the switch does not turn it
on and off. Have any damaged or defective parts repaired or replaced by an
electrician or a power tool repairer. Never attempt any repairs yourself.
12. Unplug the equipment. Unplug the equipment when it is not in use, before
changing any parts, accessories or attachments and before servicing.
!!
!
!
!
!

5
ADDITIONAL SAFETY INSTRUCTIONS FOR WELDERS
GENERAL POWER TOOL SAFETY WARNINGS
13. Do not abuse the cord. Never carry the equipment by its cord or pull it to
disconnect from the socket. Keep the cord away from heat, oil and sharp
edges.
14. Store equipment. When not in use, equipment should be stored in a dry,
locked up or high place, out of reach of children.
15. Maintain mains equipment with care. Keep the equipment clean and in
good condition for better and safer performance. Follow the instructions for
maintenance and changing accessories. Keep handles and switches dry, clean
and free from oil and grease.
16. Have your tool repaired by an electrician or a power tool repairer. This
power tool complies with relevant safety requirements. To avoid danger,
electrical equipment must only be repaired by qualified technicians using
original spare parts; otherwise this may result in considerable danger to the user.
17. Users. This equipment is not intended for use by young children or infirmed
persons without supervision. Young children should be supervised to ensure
that they do not play with this equipment.
18. Replacement of the supply cord. If the supply cord is damaged, it must be
replaced by an electrician or a power tool repairer in order to avoid a hazard.
Under no circumstances should the housing of the welder be opened.
Always protect your eyes and face with a welding mask.
Wear appropriate protective clothing such as a welding apron and sleeved gloves etc.
Avoid exposing skin as UV rays are produced by the arc.
Screen off the work place to protect others working nearby from UV rays.
Welding materials with contaminated surfaces may generate toxic fumes. Ensure
the surface is clean before welding. Avoid operating on materials cleaned with
chlorinated solvents or near such solvents.
Do not weld metal equipment that holds/contains flammable materials, gases or
liquid combustibles.
Zinc-plated or galvanized material should not be welded as the fumes created are
highly toxic.
Do not use the welder in damp or wet conditions.
Do not use cables with worn insulation or loose connections.
Disconnect from the power supply before replacing electrodes or welding wire.
Avoid direct contact with the welding circuit.
Do not use the welder to defrost piping.
Ensur
e the welder is placed on a level sur
face to prevent overturning.
Pr
ovide adequate ventilation or a means for removal of the welding fumes produced
(forced circulation using a blower or fan).
!!
!!

ADDITIONAL SAFETY INSTRUCTIONS FOR MIG WELDERS
6
This appliance is not intended for use by persons (including children) with reduced
physical, sensory or mental capabilities, or lack of experience and knowledge,
unless they have been given supervision or instruction concerning use of the appliance
by a person responsible for their safety.
Recommendations for the use of a residual current device with a rated residual
current of 30mA or less.
Fumes
Toxic gases are given off during the INVENT MIG welding process, which may collect
in the welding area if the ventilation is poor. Be alert at all times to the possibility of
fume build-up. In small or confined areas use a fume extractor.
Glare
The electric arc generated by the INVENT MIG process gives direct heat and
ultraviolet radiation. It is essential that the eyes of the operator and bystanders are
protected from the glare during welding.
ALWAYS USE A FACESHIELD OR WELDING HELMET FITTED WITH THE CORRECT
GLASS FILTER.
Heat
It is desirable that welding gloves are worn whilst welding. They will protect the hands
from ultra-violet radiation and direct heat from the arc.
OVERALLS should also be worn. They should be of type designed to be buttoned at
the wrists and the neck.
Dress
In addition to a face shield, welding gloves and overalls, other types of protective
clothing should be worn when welding. Additional protective clothing such as a leather
apron, sock protectors and a hat will all assist in reducing any injuries due to heat,
sparks and slag produced during welding.
If the supply cord is damaged, it must be replaced by an electrician or qualified
power tool repairer.
!!

7
ASSEMBLY
Setting the Welding Current in Gasless Welding Wire Mode
When welding in the gasless mode, the welding
current must be set as follows:
To view the polarity terminal knobs, open the side
cover (6) of the welder by raising the side cover
release lever (8), lift the side cover (6) to view the
polarity terminal knobs (Fig. 1).
Ensure that the polarity terminal knobs are
connected correctly. The positive (red coloured)
welding cable of the MIG torch must be connected
to the negative black (-) terminal knob and the
negative (black coloured) welding cable of the earth
clamp must be connected to the positive red (+)
terminal knob (Fig. 2).
To ensure a secure connection between the welding
cable and the polarity terminals, fully tighten the
terminal knobs in a clockwise direction using the
spanner (17) provided (Fig. 3).
WARNING! Terminal knobs must be securely
tightened prior to operation. Loose or
incorrect fastening may cause the connection
to overheat or burn.
Setting the Welding Current when using a Shielding Gas
When welding using a shielding gas ,the welding current must be set as follows:
Ensure that the polarity terminal knobs are connected
correctly. The positive (red coloured) welding cable of
the MIG torch must be connected to the positive red
(+) terminal knob and the negative (black coloured)
welding cable of the earth clamp must be connected
to the negative black (-) terminal knob (Fig. 4).
To ensure a secure connection between the welding
cable and the polarity terminals, fully tighten the
terminal knobs in a clockwise dir
ection using the spanner (17) provided (Fig. 3).
WARNING! Terminal knobs must be securely tightened prior to
operation. Loose or incorrect fastening may cause the connection to
overheat or burn.
Fig. 1
Fig. 2
Fig. 4
Fig. 3
!
!
!
!

8
ASSEMBLY (cont.)
Attaching the Shielding Gas Hose and Regulator to the MWR-135
When using a shielding gas with the MIG welder, you will
require additional hoses and gauges.
These additional accessories are available at your
local gas supplier (these additional hoses and gauges are
not included with your MIG welder) (Fig. 5).
Ensure that when you are using a shielding gas, you
connect the hose to the welder gas intake barb (13) with
the appropriate hose clamps (Fig. 6).
Check all of the connections to the gauges and the
shielding gas bottle for leaks prior to commencing
to weld.
Check with your local gas supplier for their
recommendations of the required gas mixture and
flow rate for your MIG welder.
When using a shielding gas with a standard size argon
gas bottle, you should be able to connect the hose
directly to the welder gas intake barb (13). If you are
using a disposable argon gas bottle, you may need to
purchase a hose reducing adaptor from your gas supplier.
A gas hose adaptor will reduce the larger flexible rubber
hose (used with standard regulators) to the smaller 4mm
hard poly tube supplied when you purchase the disposable argon gas bottle set up
(Fig. 7).
Note: The adaptor, disposable argon cylinder, regulator and hose are available
form your local gas supplier.
The MWR-135 MIG welder is supplied with a 0.2kg coil of 0.8mm gasless welding wire
(b) (Fig. 7). Welding wire up to 5.0kg can be fitted to this MIG welder using the 5.5kg
coil adaptor (e) as described below.
Fig. 5
Fig. 6
Fig. 7

9
ASSEMBLY (cont.)
Fitting the Welding Wire 0.2kg coil (Fig. 8)
Remove the wing nut (d) by
rotating anti-clockwise and
remove the drive washer (c)
from the welding wire drive
shaft (a).
Slide the 0.2kg coil onto the
wire drive shaft (a). Align the
drive washer (c) lug with the
slot in the drive shaft (a) and
slide the drive washer (c)
onto the wire drive shaft (a).
Re-fit the wing nut (d) by
rotating clockwise onto the wire drive roller (a), do not over tighten.
Note: Over tightening of the wing nut will restrict the wire feed rate and can cause
damage to the wire feed motor or irregular welding.
Fitting the Welding Wire 5.0kg coil (Fig. 8)
Remove the wing nut (d) by rotating anti-clockwise and remove the drive washer (c)
from the welding wire drive shaft (a).
Slide the 5.0kg coil adaptor (e) onto the wire drive shaft (a) and then the 5.0kg coil
of wire onto the coil adaptor (e).
Align the drive washer (c) lug with the slot in the drive shaft (a) and slide the drive
washer onto the wire drive shaft (a).
Re-fit the wing nut (d) by rotating clockwise onto the wire drive roller (a) but do not
over tighten.
Note: Over tightening of the wing nut will restrict the wire feed rate and can cause
damage to the wire feed motor or irregular welding.
Fig. 8
a
b
c
d
Drive
washer (c)
Drive
shaft (a)
5.0kg Coil
adaptor (e)

10
ASSEMBLY (cont.)
Wire Drive Roller Size
Caution: It is critical that you choose the right wire drive roller (I) size (Fig. 9).
There are two different size rollers included with the Gas/Gasless MIG welder, a roller
to suit gasless flux-cored welding wire (0.8mm and 0.9mm) and general purpose wire
(0.6mm and 0.8mm).
Open the side cover (6) of the welder by raising the side cover release lever (8), lift
and open the side cover (6) to reveal the drive roller assembly.
Drive Roller Assembly Descriptions (Fig. 9)
Fig. 9
B
Pressure
Roller
A
Conduit
Liner
I
Wire Drive
Roller
H
Wire Drive
Roller Bracket
F & G
Guide Roller
Bracket Screws
C
Adjustable
Pressure Screw
D
Pressure Arm
E
Inlet Guide

Setting the Wire Drive Roller Size
Release the pressure of the pressure roller (B) by loosening the adjustable pressure
screw (C) anti-clockwise (Fig. 10).
Push the pressure arm (D) down towards the base of the welder and swing the arm
away form the welder (Fig. 11). This will release the pressure of the pressure roller
(B) and allow access when changing the wire drive roller bracket (H) or feeding the
welding wire to the MIG torch (10) (Fig. 12).
Remove the two screws (F & G) from the wire drive roller
bracket (H) (Fig. 13) and then remove the wire drive
roller bracket (H) (Fig. 14 & 15).
Lift the wire drive roller (I) off the drive shaft (a) and
inspect it to confirm the wire groove size is stamped on
either face of the roller (Fig. 16). Always ensure the
wire drive roller size you require is facing outward when
assembled on the MIG welder.
Note: Always ensure that the welding wire size you are
using matches the wire drive roller (I) size. If you use the
incorrect drive roller size then you will experience issues
such as the wire not feeding correctly or irregular welding.
Re-fit the welding wire drive roller (I) and wire feed
bracket (H), then tighten the screws (F & G).
Caution: Do not over tighten screws (F & G) as this could
result In damage to the MIG welder.
ASSEMBLY (cont.)
11
Fig. 13
Fig. 14
Fig. 15
Fig. 16
Fig. 10
Fig. 12
Fig. 11

ASSEMBLY (cont.)
Adjusting the Drive Roller Pressure
The pressure roller (B) applies pressure to the drive roller (I) through an adjustable
pressure screw (C) and pressure arm (D). It is recommended that you adjust the
adjustable pressure screw (C) in order to apply sufficient pressure to the wire drive
roller (I), this will provide satisfactory wire feed and prevent the wire from slipping in
the wire groove of the wire drive roller (I). If the welding wire appears to be slipping
and not feeding correctly do as follows:
• Inspect the wire torch tip (12) to ensure that there is no wear, distortion or welding
slag stopping the welding wire from feeding through the tip.
• Inspect the drive shaft (a) (this is the flexible inner tube
that carries the welding wire between the welder and the
welding torch) for bends, kinks and clogging by metal
filings or welding wire left in the drive shaft (a). If this is
not the cause of the slipping, the pressure of the pressure
roller (B) should be increased by rotating the adjustable
pressure screw (C) clockwise (Fig. 17).
Caution: Over tightening the adjustable pressure screw (C)
can apply excessive pressure to the wire drive roller (I), this can cause excessive wear
to the wire drive roller (I), pressure rollers (B), shafts and bearing.
Welding Wire Maintenance
Caution:
It is critical to make sure that your welding wire is free from kinks, bends and
sharp points at the end of the wire. Kinks and bends in the welding wire will cause the
wire to jam or drag in the welding torch lead inner tube (A). The flexible inner tube (A)
allows the MIG wire to pass between the MIG welder and the MIG torch (10) without
creating drag. Kinks and bends can also cause the welding wire to become jammed in
the torch tip (12).
Cutting Welding Wire (Fig.18)
When cutting the welding
wire, avoid cutting the
welding wire on an angle
(e.g. leaving a sharp point on
the end), it is recommended
you lightly file a flat end of
the welding wire prior to
feeding the wire into the
flexible inner tube (A).
WARNING! Ensure that
you do not make contact
with the earth clamp at
any stage when feeding the welding wire through to the MIG torch (10).
The electrode wire will be at welding voltage whilst it is being fed through to the
MIG tor
ch (10).
Keep the MIG T
or
ch (10) away fr
om your eyes and face.
12
ALWAYS DISCARD ANY
KINKED OR DAMAGED
WELDING WIRE
NEVER LEAVE A SHARP
POINT ON THE END OF THE
WELDING WIRE
Welding
wire with a
sharp point
Welding wire
with a flat or
round end
Fig. 18
Fig. 17

ASSEMBLY (cont.)
13
Feeding the Welding Wire (Fig. 19)
1. Remove the shroud (11) and then unscrew the
torch tip (12) from the MIG torch (10) by turning
the torch tip (12) anti-clockwise. This will allow
the welding wire to pass through the MIG torch
(10) without catching on the back of the torch
tip (12) (Fig. 20).
2. Release the tension of the pressure arm (D) by
turning the adjustable pressure screw (C) anti-clockwise, this will reduce the
tension of the pressure arm (D).
3. Push the pressure arm (D) downward and then swing the pressure arm (D) away
from the MIG welder. This will allow the pressure roller (B) to swing away from
the drive roller, allowing access to feed your welding wire into the flexible inner
tube (A).
4. Lift up the pressure arm (D) and pass the electrode wire through the inlet guide
(E), between the feed rollers and into the flexible inner tube (A).
5. Lower the pressure arm (D) and adjust the pressure accordingly ,using the
adjustable pressure screw (C).
Fig. 19
B
Pressure
Roller
A
Flexible
inner tube
H
Wire drive
roller
bracket
I
Wire drive roller
Fig. 20
C
Adjustable
pressure
screw
D
Pressure
arm
E
Inlet guide

14
Feeding the Welding Wire through to the MIG Torch (Fig. 21)
Ensure the MIG torch (10) lead is straight, and
the welder On/off switch (1) is turned on
(Fig. 19).
Feed the welding wire through to the MIG
torch (10) by depressing the MIG torch (10)
trigger switch.
Continue depressing the trigger switch on the
MIG torch (10) until the welding wire protrudes
out of the end of the MIG torch (10) where the
torch tip (12) has been removed.
Fit the appropriate welding wire torch tip (12).
Once you have re-fitted the correct welding
wire torch tip (12) size cut off any excess
welding wire by leaving approximately 10mm protruding from the end of the torch tip
(12). Replace the MIG torch shroud (11).
Adjusting the Wire Speed (Fig. 22)
The wire speed can be controlled using the wire feed speed
control (3). The wire feed speed control (3) controls the
welding current via the welding wire, this adjusts the speed of
the wire feed motor and the rate at which the welding wire
feeds to your welding job.
Output Voltage Control Switch (Fig. 23)
The Output Voltage Control Switch (7) sets the voltage level
of the welding terminals.
Adjust to one of the five positions available.
OFF –disconnects the power from the controls.
A –16V C –18.2V
B –17.3V D –19.75V
Caution: The output voltage control switch (7) MUST NOT BE CHANGED during the
welding operation. Some internal electrical components are at mains voltage potential
when the switch is adjusted to the OFF position. Switching the output voltage control
switch (7) during the welding process can damage internal components of the MIG welder.
Fig. 23
ASSEMBLY (cont.)
Fig. 22
OPERATION
ALW
AYS EXTEND THE WELDING TORCH
FULLY AND REMOVE THE TORCH TIP
WHEN FEEDING THE WELDING WIRE
Fig. 21

OERATION (cont.)
15
Switching the Welder On and Off (Fig. 24)
The On/Off Switch (1) will illuminate when the ON/OFF
switch (1) is in the ON position.
To turn the welder on, select the ON position.
To turn the welder off, select the OFF position.
Overload Protection LED Light (Fig. 25)
The MIG welder features a self re-setting thermostat that
helps protect the internal components of the MIG welder.
The overload protection LED (2) will illuminate and welding
current will stop once the duty cycle of the power source
has been exceeded. If the overload protection LED (2)
illuminates, wait for it to turn off before returning to
welding operation.
Choosing the Correct Size and Type of Welding Wire
There are many variables that you will need to take into account when choosing
your welding wire size and type. Below are some of the things you need to take
into account when choosing the welding wire:
Thickness of the material to be welded.
Position and type of welding joint.
Maximum welding capacity of your welder.
How much penetration will be required for strength.
Type of bead desired for the weld.
Whether you are using a shielding gas or not.
Type of material to be welded.
Fig. 25
Fig. 24

16
MAINTENANCE
WARNING! There are extremely dangerous voltage and power levels present
inside this product. Do not attempt to open or repair unless you are a
qualified electrical tradesperson.
Disconnect the welding power source from the mains supply voltage before
disassembling. Welding equipment should be regularly checked by a qualified
electrical tradesperson to ensure that:
The main earth wire of the electrical installation is intact.
The power point for the welding power source is effectively earthed and of adequate
current rating.
Plugs and cord extension sockets are correctly wired.
Flexible cord is of the 3-core tough rubber or plastic sheathed type of adequate rating,
correctly connected and in good condition.
Welding terminals are shrouded to prevent inadvertent contact or short circuit.
The frame of the welding power source is effectively earthed.
Welding leads and electrode holder are in good condition.
The welding power source is clean internally, especially from metal filing, slag, and
loose material. If any parts are damaged for any reason, replacement is recommended.
Prior to operation, use the terminal spanner (17) to securely tighten the terminal knobs.
Cleaning the Welding PowerSource
WARNING!
To clean the welding power source, open the enclosure and use
a vacuum cleaner to remove any accumulated dirt, metal filings, slag and
loose material. Keep the shunt and lead screw surfaces clean as accumulated
foreign material may reduce the welder’s output welding current.
Cleaning the Drive Rolls
Clean the grooves in the drive rolls frequently. This can be done by using a small wire
brush. Also wipe off, or clean the grooves on the upper drive roll. After cleaning,
tighten the drive roll retaining screws.
Caution: Do not use compressed air to clean the welding power source. Compressed
air can force metal particles to lodge between live electrical parts and earthed metal
parts within the welding power source. This may result in arcing between the parts and
their eventual failure.
Note: Ozito Industries will not be responsible for any damage or injuries caused by
the repair of the tool by an unauthorised person or by mishandling of the tool.
!
!
!
!

17
SPARE PARTS
Please contact your local Bunnings Special Orders Desk to order the required
spare parts.
Most common spare parts listed below
Spare Part Part No.
Welding torch assembly SPMWR135-04
On/off switch SPMWR135-12
Wire drive roller 0.6-0.8mm SPMWR135-56
Pressure roller SPMWR135-59
Wire drive roller 0.8-.09mm SPMWR135-92
V Volts Hz Hertz
~ Alternating current W Watts
U
0
Non-load voltage U
2
On-load voltage
m/min Revolutions or
reciprocation per minute
U1 Rated AV input voltage
(with tolerance ±10%)
A/V Electric current adjustment
range, and the relevant
on-load voltage
X load duration rate
IP Protection class
Used in the environment which
has high risk of electric shock
MAG welding
Warning
Symbol of single-phase AV
power and rated frequency
I
1max
Rated maximum input current
I
1eff
Maximum effective input current
Vmax
Max. wire feeding speed
Double insulated
Regulator compliance mark
A
Amperes
Single-phase transformer
- Rectifier
1
S
1 ~ 50Hz
Do not operate in the rain
Read operator’s manual
DESCRIPTION OF SYMBOLS

1 x Gas/Gasless MIG Welder MWR-135
1 x Welding mask
1 x Combination chipping hammer and wire brush
1 x 0.6mm-0.8mm Wire feed roller (fitted to the welder)
1 x 0.8mm-0.9mm Wire feed roller
1 x 0.2kg Welding wire
1 x 0.6mm Contact torch tip
1 x 0.8mm Contact torch tip
1 x 0.9mm Contact torch tip
1 x Torch shroud
1 x Terminal spanner
1 x Instruction manual
AUSTRALIA (Head Office)
1 -23 Letcon Drive, Bangholme, Victoria, Australia 3175
Telephone: 1800 069 486
Facsimile: +61 3 9238 5588
Website: www.ozito.com.au
Email: [email protected]
Power tools that are no longer usable should not be
disposed of with household waste but in an environmentally
friendly way. Please recycle where facilities exist. Check with
your local council authority for recycling advice.
Recycling packaging reduces the need for landfill and raw
materials. Reuse of recycled material decreases pollution in the
environment. Please recycle packaging where facilities exist.
Check with your local council authority for recycling advice.
18
CARING FOR THE ENVIRONMENT
PACK CONTENTS
OZITO INDUSTRIES PTY LTD

3 YEAR REPLACEMENT WARRANTY
Your product is guaranteed for a period of 36 months from the original date of purchase
and is intended for DIY (Do It Yourself) use only. If a product is defective it will be replaced in
accordance with the terms of this warranty. Warranty excludes consumable parts, for example:
Welding tips, torch nozzles, flexible inner tube, welding wire, wire feed rollers, welding lenses,
wire brushes and chipping hammer.
WARNING
The following actions will result in the warranty being void.
Professional, Industrial or high frequency use.
If the tool has been operated on a supply voltage other than that specified on the tool.
If the tool shows signs of damage or defects caused by or resulting from abuse, accidents
or alterations.
Failure to perform maintenance as set out within the instruction manual.
If the tool is disassembled or tampered with in any way.
OZITO
Australia/New Zealand (Head Office)
1-23 Letcon Drive, Bangholme, Victoria, Australia 3175
•
•
•
•
•
OW5
WARRANTY
YOUR WARRANTY FORM SHOULD BE RETAINED BY YOU AT ALL TIMES. IN ORDER
TO MAKE A CLAIM UNDER THIS WARRANTY YOU MUST RETURN THE PRODUCT TO
YOUR NEAREST BUNNINGS WAREHOUSE WITH YOUR BUNNINGS REGISTER RECEIPT.
PRIOR TO RETURNING YOUR PRODUCT FOR WARRANTY PLEASE TELEPHONE OUR
CUSTOMER SERVICE HELPLINE:
TO ENSURE A SPEEDY RESPONSE PLEASE HAVE THE MODEL NUMBER AND DATE OF
PURCHASE AVAILABLE. A CUSTOMER SERVICE REPRESENTATIVE WILL TAKE YOUR CALL
AND ANSWER ANY QUESTIONS YOU MAY HAVE RELATING TO THE WARRANTY POLICY
OR PROCEDURE.
The benefits provided under this warranty are in addition to other rights and remedies which
are available to you at law.
Our goods come with guarantees that cannot be excluded at law. You are entitled to a
replacement or refund for a major failure and for compensation for any other reasonably
foreseeable loss or damage. You are also entitled to have the goods repaired or replaced if
the goods fail to be of acceptable quality and the failure does not amount to a major failure.
Generally you will be responsible for all costs associated with a claim under this warranty,
however, where you have suffered any additional direct loss as a result of a defective product
you may be able to claim such expenses by contacting our customer service helpline above.
`
Australia 1800 069 486
New Zealand 0508 069 486
/