Page is loading ...

VRT6221
Cordless Stck
Vacuum Cleaner
User Manual
01M-8835743200-4316-01
EN

Please read this manual first!
Dear Customer,
Thank you for selecting a Beko product. We hope that you get the best results from
your appliance which has been manufactured with high quality and state-of-the-
art technology. For this reason, please read this user manual and all other provided
documents carefully before using the appliance and keep it as a reference for future
use. If you hand over the appliance to someone else, give the user manual as well.
Follow the instructions by paying attention to all the information and warnings in the
user manual.
Meanings of the symbols
Following symbols are used in various sections of this manual:
C
Important nformaton and useful
advces regardng the usage.
A
WARNING:
Warnngs for
dangerous stuatons concernng the
safety of lfe and property.
Protecton class for electrc shock.
This appliance has been produced in environmentally-friendly, state-of-the-art facilities.
This product does not contain PCB’S.

Cordless Stick Vacuum Cleaner / User Manual
3 / 22 EN
CONTENTS
1 Important safety and
envronmental nstructons 4-6
1.1 General safety . . . . . . . . . . . . . . . . . . . . . . . . . . . . . . . . . . .4
1.2 Complance wth the WEEE Drectve and
dsposal of the waste product . . . . . . . . . . . . . . . . . . . . . .5
1.3 Complance wth RoHS Drectve . . . . . . . . . . . . . . . .5
1.4 Package nformaton . . . . . . . . . . . . . . . . . . . . . . . . . . . .5
1.5 Informaton on waste batteres . . . . . . . . . . . . . . . . .5
1.6 Plug Wrng . . . . . . . . . . . . . . . . . . . . . . . . . . . . . . . . . . . . . .6
2 Your cordless stck
vacuum cleaner 7-8
2.1 Overvew . . . . . . . . . . . . . . . . . . . . . . . . . . . . . . . . . . . . . . . .7
2.2 Techncal data. . . . . . . . . . . . . . . . . . . . . . . . . . . . . . . . . . .8
3 Part nstallaton 9
3.1 Connecton of handle part and push rod . . . . . . . .9
3.2 Handle forward assembly . . . . . . . . . . . . . . . . . . . . . .9
3.3 Installaton of battery pack and hand-
held vacuum cleaner . . . . . . . . . . . . . . . . . . . . . . . . . . . . . . 10
3.4 Installaton of hand-held vacuum cleaner and
push rod vacuum cleaner . . . . . . . . . . . . . . . . . . . . . . . . . 10
3.5 Installaton of chargng dock and push rod. . . . .11
4 Operaton 12
4.1 Operaton mode of push rod . . . . . . . . . . . . . . . . . . .12
4.2 Operaton mode of hand-held vacuum cleaner 12
4.3 Operaton mode of electrc ground brush. . . . . .12
4.3.1 What s roller cloggng rotaton protecton?. .12
4.4 Operaton mode of accessores . . . . . . . . . . . . . . . .13
4.5 Connecton of hand-held vacuum cleaner and
handle. . . . . . . . . . . . . . . . . . . . . . . . . . . . . . . . . . . . . . . . . . . . . 14
4.6 Connecton of accessores and chargng dock 16
4.7 Chargng of vacuum cleaner . . . . . . . . . . . . . . . . . . 16
5 Part cleanng and replacement 18
5.1 Cleanng of dust cup and fltraton system . . . . 18
5.2 Cleanng of electrc roller. . . . . . . . . . . . . . . . . . . . . . 20
6 Troubleshootng 21
7 Guarantee 22

4 / 22 EN
Cordless Stick Vacuum Cleaner / User Manual
Ths secton contans safety
nstructons that wll help protect
from rsk of personal njury or
materal damage.
Falure to follow these nstructons
vods any granted warranty.
1.1 General safety
• Ths applance comples wth the
nternatonal safety standards.
• Ths applance can be used by
chldren who are at the age of
8 and above and by people who
have reduced physcal, perceptual
or mental abltes or by people
who are defcent n terms of
experence and knowledge as long
as they are supervsed and gven
the nstructons regardng the safe
use of the applance and dangers
encountered. Chldren should not
play wth the applance. Cleanng
and mantenance works should
not be performed by chldren
unless they are supervsed by an
adult.
• Do not use t f the power cable or
the applance tself s damaged.
Contact an authorsed servce.
• Your mans power supply should
comply wth the nformaton
suppled on the ratng plate of the
applance.
• The mans supply on whch you
wll use the applance must be
secured wth a mnmum 13 A fuse.
• Do not use the applance wth an
extenson cable.
• To avod any damage to the
power cable, prevent t from
beng squeezed, bent or rubbed
on sharp edges.
• Do not touch the plug when the
applance s plugged n f your
hands are damp or wet.
• Do not pull the power cable when
unpluggng the applance.
• Do not vacuum flammable
materals and when vacuumng
cgarette ash make sure that t has
cooled down.
• Do not vacuum water or other
lqud materals.
• Protect the applance from ran,
humdty and heat sources.
• Never use the applance n or near
the places where combustble or
nflammable ambence or places
are present.
• Unplug the applance before
cleanng and mantenance.
• Do not mmerse the applance
or ts power cable n water for
cleanng.
1 Important safety and envronmental nstructons

Cordless Stick Vacuum Cleaner / User Manual
5 / 22 EN
• Do not attempt to dsmantle the
applance.
• Use the orgnal parts or
parts recommended by the
manufacturer only.
• Do not clean the partcles such as
cement, plaster and compressed
paper n order to prevent the flter
from beng clogged and the motor
beng damaged.
• Use the applance only wth the
adapter suppled wth.
• Do not use the applance wthout
flters; otherwse t can get
damaged.
• If you keep the packagng
materals, store them out of the
reach of chldren.
1.2 Complance wth the WEEE
Drectve and dsposal of the
waste product
Ths product comples wth EU WEEE
Drectve (2012/19/EU). Ths product
bears a classfcaton symbol for waste
electrcal and electronc equpment
(WEEE).Ths product has been
manufactured wth hgh qualty parts and
materals whch can be reused and are sutable for
recyclng. Do not dspose of the waste product
wth normal domestc and other wastes at the end
of ts servce lfe. Take t to the collecton center
for the recyclng of electrcal and electronc
equpment. Please consult your local authortes
to learn about these collecton centers..
1.3 Complance wth RoHS
Drectve
The product you have purchased comples wth EU
RoHS Drectve (2011/65/EU). It does not contan
harmful and prohbted materals specfed n the
Drectve.
1.4 Package nformaton
Packagng materals of the product are
manufactured from recyclable
materals n accordance wth our
Natonal Envronment Regulatons. Do
not dspose of the packagng materals together
wth the domestc or other wastes. Take them to
the packagng materal collecton ponts
desgnated by the local authortes.
1.5 Informaton on waste
batteres
Ths symbol on rechargeable batteres/
batteres or on the packagng ndcates
that the rechargeable battery/battery
may not be dsposed of wth regular
house hold rubbsh. For certan
rechargeable batteres/batteres, ths
symbol may be supplemented by a
chemcal symbol. Symbols for mercury
(Hg) or lead (Pb) are provded f the
rechargeable batteres/batteres
contan more than 0,0005 % mercury or more
than 0,004 % lead.
Rechargeable batteres/batteres, ncludng
those whch do not contan heavy metal, may not
be dsposed of wth household waste. Always
dspose of used batteres n accordance wth local
envronmental regulatons. Make enqures about
the applcable dsposal regulatons where you lve.
1 Important safety and envronmental nstructons

6 / 22 EN
Cordless Stick Vacuum Cleaner / User Manual
1.6 Plug Wrng
The moulded plug on ths applance ncorporates a
13 A fuse. Should the fuse need to be replaced an
ASTA approved BS1362 fuse of the same ratng
must be used. Do not forget to reft the fuse cover.
In the event of losng the fuse cover, the plug must
not to be used untl a replacement fuse cover has
been ftted. Colour of the replacement fuse cover
must be the same colour as that vsble on the pn
face of the plug Fuse covers are avalabe from any
good electrcal store.
• Fiting a different plug
• As the colours of the wres n the mans lead
of ths applance may not correspond wth the
coloured markngs dentfyng the termnals on
your plug, proceed as follows:
• Brown cable = L (Lve)
• Blue cable = N (Neutral)
• Green/yellow cable must be connected to
ground (E) lne
• Wth the alternatve plugs a 13 A fuse must be
ftted ether n the plug or adaptore or n the
man fuse box. If n doubt contact a qualfed
electrcan.
1 Important safety and envronmental nstructons

Cordless Stick Vacuum Cleaner / User Manual
7 / 22 EN
2 Your cordless stck vacuum cleaner
2.1 Overvew
11
12
13
14
15
16
17
18
19
20
8
9
7
6
5
4
3
2
1

8 / 22 EN
Cordless Stick Vacuum Cleaner / User Manual
2 Your cordless stck vacuum cleaner
1. Swtch button
2. Hand-held release button
3. Hand-held swtch button
4. Dust cup release button
5. Dust cup
6. Man body dust cup
7. Electrc ground brush
8. Chargng dock
9. Power cord
10. Metal ppe release button
11. Two-n-one har brush
12. Long flattened cleaner
13. Celng brush
14. Soft har brush
15. Long hose
16. Bed brush
17. Adapter
18. Turbo brush
19. Screw
20. Dual purpose brush
2.2 Techncal data
Rated nput power :
220W
Adapter nput :
100~240V 50/60Hz 400mA
Adapter output :
25.6V 500Ma
Electrc ground brush
rated power :
30W
Battery pack volume :
2000mAH
Chargng tme :
4-5 hours

Cordless Stick Vacuum Cleaner / User Manual
9 / 22 EN
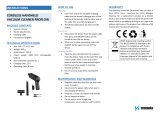
3.1 Connecton of handle part
and push rod
1. Place push rod vacuum cleaner on the ground
accordng to drecton n the pcture durng
connecton, vertcally ground brush nstallaton
hole below the handle part nto man body
upper cover.
2. Forcbly press the handle part downwards
untl hearng ‘crack’ sound,- and complete
nstallaton.
C
Handle drecton should be
consstent wth ground brush
drecton durng assembly, reverse
assembly should be avoded.
3 Part nstallaton
3.2 Handle forward assembly
1. Press the metal ppe button shown n the
pcture f the handle part should be removed
durng packaged storage.
2. Pull the handle part- accordng to drecton n
the pcture synchronously, and remove from
the nstallaton hole.

10 / 22 EN
Cordless Stick Vacuum Cleaner / User Manual
3.3 Installaton of battery
pack and hand-held vacuum
cleaner
1. Battery pack nstallaton: turn over the hand-
held vacuum cleaner to the back.
2. Push the sldng block of battery pack cover
plate downwards.
3. Open cover plate, locate the battery pack,
vertcally nsert t nto machne body battery
case accordng to drecton n the pcture,
replace the battery pack cover plate after
nstallaton, and fnsh hand-held vacuum
cleaner assembly;
4. Push the button accordng to arrow drecton.
5. Take out battery cover plate upwards.
C
The battery pack nserton hole
drecton s consstent wth host
machne plug drecton.
3.4 Installaton of hand-held
vacuum cleaner and push rod
vacuum cleaner
1. Hold hand-held vacuum cleaner handle when
hand-held vacuum cleaner s nstalled on push
rod vacuum cleaner, algn round ar nlet of
push rod vacuum cleaner(poston shown n the
pcture).
2. Insert to the bottom, and rotate hand-held
vacuum cleaner accordng to drecton n the
pcture untl ‘clck’ lockng sound s heard.
3. Frstly hold hand-held release button, then take
out hand-held vacuum cleaner accordng to
rotaton drecton shown n the fgure when the
hand-held vacuum cleaner should be removed
and used sngly.
3 Part nstallaton

Cordless Stick Vacuum Cleaner / User Manual
11 / 22 EN
3.5 Installaton of chargng
dock and push rod
After use connect the vacuum cleaner to the
chargng dock. When the vacuum cleaner s
connected to 240V AC power supply, the vacuum
cleaner can be recharged at the same tme.
•
Installaton of chargng dock:
vertcally nsert the support plate n the
chargng dock base accordng to drecton n the
pcture untl ‘clck’ lockng sound s heard, and
complete chargng dock assembly.
•
Installaton of push rod vacuum
cleaner and chargng dock:
nsert
the hook on the push rod behnd the vacuum
cleaner nto hook notch on the chargng dock
accordng to pcture, and nstall t accordng to
pcture.
Inert nto notch
hook
hook notch
3 Part nstallaton

12 / 22 EN
Cordless Stick Vacuum Cleaner / User Manual
4 Operaton
4.1 Operaton mode of push
rod
1. Remove the vacuum cleaner from chargng
dock.
2. Press whole machne swtch button on the
handle, and control start and stop of the
vacuum cleaner.
3. Press handle swtch button, turn on the
ndcator lght, set the machne n hgher level
4. Press the button agan for settng the machne
n lower level.
5. Press the button for the thrd tme for turnng
off the machne, and acheve crculatng
operaton.
Whole-machne
swtch button
Hand-held
swtch button
C
The vacuum cleaner can
automatcally walk at slow speed
after whole machne swtch button
on the handle s pressed n order
to help users to push the vacuum
cleaner easly.
4.2 Operaton mode of hand-
held vacuum cleaner
1. Remove hand-held vacuum cleaner.
2. Press the swtch button to turn on the hand
held devce. The ndcator wll lght.
3. Press the handle once for settng the machne
n hgher level.
4. Press the button agan for settng the machne
n lower level.
5. Press the button for the thrd tme for turnng
off the machne, and acheve crculatng
operaton.
Hand-held swtch button
4.3 Operaton mode of electrc
ground brush
The electrc ground brush can be used for short
ple carpets, hard floors and floor tles.
4.3.1 What s roller cloggng
rotaton protecton?
When the electrc ground brush s used, f the large
objects enter the unt the roller chamber may be
damaged therefore the unt wll automatcally
turn off as a protecton feature.

Cordless Stick Vacuum Cleaner / User Manual
13 / 22 EN
4.4 Operaton mode of
accessores
Hand-held vacuum cleaner part s specally
equpped wth accessores n the product n
order to facltate use. When you separately
use hand-held vacuum cleaner, accessores
can be connected accordng to demand, or the
accessores can be connected through adapter
hose.
Two-n-one accessory connecton:
Vertcally nsert the sofa cleaner nto adapter
notch of har brush accordng to drecton n the
pcture untl ‘clck’ lockng sound s heard;
sofa cleaner
har brush
Connecton of hand-held vacuum
cleaner and two-n-one accessory:
1. Algn square adapter port of two-n-one
accessory to dust cup ar nlet of hand-held
vacuum cleaner as shown n the pcture.
2. Vertcally nsert to the stop poston accordng
to drecton n the pcture.
• The followng accessores also can be drectly
connected wth hand-held vacuum cleaner: long
flattened cleaner, bed brush, soft har brush and
bed cleaner, and the connecton mode s the
same as two-n-one accessores.
Long flattened
cleaner
Soft har brush
Bed brush
Turbo
brush
4 Operaton

14 / 22 EN
Cordless Stick Vacuum Cleaner / User Manual
4 Operaton
C
Algn long hose square adapter
port to dust cup ar nlet of hand-
held vacuum cleaner as shown n
the pcture, and then vertcal nsert
to the stop poston accordng to
drecton n the pcture.
C
Connecton of flexble hose and two-
n-one har brush: vertcally nsert
connector accordng to drecton
n the pcture, and vertcally nsert
untl t can not be moved;
Other accessores connected wth
flexble hose: long flattened cleaner,
bed brush and soft har brush. The
connecton methods are the same
as the above-mentoned method.
Long hose
Long flattened cleaner
Bed brush
Soft har brush
Bed brush
Two-n-one accessores
4.5 Connecton of hand-held
vacuum cleaner and handle
C
Remove handle, press handle
button, push out and open the
rubber plug, then nsert the square
adapter port on the handle end nto
dust cup ar nlet of the hand-held
vacuum cleaner.
Press and push out
C
Vertcally nsert the celng brush
nto termnal of handle accordng
to drecton n the pcture;

Cordless Stick Vacuum Cleaner / User Manual
15 / 22 EN
4 Operaton
C
Handle termnal can be connected
wth adapter, and adapter
nstallaton can be the same as
celng nstallaton method.
The followng accessores can be connected at the
termnal of the adapter: two-n-one har brush,
long flattened cleaner and soft har brush, and
they can be nserted nto adapter stop accordng
to drecton n the pcture.
Two-n-one
har brush
Adapter
Long
flattened
cleaner
Two-n-one
har brush
Soft har brush
Adapter
the adapter can be randomly
bent accordng to arrow
drecton
C
When the adapter and metal ppe are
connected, the adapter angle can
be adjusted to help clean n places
whch are not easly accessble.

16 / 22 EN
Cordless Stick Vacuum Cleaner / User Manual
4 Operaton
4.6 Connecton of accessores
and chargng dock
Hand-held vacuum cleaner part s specally
equpped wth accessores n the product n order
to facltate use. After the accessores are used,
accessores can be placed on the chargng dock
accordng to pcture.
Two-n-one
accessores
Long flattened
cleaner
Celng brush
Two-n-one har brush
It s sutable for cleanng dust
on cupboard, wndow sll,
sofa and all table-boards.
Bed brush
It s sutable for cleanng
mtes and dust on bed
surface, sofa and all cloth
furnture.
Soft har brush
It s sutable for cleanng
furnture made of materals
whch can be scratched
easly, such as bookcase,
crafts, etc.
Long flattened cleaner
It s sutable for cleanng
narrow slts, dead corners of
doors and wndows and other
varous small gaps.
Celng brush
It s sutable for cleanng
celng, wndow curtan, ar-
condtoner ar outlet grades
and other places whch can
not be cleaned easly on hgh
postons.
Turbo brush
It s sutable for flappng and
suckng out mtes, bactera,
etc. hdden n beddng or
sofa through roller flappng
and vbraton amng at sofa
and mattress.
4.7 Chargng of vacuum
cleaner
When vacuum cleaner power s nsuffcent, please
charge the vacuum cleaner tmely. When the
voltage s too low, the vacuum cleaner can produce
automatc power falure protecton phenomena
n order to protect battery. The vacuum cleaner
must be charged. Before t s charged, please
ensure that the hand-held vacuum cleaner, push
rod vacuum cleaner and handle part have been
nstalled, they can be nstalled on the assembled
chargng dock. Plug of the charger can be nserted
on the AC power supply socket, the chargng
ndcator lght s red under the condton, and t s
obvous that the vacuum cleaner s charged.

Cordless Stick Vacuum Cleaner / User Manual
17 / 22 EN
When the product s used for the frst tme, please
fully charge the battery, and battery power should
be completely released before t s charged for the
second tme, thereby extendng the servce lfe of
the battery.
Chargng tme s 4 hours or so. When the chargng
ndcator lght on the hand-held vacuum cleaner s
changed from ‘red’ to ‘green’, t s obvous that the
vacuum cleaner battery has been fully charged.
The charger s stll mplementng trckle chargng,
and you can contnuously charge for 0.5-1 hour,
thereby the chargng effect s better.
Battery pack volume s ncreased, thereby
provdng more durable dust removal tme.
Correspondngly, the chargng tme s 5 hours or
so;
The chargng tme s 6 hours or so;
After chargng s completed, please tmely remove
the chargng dock plug from the AC power supply
socket, and chargng process can be stopped.
4 Operaton

18 / 22 EN
Cordless Stick Vacuum Cleaner / User Manual
5 Part cleanng and replacement
• MIF flter s sold n vacuum cleaner dstrbutor.
• It s suggested that dust cup should be cleaned
after beng used each tme. When much dust
s accumulated, and the MIF flter s clogged,
the sheet should be cleaned or washed. It
can be replaced f requred. After the electrc
roller s used for long term, the roller har can
be twsted by har and other long materal,
therefore regular cleanng s recommended,
thereby vacuum cleaner can be operated more
effcently.
5.1 Cleanng of dust cup and
fltraton system
Dust cup
release button
Dust cup
Flter
Dust cup
handle
MIF flter handle
C
Hold ar hood cover plate by- hand,
and rotate accordng to arrow
drecton.
Rotate to unlockng mark

Cordless Stick Vacuum Cleaner / User Manual
19 / 22 EN
C
Dual purpose brush can be used for
removng har on the ron network
of cyclone durng cleanng.
Copper wre
brush
C
Hold transparent dust cup by hand,
and rotate accordng to arrow
drecton.
Rotate to
unlockng mark
5 Part cleanng and replacement
C
Copper wre brush can be used
for removng har on ron network
durng cleanng.
Copper wre
brush
1. Forcbly press dust cup release button, rotate
dust cup component accordng to drecton n
the pcture synchronously, separate dust cup
component and machne body;
2. Pull out the flter component accordng to
arrow drecton n the pcture, and dump dust n
the dust cup;
3. Separate cyclone mechansm and MIF flter
accordng to arrow drecton n the pcture,
clean and wash MIF flter;
4. Rotate cyclone cover plate to unlockng state
accordng to arrow drecton n the pcture,
separate cyclone cover plate downwards
accordng to pcture 6, clean metal net cover,
and wash transparent cyclone hood;
5. Clean or wash and dry MIF flter (replaced n
necessary condton);
6. Rotate dust cup accordng to arrow drecton
n the pcture, separate dust cup and push rod
vacuum cleaner, clean metal mesh hood, dump
dust n the dust cup, and assemble accordng
to procedures reverse to dsassemblng
procedures after completon.

20 / 22 EN
Cordless Stick Vacuum Cleaner / User Manual
5 Part cleanng and replacement
5.2 Cleanng of electrc roller
Roller cover knob
1. Use ‘-’ shaped screwdrver or con for rotatng
the roller cover lockng button as shown n the
pcture, and unlock the roller cover;
2. Remove roller cover accordng to drecton n the
pcture, and remove the roller out of the notch
for cleanng (water washng s not allowed);
3. Assemble accordng to procedures reverse to
the dsassemblng procedures after cleanng or
replacement s completed.
/