Page is loading ...

1
• POELES A BOIS
POELES A BOISPOELES A BOIS
POELES A BOIS
• WOOD STOVES
WOOD STOVESWOOD STOVES
WOOD STOVES
• ÖLÖFEN FÜR HOLZFEUERUNG
ÖLÖFEN FÜR HOLZFEUERUNGÖLÖFEN FÜR HOLZFEUERUNG
ÖLÖFEN FÜR HOLZFEUERUNG
• STUFE A LEGNA
STUFE A LEGNASTUFE A LEGNA
STUFE A LEGNA
• ESTUFAS DE LE
ESTUFAS DE LEESTUFAS DE LE
ESTUFAS DE LEÑ
ÑÑ
ÑA
AA
A
•
SALAMANDRAS A LENHA
SALAMANDRAS A LENHASALAMANDRAS A LENHA
SALAMANDRAS A LENHA
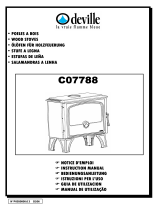
C07783
C07783 C07783
C07783
C07753 /
C07753 / C07753 /
C07753 / C07784
C07784C07784
C07784
NOTICE D'EMPLOI
NOTICE D'EMPLOI NOTICE D'EMPLOI
NOTICE D'EMPLOI
INSTRUCTION MANUAL
INSTRUCTION MANUAL INSTRUCTION MANUAL
INSTRUCTION MANUAL
BEDIENUNGSANLEITUNG
BEDIENUNGSANLEITUNG BEDIENUNGSANLEITUNG
BEDIENUNGSANLEITUNG
ISTRUZIONI
ISTRUZIONI ISTRUZIONI
ISTRUZIONI PER L'USO
PER L'USO PER L'USO
PER L'USO
GUIA DE UTILIZA
GUIA DE UTILIZA GUIA DE UTILIZA
GUIA DE UTILIZACION
CIONCION
CION
MANUAL DE UTILIZAÇÃO
MANUAL DE UTILIZAÇÃO MANUAL DE UTILIZAÇÃO
MANUAL DE UTILIZAÇÃO
N° P0050240
-
0
2
0
4
/0
8

12
CONTENTS
Page
1 - DESIGNATION ................................................................................................................ 13
2 - NOMINAL CALORIFIC POWER AND SLOW BURNING AUTONOMY .......................... 13
3 - DESCRIPTION AND SIZE................................................................................................ 14
3.1 DESCRIPTION
3.2 SIZE
3.3 VENTILATION OF THE AREA IN WHICH THE APPLIANCE IS TO BE INSTALLED
4 - STOVE OPERATING CONDITIONS................................................................................ 14
4.1 FIRST LIGHTING
4.2 FUEL
4.2.1 Fuel recommended
4.2.2 Forbidden fuel
4.3 USING THE HANDLING DEVICES AND THE ACCESSORIES
4.4 USE
4.4.1 Lighting
4.4.2 Operation
4.4.2.1 Periodic and continuous use
4.4.2.2 Fire duct
4.4.2.3 De-ashing
4.4.3 Safety instructions
5 - RECOMMENDATIONS RELATED WITH DUCT CLEANING, STOVE AND
SMOKE DUCT MAINTENANCE ........................................................................................... 17
6 - GLOBAL TERMS OF WARRANTY.................................................................................. 19

13
We strongly recommend reading carefully the entire manual in order to ensure the best possible use and the
highest satisfaction from your Deville stove.
Any non compliance with the assembly, installation and operating instructions is the sole responsibility of the
person performing any operation on the stove.
THIS STOVE MUST BE INSTALLED IN COMPLIANCE WITH THE CURRENTLY ENFORCED D.T.U.
SPECIFICATIONS.
All local, national, and European regulations must be respected when using this appliance.
The appliance must not be modified.
WE RECOMMENDED ASKING A QUALIFIED PROFESSIONAL TO INSTALL THE STOVE.
1 - DESIGNATION
The C07753, C07783 and C07784 stoves comply with the essential requirements of the directive 89/106/CEE
Construction Products according to appendix ZA of the standard EN 13240.
They are a continuous combustion, grille-type heating appliance operating exclusively with wood, and
equipped with a semi-closed combustion chamber.
2 - NOMINAL CALORIFIC POWER AND SLOW BURNING AUTONOMY
- Nominal calorific power according to standard NF EN 13240 during normal burning test: 14 kW.
The appliance can either be used in intermittent mode or in continuous mode.
Rated heat output capacity in intermittent use :
• Obtained with a draft of 12 Pa, and a wood load of 3,15 kg. Loads are comprised of 2 unsplit
hardwood logs.
• Refill every 45 minutes on a 0,5 kg layers (3cm thick) of embers with the thermostat on
maximum speed.
• The announced power is the average power obtained with each 45 minute-load.
Rated heat output capacity in continuous use :
• Obtained with a draft of 12 Pa, and a wood load of 12,45 kg. Loads are comprised of 2 unsplit
hardwood logs.
• Refill every 3 hours on a 0,5 kg layers (3cm thick) of embers with the thermostat on maximum
speed.
• The announced power is the average power obtained with each 3 hours load.
Slow combustion, burning period superior to 10h in continuous use :
• Obtained on a 6 Pa draft with a 12,45 kg-load composed of a non-split log of strong wood,
preferably with large diameters (superior to 16 cm).
• Reload on a 0.5 kg bed of embers (that is 3 cm thick) with thermostat in position 0 for C07783
and position I for C07753, C07784.

14
3 - DESCRIPTION AND SIZE
3.1 DESCRIPTION (Fig. 1)
The main elements of the stove are shown below :
(1) Lagging decoration (6) Rear protection shield
(2) Loading door (7) Thermostat control
(3) Control door (8) Handle
(4) Top (9) Strip
(5) Duct Ø 153 (10) Panel
A secondary air inlet is integrated in the upper section of the door window to maintain it clean and
ensure improved wood combustion.
The thermostat, located on the right-hand side of the appliance, enables the selection of the burning
rate.
Stove net weight : C07753 Stove approx. 130 kg
C07783 Stove approx. 113 kg
C07784 Stove approx. 130 kg
3.2 SIZE (Fig. 2)
Outer dimensions (mm)
• C07783 STOVE
Width Height Depth
Overall
920
832
415
• C07753 - C07784 STOVE
Width Height Depth
Overall
910
865
415
3.3 - VENTILATION OF THE AREA IN WHICH THE APPLIANCE IS TO BE INSTALLED
• The appliance needs air in addition to the air required by the statutory air change rate. This is obligatory when the
dwelling includes mechanical ventilation.
• The air intake should give directly to the outside or should be located in an area ventilated to the outside ; it
should also be protected by a grille.
• The air outlet should be as near as possible to the stove. The user should be able to close it off when it comes
out directly into the room. While the appliance is being used, make sure that it is free of any obstructions.
• The air intake section should be at least equal to one-quarter of the section of the smoke flue with a minimum of :
- 50 cm
2
for use with the door closed only
• It may be necessary to stop the extractor of the mechanical ventilation so as to avoid smoke coming back into the
room when the door is opened.
4 - STOVE OPERATING CONDITIONS
4.1 FIRST LIGHTING
- Once the chimney is implemented and the stove set, observe the drying time of the materials used for
the construction (2 to 3 weeks).
- Do not connect the stove to a pipe linked to several appliances.
- After first lighting (see paragraph 4.4.1), make a moderate fire for the first hours by limiting the stove's
load (a 15 cm diameter log) (thermostat position 4 for C07783 and position III for C07753, C07784).
. Progressive heating of all the elements in the chimney and normal stove expansion.
- During the first hours of use, the stove may produce a smell of paint : ventilate the room to limit its
effects.

15
4.2 FUEL
4.2.1 Fuel recommended
Hardwood logs with a maximum length of 65 cm : oak, hornbeam, beech, chestnut, etc...
Maximum loading height : 25 cm.
We recommended using very dry wood (maximum 20% humidity), i.e. 2 years dry storage
following cutting, in order to obtain higher yields and avoid sooting the smoke duct and the
windows.
Do not use resinous woods (pine, fir, spruce, etc.), which involve more frequent maintenance of
the stove and the flue.
4.2.2 Forbidden fuel
Any other combustible than wood is forbidden, in particular coal and its by-products.
Burning kindling, canes, slats, straw, cardboard, liquid fuels is dangerous and should be avoided.
The appliance should not be used as a waste incinerator.
4.3 USING THE HANDLING DEVICES AND THE ACCESSORIES
- The thermostat (Fig. 3) :
(7) Thermostat
With the ash box and loading door closed hermetically, the adjustment is performed using the
thermostat knob.
To get the maximum speed turn the handle clockwise.
For slow burning: the index must be set on position 0 for C07783 and position I for C07753,
C07784.
. Adjusting the thermostat flap (Fig. 4) :
(13) Adjustement knob
(14) Flap
Adjustment is factory-set. However, we recommend checking it before first lighting.
For a 20°C room temperature, when the control lever is on position I, the gap between the
supporting plate and the flap must be zero (cold appliance).
However, the flap must be subjected to no thrust, it must lift from its supporting plate when the
knob is set to position 1 for C07783 and position II for C07753, C07784.
If required, to obtain this operating mode, change the flap adjustment by acting upon the
adjustment knob : access inside the ash box compartment.
- The poker handle (15) (Fig. 5) required for opening the ash box door, as well as for oving the
logs inside the stove.
- Opening the Control door (Fig. 6) :
. C07783 : with the poker handle.
. C07753 / C07784 : grabing it by both nocks.
- The scraper (Fig. 7) : for de-ashing and cleaning the appliance.
Do not burn your hands uselessly. Use the accessories.
4.4 USE
4.4.1 Lighting
-
Set the thermostat to maximum pace.

16
- Place crumpled paper on the grating and very dry kindling wood (twigs), then larger cross-
section cut wood (diameter 3 to 5 cm).
- Light the paper and close the door (leave it partly open to accelerate lighting up).
- Once the "kindling wood" load is burning, open the door, load the appliance with the
recommended fuel and use the regulation devices to obtain the burning required.
4.4.2 Operation
4.4.2.1 Periodic and continuous use
- The intermittent use of the appliance requires a reload every 45 minutes.
This type of use is particularly recommended as it environmentally friendly.
- The apparatus may also be used in continuous mode when periodic use is not possible or when
reduced burning is required. In this case, maximum heat output can be maintained for 3 hours and
with a slow combustion rate, and a low heat output, the burning period can extend to 10 hours with a
12,5 kg load.
4.4.2.2 Fire duct
- The burning required is obtained by using the control devices (see § 4.3) and selecting a load
matching your needs, i.e.:
. For maximum heating, load the appliance with 3 logs of approx. 10 cm diameter (thermostat at a
maximum pace).
Use this position only temporarily, to heat the rooms following prolonged absence.
. For intermediate heating, use a smaller load : one or two logs (thermostat in position 4 for C07783
and position III for C07753, C07784).
. For a long-lasting heat output with a slow combustion rate, use 1 or 2 non-split logs with a diameter
superior to 16 cm (thermostat in position 0 for C07783 and position I for C07753, C07784).
- To get a long-lasting combustion rate, reload on a merely burning bed of embers.
- For rapid restarting of the fire, add some kindling wood, load the logs, and only if necessary keep
the door partly open for several minutes, without leaving the appliance unattended. Thereafter, use
the controls as per the instructions (paragraph 4.3). This method gets the fire going quickly again,
especially if the wood is slightly damp.
- Change the burning rate (switching from a slow combustion rate to a normal rate for example)
before reloading, during the combustion stage of the embers, to enable the appliance and smoke
duct to change progressively from one burning rate to another.
- To prevent smoke from driving back and the ash from entering the room, at the time of loading,
opening the door requires a number of precautions:
. Open the door partly, waits for the open door suction to start, and open the door slowly.
- Using the stove in continuous mode and a slow combustion rate, especially in milder temperature
conditions (bad draught) and with wet timber, leads to an incomplete combustion and the formation
of tar and soot deposits :
o Alternate the slow burning periods with returns to normal burning.
o Burning small loads is recommended
- After the stove has been used in slow combustion mode, the front glass may darken because of a
slight soot deposit, this deposit will burn off (by pyrolysis) with the next hot fire (higher combustion
rate).
The fitting of a suction moderating flap in the connecting duct enables to control the burning, notably slow
burning, enabling long lasting heating (see installation manual).
4.4.2.3 De-ashing
The air used for wood combustion arrives on the grating when the thermostat is open.
This air also ensures the cooling of the grating. Therefore, it is vital, to ensure optimum performance
and prevent the degradation of the grating due to overheating, to prevent any obstruction by
performing regularly de-ashing operations and evacuating the ash :

17
- Use the scraper (1) to de-ash the grating.
Extracting the ash box :
. Open the door
. Turn both locks with the poker
. Open the ash box door, pull the ash box and grab it by the handle
. Close the ash box door in order to prevent the appliance from overheating which
would result in destruction.
- The level of ash must never reach the stove's cast iron grating : de-ash every 2 to 3 days.
- Remove periodically any ash which spilled accidentally in the ash box compartment.
4.4.3 Safety instructions
- Never throw water on the fire to put it out.
- The front glass as well as other parts of the stove are very hot : beware the risk of burns.
- The stove produces a large quantity of heat by means of radiation through the window : do not place
any materials or objects which are sensitive to heat within 1.5m of the windowed zone.
- It is imperative to maintain the loading closed at all times.
- Do not place any easily flammable materials near the appliance.
- Empty the ash pan into a special metal or otherwise inflammable receptacle used only for this
purpose. Ashes that might appear cold can still be very hot, even if you think they have had enough
time to get cold.
- It is especially important not to store wood under the appliance.
- If there is a fire in the chimney, turn the thermostat to position 0 for C07783 and position I for
C07753, C07784.
- When using the top in glass of C07753 for cooking, the loading not to be overload is 10 kg.
5 - RECOMMANDATIONS RELATED WITH DUCT CLEANING, STOVE AND SMOKE DUCT
MAINTENANCE
The mechanical cleaning of the smoke duct is compulsory, and must be performed several times per year, at
least during the heating season. A certificate should be handed in by a qualified professional.
At the time of duct cleaning, the following operations must be carried out :
- Dismount the deflector (Fig. 8) and (Fig. 9) :
. Dismount the deflector (lift the deflector 1, move it forward 2, tilt the rear 3, lower it 4 and
remove it 5 through the right-hand side).
- Dismount the rear plate of the hearth, the two lateral hearth plates, the hearth grid and the duct pipe.
(Assembling the deflector : perform the disassembly operation in the reverse order).
- Check thoroughly the state of the appliance and particularly the elements ensuring sealing : locking joints and
devices, supporting parts (door, frame).
- Check the state of the smoke duct and connecting duct : all the connections must show proper mechanical
resistance and sealing.
- Clean the appliance using a brush and a vacuum cleaner.
In the event of an anomaly : have the appliance repaired or the installation performed by a qualified professional.
After a long off-period :
- Check that nothing obstructs any pipes before using the stove again.

18
CURRENT MAINTENANCE
- Clean the window door using a damp cloth and ash. If required, use an adapted household cleaning product by
observing the instructions of the operation manuals. Wait for the appliance to be completely cooled before
proceeding with this operation.
- Clean regularly the ventilation guides :
. Using the tip of a metallic object , scratch the inner edges of the cast iron to remove the soot
which may have formed (Fig. 10).
. Remove from the hoover the particles and dust that are stuck between the air guide and the
window pane (Fig. 11). If necessary slip a fine blade or a rigid carton sheet between the air
guide and the window pane to ease the cleaning (releasing of the particles).
These particles prevent the forming of the secondary air layer which protects the window from direct contact
with the smoke and completes the combustion of the wood (Fig. 12).
Secondary air
Air guide
Glass
Door
. These operations must be performed whenever the window is dirty and systematically following the
total extinction of the hearth.
• Check the efficiency of the bolt of the door, and if necessary make the following adjustment (Fig. 13) :
- To harden door closure :
. Successively tighten screw and tighten screw .
. Turn both screws ¼ turn and repeat the operation as required.
NOTA : This adjustment increases the pression of the watertightness joint of the door on the
equipment.
- To soften door closure :
. Successively loosen screw and loosen screw .
. Turn both screws ¼ turn and repeat the operation as required.
NOTA : This adjustment reduces the pression of the watertightness joint of the door on the
equipment.
CLEANING OF THE STOVE DECOR
The cleaning of the stove casing – chrome aspect – must be carried out with a soft cloth and soapy water, or
with a product for glass without alcohol.
CLEANING OF THE TOP GLASS OF
C07753
To clean this part you need to use a soft rap and soapy water or glass spray without alcohol.

19
6 - GLOBAL TERMS OF WARRANTY
1. TERMS AND CONDITIONS
Apart from the legal warranty, particularly for latent defects, Deville guarantees to deliver the furniture in case of
obvious defects or non-conformity to the ordered furniture.
Without prejudice to the provisions that are to be taken concerning the carrier, claims on delivery of furniture
concerning the obvious defects or the non conformity, must be issued by the Buyer in writing a registered letter
with confirmation of receipt to Deville company with in 5 days after noticing the defect. It is up to the Buyer to
prove the reality of the noticed defects and irregularities. The Buyer must let Deville every opportunity of noticing
any of those defects and irregularities in order to salve then.
The Buyer must also keep the non standard supplies at the disposal of Deville, according to the instructions of
the latter. For any problem on a product, please fax all the elements (invoice + information) and ask a previous
agreement to DEVILLE.
2. EXTEND
The warranty of Deville covers, except for any compensation or for damages, the free replacement or repairing of
supplier the part acknowledged as being defected (except for wear and tear parts ) by its services to the
exclusion of the fees for the workplace, for the removal and for the shipping.
On enamelled equipments, appliances, crackles are never considered as a manufacturing defect. They are due
to the difference of expansion of iron enamel or cast-iron enamel and don’t alter the adherence.
Paid replacement parts are warranted for a six-month period from the invoicing date, any additional warranty
agreed by a retailer from Deville doesn’t commit Deville. Whenever claiming under a warranty, the guarantee
with the stamp from the retailer Deville is strictly required. The above guarantee must be produced for any
demand to repair the appliance under warranty, or a detachable slip or coupon of any such guarantee must,
according to the own organisation of Deville, be returned to the latter within the required time. For lack of this, the
date on the invoice issued by Deville can’t be taken into account. The interventions under warranty can’t have the
effect of continuing the warranty.
3. WARRANTY PERIOD
The agreed warranty period assured by Deville is the longer of 2 years (5 years for the body of fireplaces and
inserts) from the day of the purchase of the appliance, subject to the above terms and conditions are fact that the
claims covered by the conditions are requested within the required time. The repairing, the replacement or the
alteration of parts under the warranty period can neither have the effect of continuing the period of the latter, not
get to any compensation for any fees, for late delivery, accidents or any such damages.
4. EXCLUSION
The warranty is unavailable for the following cases, without this list being exhaustive :
- Fitting out, fitting out and assembling of appliances not due to Deville.
- Consequently Deville can’t be considered as responsible for damages or supplies, or accidents to persons
due to local laws and regulations ( for example the fact that there is no linking to the a earth ground connection,
or a wrong drought of a fitting out ).
Fair wear and tear of the supplies or abnormal use of the supplies including the case of industrial or trading use
or a use of the supplies in different conditions from the ones it was built for. It is, for example, of non respect of
the conditions described in the directions issued by Deville : display to outside conditions damaging the appliance
; such as excessive dampness or abnormal change of the electrical tension. Malfunction, damage or accident
due to a shock, a drop, a carelessness, a failure of supervision or of service from the Buyer.
Any alteration, change or intervention made by a member of the staff or a company that is not approved by
Deville, or manufactured with replacement parts that are not genuine or not approved by the manufacturer.
5. SPECIAL TERMS OF WARRANTY
These terms add and define the above general terms of warranty and come first to the former, refer to the
enclosed leaf untitled : “special terms of sales Deville - warranty”.

29
INDICE
Pagina
1 - DESIGNAZIONE ............................................................................................................. 30
2 - POTENZA CALORIFICA NOMINALE E AUTONOMIA IN FUNZIONAMENTO
RIDOTTO............................................................................................................................... 30
3 - DESCRIZIONE E MISURE D’INGOMBRO...................................................................... 31
3.1 DESCRIZIONE
3.2 MISURE D’INGOMBRO
3.3 VENTILAZIONE DEL LOCALE NEL QUALE VIENE INSTALLATO L’IMPIANTO
4 - CONDIZIONI D’USO DI QUESTO APPARECCHIO ........................................................ 31
4.1 PRIMA ACCENSIONE
4.2 COMBUSTIBILE
4.2.1 Combustibile raccomandato
4.2.2 Combustibili vietati
4.3 USO DEGLI ORGANI DI MANOVRA E DEGLI ACCESSORI
4.4 UTILIZZO
4.4.1 Accensione
4.4.2 Funzionamento
4.4.2.1 Funzionamento intermittente e continuo
4.4.2.2 Condotto del fuoco
4.4.2.3 Eliminazione cenere
4.4.3 Norme di sicurezza
5 - CONSIGLI DI PULITURA E DI MANUTENZIONE DELL’APPARECCHIO
E DEL CONDOTTO FUMARIO............................................................................................. 34
6 - CONDIZIONI GENERALI DI GARANZIA......................................................................... 37

38
CONTENIDO
Páginas
1 - DESIGNACION ............................................................................................................... 39
2 - POTENCIA CALORIFICA NOMINAL Y AUTONOMIA EN MARCHA O REDUCIDA....... 39
3 - DESCRIPTIVO Y VOLUMEN........................................................................................... 40
3.1 DESCRIPTIVO
3.2 VOLUMEN
3.3 VENTILACION DEL LOCAL DONDE SE INSTALA EL APARATO
4 - CONDICIONES DE UTILIZACION DEL APARATO ........................................................ 40
4.1 PRIMER ENCENDIDO
4.2 COMBUSTIBLE
4.2.1 Combustible recomendado
4.2.2 Combustibles prohibidos
4.3 EMPLEO DE LOS ORGANOS DE MANEJO Y DE LOS ACCESORIOS
4.4 UTILIZACION
4.4.1 Encendido
4.4.2 Funcionamiento
4.4.2.1 Funcionamiento intermitente y continuo
4.4.2.2 Mantenimiento del fuego
4.4.2.3 Evacuación de las cenizas
4.4.3 Normas de seguridad
5 - CONSEJOS PARA EL DESHOLLINAMIENTO Y EL MANTENIMIENTO
DEL APARATO Y DEL CONDUCTO DE HUMOS................................................................ 43
6 - CONDICIONES GENERALES DE LA GARANTIA.......................................................... 46

56
C07753 /
C07753 / C07753 /
C07753 / C07784
C07784C07784
C07784
C07783
C07783C07783
C07783
C07753 /
C07753 / C07753 /
C07753 / C07784
C07784C07784
C07784
Fig. 2
Fig. 1
Fig. 3
C07753 /
C07753 / C07753 /
C07753 / C07784
C07784C07784
C07784
Allure minimale
Minimum pace
Minimale Geschwindigkeit
Andatura minima
Marcha mínima
Andamento mínimo
Allure moyenne
Average pace
Mittlere Geschwindigkeit
Andatura media
Marcha media
Andamento médio
Allure maximale
Maximum pace
Maximale Geschwindigkeit
Andatura massima
Marcha máxima
Andamento máximo
C07783
C07783C07783
C07783
C07783
C07783C07783
C07783
/
