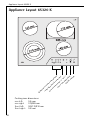
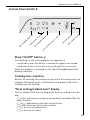
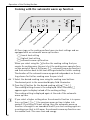
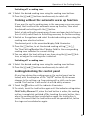
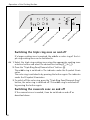
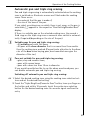
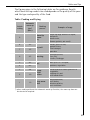
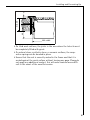
AEG 6532K-MN is a built-in cooking surface with advanced features for precise and versatile cooking. It offers touch control sensor buttons for intuitive operation and a main "On/Off" button for quick access. Each cooking zone has its own heat setting and residual heat display, allowing you to monitor and adjust the temperature accurately. The triple ring zone and oval casserole zone provide flexibility for using different pan sizes and shapes.
AEG 6532K-MN is a built-in cooking surface with advanced features for precise and versatile cooking. It offers touch control sensor buttons for intuitive operation and a main "On/Off" button for quick access. Each cooking zone has its own heat setting and residual heat display, allowing you to monitor and adjust the temperature accurately. The triple ring zone and oval casserole zone provide flexibility for using different pan sizes and shapes.


-
 1
1
-
 2
2
-
 3
3
-
 4
4
-
 5
5
-
 6
6
-
 7
7
-
 8
8
-
 9
9
-
 10
10
-
 11
11
-
 12
12
-
 13
13
-
 14
14
-
 15
15
-
 16
16
-
 17
17
-
 18
18
-
 19
19
-
 20
20
-
 21
21
-
 22
22
-
 23
23
-
 24
24
-
 25
25
-
 26
26
-
 27
27
-
 28
28
-
 29
29
-
 30
30
-
 31
31
-
 32
32
-
 33
33
-
 34
34
-
 35
35
-
 36
36


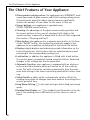
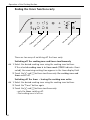
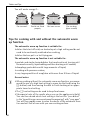
AEG 6532K-MN is a built-in cooking surface with advanced features for precise and versatile cooking. It offers touch control sensor buttons for intuitive operation and a main "On/Off" button for quick access. Each cooking zone has its own heat setting and residual heat display, allowing you to monitor and adjust the temperature accurately. The triple ring zone and oval casserole zone provide flexibility for using different pan sizes and shapes.
Ask a question and I''ll find the answer in the document
Finding information in a document is now easier with AI
Related papers
-
AEG C65301K Installation And Operating Instructions Manual
-
-
-
-
-
-
-
-
-
Other documents
-
Electrolux 65300KF-an User manual
-
-
-
-
-
-
AEG Electrolux 79301 KF-N Installation And Operating Instructions Manual
-
-
-