Midea MY-CH502A User manual

Category
Multi cookers
Type
User manual
09
11
12
11
03
04
05
05
06
08
08
Electric Pressure Cooker
(Pictures are for reference only, actual
product may differ from pictures shown.)
Thank you for purchasing Midea pressure cooker. Please read and understand the instruction manual
before using and keep it safely for your future reference.
Model:
MY-CH502A
Table of Contents
Important Safeguards
Specifications
Product Diagram
Notice Prior to Use
Cooking Preparation
Function Selection
Safe Cover Opening
Cooking Examples
Care and Maintenance
Safety Cautions
Cautions
Cleaning
Service Warranty
Troubleshooting
01
1. Before using this product, please read this User Manual carefully.
2. Do not place the unit on an unstable location. It is strictly prohibited to use it on a newspaper, foam
or other object that may easily block the vent hole at the bottom.
3. Never use it in a place which is near water or fire. Do not use it in a place exposed to direct
sunshine or oil splash. put it in a place out of the reach by children.
4. Never place the product, power cord or plug in water or other liquid.
5. If a spare part such as wire and plug is damaged or the product fails, stop the operation instantly
and send it to the service center for inspection and repair. Repair by the user is not allowed.
6. Never make unauthorized replacement of any spare part inside the pressure cooker, as this may
cause electric shock, fire or injury.
7. Before use each time, be sure to check the anti-block shield, float valve and exhaust valve for
obstruction, wipe the surface of the inner pot and the heating plate to confirm they are free of any
foreign object; Check the exhaust valve for sealing location.
8. When in use, never hang the power cord on a location which may easily trip over.
9. Avoid cooking food such as laver and oat meal in the pot, as they may easily clog the anti-block
shield.
10. When cooking dry food , please soak for a period of time.
11. The maximum cooking amount shall not exceed the MAX level marked inside the inner pot.
12. When in operation, never move this product and prohibit compulsory opening.
13. When in operation, never move your hands or face to the exhaust valve or float valve to avoid
being scalded.
14. When in operation, never touch the cover with your hands to avoid being scalded.
15. After cooking, do not open the cover until you confirm that there is no pressure inside or pressure
has decreased sufficiently.
16. When opening the cover after cooking, do not touch the inner pot and cover inside with your
hands directly to avoid being scalded.
17. Before cleaning this product, please unplug it or disconnect the power supply.
18. It is strictly prohibited to use this product for purposes other than those specified.
19. CAUTION: In order to avoid a hazard due to inadvertent resetting of the thermal cutout, this
appliance must not be supplied through an external switching device, such as a timer, or
connected to a circuit that is regularly switched on and off by the utility.
20. Keep the cooker out of reach of children. Do not allow them to use the appliance without
supervision.
21. This appliance is not intended for use by persons (including children) with reduced physical,
sensory or mental capabilities, or lack of experience and knowledge, unless they have been
given supervision or instruction. concerning use of the appliance by a person responsible for their
safety.
22. This appliance is intended to be used in household and similar applications such as: -staff kitchen
areas in shops, offices and other working environments; -farm houses; -by clients in hotels,
motels and other residential type environments; -bed and breakfast type environments.
23. If the supply cord is damaged, it must be replaced by a special cord or assembly available from
the or its service agent.manufacturer
24. The ducts in the pressure regulator allowing the escape of steam should be checked regularly to
ensure that they are not blocked.
25. This appliance is for household use only. Do not use outdoors.
Power CordMeasuring Cup ManualUse a Spoon
Caliber of
inner pot
Working
pressure
Warm
Temperature
VolumePowerPower SupplyModel
Accessories
Specifications
Important Safeguards
60°C~80°C220-240V~ 50/60Hz 900W 5.0L 22cm 30-60kPa
MY-CH502A
02
To exhaust (to release pressure after cooking) the
exhaust valve should be aligned with the steam
symbol shown on the lid. During cooking the steam
valve should be closed by pushing the exhaust valve
down and turning it slightly anti-clockwise until it
locks in place as shown in the diagram.
Under certain cooking conditions, the
float valve on the safety eye will be up
when the cooker starts to work with
pressure. When the safety valve is up
the lid cannot be open unless the
pressure in the cooker is
released/exhausted.
Diagram of water
case removal
Structural diagram of float valve
Special lid
location design
Note: Please fix the water case at the right position according to the “Illustration of water case
fixing and removing” before the pressure cookers operate. To prevent odors, after every use,
please remove the water case for cleaning.
Float Value Up-cover
cannot be opened
Float Value Down- cover
can be opened
Product Diagram
Safety eye
Exhaust valve
Upper cover handle
Handle cover
Handle
Rice paddle shelf
Control panel
Base
Handle cover
Float valve gasket ring
Anti-block shield
Inner pot
Exterior pot
Housing
Disassemble
Assemble
Before first use, please take out all accessories from the cooker body and read the
User Manual carefully, special care must be taken to use directions and cautions to
avoid any damage to property or human injury.
03
Notice Prior to Use
Anti-block
shield
Screw upward
counterclockwise
Screw downward
clockwise
1. Prior to each use,
inspect whether the
gasket and anti-block
shield are mounted to the
upper cover.
2. After use, remove any
foreign object from the
gasket and anti-block
shield. keep clean to
avoid odor.
3. Never pull the gasket, as
pull deformation may
affect sealing and
pressure effect.
4. A damaged gasket
should not be used, and
should be sent to the
service center for
replacement.
Operation Section
“HEA
“POWER” indicator
Timing knob
Menu Function Panel
Disassembly and installation of anti-block shield and gasket
Disassembly and Installation of Anti-block Shield
Disassembly Assembly
Disassembly and Installation of Gasket
Disassembly Assembly
Pull up Press down
Gasket
TING” indicator
04
04
Check whether gasket, float valve and anti-block
shield are clean. If they are stained, clean them
immediately.
1
2
3
4
5
6
Take out the inner pot, and put food and water in
the inner pot. Total amount of food and water shall
not exceed the MAX level of inner pot height.
Check whether the anti-block shield becomes loose. If yes,
tighten it instantly.
After inspection, mount the gasket component to the upper
cover correctly.
Before first use, please take out all accessories from the cooker
body and read the User Manual carefully. Special care must be
given to use directions and cautions to avoid any damage to
property and/ or injury.
Hold the cover handle firmly with a hand, rotate the cover to the
opening position in the clockwise direction and lift the cover.
After putting on the upper cover, rotate it anti-clockwise to the
locking position; Make sure that it is rotated in place, otherwise,
the cooker will not cook.
When cooking, the total amount of rice and water shall not
exceed the maximum level of inner pot.
Never boil laminated food (e. g. laver, kelp, etc.) and shattered
food (e. g. corn residue and oatmeal), as they may easily clog the
anti-block shield.
Before that, be sure to remove any foreign object and water on
the outer surface of the inner pot and also on the inner surface of
the cooker;
After putting in, rotate the inner pot lightly left to right to ensure
good contact between the inner pot and heating plate.
Cooking Preparation
After switch-on, a warning tone will sound, indicating that the unit
enters standby state.
This tone can be heard after switch-on and when completing
opening and closing.
Open the cover correctly
Put the inner pot in the pressure cooker
Close the cover completely
Switch on
Do not open the cover until pressure inside the spot is released adequately.
Never pull out the exhaust valve when it is exhausting.
For fluid foods (porridge and sticky liquid), do not slide the exhaust valve to press the exhaust
button to exhaust when cooking is just finished , otherwise food will eject from the exhaust valve
core. Be sure to disconnect the power supply, have the unit cool naturally or put a wet towel
around the cover to speed up cooling until the float falls, and finally open the cover.
When large quantity of food is cooked, do not exhaust immediately after cooking. It is
recommended to open the cover and have the food after some time of warm-keeping.
05
The knob is marked with ranges of pressure-holding times
corresponding to different foods. You can regulate the pressure-holding
times according to food, personal taste and cooking pressure-holding
Cooking work time equals heating rise time plus pressure-holding time.
The more the food, the longer the heating rise time.
Cooking time varies with different function level. The bigger the food
amount, the longer the cooking time. The cooking times listed in the
table below are for reference only (e.g. food amount + water = 8
scales):
Cooking time = heating time + holding time
Safety Eye: Pressure-visual valve, it can lift or drop according to the size of
pressure. Give timely cleaning to avoid any blockage.
2. Switch on
3. Set pressure-holding time according to food
After switch-on, the “Power” function indicator illuminates,
indicating the electric safety pressure cooker is in working state.
4. After cooking, it will enter the “Keep Warm”state automatically
Function key White Rice
Warm Tips:
Function Selection
General Functions
During operation, the cooker may sometimes
generate the “cluck” sound, this is not a
malfunction indication.
When cooking small amount of food, the
inner pot may be sucked up when the cover
is opened. In this case, shake the inner pot
manually, and remove the inner pot cover
after the inner pot falls into the cooker body.
About 30 About 35 About 40 About 45
Cooking time (min) About 15 About 20 About 25
Soup Bean/
Tendons
Roasts
Legumes Stir FryMeat/Stew
Fish Vegetables
When the knob reverses back to the “Pressure Time” position, cooking is finished, and the
“Keep Warm” lamp illuminates, entering into keep warm state.
lf no continuous warming is required after entering keep warm state, unplug the unit.
Safe Cover Opening
1.D isconnects the power or take off the power plug.
2.E xhaust method
A. Quick opening method
Slide the exhaust valve to the exhaust position until the float valves falls. (for non-fluid food)
Put a wet towel on the cover to quicken cooling until the float valve falls. (for non-fluid food)
B. General opening method
Have the pressure cooker to cool naturally, until the float valve falls.
3.O pen the cover
Hold the cover handle firmly, turn the cover clockwise to the spacing edge, and pull up the cover.
1. Finish cooking preparation according to Page 4
06
Uncooked
Rice
Measures
Water
Measures
Cooked Rice
Measures
1 cup
1.5 cups
2 cups
2 cups
3 cups (up to
the “2” marking
inside the bowl)
4 cups
4 cups
5 cups (up to
the “4” marking
inside the bowl)
8 cups
6 cups
8.5 cups (up to
the “6” marking
inside the bowl)
12 cups
8 cups
11 cups (up to
the “8” marking
inside the bowl)
16 cups
10 cups
13.5 cups (up
to the “10”
marking inside
the bowl)
20 cups
Use the same cup measure for both rice
and water:
NOTE: The cooking table uses the cup
provided for all measurements. For an
accurate result, pour the rice first and fill
with water until you reach the
corresponding marking inside the
cooking bowl.
TIP: To avoid any matting at the base of
the rice, cut a circle in non-stick baking
paper the same size as the rice cooker
bowl and place at the bottom.
TIP: After cooking is over, wait for at
least 10 minutes before opening the
pressure cooker. It will give some time to
the rice to absorb any excess moisture.
White Rice Setting
MIN – 1 cup | MAX – 10 cups
Cooking Examples
07
The Saute setting is ideal for browning meat
and caramelising vegetables.This seals in the
moisture, tenderises and intensifies the flavour.
The STIR FRY setting is also handy if the liquid
amount is excessive after pressure cooking.
Just remove the lid and operate the Saute
setting for approximately 10–15 minutes or until
the liquid reduces by the desired amount.
TIP: A small amount of flour mixed with
cold water added in the cooking bowl
can assist in thickening a sauce on the
STIR FRY setting.
1. Make sure that the power outlet is
switched off and that the power cord is
unplugged from the power outlet before
starting.
2. Remove the lid from the pressure express
and leave off while using the “Saute”
setting. Ensure the removable cooking
bowl is correctly inserted into the stainless
steel housing.
NOTE: “STIR FRY” will only operate with
the lid removed. When the lid is locked
into position, Saute on the control dial
becomes the 30 minute timer mark for
pressure cooking.
3. Plug the power cord into the power
outlet and switch on. The green
“POWER” light will illuminate.
4. Move the selection control dial to the
“STIR FRY” setting.
HINT: Trim excess fat from meat or
poultry before sauteing. Also, if a recipe
calls for browning meat, it may be
browned using the STIR FRY setting.
7. Once all the ingredients have cooked to
the required level of doneness, turn the
dial back to the “OFF” Position. The
orange “HEATING” light will extinguish
and the green “POWER” light will
illuminate.
NOTE: Use the heat resistant serving
spoon or ladle to stir and serve the food.
6. Place the food to be cooked (as per
recipe being used) into the removable
cooking bowl.
Depending on the quantity of food, you
may have to saute in batches.
NOTE: Do not place the lid on the
Pressure Express when using the
Saute function.
5. Allow the pressure express a couple of
minutes to preheat. Add oil (if applicable)
into the removable cooking bowl.
STIR FRY Setting
Cooking Examples
08
Care and Maintenance
Power cord and plug suffer from expansion, deformation,
discoloration, damages, etc.
A portion of the power cord and the plug are hotter than usual.
Electric pressure cooker heats abnormally, emitting a burnt smell.
When power-on, there is an unusual sound or shock.
Regular care or maintenance is essential in ensuring that this product is safe for
use.
When the following circumstances take place
There is dust or dirt on the plug or socket. Remove dust or dirt with a dry
brush.
Stop use immediately, and send
it to a service center authorized
by Midea Star.
Solutions
Safety Cautions
For safety, please observe the following caution signs displayed:
Meanings of icons displayed:
Indicates “Prohibition”
Indicates “Compulsory”
Content
General Prohibition
Contact Forbidden
Must Be Carried Out
Disassembly
Forbidden
Drenching Forbidden
Unplug
Wet Hand forbidden
Ignoring these signs can/may cause injuries.
violation of warnings may cause personal death and
serious injuries
violation of cautions may cause injuries to persons and
properties.
Warning
Caution
Do not insert foreign objects
such as metal scraps and
needles into a gap.
May cause electric shock or
unusual action.
It is strictly prohibited to use
non-brand cover during
heating.
May cause electric shock or
other serious injury.
It is prohibited to modify or
repair the unit by a non-
technician, as this may cause
fire or electric shock.
Please send it to a designated
service centre for repair or
replacement of spare parts.
When the electric pressure cooker does not work,
there is no pressure inside the pot and the float
valve falls down;
When the unit works, pressure inside is on the
rise, and so is the float valve. Do not open the
cover forcibly until pressure is completely
discharged;
Otherwise or other injury may be caused. scalding
Please use an individual
socket with earthed wire of
more than 13A rated current;
Joint use of the same socket
with other appliance may
cause unusual heat and fire.
The damaged power cord
must be replaced with a
special flexible cord or a
special component bought
from the manufacturer or
service centre.
Place it away from children.
This may cause burn or
electric shock.
Carry out regular inspection
of the exhaust valve and
anti-block shield to make
sure that they are
unobstructed;
Do not add any heavy object
to the exhaust valve or
replace it with other object.
09
Fire or electric shock may
occur if 220-240V AC-50/60Hz
is not used.
AC 220-240V
Cautions
CAUTIONS
Please use a 220-240V~50/60Hz socket
Using other cover during heating is strictly prohibited
Do not insert foreign object
No modifications
Warning on cover lifting Regular inspection
Do not wash or immerse it in water
This may cause electric
shock and short circuit.
Keep away from children
Stop the use of a damaged power cord
A socket shall be used independently.
When pulling out the plug,
be sure to pinch the plug
handle;
Never pull the power cord as
this may cause damage to
the power cord and result in
electric shock or short circuit.
In cooking, never move your
hand or face to the exhaust
valve vent to avoid being
scalded.
During cooking, do not
cover the exhaust valve vent
with a rag.
Food to be cooked should
not exceed the MAX level,
otherwise the food may be
half-cooked or failure may
happen.
When the unit is operating,
the cover has a higher
temperature, so never
touch it with your hand;
This may cause scalding.
When there is foreign object
between the inner pot
bottom and heating plate,
first remove the foreign
object before using.
May cause overheat or
abnormal operation.
To avoid deformation or
failure of inner pot.
Please use the supplied
special inner pot.
10
To move the unit, never lift the
cover handle directly to
prevent the cover from falling
down.
Cautions
CAUTIONS
Do not insert and pull off
the plug with wet hand
When removing the plug, be
sure to pinch the plug handle
May cause electric shock.
May cause creepage, fire or
malfunction.
When not in use, remove plug from socket.
During operation, never move your
hand to the exhaust valve vent
Never touch the cover during operation Cooking amount shall not
exceed MAX level
Use only the special inner pot Do not place the inner pot on
other appliance for heating
When moving the product,
please hold the cooker handle
Never use the product in
following places
Unstable place;
Places near water or fire;
Adjacent to walls and furniture;
Places exposed to direct sunshine or oil splash.
11
1. After each use, give timely cleaning of the product.
2. Before cleaning, unplug the unit and carry out cleaning and
maintenance after the product cools down completely.
3. Take out the cover and inner pot, wash them with a detergent, rinse
with fresh water and then wipe them dry with a soft cloth.
4. Using clear water, clean the cover, including the gasket, exhaust valve,
anti-block shield, exhaust valve core and float valve, and wipe it clean
with a rag. After cleaning, install it on the cover correctly .
5. Clean the cooker body with a rag. Do not immerse the cooker in water
or wash with splashing water.
1. There is one year warranty with this North Star electric pressure cooker. (for household
products only)
2. The starting date of the service warranty is based on the date of the invoice.
3. In any one of the following cases, the warranty will be invalidated:
Damage by unsuitable operation, storage and maintenance by the consumer;
Damage due to use of non-specified accessories by any person other than a service
center authorized by this company.
Failure to produce an effective invoice.
Damage by force;
4. For product maintenance beyond the warranty scope, please check with the designated
Customer Service Center.
This marking indicates that this product should not be
disposed with other household wastes throughout the EU. To
prevent possible harm to the environment or human health
from uncontrolled waste disposal, recycle it responsibly to
promote the sustainable reuse of material resources. To return
your used device, please use the return and collection
systems or contact the retailer where the product was
purchased. They can take this product for environmental safe
recycling.
Cleaning
Service Warranty
12
Float valve fails to fall after steam
release
Bad contact with socket
Lamp not bright after power
on
Exhaustion from exhaust
valve does not stop
Exhaust valve not in sealing
position
Excessively little food and water
inside pot
Leftover food attached to float
valve gasket ring
Little leakage from cover or
exhaust valve
Too little water added
SolutionS/N Possible ReasonProblem
Push rod jammed by float valve
Difficult to open the cover
Difficult to close the cover
Pressure exists inside the cooker
Gasket not positioned well
Troubleshooting
The following unusual cases are not completely caused by mechanical
failures. Please carry out a careful examination before sending the unit for
repair.
Leakage from cover
Float valve unable to rise
Rice half cooked/too hard
Rice too soft
Leakage from float valve
No gasket
Leftover food attached to gasket
Gasket is worn out
Float valve gasket ring worn
Pressure control fails
Cover closed prematurely
Too much water added
Cover not closed firmly
Press the float valve lightly with
chopsticks
Please inspect the socket
Slide the exhaust valve to the
sealing position
Put food and water according to the
rule
Clean the float valve gasket
Send it to the service centre for
inspection
Add more water
Open the cover after the pressure
lowers down
Locate the gasket well
Place the gasket according to the
requirement
Clean the gasket ring
Replace the gasket ring
Replace the float valve gasket
Send it to the service for centre
maintenance
After the time is up, release steam
and open the cover in 5 minutes
Reduce water level
Close the cover again
Push the push rod lightly with a
hand
Addition: Any technical improvements shall be placed in the
revised manual without notice; For any changes in
appearance and color, those of the actual product shall
Prevail.
Special Declaration
09
11
12
11
03
04
05
05
06
08
08
Periuk Tekanan Elektrik
(Gambar hanyalah untuk rujukan semata-mata,
produk sebenar mungkin lain daripada yang ditunjukkan.)
Terima kasih kerana membeli periuk tekanan Midea. Sila baca dan fahami manual arahan sebelum
menggunakan dan simpan di tempat selamat untuk rujukan masa depan.
Model:
MY-CH502A
Kandungan
Keselamatan Penting
Spesifikasi
Diagram Produk
Notis Sebelum Penggunaan
Persediaan untuk Memasak
Pilihan Fungsi
Pembukaan Penutup Selamat
Contoh Pemasakan
Penjagaan dan Penyelenggaraan
Langkah Keselamatan
Awas
Membersih
Jaminan Perkhidmatan
Penyelesaian Masalah
01
1. Sebelum menggunakan produk ini, sila baca Manual Pengguna dengan teliti.
2. Jangan letak unit atas lokasi yang tidak stabil. Adalah dilarang untuk menggunakan produk atas
suratkhabar, busa atau objek lain yang boleh menghalang lubang pengudaraan di bahagian bawah.
3. Jangan guna di tempat berdekatan dengan air atau api. Jangan guna di tempat yang terdedah pada
matahari atau percikan minyak. Letak di tempat luar capaian kanak-kanak.
4. Jangan letak produk, kabel kuasa atau plag ke dalam air atau cecair yang lain.
5. Jika bahagian tambahan seperti wayar dan plag rosak atau produk gagal, berhenti operasi dengan
segera dan hantar ke pusat servis untuk pemeriksaan dan pembaikan. Pembaikan oleh pengguna tidak
dibenarkan.
6. Jangan buat penggantian yang tidak dibenarkan untuk sebarang bahagian dalam periuk tekanan,
kerana ia boleh menyebabkan kejutan elektrik, api atau kecederaan.
7. Setiap kali sebelum guna, pastikan untuk menyemak pelindung anti-tahan, injap apung dan ekzos untuk
sebarang halangan, saput permukaan periuk dalaman dan plat pemanas untuk pastikan ia bebas
daripada sebarang objek asing; Semak injap ekzos untuk lokasi pelekap.
8. Ketika penggunaan, jangan gantung kabel kuasa pada lokasi yang mudah tersadung.
9. Elak memasak makanan seperti mil oat dan rumpai air merah di dalam periuk, kerana ia boleh
membuat pelindung anti-penghadang tersumbat.
10. Apabila memasak makanan kering, sila rendam terlebih dahulu.
11. Jumlah pemasakan maksimum tidak melebihi penanda MAKS yang terdapat dalam periuk dalaman.
12. Apabila beroperasi, jangan gerakkan produk ini dan dilarang untuk membuka.
13. Apabila beroperasi, jangan gerakkan tangan atau muka anda kepada injap ekzos atau injap apung
untuk mengelak daripada melecur.
14. Apabila beroperasi, jangan sentuh penutup dengan tangan anda untuk mengelak dari melecur.
15. Selepas memasak, jangan membuka penutup sehingga anda memastikan tiada tekanan dalam atau
tekanan telah menurun secukupnya.
16. Apabila membuka penutup selepas memasak, jangan sentuh periuk dalaman dan lapik bahagian
dalam dengan tangan anda agar tidak melecur.
17. Sebelum membersih produk ini, cabut plag dan tutup sumber kuasa.
18. Adalah dilarang untuk menggunakan produk ini untuk tujuan selain daripada yang telah dikhususkan.
19. AWAS: Untuk mengelak bahaya disebabkan oleh penetapan semula pemotongan terma, alat perkakas
ini tidak boleh dibekalkan melalui peranti penukar luaran, seperti pemasa, atau bersambung kepada
talian yang biasa dibuka dan tutup oleh perkakas.
20. Simpan pemasak jauh daripada capaian kanak-kanak. Jangan biarkan mereka menggunakan alat
perkakas tanpa penyeliaan.
21. Alat perkakas ini tidak bertujuan untuk digunakan oleh seseorang (termasuk kanak-kanak) yang
kekurangan fizikal, deria atau keupayaan mental, atau kurang pengalaman dan pengetahuan, kecuali
mereka diberikan penyeliaan atau arahan, berkenaan penggunaan oleh seseorang yang
bertanggungjawab terhadap keselamatan mereka.
22. Alat perkakas ini hanya bertujuan untuk penggunaan dalam rumah dan penggunaan sama yang lain
seperti: -kawasan dapur seperti di kedai, pejabat dan persekitaran pekerjaan yang lain; -rumah
ladang; -oleh klien di hotel, motel dan lain-lain persekitaran kediaman; -persekitaran sarapan dan
tempat tidur.
23. Jika kabel kuasa rosak, ia patut diganti dengan kabel khas atau unit sedia ada daripada pengilang
atau agen servis.
24. Saliran dalam pengawal tekanan membenarkan stim untuk keluar patut diperiksa secara berkala untuk
memastikan ia tidak tersumbat.
25. Alat perkakas ini hanya untuk kegunaan dalam rumah sahaja. Jangan guna di luar rumah.
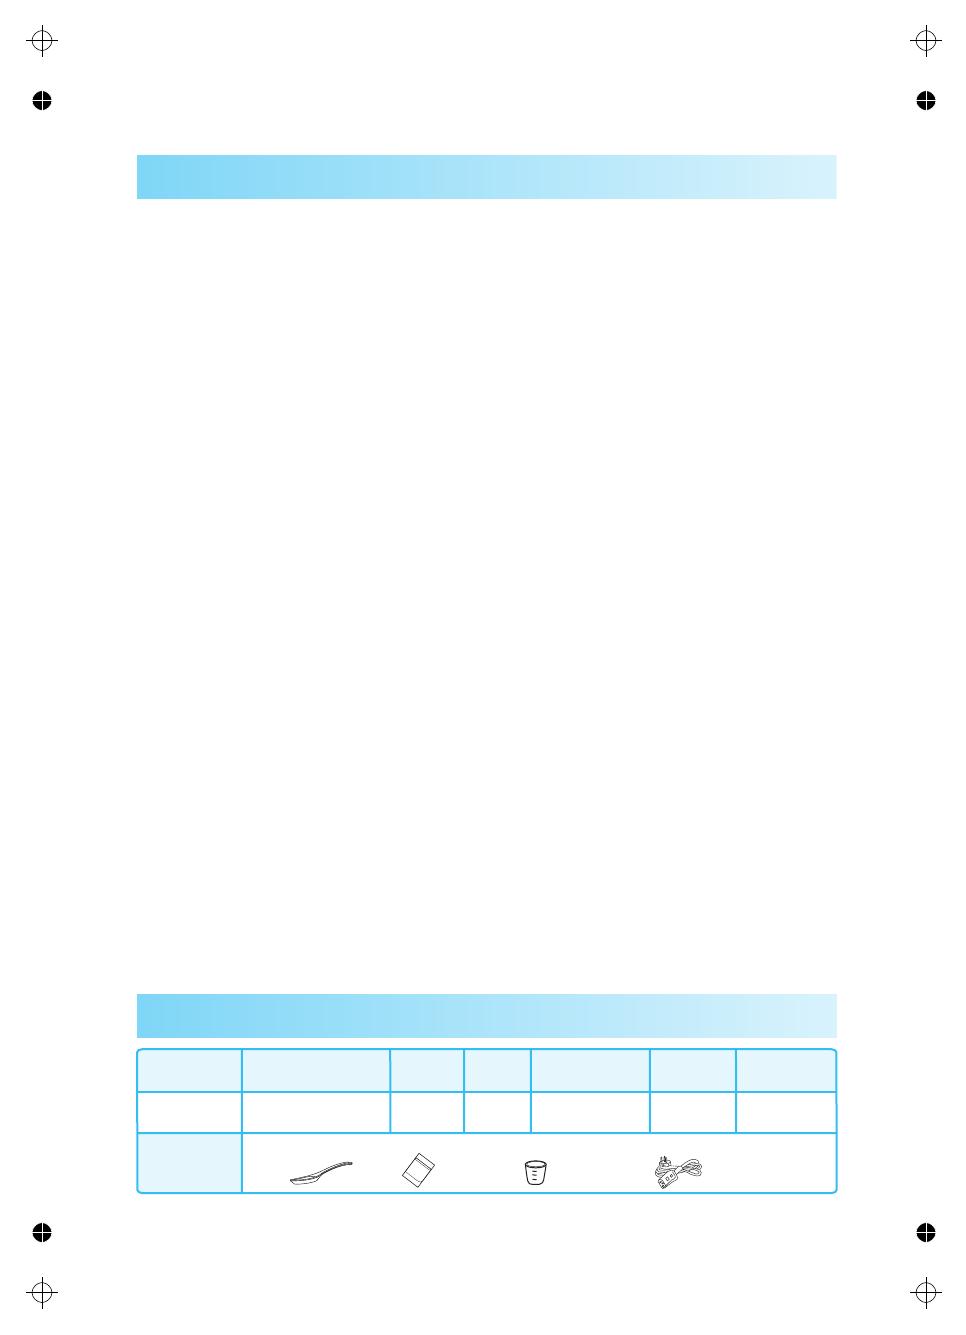
Kabel KuasaCawan Penyukat ManualGunakan Sudu
Kaliber periuk
dalaman
Tekanan
Bekerja
Suhu
Panas
Aras
Kuasa
Bekalan Kuasa
Model
Aksesori
Spesifikasi
Keselamatan Penting
60°C~80°C
220-240V~ 50/60Hz 900W 5.0L 22cm 30-60kPa
MY-CH502A
02
Untuk ekzos (untuk melepaskan tekanan selepas
memasak) injap ekzos perlu sejajar dengan simbol
wap yang ditunjukkan pada penutup. Semasa
memasak injap stim perlu ditutup dengan menolak
injap ekzos ke bawah dan menjadikan ia sedikit
anti-arah jam sehingga ia terkunci di tempat seperti
yang ditunjukkan dalam gambar rajah.
Di bawah keadaan tertentu, injap
pung pada mata keselamatan akan ke
atas apabila pemasak muka bekerja
dengan tekanan. Apabila injap
keselamatan naik penutup tidak boleh
dibuka kecuali jika tekanan dalam
periuk dilepaskan/habis.
Diagram pengeluaran
bekas air
Diagram struktur injap apung
Rekaan lokasi
penutup khas
Nota: Sila baiki bekas air pada posisi yang betul mengikut "ilustrasi membaiki bekas air dan
pengeluaran" sebelum periuk tekanan beroperasi. Untuk mengelak bau, selepas setiap penggunaan,
sila keluarkan bekas air untuk dibersihkan.
Jumlah Apung Naik-
penutup tidak boleh dibuka
Jumlah Apung Menurun-
penutup boleh dibuka
Diagram Produk
Mata keselamatan
Injap ekzos
Pemegang penutup atas
Pemegang penutup
Pemegang
Rak pedal nasi
Panel kawalan
Asas
Pemegang
penutup
Gegelung gasket injap
apung
Pelindung
anti-penghadang
Periuk Dalaman
Periuk Luaran
Rumah
Pembukaan
Pemasangan
Sebelum penggunaan pertama, sila mengambil semua aksesori daripada badan periuk
dan membaca Manual Pengguna berhati-hati, penjagaan khas perlu diambil untuk
menggunakan arahan dan amaran untuk mengelakkan sebarang kerosakan kepada
harta benda atau kecederaan manusia.
03
Notis Sebelum Penggunaan
Pelindung
anti-penghadang
Skru ke atas
bertentangan arah jam
Skru ke bawah
mengikut arah jam
1. Sebelum setiap
penggunaan, periksa sama
ada gasket dan pelindung
anti-penghadang dipasang
pada penutup atas.
2. Selepas guna, keluarkan
sebarang objek asing
daripada gasket dan
pelindung anti-penghadang.
Kekal bersih untuk
mengelak bau.
3. Jangan tarik gasket, kerana
tarikan deformasi mungkin
memberi kesan kepada
penampal dan kesan
tekanan.
4. Gasket yang rosak tidak
patut diguna, dan patut
dihantar kepada pusat
servis untuk gantian.
Bahagian Operasi
Penanda “HEATING”
Penanda “POWER”
Tombol Pemasa
Menu Panel Fungsi
Pembukaan dan pemasangan pelindung anti-penghadang dan gasket
Pembukaan dan Pemasangan Pelindung Anti-Penghadang
Pembukaan Pemasangan
Pembukaan dan Pemasangan Gasket
Pembukaan Pemasangan
Tarik ke atas Tekan ke bawah
Gasket
04
04
Memeriksa sama ada gasket, injap apung dan pelindung
anti-penghadang bersih. Jika ia tercemar, bersihkan
dengan segera.
1
2
3
4
5
6
Mengambil periuk dalam, dan meletakkan makanan dan air
di dalam periuk dalam. Jumlah makanan dan air tidak
boleh melebihi paras MAKS ketinggian periuk dalam.
Periksa sama ada perisai anti-blok menjadi longgar. Jika ya, ketatkan
dengan segera.
Selepas pemeriksaan, gunung komponen gasket untuk penutup atas
dengan betul.
Sebelum penggunaan pertama, sila mengambil semua aksesori
daripada badan periuk dan membaca Manual Pengguna dengan teliti.
Perhatian khusus mesti diberikan untuk menggunakan arahan dan
amaran untuk mengelakkan sebarang kerosakan kepada harta dan /
atau kecederaan.
Pegang penutup mengendalikan tegas dengan tangan, berputar penutup
untuk kedudukan pembukaan dalam arah ikut jam dan angkat penutup.
Selepas meletakkan pada penutup atas, berputar melawan arah jam
ke kedudukan mengunci; Memastikan bahawa ia diputar di tempat, jika
tidak, periuk tidak akan memasak.
Apabila memasak, jumlah beras dan air tidak boleh melebihi tahap
maksimum dalam periuk.
Jangan sekali-kali mendidih makanan berlapis (cth Laver, rumpai laut, dan
lain-lain) dan makanan berkecai (cth. Sisa jagung dan oatmeal), kerana
mereka dengan mudah boleh menyumbat pelindung anti-penghadang.
Sebelum itu, pastikan untuk mengeluarkan apa-apa objek asing dan
air pada permukaan luar periuk dalam dan juga pada permukaan
dalam periuk;
Selepas meletakkan ke dalam, putarkan periuk dalam dari kiri ke
kanan dengan perlahan untuk memastikan sentuhan yang baik antara
periuk dalam dan plat pemanas.
Persediaan untuk Memasak
Selepas dipasang, bunyi amaran akan kedengaran, menandakan unit
berada dalam keadaan bersedia.
Bunyi ini boleh didengari selepas dipasang dan apabila dibuka dan
ditutup sepenuhnya.
Buka penutup dengan betul
Letak periuk dalaman dalam periuk tekanan
Tutup penutup secara menyeluruh
Pasang
Jangan buka penutup sehingga tekanan di dalam tempat dilepaskan secukupnya.
Jangan sekali-kali tarik keluar injap ekzos apabila ia berfungsi.
Untuk makanan cecair (bubur dan cecair melekit), tidak slaid injap ekzos untuk menekan butang ekzos untuk ekzos
apabila memasak adalah baru sahaja selesai, jika tidak, makanan akan mengeluarkan dari teras injap ekzos.
Pastikan anda memutuskan sambungan bekalan kuasa, biarkan unit menjadi sejuk secara semula jadi atau
meletakkan tuala basah di keliling penutup untuk mempercepatkan penyejukan sehingga apungan akan turun, dan
akhirnya membuka penutup.
Apabila kuantiti yang banyak makanan dimasak, tidak menghabiskan segera selepas memasak. Ia adalah
disyorkan untuk membuka penutup dan mempunyai makanan selepas beberapa ketika memanaskan
penyimpanan.
05
Tombol ditanda dengan julat masa memegang mengikut jenis makanan.
Anda juga boleh mengawal masa memegang-tekanan mengikut makanan,
citarasa sendiri dan masa memasak memegang tekanan
Masa bekerja memasak adalah sama dengan masa pemanasan
meningkat tambah masa memegang-tekanan. Lebih banyak makanan,
lebih lama masa pemanasan untuk meningkat.
Masa memasak berbeza mengikut tahap fungsi yang berlainan. Lebih
banyak jumlah makanan, lagi lama masa untuk memasak. Masa memasak
yang disenaraikan dalam jadual di bawah adalah untuk rujukan sahaja
(cth. jumlah makanan + air = 8 skala):
Masa memasak = masa pemanasan + masa memegang
Mata keselamatan: Injap visual-tekanan, boleh naik atau turun mengikut saiz
tekanan. Bersihkan dengan teliti untuk mengelak tersumbat.
2. Pasang
3. Tetapkan masa memegang-tekanan mengikut makanan
Selepas suis dipasang, penunjuk fungsi "Power" menyala, menandakan
keselamatan elektrik periuk tekanan berfungsi.
4. Selepas memasak, ia akan masuk keadaan "Keep Warm" secara automatik.
Kekunci Fungsi Nasi putih
Tip Memanas:
Pilihan Fungsi
Fungsi Umum
Ketika operasi, pemasak mungkin akan
menghasilkan bunyi "cluck”, ia bukan
menandakan tidak berfungsi.
Apabila memasak jumlah makanan yang
sedikit, periuk dalaman mungkin akan
disedut ke atas apabila penutup dibuka. Jika
ini berlaku, goncang periuk dalaman secara
manual, dan keluarkan penutup periuk
dalaman selepas periuk turun daripada
badan pemasak.
Lebih kurang 30 Lebih kurang 35 Lebih kurang 40 Lebih kurang 45Masa memasak (min) Lebih kurang 15 Lebih kurang 20 Lebih kurang 25
Sup Kacang/
Tendon Panggang TumisanDaging/StuIkan Sayuran
Apabila tombol pusing kembali ke posisi "Pressure Time", pemasakan telah selesai, dan lampu "Keep Warm" menyala,
dan memasuki keadaan kekal panas.
Jika tiada pemanasan berterusan diperlukan selepas memasuki keadaan kekal panas, cabut unit.
Pembukaan Penutup Selamat
1. Cabut kabel kuasa atau cabut plag.
2. Kaedah ekzos
A. Kaedah membuka cepat
Slaid injap ekzos ke kedudukan ekzos sehingga injap apung terjatuh. (untuk makanan bukan cecair)
Letak tuala lembap pada penutup untuk mempercepatkan penyejukan sehingga injap apung turun.
(untuk makanan bukan cecair)
B. Kaedah membuka secara am
Biar periuk tekanan sejuk dengan sendiri, sehingga injap apung turun.
3. Buka penutup
Pegang pemegang penutup dengan ketat, pusing penutup mengikut arah jam kepada penghujung jarak, dan tarik penutup.
1. Habiskan persediaan masakan mengikut Halaman 4
  • Page 1 1
  • Page 2 2
  • Page 3 3
  • Page 4 4
  • Page 5 5
  • Page 6 6
  • Page 7 7
  • Page 8 8
  • Page 9 9
  • Page 10 10
  • Page 11 11
  • Page 12 12
  • Page 13 13
  • Page 14 14
  • Page 15 15
  • Page 16 16
  • Page 17 17
  • Page 18 18
  • Page 19 19
  • Page 20 20
  • Page 21 21
  • Page 22 22
  • Page 23 23
  • Page 24 24
  • Page 25 25
  • Page 26 26
  • Page 27 27
  • Page 28 28
  • Page 29 29
  • Page 30 30
  • Page 31 31
  • Page 32 32
  • Page 33 33
  • Page 34 34
  • Page 35 35
  • Page 36 36
  • Page 37 37
  • Page 38 38
  • Page 39 39
  • Page 40 40
  • Page 41 41
  • Page 42 42

Midea MY-CH502A User manual

Category
Multi cookers
Type
User manual

Ask a question and I''ll find the answer in the document

Finding information in a document is now easier with AI

in other languages