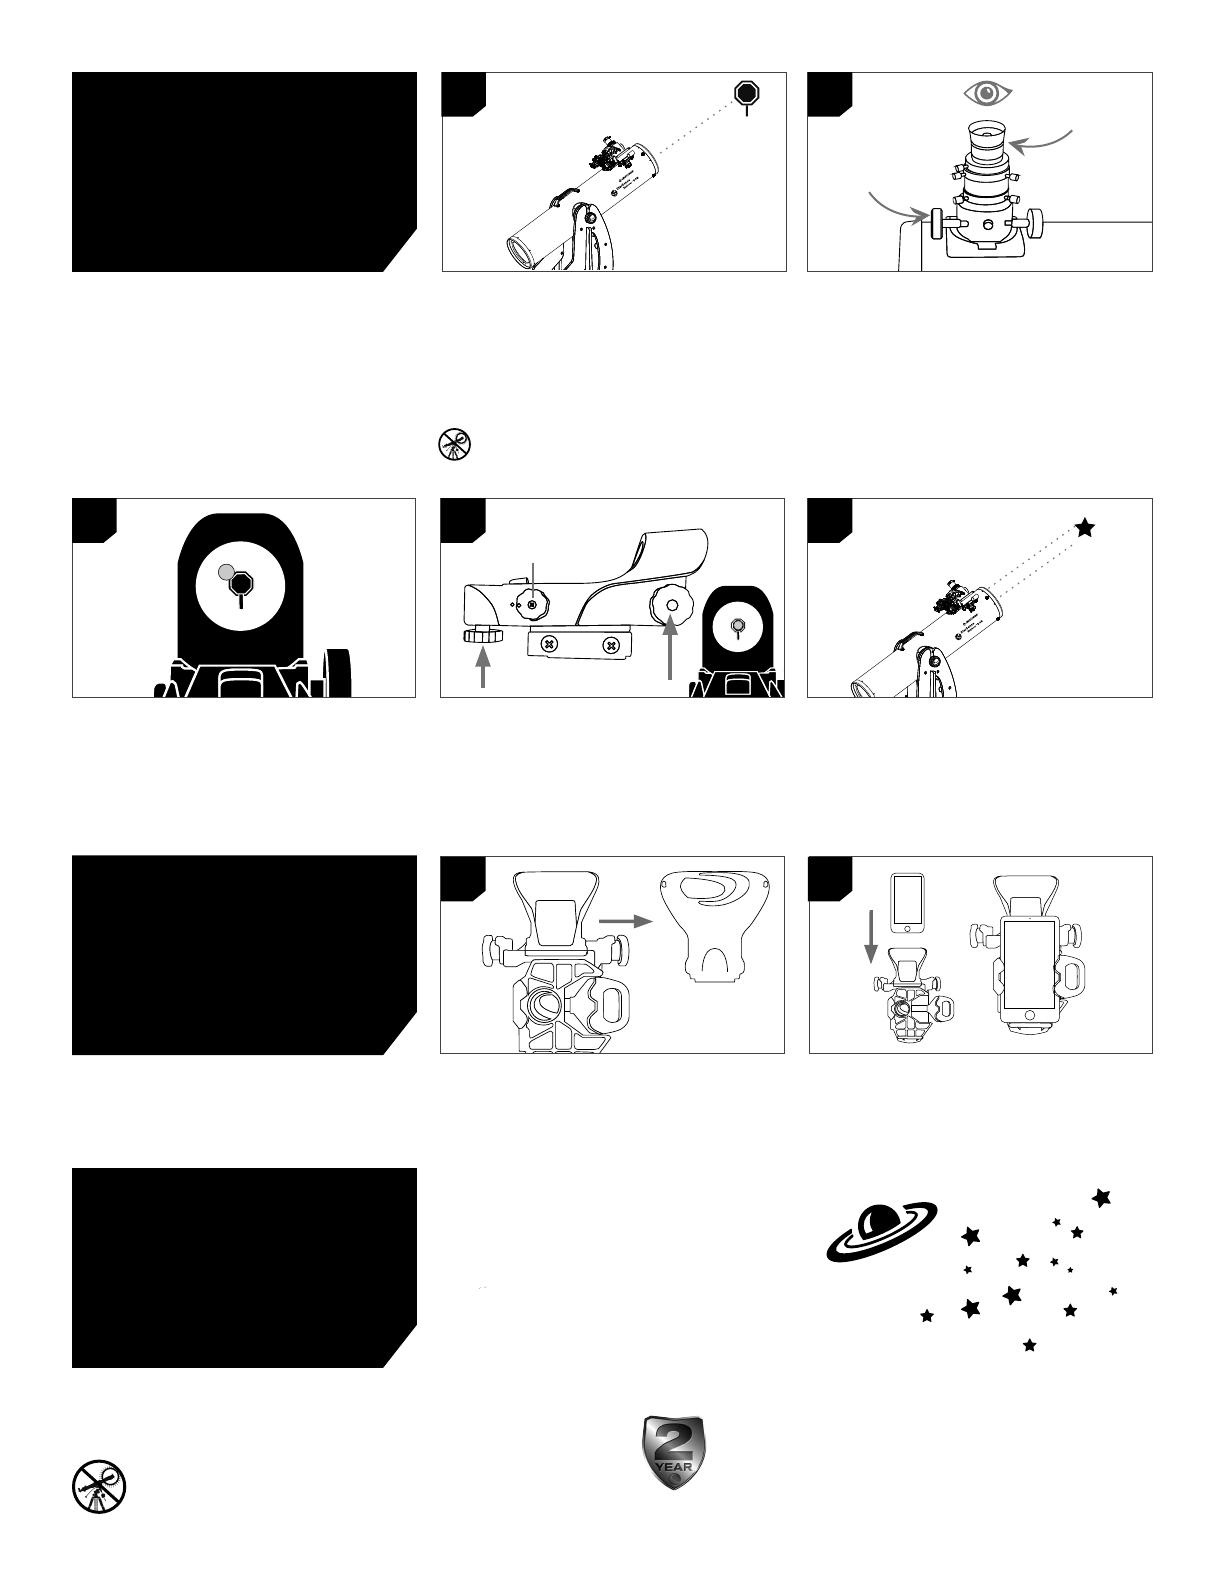
2. CENTER THE TARGET IN THE EYEPIECE
Look through the telescope using the 25mm
eyepiece. Move the telescope until the object you
chose lies in the center of the view. If the image is
blurry, gently turn the focus knobs until it comes
into sharp focus.
NOTE: The image in your telescope may appear
inverted. This is perfectly normal in an
astronomical telescope.
Aligning the
Finderscope
The StarPointer red dot finderscope is one of the
most important parts of your telescope. Although
the StarSense Explorer app will locate and center
objects for you, having the StarPointer properly
aligned will help during alignment of the app to
the telescope. The first time you assemble your
telescope, you need to align the finder to the
telescope’s main optics. It’s best to do this during
the day.*
1. CHOOSE A TARGET
Take the telescope outside during the day and
find an easily recognizable object, such as a
streetlight, car license plate or sign. The object
should be as far away as possible, but at least a
quarter mile away.
*SOLAR WARNING! Never attempt to view
the Sun through any telescope without a
proper solar filter!
4. ADJUST THE FINDERSCOPE
Without moving the telescope, use the two
adjustment knobs to move the red dot until it
appears over the same object you are observing
in the telescope’s 25mm eyepiece.
5. YOUR FINDERSCOPE IS NOW ALIGNED!
It should not require realignment unless it is
bumped or dropped. Now, when you look through
the StarPointer, the red dot will indicate where the
telescope is pointing.
3. LOOK THROUGH FINDERSCOPE
Pull the battery protection tab out of the StarPointer
and turn it on to maximum brightness using the on/
off knob. Look through the StarPointer and locate
the red dot.
Congratulations! Your telescope is now set
up and you are ready to explore the cosmos.
Take the telescope outside, insert your 25mm
eyepiece, remove the lens cap, insert your
smartphone into the holder, and launch the
StarSense Explorer app. The tutorial in the app
will walk you through the steps to find your first
astronomical target.
1. Remove the large cap covering the mirror on
the front of the StarSense dock.
2. Pull open the spring-loaded slider on the top
of the phone dock and set the phone into
the holder so it is flush with the bottom lip of
the phone holder. Slowly release the slider to
secure the phone in place.
25MM EYEPIECE
FOCUS KNOBS
ON/OFF KNOB
1
3 4
1
5
2
2
Aligning the
StarPointer
Attaching the
Smartphone
Your First
Night Out
For more information on this product, please visit the respective
product page on celestron.com
SOLAR WARNING:
Never attempt to view the Sun through any telescope without a proper solar filter. www.celestron.com/pages/warranty
Need assistance?
Contact Celestron Technical Support by visiting
celestron.com/pages/technical-support
12-21


