The black wire should be connected to a negative (or ground) and the red wire
should be connected to a +12VDC or +24VDC supply. Light should be installed
on a protected circuit with an appropriately sized fuse or circuit breaker. Each
light will draw up to 1.00Amp@12VDC/0.50A@24VDC.
White Only Non-Dimming Lights: Turn power on to illuminate the device. This
product has no dimming or color changing features.
White Only Dimming Lights: Turn power on. The light will ramp in intensity
over a period of 4 seconds. To invoke a “dimmed” state of white light, interrupt
the 4 second ramp with a brief “off/on” toggle. No interruption during the 4
second ramp will result in full intensity white light.
White/Blue or White/Red Lights: The light ramps in intensity over a period of
about 3 seconds on startup. With no interruption of this ramp the light will
achieve and maintain full intensity. To enable a “dimmed mode” simply
interrupt the ramp in intensity with a brief off/on toggle of the power. A
subsequent off/on toggle will allow the light to change colors. Dim the color
feature using the same ramp and toggle method while in the color mode.
Spectrum Full Color Lights: The light must be powered up and already in
White Only Mode. (full intensity or dimmed) A subsequent “off/on” toggle
within 2 seconds will begin Spectrum Full Color Mode. NOTE - Spectrum Full
Color Mode will begin with white light and transition to all other colors. At any
time during the color cycle, the user can apply another brief “off/on” toggle
within 2 seconds to “lock” the desired color while in Spectrum Full Color Mode.
If the light is turned off for more than 2 seconds at any point, it will revert back
to White Only Mode.
These lights are compatible with the Lumitec POCO system.
Limited Warranty
The product is warranted to be free from defects in workmanship and materials for a period of
three (3) years from the date of original purchase. Lumitec is not responsible for product failure
caused by abuse, neglect, improper installation, or failure in applications other than those for
which it was designed, intended, and marketed. Lumitec, Inc. assumes no responsibility whatsoev-
er for any damage, loss, or injury that may result from the incorrect installation of this product,
including but not limited to structural damage due to water intrusion, electrical malfunction or
vessel sinking when used in marine applications. Should your Lumitec product prove defective
during the warranty period, promptly notify Lumitec for a return authorization number and return
product with freight prepaid. Lumitec will, at its option, repair or replace the product or defective
portion without charge for parts or labor, or, at Lumitec’s option, refund purchase price. Products
repaired or replaced under this warranty shall be warranted for the unexpired portion of the
warranty applying to the original product(s). No warranty or affirmation of fact, express or implied,
other than as set forth in the limited warranty statement above is made or authorized by Lumitec,
Inc. Any liability for consequential and incidental damages is expressly disclaimed. Lumitec
liability in all events is limited to, and shall not exceed, the purchase price paid.
For more information, visit: www.lumiteclighting.com
Capri3 / Caprera3
Operating Instructions
PN600827_A
1.05
3.75
Ø0.50
3.25
0.55
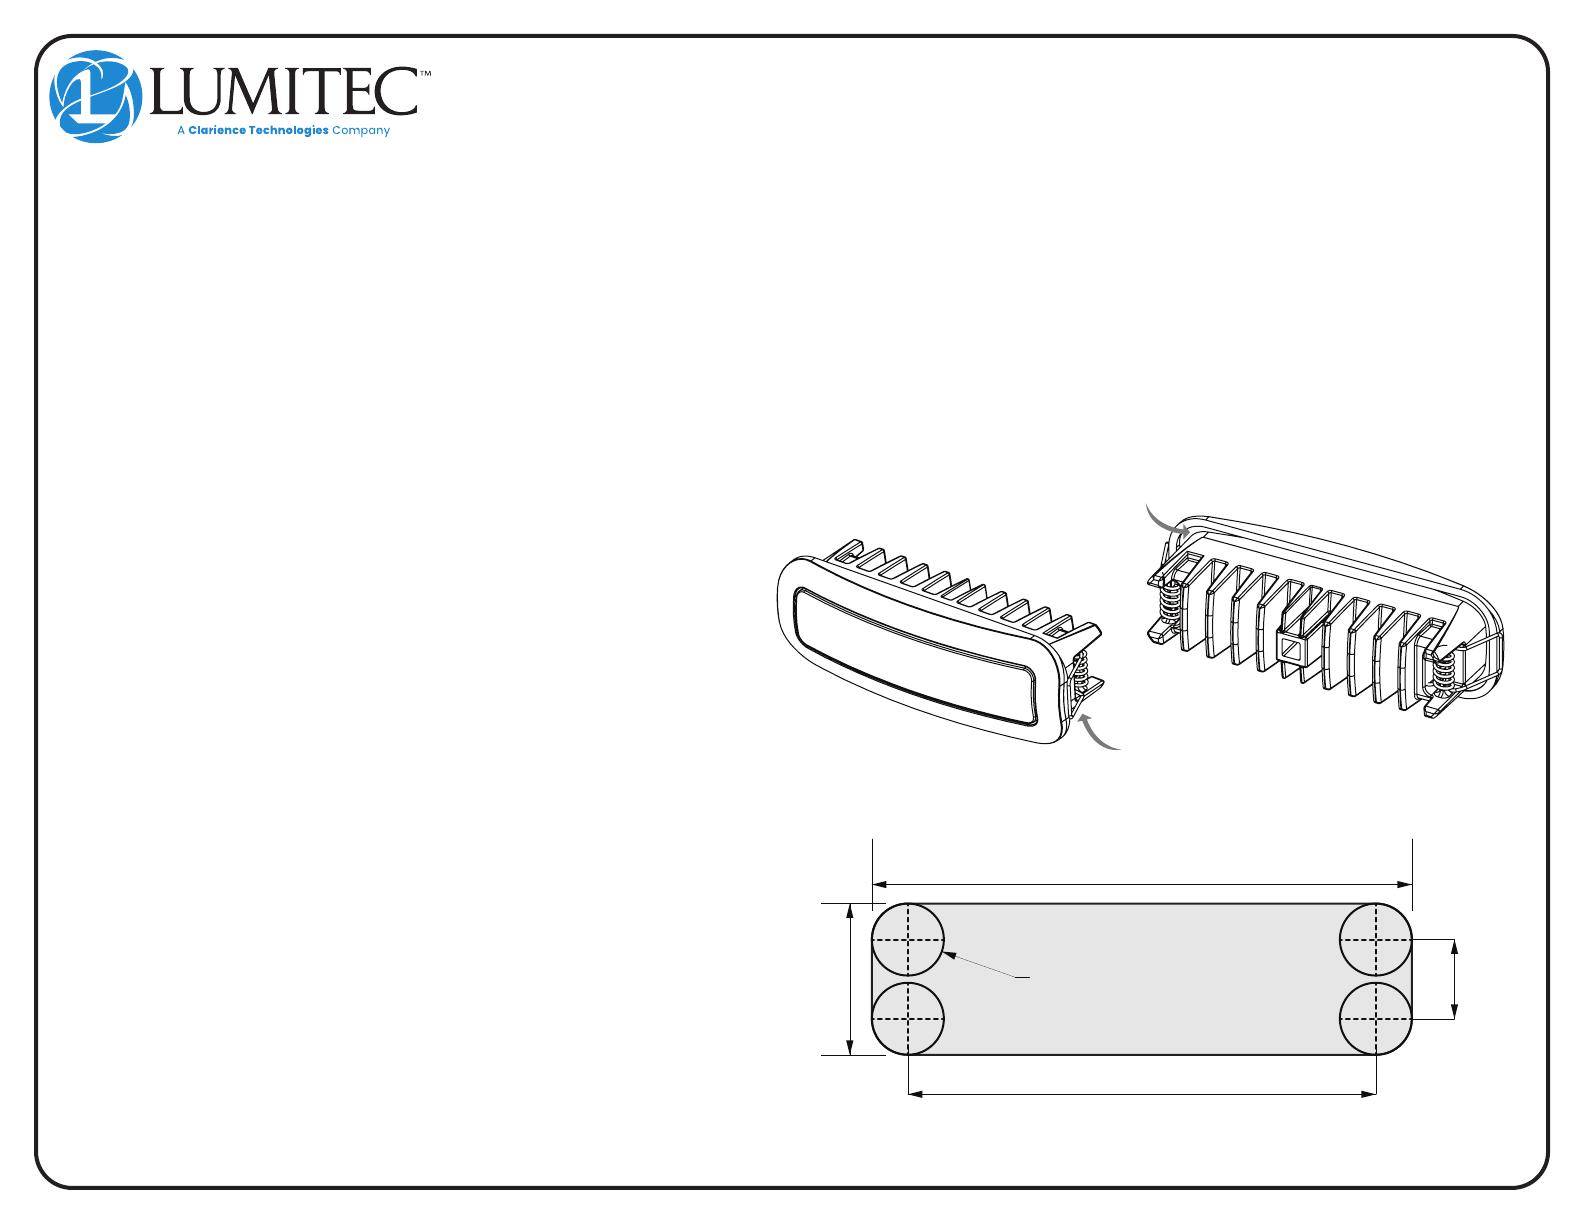
CAPRI3 MOUNTING HOLE TEMPLATE
Instructions:
NOTE: The Capri3 uses spring mechanisms for mounting. No screw fasteners
are required. It is recommended that an RTV sealant be used between the
mounting surface and the light. (as shown below)
o Cut the mounting hole using the template provided below.
o Add sealant to the back of the light in the area indicated below.
o Make sure the power wires are connected and the light is functioning properly.
o Retract the spring and place the light into the mounting hole
o Wipe away any visible sealant and allow to dry.
MOUNTING SPRINGS
ADD SEALANT TO BACK PERIMETER


