JL Audio SB-T-4RNRG5 Installation guide

Type
Installation guide

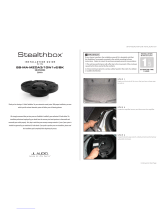
JL Audio SB-T-4RNRG5 is a custom-fit subwoofer enclosure designed to deliver powerful and accurate bass in your 2010 & Up Toyota 4Runner. Engineered to fit seamlessly into the rear cargo area, this enclosure houses a single 10TW3-D4 subwoofer, providing up to 400 watts of continuous power handling. The sealed enclosure design ensures precise and controlled bass response, enhancing your overall audio experience. Installation is made easier with the included hardware and detailed instructions, allowing you to integrate the SB-T-4RNRG5 into your vehicle's audio system effortlessly.

JL Audio SB-T-4RNRG5 is a custom-fit subwoofer enclosure designed to deliver powerful and accurate bass in your 2010 & Up Toyota 4Runner. Engineered to fit seamlessly into the rear cargo area, this enclosure houses a single 10TW3-D4 subwoofer, providing up to 400 watts of continuous power handling. The sealed enclosure design ensures precise and controlled bass response, enhancing your overall audio experience. Installation is made easier with the included hardware and detailed instructions, allowing you to integrate the SB-T-4RNRG5 into your vehicle's audio system effortlessly.

Stealth
box
®
INSTALLATION
GUIDE
for
the
SB-T-4RNRG5/1
OTW3
SKU#
94685
2010
&
Up
Toyota
4Runner
Enclosure
Type:
Sea
led
Driver
Type:
10
TW3-D4
Nominal
Impedance:
2 oh
ms
Continuous
Power
Handling:
400
watts (R
MS
meth
od)
SB-
T-
4RNRG
S/10T
W3
IN
ST
R_S
KU
# 01
15
55
!
IMPORTANT
•
In
sta
ll
at
ion requ
ires
appro
pr
iate too
ls
and
safe
ty
equipment.
Professional
ins
ta
llation
is
recommended.
, If you prefer to perform your own
ins
tallation, pl
ease
rea
d this
insta
ll
ation guide completely before beginning.
• Before
cutt
ing or
dr
illing, check for potential obstacl
es
behind
mount
ing
su
rfa
ces.
• Mount this product
sec
u
rel
y to prevent damage or injury in
seve
re conditio
ns.
INSTALLATION
I
DIFFICULTY:
OUT
S
OF
EST
I
MATED
TI
ME:
2
HOURS
Con
ti
nu
ed
on
ext
Pc1
ge
SB-T-4
RNRG
5/10
T
W3
IN
ST
R
_SKU
#
011555
INCLUDED
HARDWARE
;]
_
a-
~
© -®- _
e,
~-
_
@)-
_@
--
m 3 2 6
-~ -
1-\
0-
0-
-
OJ--
- -
-@
- -
---
@ -
--
6 3 8
--
-.
M6
x 1
mm,
25
mm Hex H
ead
2 13 1/4" S lit Lock Washer
3 13 1/4" Flat Washer
4 l
5 2
6 9
15
1
137
1/4" -20 x J" Hex Head Screw
7 l
154
1
89
1/4" -20 x 3/4" Hex H
ead
Screw
8 2 15
116
4 1/4 -
20
U-
Nut
9 1
54
1
92
Side Bracket
10
154187
Grille Panel (n
ot
shown)
Page
2 •
JL
Audio,
Inc
.,
202
1
Con
tinu
ed
on
ext
Page
S
B-
T
-4
RNRG
5/10
TW3 IN
ST
R
_SKU
# 0
11555
POWER RECOMMENDATION
JL
Audio recommends hi
gh
quality
amp
lifiers such
as
the
JL
Audio
XD300/
1v2.
The diagram
below
shows the recommended crossover settings
for
the
XD300/
1v2.
For a detailed description
of
the
amplifier
settings, consult the
owner
's manual
for
the
amp
lifier. If
anot
h
er
amp
li
fier
is
being
used, please reference this illustration and use similar settings on
that
amp
lifi
er.
I @ @ '
J \
I I I I
Tum-Ol'!Mode
JLAUDIO
.
[L[]
amr
~:.::<-©
X!:J
300
/1
ve
Affll
OffM!
I
SQ
n;iil
LPF
1
lt
1r
Monoblock
Su
bwoofer Ampll
fl
er
ln
putVolt&gt,
Mu:i
•~~ ~O
[L[]
Lt:rNI
H
!!ilh
Off
l 1
2rl
BI
M<fB
,ii
5
00
n,
erF
~q
.(H!.I
© @ I 0 ©
Mono Subw
ooh!
r
Ou
tput
[
(@ (@
~] @
RJ
0
CO@@@J
+l
~V
DC G
rou
nd
Re
mote
@ @ ~ ~
"
~
@
If
CONNECTIONS
Us
ing qua
li
ty
powe
r,
signal, and speaker wire
is
essential in ensuring
the
performance
of
your
Stealth box~.
JL
Audio recommends using a 4
AWG
powe
r kit such
as
the
XD
-
PCS4
-1 B for your
Stealthbox~
amp
li
fier. Other kits are available should you be using more than one
amp
lifier. Signal wire such
as
the
JL
Audio
Premium Audio Interconnect Cables should be used to provide signal
for
both
channels
of
the amplifier. JL
Audio
recommends using
12
AWG
speaker wire for subwoofers such
as
our
XC
-
BCS12
-
25.
Page
3 •
JL
Aud
i
o,
Inc.,
202
1
Con
ti
nu
ed
on
ext
Page
Page
4 •
JL
Aud
i
o,
Inc.,
202
1
STEP 1
Clear the rear
ca
rgo area.
STEP 2
Carefully unc
li
p and remove
the
center cargo
door
si
ll panel.
STEP 3
Open the indicated plastic cover and remove
the
exposed 1 O
mm
bolt.
STEP 4
Tu
rn
the
cargo
net
retaining hook clockwise
to
release and remove
the
hook. Remove the
exposed
Ph
illi
ps
screw.
SB-T-4
RNR
G5/10
T
W3
IN
ST
R
_SKU#
01
1555
STEP
5
Use
a panel removal tool
to
remove the
two
indicated
trim
covers. Remove the
two
exposed
10
mm
bol
ts.
STEP
6
Open the
two
indicated plastic covers and
remove the
two
exposed 1 O
mm
bo
l
ts.
STEP
7
Remove the lower rear seat carpeted
trim panel from the vehicle.
STEP
8
Carefully uncllp and remove the carpeted fl
oor
panel. There are four
(4)
clips
that
secure the
floor
panel
to
the vehicle.
Lift and remove the exposed Styrofoam
subfloor panel.
Remove the single exposed
Phi
llips screw
from
the location indicated on the floor.
Co
tinued
on
ext
0
age
Page
5 •
JL
Aud
i
o,
Inc.,
202
1
STEP 9
Use
a panel removal
tool
to
carefully remove
the passenger rear seat recline lever assembl
y.
The lever assembly
must
be pried towards the
center
of
the vehicle
to
remove.
STEP
10
After removing the passenger rear seat recline
lever assembl
y,
disconnect the metal pull cable
from the back
of
the handl
e.
STEP
11
Remove the
two
exposed
10
mm
bo
l
ts.
STEP
12
Open the plastic cover over the seat belt bolt
and remove the exposed
14
mm
bolt.
S
B-
T-4
RNR
G5/10
T
W3
IN
ST
R
_SKU#
01
1555
STEP 13
Fllp the carpeted flap
at
the
bottom
of
the rear
seat forward and remove the exposed
14
mm
bo
l
t.
STEP
14
With the passenger rear seat back upright,
remove the indicated
14
mm
bolt
STEP
15
From behind the rear passenger
seat,
remove
the indicated
14
mm bolt and move the rear
passenger seat back aside.
STEP
16
Carefully unclip and remove the
rea
r passenger
side
door
sil
l
trim
panel.
Cont
i
nued
on
ext
0
age
Pag
e 6 •
JL
Aud
i
o,
Inc.,
202
1
STEP
17
Lift
the
weatherstripping
from
the
rear edge
of
the
OEM
rear panel.
Carefully unclip
the
OEM
rear panel and
remove
it
from
the
vehicle.
STEP
18
From the rear
of
the
OEM
rear panel,
disconnect
the
power
harnesses
from
the
AC
and
DC
power
sockets.
Remove the
OEM
rear panel
from
the
ve
hicle.
STEP
19
Use
a
too
l
to
cut the
OEM
plastic leg where
indicated
by
the
yel
low
circle in
the
image.
Install one
of
the
su
pp
lied
1/4-
20
U-Nuts
onto
the
exposed
OEM
metal
mounting
tab.
STEP
20
Sl
ide a 1/4" Split Lock Washer and a 1/4" Fl
at
Washer over each
of
six
1/4" -20 x
1"
He
x Head
Screws. Referring to Page 2
as
a g
ui
de, u
se
two
assemblies per Bracket
to
attach
the
Top
Bracket,
Bottom
Bracket, and Side Bracket
to
the
Stealthbox
<1>
. Center each assembly in
the
Bracket Slots, then fully tighten
them
i
nto
the
Stea
l
thbox
* threaded i
nse
r
ts.
Install one
1
/4
-
20
U-N
ut
onto
the
Bottom
Bracket
as
indicated.
SB-T
-4RNR
GS/
10
T
IN3
IN
STR_S
KU
01
1555
STEP
21
Starting
from
the
bottom
of
the
openlng,
insert
the
Stealthbox
,,
into
the
mounting
location,
aligning
each Bracket
to
the
OEM
metal
mounting
points.
The
Bottom
Bracket sits behind
the
OEM
bottom
metal
mounting
point,
whereas
the
other
mounting
brackets
wi
ll
sit in
front
of
the
remaining
OEM
metal
mounting
points.
STEP
22
Slide a
1/4"
Split
Lock Washer and a 1/4" Fl
at
Washer
over
ea
,
ch
of
three
M6 x 1mm,
25mm
Hex Head Screws. Use these assemblies
to
secure
the
top
hole
of
the
Front Bracket,
the
Top Bracket, and
the
Side Bracket
to
the
OEM
meta
l
mount
ing points. Slide a 1/4" Split L
ock
Washer and a 1/4" Flat Washer over one
1 /4" -20 x
3/4
" Hex Head Screw and use
it
to
secure
the
bottom
hole
of
the Front Bracket
to
the
OEM
metal
mounting
point.
STEP
23
Slide a 1/4" Split L
ock
Washer and a 1/4" Fl
at
Washer
over
each
of
three
1/4" -20 x
l"
Hex
Head Screws. Use these assemblies
to
secure
the Front Bracket
to
the
threaded
ho
l
es
on
the
Steal
th
box
,,
and
the
Bottom
Bracket
to
the
OEM
metal
mounting
point.
Route
the
speaker cable and
connect
to
the
termina
l
cup
on
the
Steal
thbox
*.
STEP
24
Flip
the
OEM
rear panel over and lay
it
on a
flat
surface. Use a screwdriver
to
remove
the
15
Phillips screws
around
the
perimete
r
of
the
cargo pocket. Remove the cargo
pocket
from
the panel.
After
removing
the
cargo pocket, use a
screwdriver
to
remove
the
two
indicated
Phillips screws,
then
remove
the
indicated
trim
piece
from
the
rear
of
the
panel.
Con
ti
nu
ed
on
ext
0age
Page
7 •
JL
Aud
i
o,
Inc.,
202
1
STEP25
Remove the plastic protrusions from the b
ac
k
of
the
OEM
rear panel
within
the
indicated areas.
' (Note: The plastic protrusions have already
1 been removed in this image.)
STEP
26
Place
the
Stealth box~
Gri
lle Panel over the
panel opening
with
the
gri
ll
e cloth facing
down.
Use
a screwdriver
to
hand tighten
14
of
the
Phi
llips screws removed in
STEP
20
around
the
Grllle Panel
's
perimeter.
After hand tightening
the
screws,
work
back
around the perimeter
of
the Grille
Pane
l and
fu
lly
tighten
each screw. Do
not
overtighten
the screws.
STEP
27
Reinsta
ll
the
OEM
rea
r panel.
STEP
28
Rei
nstall
the
remainder
of
the
OEM
panels
and parts.
SB-
T
-4RNRG
5/10
T
W3
IN
ST
R
_SKU#
01
1555
CONGRATULATIONS!
You
have completed
the
installation
for
this
mode
l! Enjoy your new Stealthbox~!
MID/HIGH
FREQUENCY
DRIVER
FITMENT
A variety of
JL
Audra
coax
I
al
and component systems
wrll
fit
in
the factory speaker locations of
you
vehicle.
Location/
OEM
Suggested
JL
Audio Speaker Models
-- - -
--
Speaker Size Coaxial Models Component Models
Front
Door
/
6
x9
-inch
Rear
D or /
6.5-inch
1-
69Ox
(l)
, 1-690tx0>, 2-690tx(
ll
1- -
650
(1),
2-65 xm,
5-650x
0l
5-
7-65
Qrn,-,
(
1.
i1
--------+-----
50,
650cw
m
1-
650x
, 2-
650
, 5-
650x
1 • lnstallatron
may
require adaptor, 2 • Component woofer
only
JL
AUDI
â–¡
~
How
we
play.
IJ
Cl
[I]
[!J
(
854)
443
-
1100
I
www.Jl•udlo
.
oc:im
-'JI
_,l!cwdono
"'"
oub,loot
IO
ct,.a,go "lltio,,tr,;, ca
'JL
1..,11,•·
.,,
'How"'
1nr•
'••
r
â– 
gl1ts
â– 
d
~al..,..,
of
JL.
l..dlo,
nc.
'""q:f
or
!ht C..r'4' n
111
r"'f'OCf"'
go
-
â– 
Irr.I..,,.~•
of JLi..do,
1-,r
l'PlntOQ
US/,•
-~I
JLl,.Jdo,n~,
Form:rod1tallodlolormo0"'1pi->i1il
onln
â– 
,1(-,wwJlaudloarn.
JLA-SKU#
011489 •ver.10.12 ,
2021
· '0369
NCJGTH
CCMMEi<.CE
PARKWA.V
•
MIRA!'/
R,
FLORIDA
·
33025
·
USA
1111111111111111
1
1111
1
111
11
11
1
1111
11
111
1
*011555"
USA
Limited Warranty
FOR
CAR
AUDIO PRODUCTS
SOLD
AT
RETAIL:
JL
Audio
warrants
these
products
to
be
free
of
defects
in
materials
and
workmanship
from
the
original
date
of
purchase
for
these
periods
:
One
(1)
year
from
the
original
date
of
purchase
:
Car
Speakers
and
Sub
woofers
Two
(2)
years
from
the
original
date
of
purchase
:
Car
Amplifiers,
Electronlcs,
Enclosed
Sub
woofers
,
Stealthbox
and
Connection
Products
Note
:
The
Car
Amplifier
Warranty
Period
Is
extended
to
three
(3)
years
when
accompanied
with
the
purchase
of
a
qualifying
JL
Audio
Amplifier
Power
Connection
System
and
with
installation
by
an
authorized
JL
Audio
dealer
.
This
warranty
is
not
transferable
and
applies
only
to
the
original
retail
purcha
s
er
from
an
authorized
JL
Audio
dealer
in
the
USA
.
Should
service
be
necessary
under
thi
s
warranty
for
any
reason
due
to
manufacturing
defect
or
malfunction
,
JL
Audio
will
(at
its
discretion),
repair
or
replace
the
defective
product
with
new
or
remanufactured
product
at
no
charge.
Note:
Products
purchased
from
unauthorized
dealers
are
not
covered
under
warranty.
Damage
caused
by
the
following
is
not
covered
under
warranty:
ac
cident
,
misuse
,
physical
abuse,
product
modification
or
neglect
,
failure
to
follow
Installation
instructions
,
unauthorized
repair
attempts
,
misrepresentations
by
the
seller
.
loudspeakers
with
thermal
or
over
-
excursion
damage
are
not
covered
under
warranty
.
This
warranty
does
not
cover
incidental
,
accidental
or
consequential
damages
and
does
not
cover
the
co
st
of
removing
or
reinstalling
produ
c
ts
.
Cosmetic
damage
due
to
improper
handling
,
accident
or
normal
wear
and
tear
or
exposur
e
to
harsh
chemicals
is
not
covered
under
warranty
.
Jl
Audio
will
not
be
responsible
for
restoring
or
maintaining
custom
finishes
or
cosmetic
treatments
applied
to
products
.
This warranty is
void
If
the
product's serial
number
has
been
removed,
altered
or
defaced.
Any
applicable
implied
warranties
are
limited
in
duration
to
the
period
of
the
expres
s
warranty
as
provided
herein
beginning
with
the
date
of
the
original
purchase
at
retail
,
and
no
warranties
,
whether
express
or
implied
,
shall
apply
to
this
product
thereafter
.
Some
states
do
not
allow
limitations
on
implied
warranties
,
therefore
these
exclusions
may
not
apply
to
you
.
This
warranty
gives
you
specific
legal
rights,
and
you
may
also
have
other
rights
which
vary
from
state
to
state
.
If
you
need
service
on
your
JL
Audio
product:
All
USA
retail
warranty
returns
should
be
nnt
to
JL
Audio
freight
prepaid
through
an
authorized
JL
Audio
dealer
and
must
be
accompanied
by
proof
of
purchase
(a
copy
of
the
original
retail
sales
receipt.
)
Direct
returns
from
consumers
or
non
-
authorized
dealers
will
be
refused
unless
specifically
authorized
by
Jl
Audio
with
a
valid
return
authorization
number
.
Warranty
expiration
on
products
returned
without
proof
of
purchase
will
be
determined
from
the
manufacturing
date
code
.
Coverage
may
be
invalidated
as
thi
s
date
is
prior
to
purchase
date
.
Return
only
defe
c
tive
co
mponent
s.
(If
one
speaker
fails
in
a
system
,
return
only
that
speaker
component
,
not
the
entire
s
ystem
.) Non-
defective
item
s
received
will
be
returned
freight
-c
olle
c
t.
Customer
is
responsible
for
shipping
charges
and
insurance
in
sending
the
product
to
Jl
Audio
.
Freight
damage
on
returns
is
not
covered
under
warranty
.
JL
Audio
Customer Service:
1-954-443-1100
9:00 AM - 5:
00
PM
(Eastern
Time
Zone)
JL
Audio
Technical
Support:
www
.
jlaudio
.
com/support
Original Equipment Warranty
For
JL
Audio
products
installed
as
original
equipment
by
a
boat
or
vehicle
manufacturer
,
warranty
coverage
Is
provided
within
the
boat
or
vehicle
manufacturer
's
warranty
program
.
Please
contact
your
boat
dealer
or
manufacturer
.
International Warranty
JL
Audio
Car
Audio
products
are
warrantied
against
defects
in
materials
and
workmanship
for
a
minimum
time
period
as
stated
in
the
USA
warranty
above
,
beginning
on
the
date
of
pur
c
ha
se
from
a
Dealer
authorized
by
a
JL
Audio
Distributor
.
The
warranty
is
only
valid
within
the
country
of
purchase
and
products
are
covered
by
each
country's
JL
Audio
Distributor
warranty
program.
To
find
your
country's
Distributor
please
visit
this
link
:
www.jtaudio
.
com
/
pages
/
dealer-locator
Consumers
In
the
EEA
countries
and
the
Russian
Federation
are
protected
by
local
consumer
law
and
benefit
from
local
statutory
warranties.
Jl
Audio
reserves
the
right
to
change
or
modify
any
of
the
terms
and
conditions
co
ntained
in
this
Warranty
Statement
,
at
any
time
and
in
our
sole
discreti
on.
Any
changes
or
modification
will
be
effective
immediately
upon
posting
of
the
revisi
o
ns
on
the
JL
Audio
website
at
www.jlaudlo.com/warranty
,
and
you
waive
any
right
you
may
have
to
receive
specific
notice
of
such
changes
or
modifications.
  • Page 1 1
  • Page 2 2
  • Page 3 3
  • Page 4 4
  • Page 5 5
  • Page 6 6
  • Page 7 7
  • Page 8 8
  • Page 9 9
  • Page 10 10
  • Page 11 11
  • Page 12 12
  • Page 13 13
  • Page 14 14
  • Page 15 15

JL Audio SB-T-4RNRG5 Installation guide

Type
Installation guide

JL Audio SB-T-4RNRG5 is a custom-fit subwoofer enclosure designed to deliver powerful and accurate bass in your 2010 & Up Toyota 4Runner. Engineered to fit seamlessly into the rear cargo area, this enclosure houses a single 10TW3-D4 subwoofer, providing up to 400 watts of continuous power handling. The sealed enclosure design ensures precise and controlled bass response, enhancing your overall audio experience. Installation is made easier with the included hardware and detailed instructions, allowing you to integrate the SB-T-4RNRG5 into your vehicle's audio system effortlessly.

Ask a question and I''ll find the answer in the document

Finding information in a document is now easier with AI