1
These instructions are for your safety. Please read through
them thoroughly before use and retain for future reference.
Parts Supplied
Ref Description Illustration Qty
A Main body
1
B Feet
2
C Screw for feet
4
Tools Required (not supplied)
Cross Head Screwdriver
Before You Start
Check the pack and make sure you have all of the parts listed
above.
This appliance is designed for use as a supplementary heat
source, it is not intended to be the main source of heat.
Safety & Operating Instructions
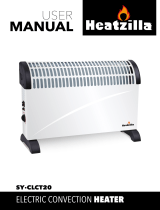
CONVECTOR HEATER
CH-2000B TURBO

2
PLEASE READ THE FOLLOWING INSTRUCTIONS
CAREFULLY BEFORE USING THE APPLIANCE.
• This appliance can be used by children aged from 8 years and
above and persons with reduced physical, sensory or mental
capabilities or lack of experience and knowledge if they have
been given supervision or instruction concerning use of the
appliance in a safe way and understand the hazards involved.
Children shall not play with the appliance. Cleaning and user
maintenance shall not be made by children without supervision.
• Children of less than 3 years should be kept away unless
continuously supervised. Children aged from 3 years and less
than 8 years shall only switch on/off the appliance provided that
it has been placed or installed in its intended normal operating
position and they have been given supervision or instruction
concerning use of the appliance in a safe way and understand
the hazards involved. Children aged from 3 years and less than
8 years shall not plug in, regulate and clean the appliance or
perform user maintenance.
• CAUTION - Some parts of this product can become very hot
and cause burns. Particular attention has to be given where
children and vulnerable people are present.
• If the supply cord is damaged, it must be replaced by the
manufacturer, its service agent or similarly qualified persons in
order to avoid a hazard.
•
WARNING: In order to avoid overheating, do not cover
the heater.
• The heater must not be located immediately below a socket-
outlet.
• Do not use this heater in the immediate surroundings of a bath,
a shower or a swimming pool.
• CAUTION: In order to avoid a hazard due to inadvertent
resetting of the thermal cutout, this appliance must not be
supplied through an external switching device, such as a timer,
or connected to a circuit that is regularly switched on and off by
the utility.
• Do not use the appliance for other than its intended use. For
domestic indoor use only.

3
• Place the appliance on a flat, stable, heat-resistant surface.
Operating the product in any other position could cause a
hazard.
• There may be trace of odour during the first few minutes of
initial use. This is normal and will quickly disappear.
• Do not attempt to repair, disassemble or modify the appliance.
There are no user-serviceable parts inside.
• CAUTION – if using an extension lead please ensure you do
not exceed the maximum rated running wattage/load of the
extension lead.
Assembly Instruction
Before using the heater, the feet (supplied
separately in the carton), must be fitted to
the unit. These are to be attached to the
base of the heater using the 4 small self-
tapping screws provided, taking care to
ensure that they are located correctly in the
bottom ends of the heater side mouldings.
Operating Instructions
1. Place the product in an upright position on a flat, steady,
stable, heat-resistant surface. Make sure there is nothing
flammable or heat sensitive within 1 metre (40 inches).
Operating the product in any other position could cause a
hazard.

4
2. Insert the plug into a suitable wall outlet after turning the
thermostat switch counter-clockwise to the minimum position
and setting the Heater Switches and Fan Switch to “OFF”.
The heater is suitable for operation on an electricity supply
having the same voltage as that show on it’s rating label.
3. Turn on the Heater Switch to “I” (750W) for low heating. Turn
on the Heater Switch “II” (1250W) for medium heating. Turn
on both switches for high heating (2000W).
4. Turn the thermostat knob clockwise to maximum position.
When the room temperature has risen to a comfortable level,
slowly turn thermostat counter-clockwise until you hear a
click. The thermostat will now attempt to maintain the room at
this temperature by automatically cycling on-and-off.
5. To adjust the room temperature, turn the thermostat
clockwise to raise the temperature, or counter-clockwise to
lower it.
6. Fan operation: This is operated by means of the switch with
the fan symbol along side it. The fan will only operate with
the thermostat in the “on” position and can be used when the
heating elements are “on” to blow warm air into the room, or
can be used when the heating elements are “off” to blow cool
air into the room.
7. To turn the heater off, switch off both “750W” and “1250W”
switches.
(Note: There may be trace of odour during the first few minutes
of initial use. This is normal and will quickly disappear. )
Safety Control (Thermal Cut-Out):
CAUTION - This product has one non-self-resetting overheat
protection devices.
In the event that the heater stops working as a result of
overheating take the following immediate steps: switch the
electricity off at the socket and remove the plug. Remove any
objects that are covering the product. CAUTION: Do not touch
the heater as it will be hot.
Set the heater switches to OFF and leave the heater to cool
down fully. Once completely cool, reconnect the heater and
switch it on. Do not open this product. There are no user-
serviceable parts inside.

5
Plug Replacement
This appliance is supplied with a BS1363 3 pin plug fitted
with a 13 Amp fuse. Should the fuse require replacement,
it must be replaced with a fuse rated at 13 Amp and
approved to BS1362.
In the event the mains plug has to be removed/replaced
for any reason, please note:
The wires in the mains lead on this appliance are coloured in
accordance with the following code:
Green and Yellow – Earth
Blue – Neutral
Brown – Live
THIS APPLIANCE MUST BE EARTHED
As the colours may not correspond with the markings identifying
the terminals in your plug proceed as follows.
The green and yellow wire must be connected to the
terminal in the plug, which is marked with the letter E or
with the earth symbol
or coloured green and yellow.
The blue wire must be connected to the terminal marked N
or coloured black.
The brown wire must be connected to the terminal marked
L or coloured red.
Important - any cut off plug should be disposed of safely to
prevent hazard. There is a danger of electric shock if a cut off
plug is inserted into a socket outlet.
Care and Cleaning
1. Always ensure the product’s housing is intact and completely
assembled before each use.

6
2. Clean the exterior surface of the product by wiping it with a
soft, damp cloth.
CAUTION: Allow the product to completely cool before
handling or cleaning it.
Ensure the product is in the “ 0 ” (OFF) position and the
power cord is unplugged from the electrical outlet before
cleaning the product.
3. Do not allow water or other liquids to run into the interior of
the product, as this could create a fire and/or electrical
hazard.
4. Do not use any abrasive cleaners or solvents, as product
damage will occur.
5. Store the product in a clean, dry place when it is not in use.
Conformity with Directives
Conforms with relevant European Directives.
Environmental Protection
Waste electrical products should not be disposed of
with household waste. Please recycle where
facilities exist. Check with your Local Authority or
retailer for recycling advice.
SFD Ltd BA22 8RT
/