20
Something Wrong with your Cooker?
Before contacting your nearest Service Centre/Installer, check the problem guide below; there may be nothing wrong
with your cooker.
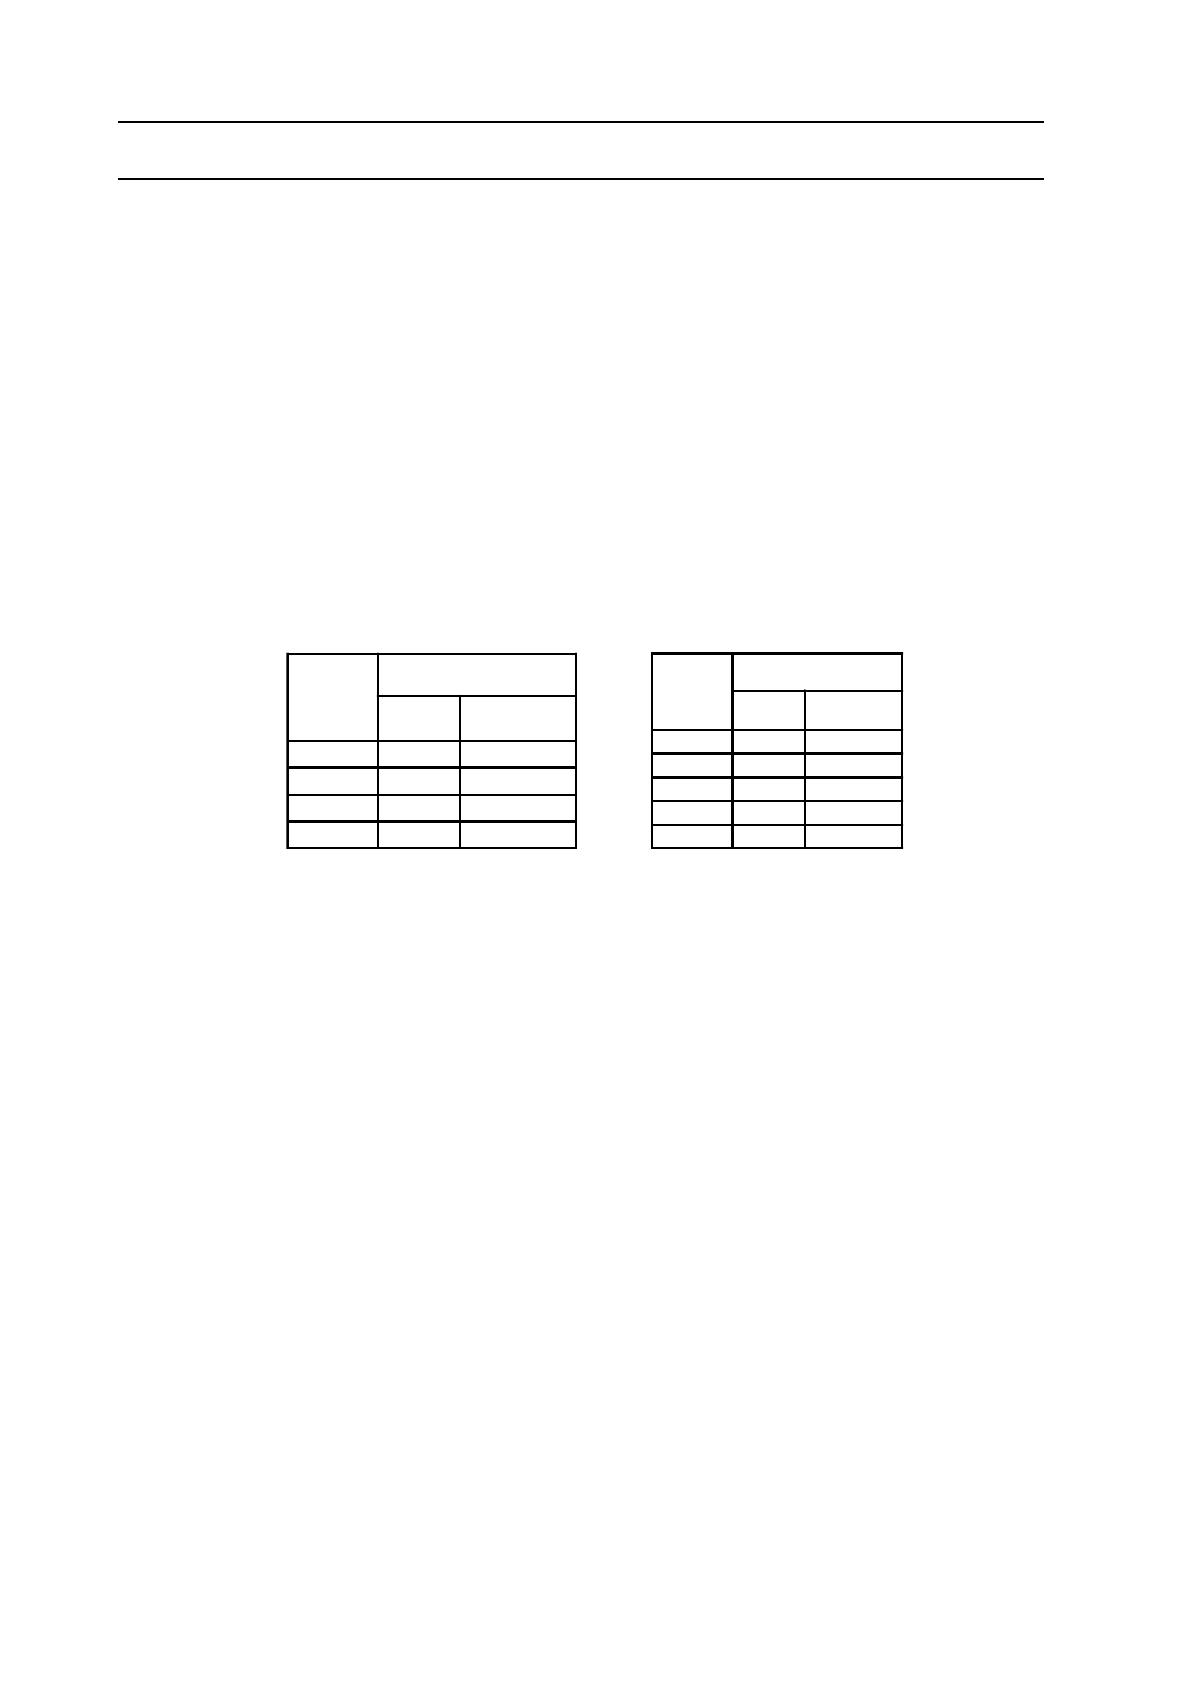
Problem Check
Ignition does not work
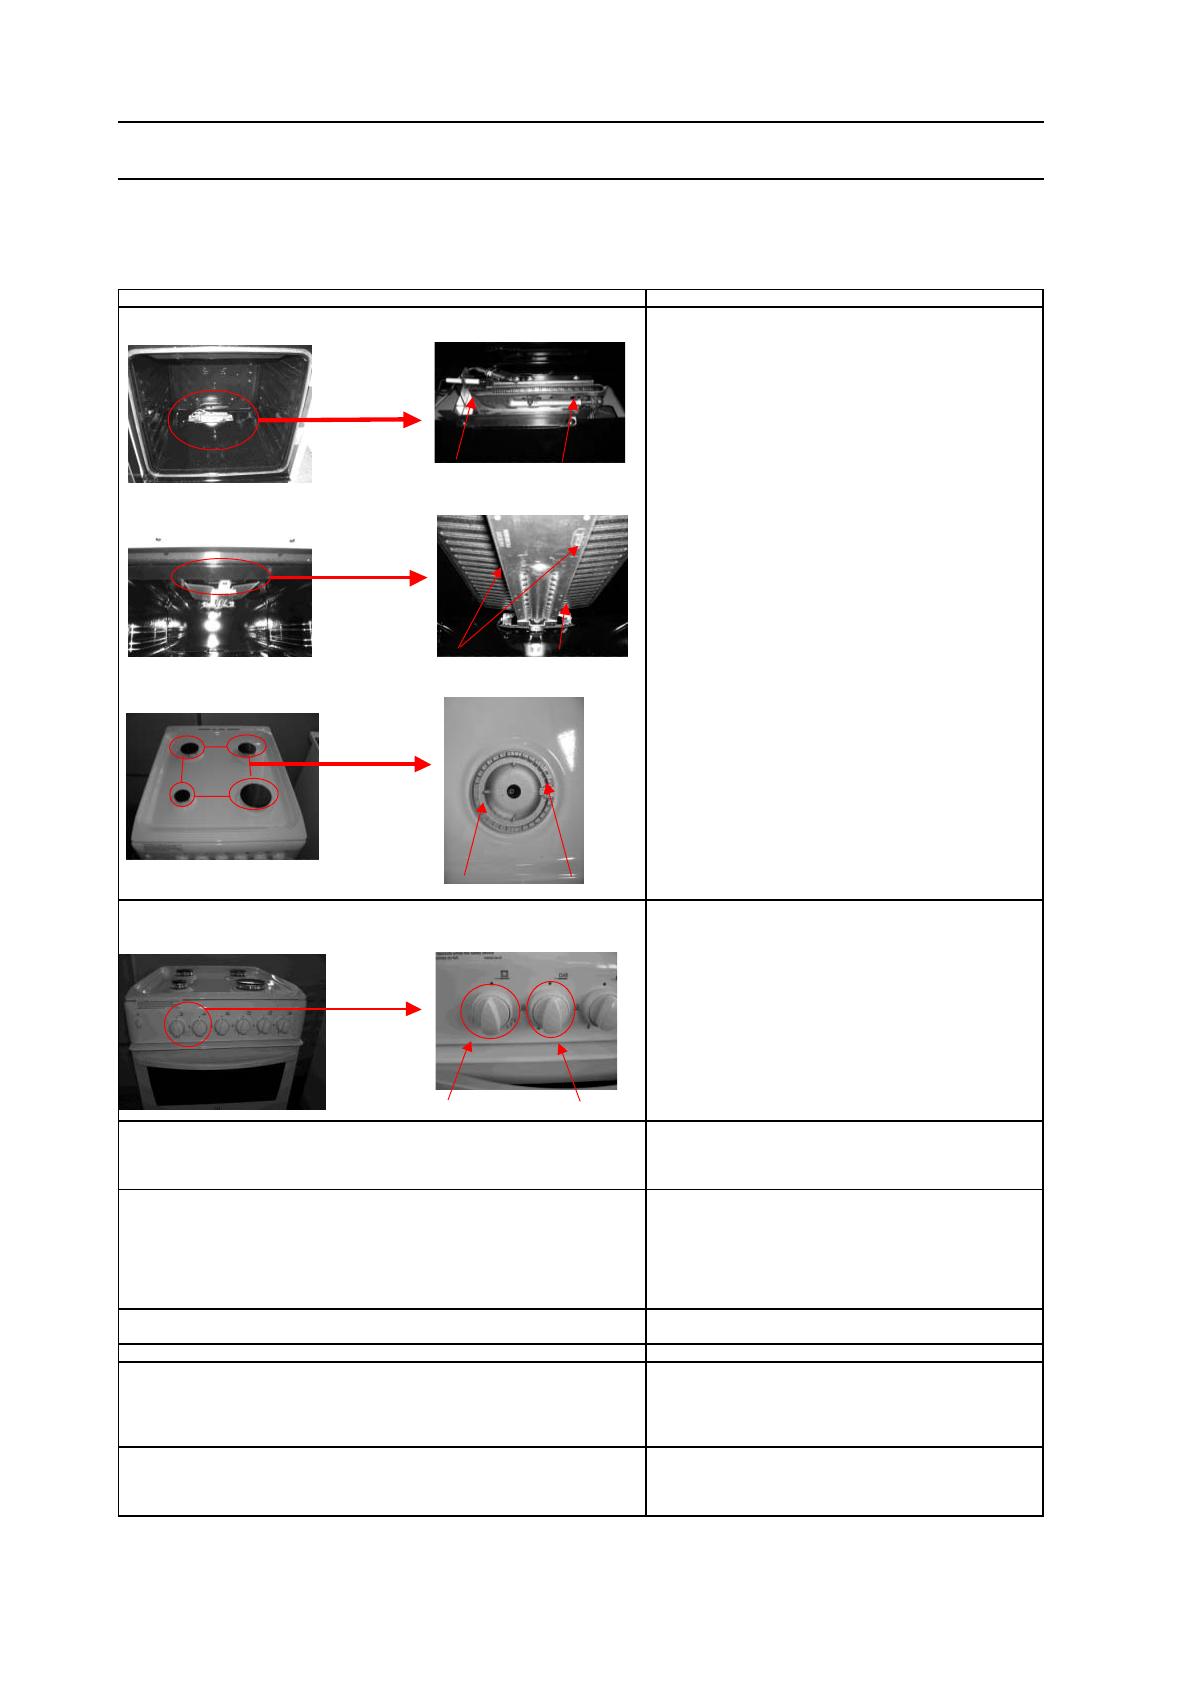
If all burners fail to ignite:
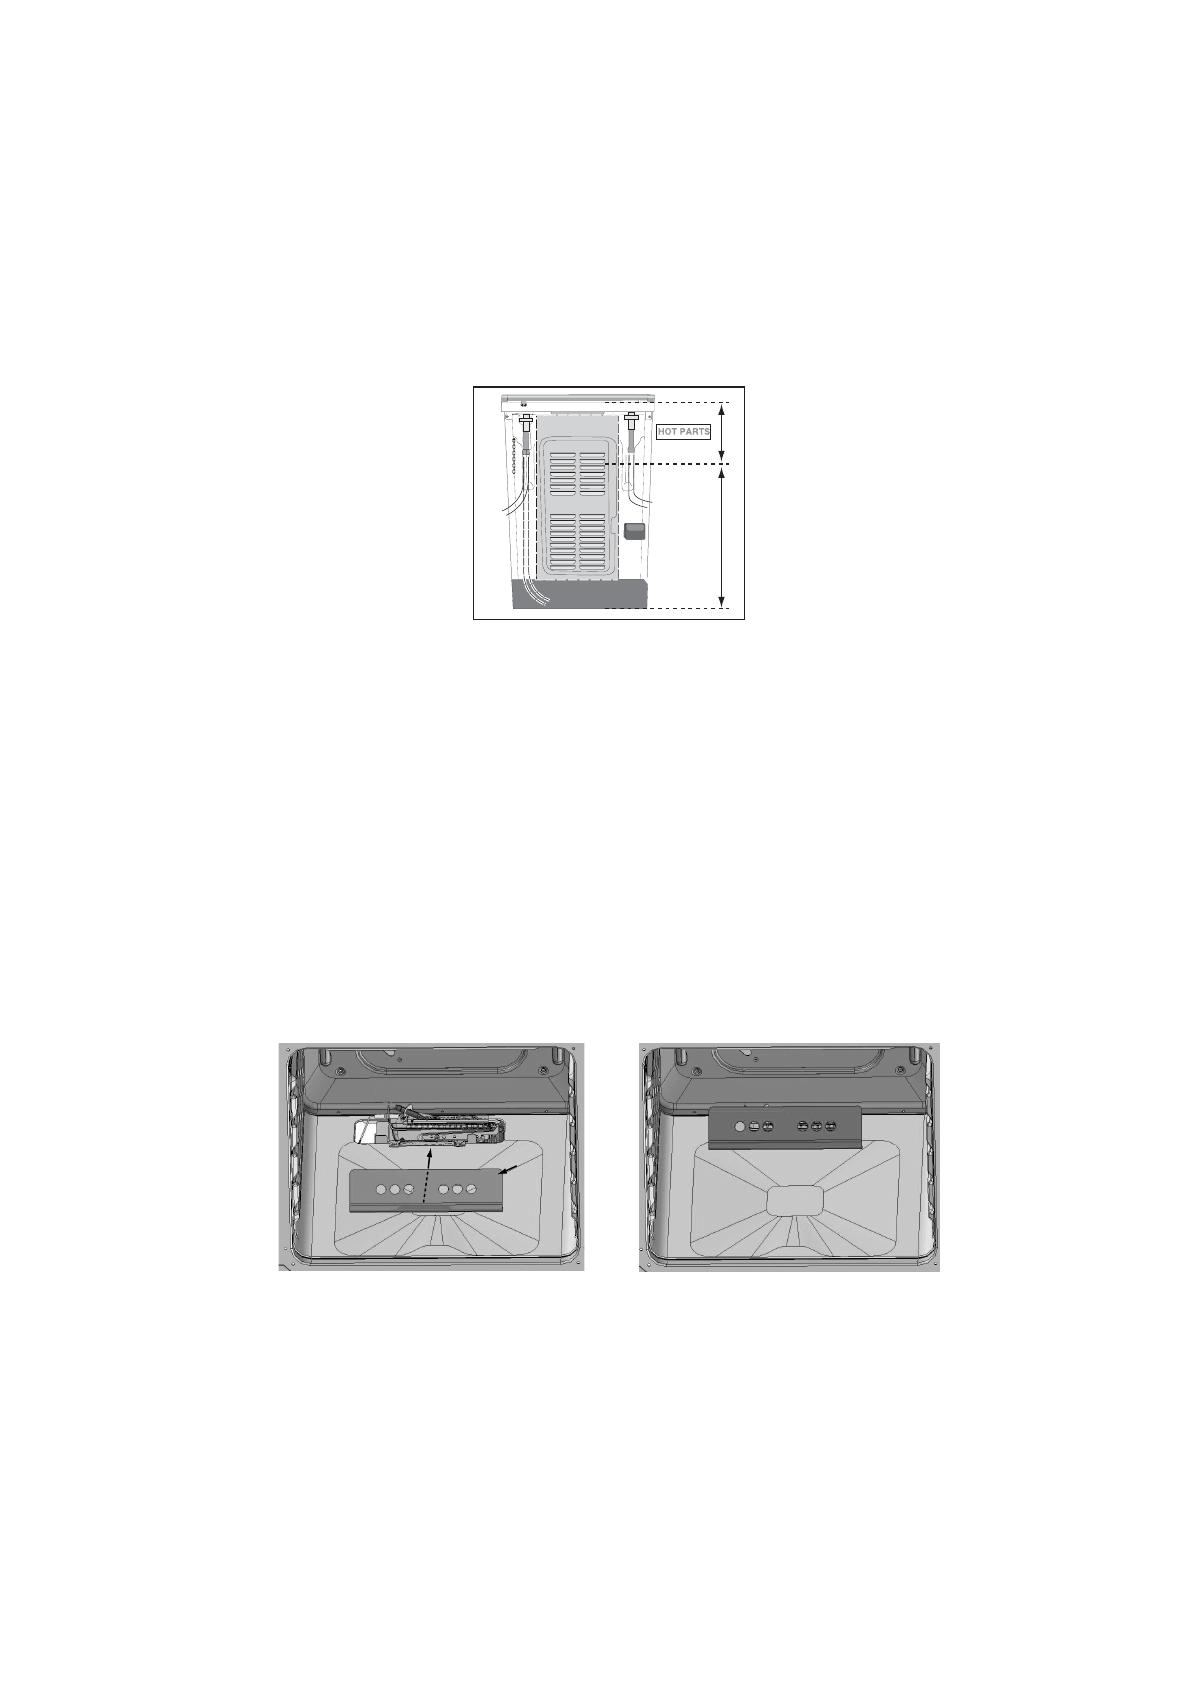
Oven Cavity Oven Burner
Chec k that sparks appear at the burners;
A cl i cki ng noi se shoul d be heard.
If not
Chec k that the pl ug i s plugged in to a
13am p Electr ic s ocket and the s upply
is swi tched on.
Ignitor Burner Ports
If all burners still fail to ignite
Top Cavity Grill Burner
Chec k and repl ace i f necessary the 13amp fus e
If only one burner fails to ignite
Check that the burner is dry and that spillage of food or
cl eani ng fluid remai ns are not affecti ng the Ignitor or bur ner
ports .
Burner Ports Ignitor
Clean away any debris with a dry nylon brush such as an
Hotplate Burner
ol d dry toothbrus h.
Hob Top
If a wire wool pad has been used for c l eaning around the
burner ensure the Ignitor i s free from any stray strands.
Any water on the burner s hould be dri ed with a cloth or
kitchen towel.
On the hotplate make sure that all burner
parts ar e c orr ectl y s eated
Burner Ports Ignitor
Oven or Grill will not stay lit
For correct ignition of oven/grill burners press the ignition button
when the control knob is r eleased
and then push in and turn control knobs anti -cl ock wise.
Control Panel Control Knobs
Continue to pr ess the igni ti on button unti l the spark l i ghts the gas .
Once al ight release the igni ti on button and continue to hold the
control knob in for a further 6 to 10 seconds.
Then release the control knob and set to the required temperature.
The flame shoul d now stay alight.
If the flame does not hold and goes out wait 30 sec onds and tr y
agai n
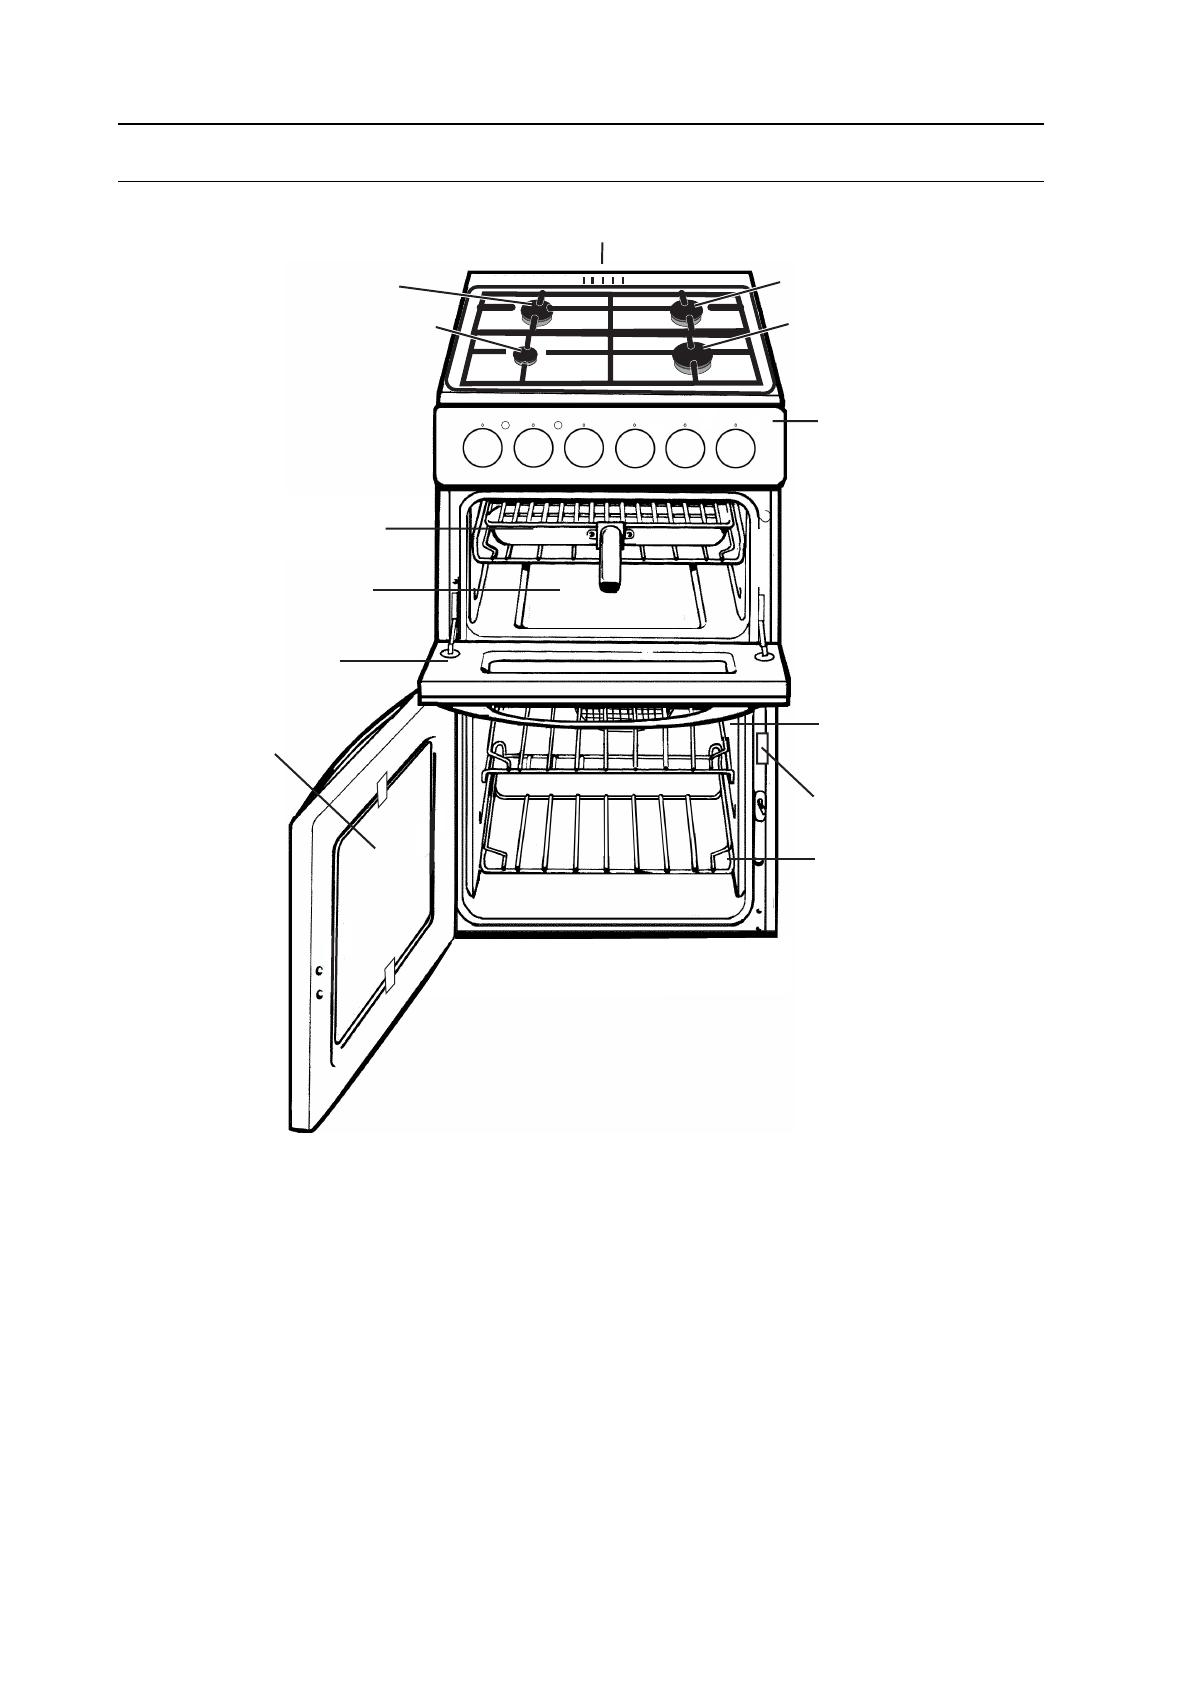
Oven Control Grill Control
Oven Temperature seems too
Chec k that the temperature has been set i n acc ordance wi th
high or too low
the temperature charts. It may be necessary to increase or
decrease the recom mended temperature by 10 C to suit your
taste
Oven does not cook evenly.
Chec k the temperature and s hel f position ar e as recommended
in the temperature charts
Chec k that the Utensil bei ng used i n the oven al low suffi cient
air flow around them.
Chec k that the cook er i s l evel.
Hotplates are slow to boil or will
Chec k that your pans conform to the recommendations in
not simmer
these instructions.
Odour or smoke when using your new cooker
This is nor mal and shoul d ceas e after a short peri od.
Condensation / Steam in the Oven After Use
Condensation and s team is a by product of cooking food
wi th a water content.
To help mi ni mise al ways:
A) Tr y to avoi d leav ing food i n the oven to cool after being c ooked
B) Use a c oved Utensi l wher ever possi ble
Condensation on t he Wall at t he Rear of the Cooker
Steam and/or condensati on may appear from the vent at the rear of
the appl iance when usi ng an oven, par ti cularly when cooki ng foods
wi th a high water content (Such as Oven Chi ps or Chicken).
This is nor mal and any ex cess shoul d be wiped off