7
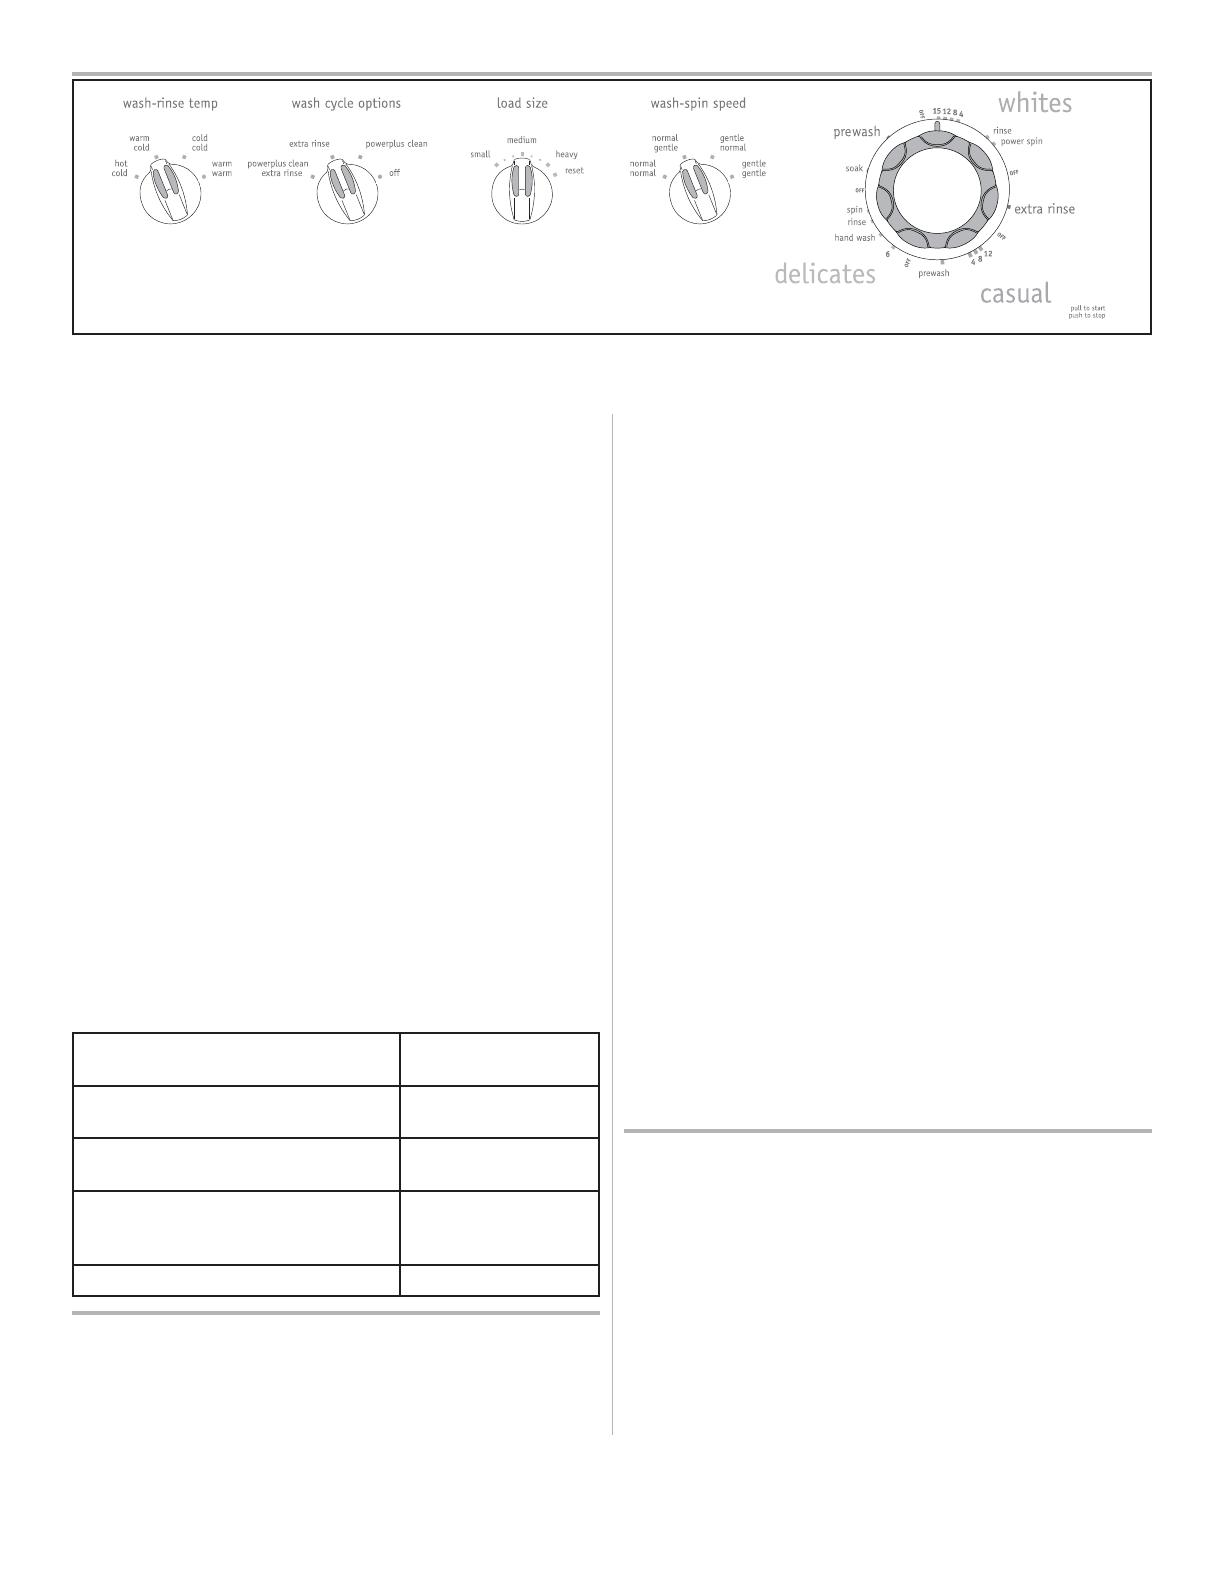
This manual covers many models and not all cycles, options, or features listed are available on
every model. Console shown above for reference only. Your model may differ.
Cycle Settings, continued
Cycle Options
Energy Saving Tips
Wash full loads. Oversize loads use extra energy. Undersized •
loads waste energy.
When small wash loads cannot be avoided, use lower •
water levels.
Select the appropriate cycle and time for each load. •
Shorten wash times for lightly soiled loads.
To reduce drying time, select a fast spin speed to remove •
more water from heavy items such as towels and jeans.
Use warm water to wash most loads. Limit hot water •
washes to heavily soiled and white loads. Use cold water
for lightly soiled items and rinsing.
Operate the washer in early morning and late evening •
when utility demands are low.
Follow proper laundry procedures to avoid rewashing.•
Fabric Type
Wash/Rinse
Temperature
Heavily soiled white/colorfast cotton,
perm press
Hot/Cold
Normally soiled white/colorfast cotton,
perm press
Warm/Cold
Lightly soiled cottons and perm press,
noncolorfast fabrics, knits, delicates, hand
washables
Cold/Cold
Washable woolens Warm/Warm
LOAD SIZE
Turn the • Load Size knob to select a water level
appropriate for the load size. For best results, DO NOT
overload. Add items loosely to the tub. The dry load
should not be higher than the top of the agitator vanes.
There should be enough water in the tub for items to
move freely.
To increase the water level after the wash cycle begins, turn •
the Load Size knob to Reset and hold. When water begins
to enter the tub, turn the knob to the desired setting.
WASH/RINSE TEMPERATURE
Turn the • Wash/Rinse Temp knob to select the wash
water temperature suitable for the fi ber content and soil
level of each load. A cold water rinse saves energy and
reduces wrinkling.
If a cold rinse is selected, the washer will fi ll with cold •
water during rinse, followed by a cold spray rinse during
fi nal spin. If a warm rinse is selected, the washer will fi ll
with cold water during rinse, followed by a warm spray
rinse during fi nal spin.
To conserve energy, the hot wash water is regulated. •
Warm and cold wash and rinse water temperatures are
not regulated.
The following chart suggests wash/rinse temperatures for •
basic fabric types.
POWERPLUS CLEAN (on select models)
Select PowerPlus Clean to automatically advance a load
from the Soak or Prewash setting into the Whites wash
and Extra Rinse cycles.
Add the measured amount of detergent to wash tub, 1.
then add wash load.
Select appropriate 2. Wash/Rinse Temperature, Load
Size, and Wash/Spin Speed.
Select 3. PowerPlus Clean under Wash Cycle Options.
To use a cycle other than • Whites after the Soak or
Prewash settings, select OFF and manually advance
cycle selector to cycle desired.
Fill fabric softener dispenser with the recommended 4.
amount of LIQUID detergent. Add water to bring liquid
level to fi ll line on dispenser cap.
When selecting • PowerPlus Clean, the fabric softener
dispenser must be fi lled with diluted liquid detergent
at the beginning of the Soak or Prewash setting. The
detergent for the Whites cycle will then be dispensed
after the spin in Prewash.
DO NOT use powdered detergent in the dispenser.•
Clean the fabric softener dispenser thoroughly after •
each use. Fabric softener and liquid detergent should
not be mixed.
Set the cycle selector at 5. Soak or Prewash and pull
knob to start. The washer will provide Soak or Prewash
as selected. It then automatically advances to the full
Whites cycle and Extra Rinse cycle.
EXTRA RINSE
Select Extra Rinse to automatically add an additional deep
rinse to the Whites cycle. It provides 3 minutes of rinse
agitation in cold water, followed by a spray rinse at the
selected rinse water temperature during spin. If desired, add
liquid fabric softener to this rinse (not the fabric softener
dispenser) or use a softener sheet in the dryer. DO NOT pour
fabric softener directly onto the load.


