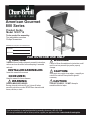
Char-Broil American Gourmet 800 Series User manual
- Category
- Barbecues & grills
- Type
- User manual
This manual is also suitable for
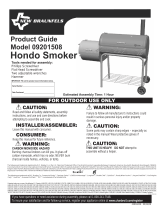
Char-Broil American Gourmet 800 Series: The perfect addition to any outdoor space for grilling enthusiasts seeking a versatile and powerful cooking experience. Equipped with adjustable charcoal grates, this grill provides precise temperature control for various cooking needs. Create succulent grilled dishes with the option of direct or indirect grilling methods. Its durable construction ensures longevity, while the included tools make assembly and maintenance a breeze.
Char-Broil American Gourmet 800 Series: The perfect addition to any outdoor space for grilling enthusiasts seeking a versatile and powerful cooking experience. Equipped with adjustable charcoal grates, this grill provides precise temperature control for various cooking needs. Create succulent grilled dishes with the option of direct or indirect grilling methods. Its durable construction ensures longevity, while the included tools make assembly and maintenance a breeze.


-
 1
1
-
 2
2
-
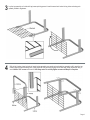
 3
3
-
 4
4
-
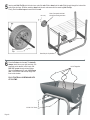
 5
5
-
 6
6
-
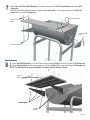
 7
7
-
 8
8
-
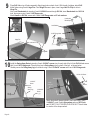
 9
9
-
 10
10
-
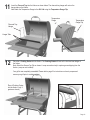
 11
11
-
 12
12
-
 13
13
-
 14
14
-
 15
15
-
 16
16


Char-Broil American Gourmet 800 Series User manual
- Category
- Barbecues & grills
- Type
- User manual
- This manual is also suitable for
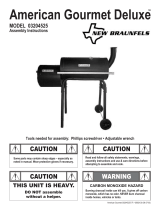
Char-Broil American Gourmet 800 Series: The perfect addition to any outdoor space for grilling enthusiasts seeking a versatile and powerful cooking experience. Equipped with adjustable charcoal grates, this grill provides precise temperature control for various cooking needs. Create succulent grilled dishes with the option of direct or indirect grilling methods. Its durable construction ensures longevity, while the included tools make assembly and maintenance a breeze.
Ask a question and I''ll find the answer in the document
Finding information in a document is now easier with AI
Related papers
-
Charbroil 10301567 Owner's manual
-
-
-
-
Char-Broil 15302030 User manual
-
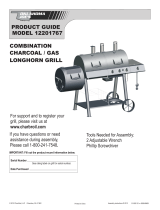 oklahoma joes 12201767 User manual
-
Charbroil 12301672 Owner's manual
-
-
-
Kingsford 11301648 User manual

Other documents
-
 New Braunfels 11201699 User manual
-
 New Braunfels 09201508 Owner's manual
-
 New Braunfels 03207245 Owner's manual
-
-
 New Braunfels 03204525 Owner's manual
-
-
-
-
-


